A Bit of Carnage - Using Dragons in Battle!
This week's Share Your Battle challenge features the Dragon splinter! The Dragon splinter has plenty of cards which are outstanding in a particular niche, and we'll be showing a couple of those off today. In the summoner spot we have Brighton Bloom, a summoner who is borderline broken in the right ruleset, and in a staring role in our monster lineup, we have Carnage Titan - a standout tank who shines near the front and happens to be one of my favorite Chaos Legion cards. Pair them with a solid supporting cast of Life cards and we have just the recipe for some fireworks!
If you wanted to jump right to the action, the Battle Link is right here. Want to hear some more about the lineup? Read on further!


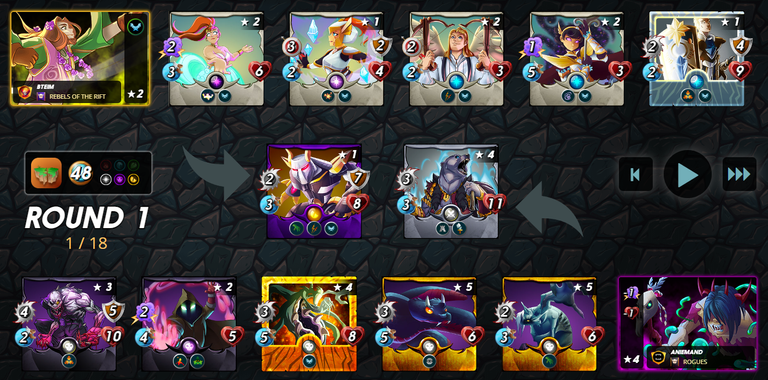
This was the ruleset for our battle. Any battle with Earthquake and the Dragon splinter allowed is a strong possibility for Brighton Bloom. Even better, there is plenty of mana to work with. 48 mana is a relatively high mana cap, which is great for the Dragon splinter because there are plenty of good high mana cost Dragon monsters.

As previously mentioned, Brighton Bloom is a natural choice for the Earthquake ruleset. Giving our whole team Flying takes the Earthquake damage out of the picture, and allows us to play a slightly more defensive lineup on the off-chance that out opponent will have non-flying monsters which will be taking damage each turn.
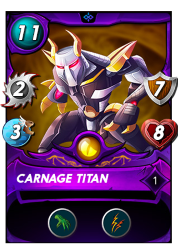

We're leading off our team with a pair of heavy hitters. Carnage Titan is not a cheap monster to bring into the battlefield, but he's beefy and hits awfully hard. Carnage Titan most often appears in the second position where he can take advantage of Reach, but some of our other monster selections make it fine for us to put him up front for this battle. Djinn Renova is a solid support monster, giving the entire team a health buff while also chipping in a couple of points of magic damage per turn.
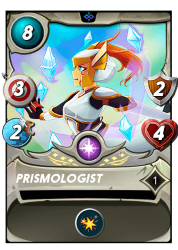
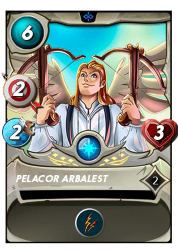
The middle of the lineup held the bulk of our damage - Prismologist is one of the hardest hitting ranged attackers, pairing a beastly 3 damage with Blast. Pelacor Arbalest is a tad bit behind with just 2 damage, by gets an extra attack each turn thanks to Double Strike. These two monsters have a sky high damage output but are also on the squishy side, so the gameplan is to protect them for as long as possible.
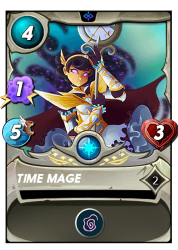

Our team is bookended with some more monsters to try and protect the high damage output monsters in the middle. Shieldbearer with Taunt is great to sit in the back and attract all of the enemy attacks, and Time Mage pairs a bit of magic damage and very respectable speed with the Slow ability, which will debuff the enemy monsters' speed. This is particularly helpful because slowing the opposing team will both give my monsters a better opportunity to knock out enemy attackers before they get the chance to strike and help my monsters dodge attacks.

With the lineup set, it's off into battle! When I see the selected teams I am hopeful - my opponent chosen a lineup which is somewhat similar to mine, with a Taunt monster in back and a lineup of assorted attacking monsters. However, the majority of their team lacks flying. This means that the longer the fight goes on, the more the tables are likely to tilt in my favor.
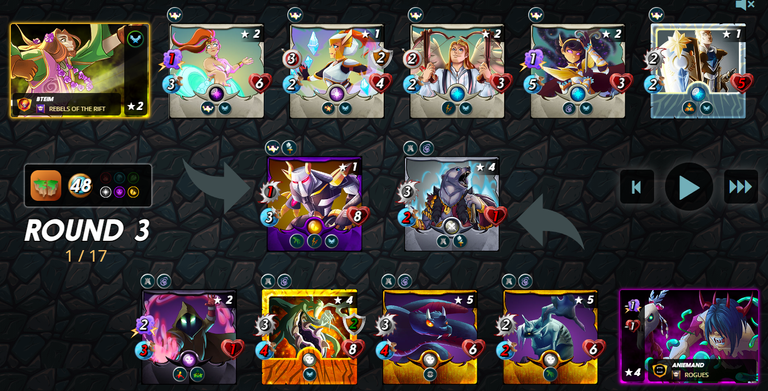
We get off to a slow start - in the first round the majority of the attacks from both sides only deal armor damage. Both of our tanks take a bit of damage, but no significant blows land. I am perfectly happy with the outcome so far - Earthquake damage is about to come into play!

Another round and things are beginning to look more favorable for my team. The damage is starting to pile up on my opponent's monsters - their Taunt monster is already gone, and both the front and back remaining monsters are about to go down. On the other side, my team is still mostly unscathed.
One round later and the outcome becomes clear - another turn's worth of Earthquake and a flurry of attacks, and my team is poised to take the victory. A solo monster remains on my opponent's side of the field, facing off against my full array of monsters. A couple of attacks and the win is sealed. And again, if you wanted to see the whole battle for yourself, you can see it right here.
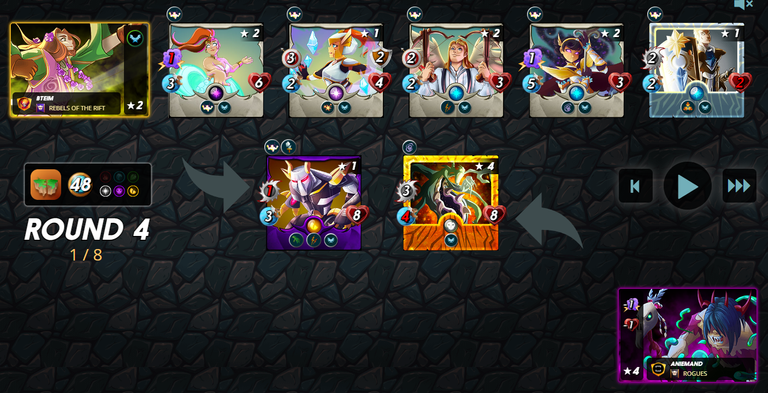
My strategy for this battle worked out perfectly. Brighton Bloom kept my team safe from Earthquake damage while my team of monsters led by Carnage Titan were able to protect my high damage monsters and take down my opponent in short order. Brighton Bloom and Carnage Titan both did a great job in the fight, playing crucial roles in helping my team to work well within the battle rules and to outlast my opponent's monsters. Both of these cards have earned their place in my deck, and will continue to be staples of my lineups moving forward.

Thank you so much for reading all the way to the end. Interested in seeing some more of my writing in the future? Be sure to give me a follow! In the meantime, if you'd like to see some of my recent posts:
Splinterlands Economics: Causation - A look at causation, and how we can apply it to Splinterlands!
Sneak Attack - Using Death in Battle! - Last week's battle challenge, featuring the Death splinter!
Splinterlands Economics: Ceteris Paribus - An introduction to the concept of Ceteris Paribus, and how we can apply it to Splinterlands!
Thinking about giving Splinterlands a try but haven't signed up yet? Feel free to use my referral link: https://splinterlands.com?ref=bteim, and be sure to reach out to me if you have any questions!
All images used in this article are open source and obtained from Pixabay or Unsplash. Thumbnails borrowed with permission from the Splinterlands team or made in Canva.
https://twitter.com/1467643672636190720/status/1628861789151830017
The rewards earned on this comment will go directly to the people( @bteim ) sharing the post on Twitter as long as they are registered with @poshtoken. Sign up at https://hiveposh.com.
Do you know you can win a Chaos Legion pack and many other things just by following some simple steps ?? Check out our Latest Daily Showcase and Participate our latest Giveaway. Thanks
Thanks for sharing! - @zallin

Good Battle, thanks for sharing!