[HOW TO] Making an Animated Water Divider
Table of Contents
Use the Table of Contents above for your convenience.
Introduction
Reading a big block of text is not only boring but makes your readers unmotivated. Using dividers not only breaks those blocks of texts but can also be used to highlight your points.
This week, I created not just a simple divider but an animated one that can be used by anyone if they wanted to. The only thing I ask of you is to never sell or take profit from this as it would be unfair that I gave stuff for free and you sell this to someone.
Here's the proof of work and at the very end, is the divider that is free to use by anyone, especially my fellow hivers.
Sources and Materials
Below are the materials I used in this art.
By iconlibrary.com found via Google Search.
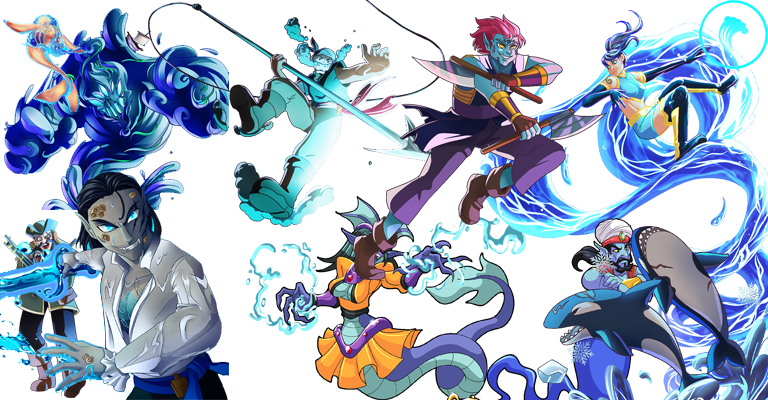
These characters are from Splinterlands. You may use your desired characters and do not require to stick with these.
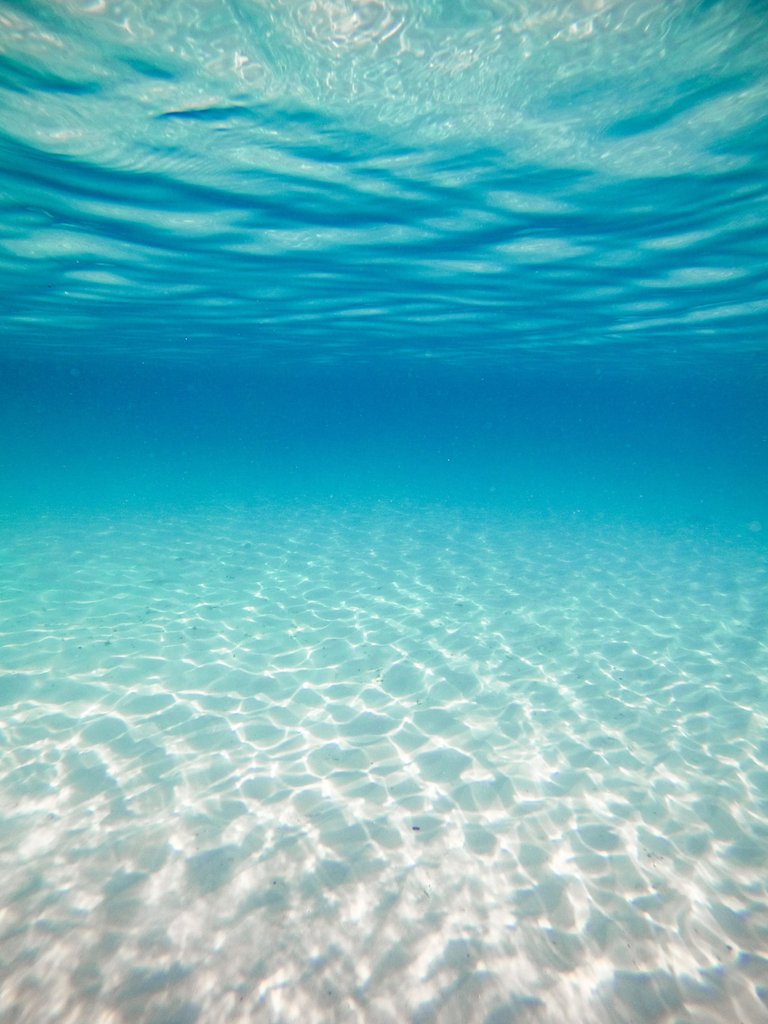
Background by Ali Abdul Rahman on Unsplash
Step 1 Creating New Project
I'm currently using Photoshop CS5 but this can also be made on other versions. Click on File, New, then complete the data below:
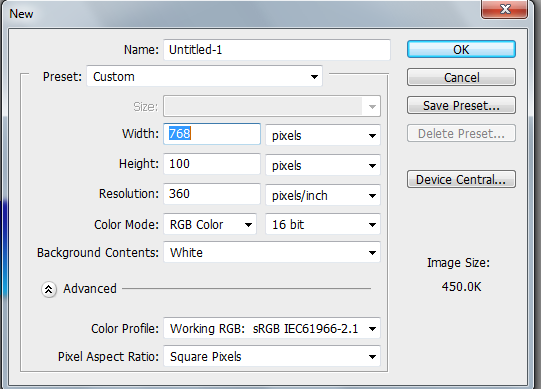
Based on my research, best size for the dividers in Hive and Ecency is 768 x 100 pixels. That's the size we'll use.
Step 2 First Background
With this banner, we'll use two backgrounds. One for the background of the characters and foreground for the mask. This would make sense as you progress through this guide.
Step 2.1 Gradient Background
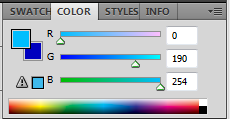
For the initial background, we uses a gradient so it wouldn't be too flat. Since the theme is water, I used a light and darker shade of blue. I used these two swatches below:
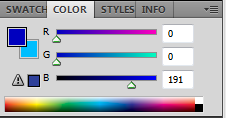
With the Gradient Tool, drag your cursor upwards. Make sure the color is positioned like this:

The ending background should have a darker top side and lighter below:

Step 2.2 Adding the Characters
This part is easy. Collect your favorite characters then insert it in the project. Add varying perspective by resizing the characters and layering them. I find it easier to imagine like a diorama. There's foreground, middleground and background.
You can do like what I did, but you can just wing it as well. This part will not be animated so as long as you're satisfied with the placing, it's okay.

~ Foreground ~

~ Midground ~

~ Background ~
When you combine them, it should look something like this.

Before going to the next step, hide the layers by clicking the eye icon on the left of the layers.
Step 3 Text Masking
I'm planning to use a transparent text that shows the background. Since we're using multiple transparent effects on the same layer, using screens to change the animation will not be available and we'll have to use layer masking.
Step 3.1 Transparent Text
First, using the Type Tool, type the word, "Water", since this is water themed for the Water Elements in Splinterlands.
Here, I used the font style, "Wide Latin".

The font size and color can be changed. This will not be seen, either way, at the end as this text would be transparent.
While holding the ctrl button, you can slide the bottom box to make the text warp and italic. It should look something like this:

For the last step, Ctrl + left click on the Text layer, hide the text layer, then select the Gradient Background Layer to make it the active layer. While holding the alt button, click on "Add Vector Mask."

Background by Ali Abdul Rahman on Unsplash
Step 4 Layer Over Layer
This step is the same as the "Transparent Text" step.
The difference is we'll use a pattern instead of a text. So, brush up and clean that water logo, and let's proceed.
Step 4.1 Water Logo Mask
Resize the water logo. It should touch both up and down of your work space. Use the "Magic Wand" tool to help clean it faster. Leave the bluish wave for masking.
Create a new group and drag your text layer over it to put it inside the group. Adding a new group layer is as simple as clicking the "Create a New Group" button or the folder-like button below your layer panel.

After creating the group layer, follow these next steps.
- Ctrl + left click on edited water logo.
- Hide the logo by clicking the eye button.
- Click on the group.
- Hold alt + left click Add Vector Mask.
- Click on chain between to unlink.
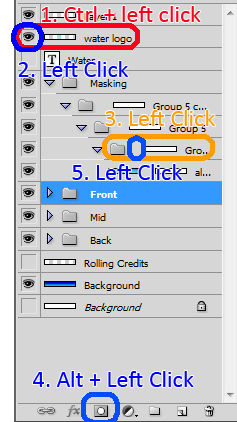
You can use this guide for easier understanding.
We unlink the layer and mask so we can move the mask without moving the layer for the animation on the later steps.
Repeat this 2 more times. Change the size of the waves to make it look better.
You should get something like this:

Don't mind the masking out of frame. I moved it so I can show you how it looked. We'll move it later on the animation part so it doesn't affect the final divider.
Step 5 Hiding Masked Layers and Groups
Hide all the mask by clicking on the eye icon on the left side of the top most folder. Since they are under a parent folder, hiding the Parent folder or top most folder also hides everything inside.
Also, hide the gradient background for now as well. This allows us to see what we're doing on the next step.
Step 6 Rolling Credits
This part is as simple as it gets. Insert the photo below:

Photo by Splinterlands. Found as a result of Google Search.
Place it above the Background Gradient.
Resize it until the sides fit all the workspace.
Ctrl + T or Edit, then Free Transform.
While holding the Shift button on your keyboard, drag the upper left or upper right of the picture. This allows your resize to scale proportionally.
A huge part of the photo will get out of screen, mainly the top and bottom. We will use this as an effect for a rolling credit.
Step 7 Mask Placement
Once you've done everything above, We'll move some layers out of screen in preparation for animating.
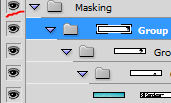
Step 7.1 Double Check Linked Layers
Double check and make sure every mask is unlinked. To unlink, if you see any chain like in the photo below:
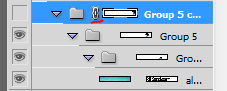
You can either click the chain to unlink, or highlight the layer (Would be in blue like in the picture), then at the bottom of the layer panel, click the "Link Layers." It's the chain-like icon or the first icon at the bottom of the layer panel.
Step 7.2 Moving the Masked Layers
Once unlinked, unhide all the masks, then click on the layer mask, then nudge it off the screen to the left by pressing and holding the left arrow key on your keyboard. Alternatively, you can use the Move tool, or press V on your keyboard. If you hold shift while dragging, you can slide them off more accurately to the left.
Do it on all the mask layers until you see your background and no mask on the workspace like below:

Step 7.3 Moving the Rolling Credits
Hide the Mask layers again, then unhide the Credits layer. Then nudge it downwards until it hides all the credits off screen:

Step 8 Improving Mask Clarity
Click on the Transparent text layer. At the bottom of your layer panel, click on the "fx" icon. Then, click on "Stroke." Follow the screen below for the inputs.
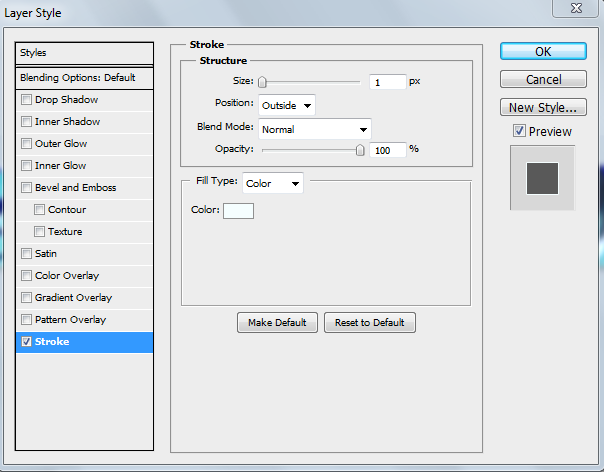
Adding one pixel of stroke effect allows the "Water" Transparent text to pop up and more readable. Unfortunately, we cannot add stroke effects to the group masks.
After doing the last step, unhide the Masked layers and we'll start moving for the animation part.
Step 9 Animation
Frame 2
Duplicate Frame 1, and nudge the wave mask at the end but at different intervals. Select the frame and either press and hold the right arrow key on your keyboard or hold shift key + left click and drag your mouse to the right.
The waves should look like this:

Frame 3
Duplicate the frame 2. On frame 3, move the waves back a few nudges. Either use your left arrow key or shift and left click then drag the mouse to the left. Frame 3 should be like this:

Frame 4
Click on Frame 2, then duplicate frame. Click and hold on frame 3, then drag it to the last frame making it the frame 4.

Frame 5
Duplicate Frame 4, then drag it to the last frame changing it to frame 5.
Nudge Wave masks on frame 5 to the left by twenty frames by pressing on left arrow key twenty times.
On frame 5, select the Text mask layer and move it until before the wave masks. If the whole text did not fit on the workspace, it's fine. Make sure to not overlap the masking.

Frame 6
Duplicate Frame 5, then move the wave masks out of the frame. Move the text mask at the end of the workspace like in here:

Frame 7
Duplicate Frame 6. Move the Transparent text mask in frame 6 to the leftmost area.

Frame 8
Duplicate frame 6. Place the duplicated layer to the rightmost frame making it frame 8.
Frame 9
Duplicate frame 8. Move the Transparent Mask layer out of the frame to the right.

Frame 10
Duplicate layer 9. Make sure the rolling credits layer is active and move the layer above of the masks.
On your workspace, using the "Move Tool", click and drag the credits from the bottom to the top until it passes the screen and out of the screen to the top instead of the bottom.
Hold shift while dragging up to make it go straight up. You can also hold the up arrow key on your keyboard to nudge the layer up.

This is the end of the animation movements. What this step does is it tells each animation frame the from and to of the events. Next step is called Tweening, or in betweens. We're going to add frames in between the animation frames so it would slowly move, "From this position to this position."
Step 10 Tweening
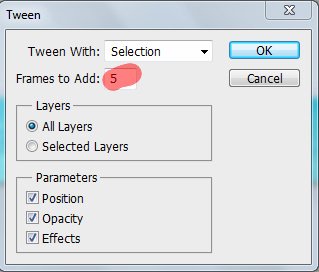
To avoid repetition of the steps, when I say "Add x in betweens," follow the steps below:
Select the first frame.

Hold Shift or Ctrl, then select the second frame or the next frame to its right to highlight them both.

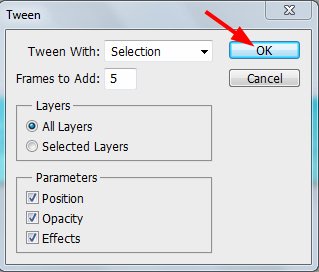
On the bottom of the Animation Panel, click the "Tweens Animation Frame" bottom. It would be this button:

Add the number of frames based on the step provided. (ex. "Add 7 frames in between frame 1 and frame 2")
Click ok. You're done for this step and proceeds to the next tweening step.
Step 10.1 Adding In-Betweens
This part is very lax. It's a challenge to find that "Sweet Spot" or the right speed. Just remember that the more frames in between, the slower the animation is.
For now, just follow the instructions below as this part is really confusing if you're going to wing it for the first time. You can do the changes you want afterwards.
- Add 43 frames in between frame 1 and frame 2. [Frame 1-45]
- Add 18 frames in between frame 45 and frame 46 [Frame 46-64]
- Add 9 frames in between frame 64 and frame 65 [64-74]
- Add 20 frames in between frame 74 and frame 75 [74-95]
- Add 20 frames in between frame 95 and frame 96 [95-116]
- Add 20 frames in between frame 116 and frame 117 [116-137]
- Add 20 frames in between frame 137 and frame 138 [136-158]
- Add 45 frames in between frame 158 and frame 159 [158-204]
- Add 120 frames in between frame 204 and frame 205 [204-325]
Step 10.2 Improving Quality of Life
This step is absolutely optional. They are just little things that improve this animation overall.
Step 10.3 Adding Animation Delays
On the bottom part of your animation frame, there's a drop down button. Clicking this gives you a quick menu for adding delays for the animation.
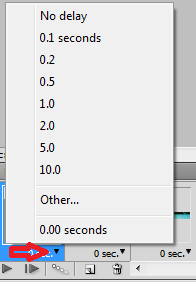
Add these delays on these frames.
Frame 151 - 0.5 sec delay
Frame 251 - 0.5 sec delay
Frame 284 - 1 sec delay
Frame 303 - 1 sec delay
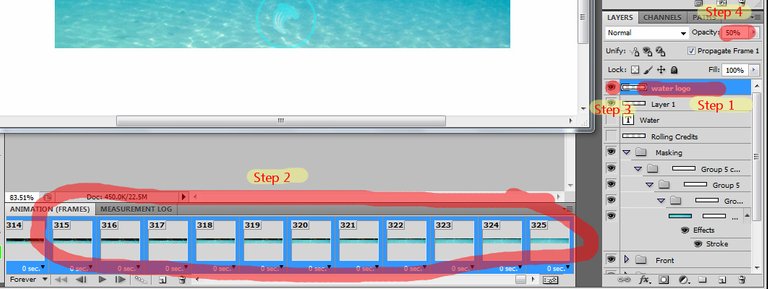
Step 10.4 Water Logo
Adding a transparent water logo in the foreground breaks up those big animation areas where there's nothing on the screen but a flat water. Adding transparency on this also makes the water logo, more coherent and not against the whole Text Masking effects.
Place the Water Logo on the top most order in your layer panel. Click on Animation Frame 1, hold shift, then go to the last animation frame, 325, and click to highlight them all. Go to your Layer panel, unhide the water logo by clicking on the eye icon on the left, then put the Opacity to 50% and you're done.
This is the last step and we're now going to save the work.
Step 12 Saving Animation
Go to File, Save for web and devices, on the lower right of your screen, there's a Looping Option drop down menu and make sure it's selected as Forever to make your animations loop. Press Save, type your desired file name and we're done.
This will export your work into a gif file which allows your image to do the animation on other web sites like hive.blog or Peakd or even your own blog.

Author's Notes
Some key points I want my readers to remember:
The more frames, the slower the animation. The normal high quality frame rate or count is 60 frames per second. You can do a 30 frames per second for a lower quality movement but any lower than that, would make it glitchy. However, there was instances that you would like a lower frame and what this does is it speeds up the movement.
Masking. If you have seen someone made a T-shirt printing, the screen they used, is the same idea as masking. It creates a shape that is blank which can be combined to make effect like a picture frame. If you're not comfortable with masking, you can recreate the effect by making a layer, fill it with a color, then create a shape in the middle, then erase that shape. If you add something else below that layer, the effect would be same as masking.
Since we used multiple mask in the same layer, this work around would not work so masking layer is the only way possible.
Disclaimer
- This post is an entry for Splinterland's Art Contest.
- This divider is for non-commercial only. Everyone are free to use this divider but are not allowed to sell or edit it. It would be unfair for anyone if they had to pay for something free.
- Other sources that I do not own are cited under their respective photos. Photos and drawings without cited sources are mine and made for this post.
If you're interested in playing the game, support me by registering using my referral link here
Have fun drawing!
Congratulations @konaqua! You have completed the following achievement on the Hive blockchain and have been rewarded with new badge(s):
Your next target is to reach 7000 upvotes.
You can view your badges on your board and compare yourself to others in the Ranking
If you no longer want to receive notifications, reply to this comment with the word
STOPCheck out the last post from @hivebuzz:
Support the HiveBuzz project. Vote for our proposal!