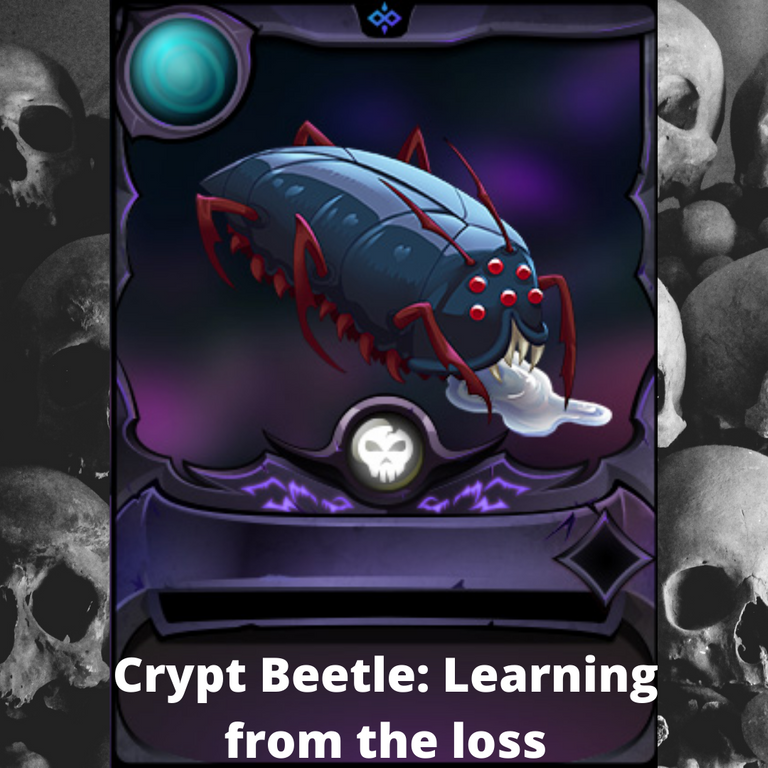
The Crypt Beetle: Learning from the Loss
I need to get this off my chest: I don't like using the DEATH splinter. It actually makes me very nervous whenever I need to play in this Splinter. I think it's because I just don't have the right strategy, or the right cards to be able to fully feel comfortable putting together a team with a lot of synergy. I guess this means it's just mistake after mistake for me - and I need to keep learning from my losses. That's what this blog will seek to do.
To do this, let's start with THE CRYPT BEETLE.
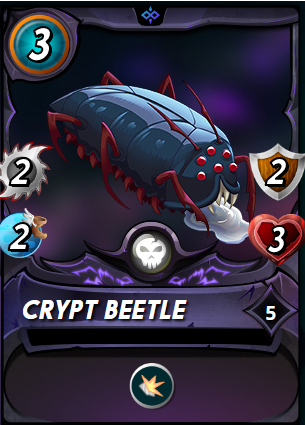
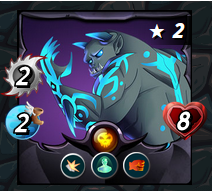
On it's surface, this is a pretty awesome card. Mine is Level 5 and it is only a 3 mana cost to play it. In short - that means this guy packs a lot of punch, really cheaply. It has 3 health, which is solid enough in a backline, especially when paired with his SHIELD skill, That 2 armour will mean this card will keep his health and be hard to knock down quickly.
Speaking of hard to knock down, the card initially has +2 speed, and this will be enough to allow him to avoid the occasional attack.
Then finally, his attack, +2 Melee. That's only average! It's not enough to be significant, and he's not likely to cause a lot of carnage.
Back to it then - The key part of this card is his SHIELD ability, this means when he is hit my melee damage or arrows, he will only take on half damage. This is significant, because it has the effect of nearly doubling his armour and health.
I actually think of this guy then as a bit of a meat-shield, where I can ask him to take hits and protect some of my more key cards.
That makes this guy rather amazing.
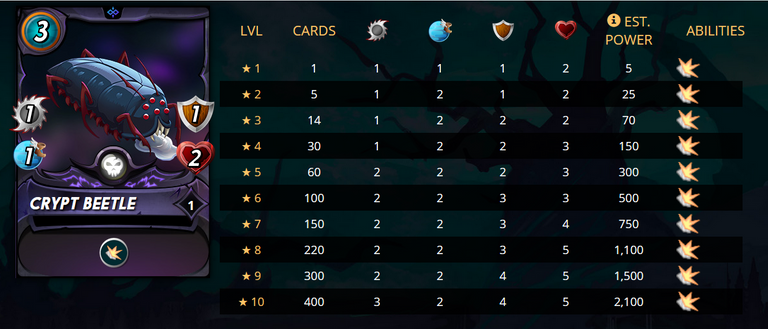
My card is Level 5, and it is leveled so I can make use of it in in my Silver league battles, but I note, I don't have a high enough summoner to use him at that fullness - but I did want to check out it's complete stats, just for some perspective.
What I note then, that in my battle, my card will be playing with only 2 health, and 1 melee attack. A bit of a reduction on what mine 'could' potentially do. I need to level up my summoner!
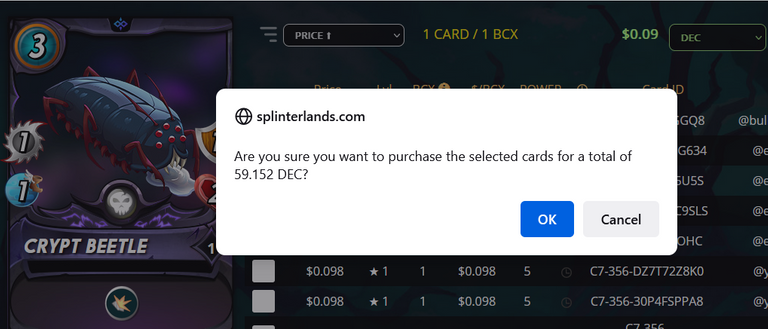
To celebrate the card, I decided to buy another! They were a bit more expensive than I remembered at 9 cents each, so perhaps I am getting a bargain by buying them before I actually need them. Will call it an investment - as I can see this card becoming more valuable as the circulation goes down. He's cheap now - but when these cards get combined - you can get a high level card relatively quickly.
It brings me to my final piece of the strategic puzzle. That puzzle is the ruleset:

To enact this plan, I chose to put Harkaw out the front - you'll notice he's a pretty awesome tank - because he has high health, a solid attack with +2, but it's his SHIELD ability which makes him so dangerous - I had hoped to negate my opponent's tank. While he doesn't have any armour, I had to figure that he'd be a very meaty tank.
My Summoner:
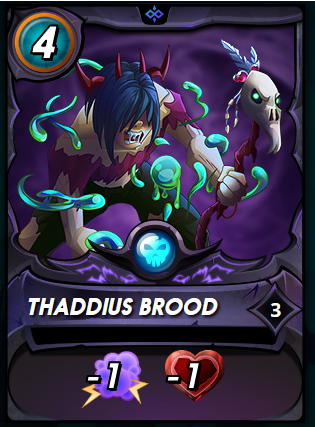
For this battle, I choose to play Thaddeus Blood. For two reasons:
- If my opponent went down a magic path, I wanted to drop his attack. This would make my defense last longer -
- My Thaddeus is Level 3, so I could play upgraded cards - my other summoners are only Level 1.
My Backrow:
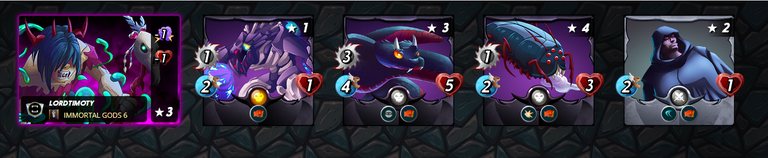
Looking at my backrow, you'll note that the mana limitations this week have meant my team doesn't have a lot of depth. I had to try balance defense and attack - and it wasn't easy.
- The 0 Mana Corpse Fiend. He is really there as a blocker position, I wanted to use my SNEAK SILENT SHA-VI to be my main offensive weapon - I'm trying to defend him from behind and in front.
- The 5 Mana SILENT SHA-VI. I like this card because he has a really strong attack with his +3 melee, which means that he can put a lot of pressure on the opponent's back-line.
- The Crypt Beetle - I wanted to put a SHIELD account both in front of my SHA-VI and behind him, this really is about protecting my main offensive weapon.
- My final team member is the CHAOS AGENT - This guy only costs 1 mana, but he as the dodge ability - and I went in hopeful he would dodge a few attacks and frustrate my opponent if they were to attack from behind.
This is how the battle gets underways:
Ok, let's have a look at how the battle went, have a look at this video. But do trust me, this battle ain't pretty!
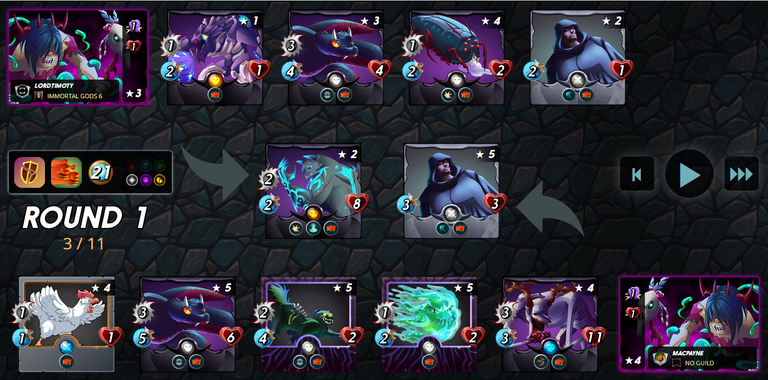
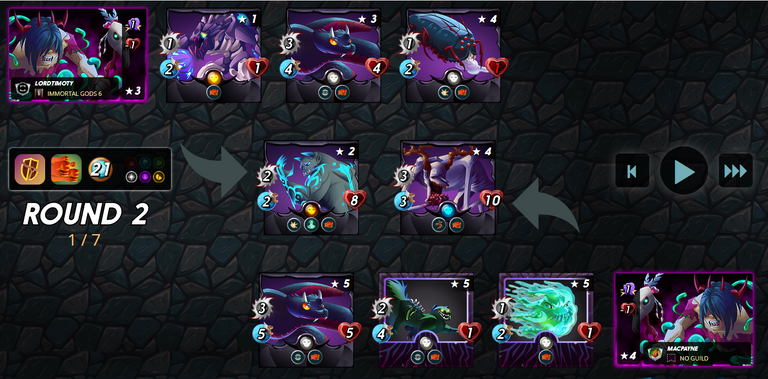
As you can see, this battle was on from the start. My opponent took the early advantage and I knew I was in trouble - I started to see that my rear-defense was not going to have the depth I needed to keep my SILENT SHA-VI alive, and this would ultimately spell my doom!!
At the end of round 1, you can see, the initial hits have taken away from both sides, and I've lost my rear defense. I am starting to see where I'm exposed - and, realise, that had I put my SILENT-SHA-VI in the off-tank position, I may have been able to give him additional longevity and this would certainly make the battle significantly tighter.
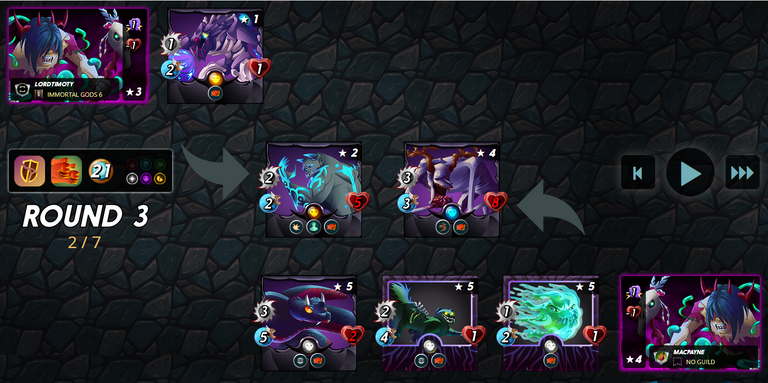
Then, as Round 3 starts you can see my Corpse Fiend is still alive, but I have absolutely no hope of a recovery here. My opponent's SHA-VI was able to gain the upper hand, and destroy my team. This is a shame, as my SHIELD TANK HAWKAW is still standing - but, he won't be able to hold on as the last man standing.
As it turns out, the battle would conclude in Round 4 - with my opponent's SILENT SHA-VI getting the winning hit! But, I didn't sigh, instead, I asked what I could learn from the experience.
So what's the verdict?
- I know I'm not great in the DEATH SPLINTER, but this battle taught me something. So often when I come across a DEATH team, it's my opponent's SHA-VI which is the key to the victory, and I need to do the same with mine.
- My CRYPT BEETLE provided some protection from the rear, but, as the battle was about having no armour, his potential to be the shield was lost and he died too quick. With the CRYPT BEETLE falling over too quick, it meant my SHA-VI was exposed, and the CRYPT BEETLE could not do for me what I needed. It suggests that he really does need to be in a battle with armour - particularly because as a rear asset, he was always going to be unable to attack, so he could only ever hope to defend.
- In moving forward, I need to keep using the CRYPT BEETLE strategically, and in this battle, it may have been playing him in the tank position - if both my opponent and I focused on the rear, by putting a strong tank out front, I could have protected the rear and moved into an advantage.
Thanks for joining me, for another Splinter Chat! This blog was put together as part of Splinterlands' weekly 'Share-Your-Battle' challenge. Have you put yours together yet?
LordTimoty

Don't forget, you can click here and sign up with my affiliate link.
#splinterlands #spt #play2earn #oneup #1up #oneup #proofofbrain #vyb #hivegaming
I think it is worth it to buy the gold foil one, because the price is very similar and you get the bonus DEC.
Great post!
!PIZZA
PIZZA Holders sent $PIZZA tips in this post's comments:
@eijibr(3/5) tipped @lordtimoty (x1)
Learn more at https://hive.pizza.
!1UP good work!
You have received a 1UP from @marianaemilia!
@monster-curator, @oneup-curator, @pimp-curator, @vyb-curator, @pob-curator, @neoxag-curatorAnd they will bring !PIZZA 🍕
Learn more about our delegation service to earn daily rewards. Join the family on Discord.
I hate the death splinter, too! Thanks for explaining the Crypt Beetle. I'm going to have to try it in my next battle.