No Neutral No Worry, Taking Sides Rulesets!
Hello guys!
Yeeeeey I'm back again with my Splinterlands post. This is my second post to follow Splinterlands Mage Secrets Battle Challenge Taking Sides. We often encounter these rulesets when pushing rank. Actually, there is no need for a special strategy in dealing with these rulesets, it's just that neutral monsters cannot be used. In this post I will share one of my battles with Taking Sides rulesets which I think this strategy is quite interesting and can be your reference if you get the same battle rulesets and in the same league.
Well, I'm neither a proplayer nor a tournament hero. I just enjoys sharing strategy and battles that I find interesting in my own view. I played on modern battles on Gold leagues, and maybe the battle strategies I'd share weren't suitable to apply in other leagues because the differences in ability that open up are different from each league. I use a scholar account from Buldog1205 with IGN NIGHTMAREINBONE.

BATTLE PREPARATION
Challenge Rules

RULESET: TAKING SIDES
Description:
No neutral units may be used.

Battle Rulesets
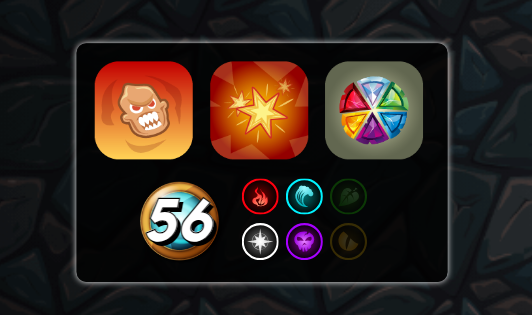
The rulesets in this battle are:
- What Doesn't Kill You (All MOnsters have the Enrage ability)
- Explosive Weaponry (All Monsters have the Blast ability)
- Taking Sides (Neutral monsters may not be used in battles)
- Mana Capacity 56
- Active Element Fire, Water, Life and Death.
Line Up and Strategy
There are 3 rulesets in this battle, and with that in mind, I plan a strategy including:
- Arrange monsters with high speed so that they have a chance to attack first, with the aim that the defense formation is not damaged because the opponent attacks first.
- Using Taunt monsters as tanks, with the aim that the target of attacks from opponents does not scatter, this aims to minimize monsters that will be hit by Blast due to Explosive Weaponry rulesets.
- If possible, use the monster's Reflection Shield to resist blasts from tanks. But if there is really no Reflection Monster, it is necessary to consider the monster that will be subverted to receive Blast.
- Using a variety of attacks, not only focusing on using 1 attack, both melee, magic and range.
I created a line-up with each monster's strategy as follows:
| Monster | Position | Abilities | Strategy |
|---|---|---|---|
 Kelya Frendul Kelya Frendul | Summoner | +1Speed, +1 Armor | Kelya Frendul has a speed buff for all monsters, and besides that many Water monsters also have a fairly high speed. So Kelya Frendul is the best Summoner to carry out the strategy I described above. In addition, the +1 Armor buff will be very useful for team defense. |
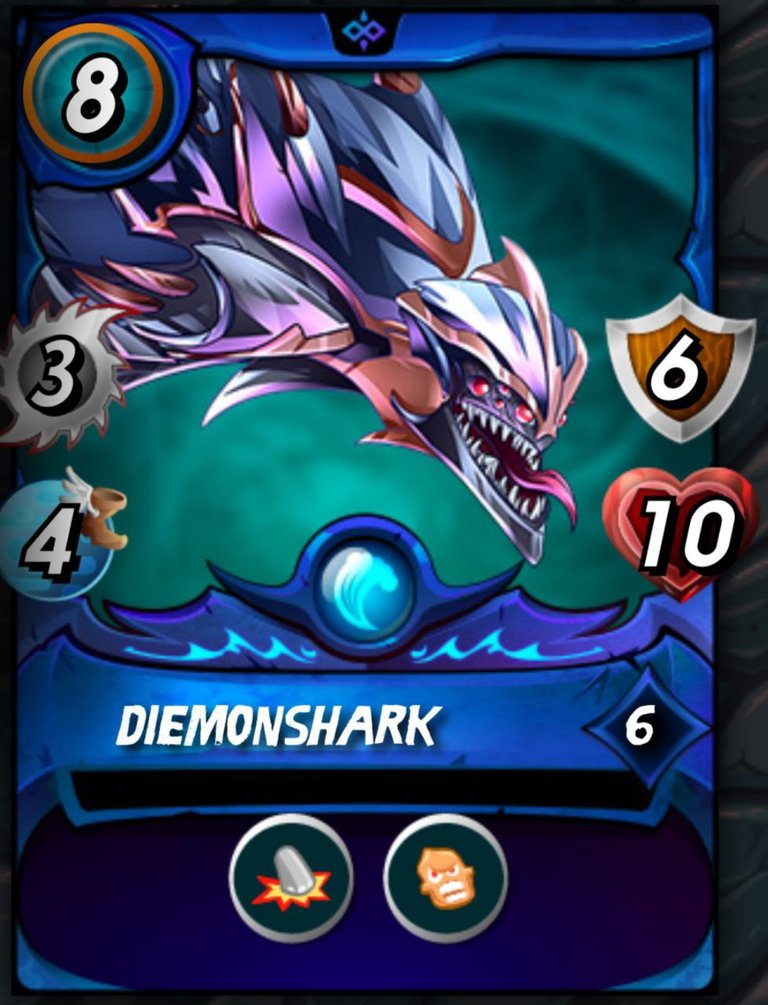 Diemonshark Diemonshark | First | Trample, Enrage | Diemonshark is one of my favorite tanks, because it has high speed, large damage and has Trample and Enrage abilities, and also has considerable HP and Armor. For Melee defense and rank is quite good, but magic attacks could be the weakness of this monster. However, I anticipated this by arranging Taunt monsters in other positions. So the opponent's monster attack point will not only focus on this monster. |
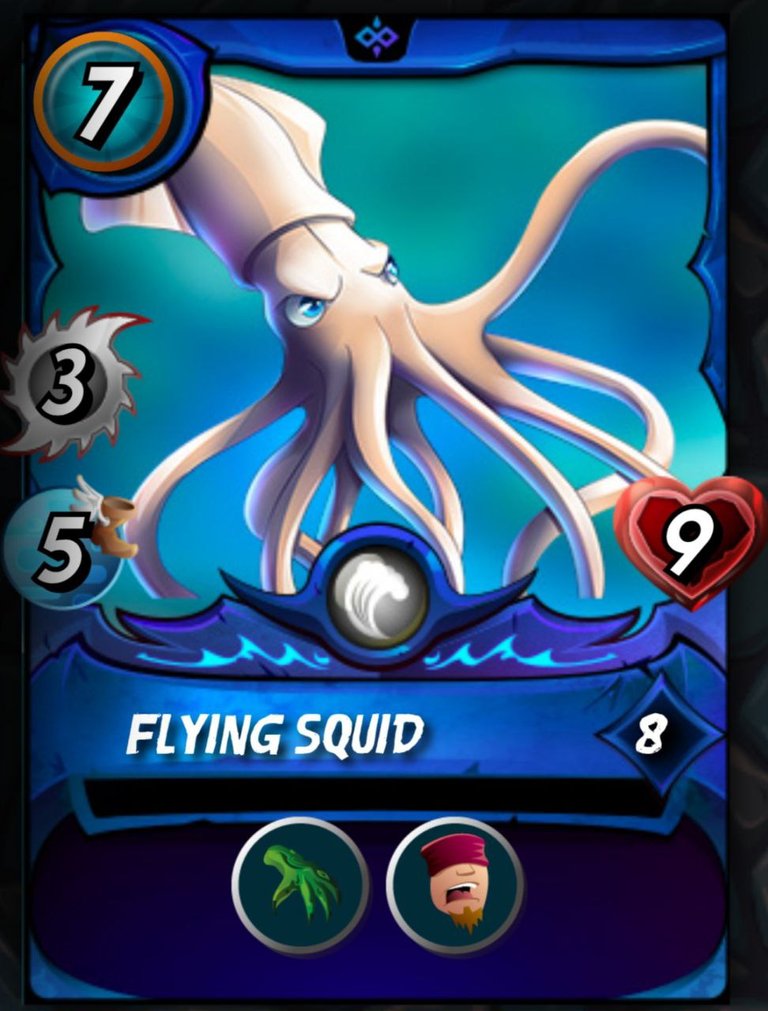 Flying Squid Flying Squid | Second | Reach, Blind | Even though this is a Melee monster, because it has Reach ability, even if it is in second place, it can still attack the opponent's monster in the first position. This monster has high speed and is equipped with a Blind ability to increase the chance that the attack from the opponent's monster will miss. While the Taunt monster is still standing, this monster will be safe because it only gets Blast from the opponent's monsters in the first and second positions if the monster has Reach. But if Taunt monster is dead then this monster will get a lot of Blast if Diemonshark gets an attack. But I'm not too worried because this monster also has decent HP. |
 Djinn Oshanus Djinn Oshanus | Third | Void, Phase, Forcefield | Djinn Oshanus who is in third place is a Magic monster with high speed, just like Flying Squid. Whether as a tank or attacker, this monster is quite powerful. Apart from Speed, which makes this monster have a chance to attack at the beginning, or because this monster has a large enough dodge chance, this monster also has the Void ability to withstand Magic attacks and also Forcefield ability where if the monster's damage to this monster has a power of 5 or more it will only receive 1. |
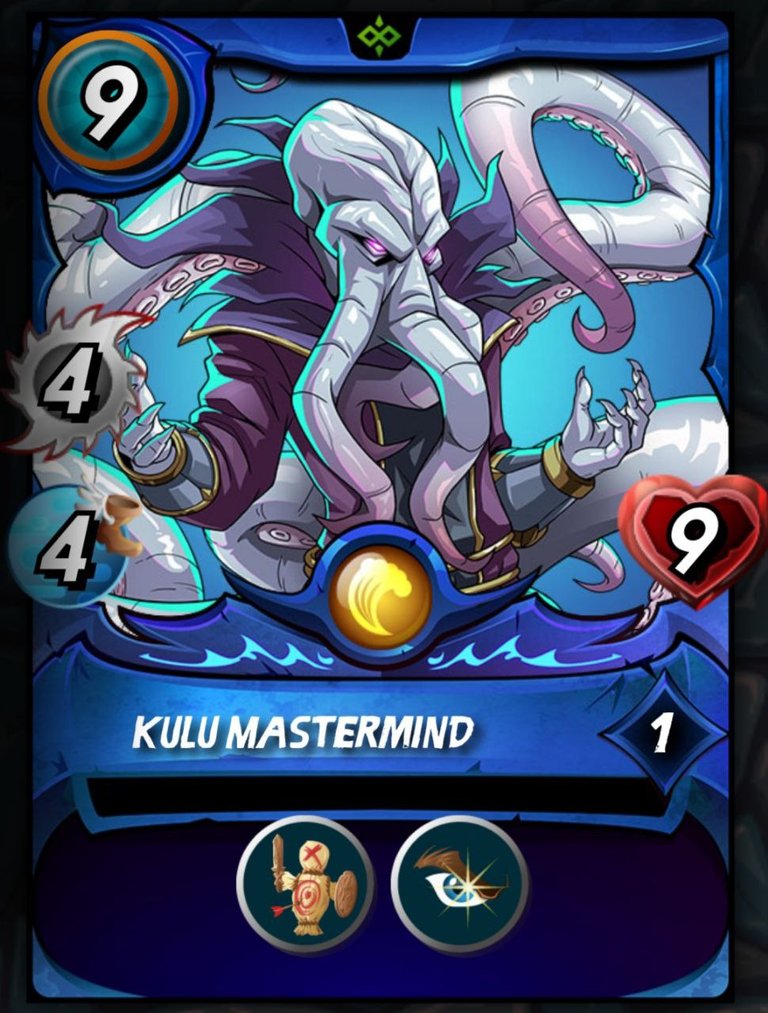 Kulu Mastermind Kulu Mastermind | Fourth | Weapons Training, Opportunity | If in my previous post showed how useful Kulu Mastermind is, this time Kulu Masterminbd is also an important point in this strategy as an attacker because it has a fairly high speed and has a fairly large damage of 4 melee attacks. In addition, this monster also has the ability Opportunity where in the rulesets of Explosive Weaponry it will certainly be very troublesome for the opponent if only the opponent does not use the Taunt monster. |
 Baakjira Baakjira | Fifth | Void, Slow, Strengthen, Heal | Baakjira will be the Blast restraint from the Taunt monster in the last position. Although this monster is next to Kulu Mastermind which has Weapons Training ability, but because Melee monster can only attack if it is in the first position, this damage is useless. My only purpose in placing this monster is to hold Blast while the monster Taunt is not dead. If the Taunt monster has died then the use of this monster is only as a defense, if in the end this battle runs for a very long time until all monsters are exhausted, then maybe Baakjira will be the savior because of the Heal ability combined with large HP. |
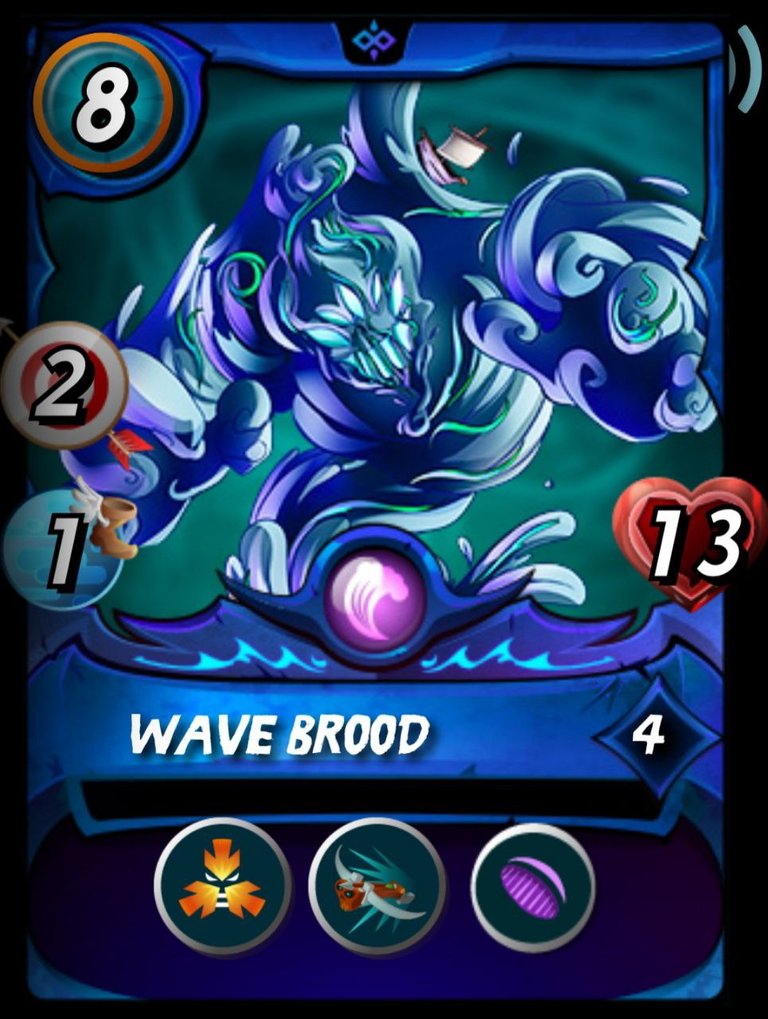 Wave Brood Wave Brood | Last | Taunt, Close Range, Void | Wave Brood is the second tank that will be the target of attacks from enemy monsters, except for those with certain abilities. Perhaps this monster is the monster that will die the earliest. But this is better than the attacks from Sneak, Snipe and Opportunity, the opponent's monsters have a target that is insulating and makes their attacks even more explosive because all monsters have Blast. In terms of defense, although this monster only has a speed of 1, at this level it is good enough to survive the magic era because it has a Void ability. This monster also has quite a lot of HP. |
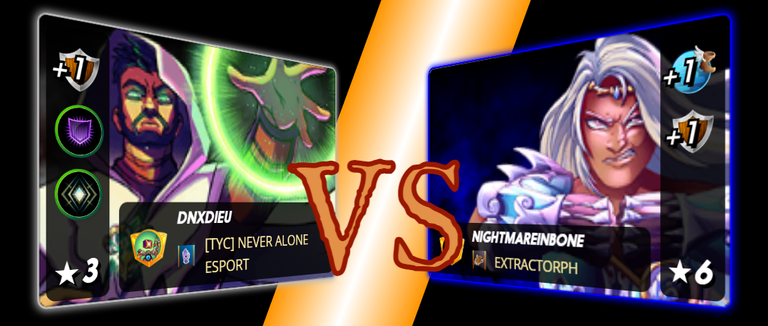
You can see the line-up of both teams in the picture below. The opponent uses Summoner Grandmaster Rathe with Iziar in the first position having taunt, Void, and Martyr abilities. Second place is Consair Bosun with ability Reach, and Reflection Magic. Djinn Renova with Strengthen and Triage abilities is in third place, and Adelade Brightwing with Flying, Repair, Immunity and Resururect abilities is in fourth position. The fifth position is Snipe monster, Slivershield Shariff who also has Piercing and Protect abilities. And the last position is Pelacor Albarest with Double Strike and Flying abilities.
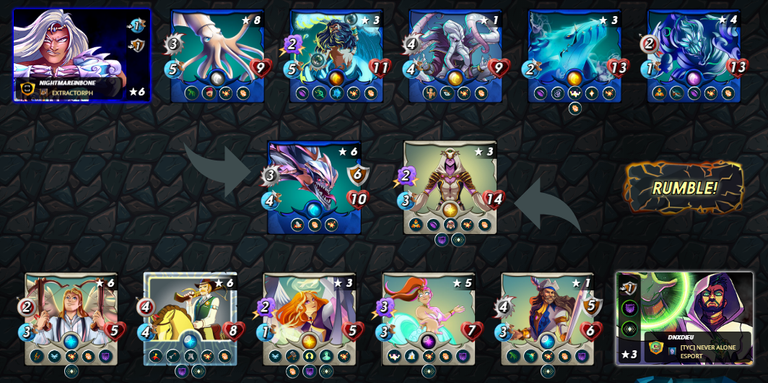
The opponent's strategy is also very good, by placing taunt monsters and Reflection monsters side by side so that Blast doesn't spill anywhere. However, do you think the opponent will win this match? Let's move to the Battlefield Arena to witness it.
BATTLEFIELD ARENA
I've also included a youtube video of this battle that you can play right away.
The battle with 3 rulesets is indeed very interesting to see, because both teams will really think about their best strategy. Like this battle, where the right strategy will make you get victory quickly. Let's take a round-by-round look at this battle!
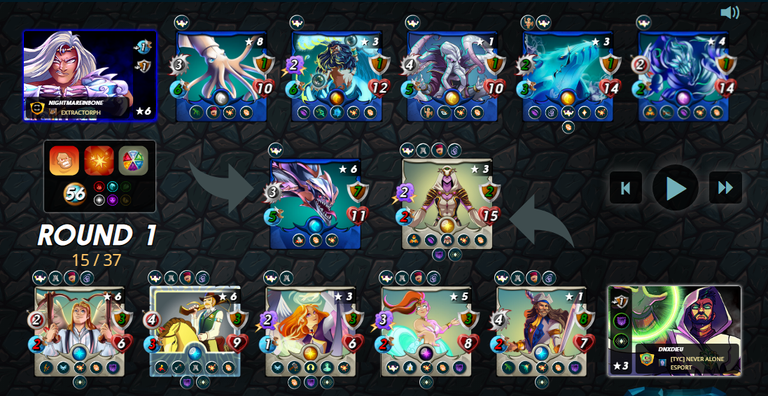
As usual, the first round begins with buffs and debuff parties from all monsters and Summoners. I get the opportunity to attack first because the average of my monsters has a higher speed than the opponent's monster. This time it was Djinn Oshanus who became the opening attacker with Iziar's target, Taunt, the opponent's monster. Then continued with Flying Squid who became the second attacker with the same target. Opponents don't need to think about Blast, because right behind Iziar is Consair Bosun who has a Reflection Shield. The next attack is still from my team, this time it's Kulu Mastermind's turn to get the opportunity to attack. This makes Enrage Iziar active. Then the next attack was continued by Diemonshark, only then the opponent had a chance to fight back with Iziar attacking Diemonshark and immediately making Enrage Diemonshark active. Blast from Iziar's moans regarding the Flying Squid, and this also makes Enrage Flaying Squid active.
The opposing monsters successively attacked Wave Brood, only Iziar and Consair Bosun targeted Diemonshark, but Consair Bosun's attack also missed hitting Diemonshark. Until the end of the first round, the two teams are still as strong as the full formation, not a single monster has died.
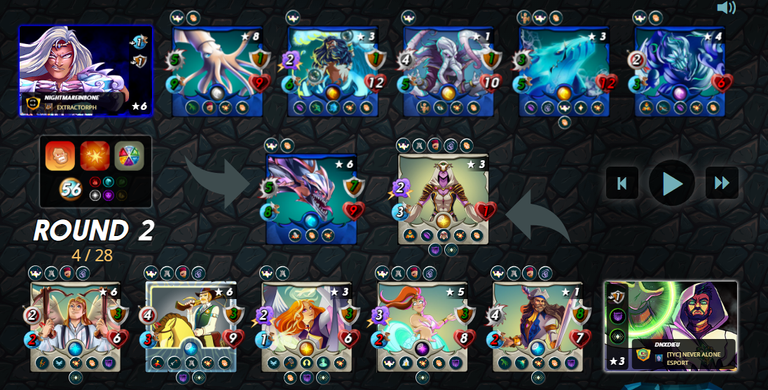
Just like the first round, my monsters get a chance to attack first because they have a higher speed than the opponent's monsters. This time Flying Squid became the first monster to attack in the second round, followed by Diemonshark. Both of these monsters have a higher speed than Djinn Oshanus because Enrage has been activated. Iziar eventually died after being attacked by Djinn Oshanus, but later came back to life due to Resurrect Adelade Brightwing. Along with the dead Iziar, the active Martyr raises Consair Bosun's stats. Even so, not long after, Iziar died again due to successive attacks from Kulu Mastermind and Wave Brood. Consair Bosun again experienced an increase in stats because of Martyr Iziar.
It was the opponent's turn to attack, starting from Consair Bosun who was in the position mainly targeting Diemonshark but missed the punch. Finally, my Wave Brood died after being attacked by Silvershield Sarif and Djinn Renova. Now the target of attack from Pelacor Albares and Adelade Brightwing is Diemonshark, but Pelacor Albares' 2x punches all miss hitting Diemonshark. The second round ended with each team losing Taunt monsters.
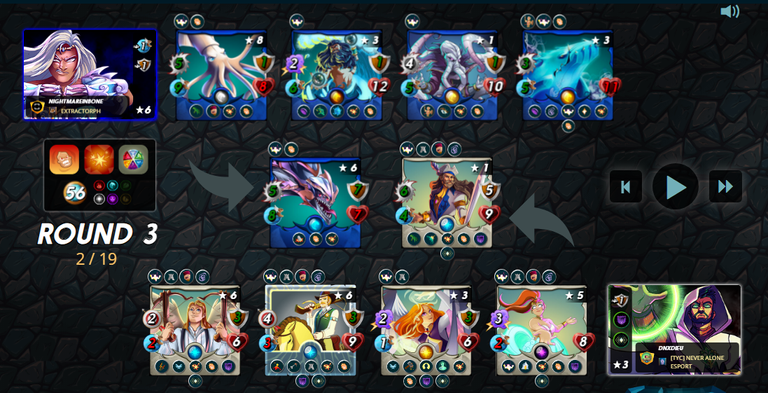
The third round begins with Flying Squid's attack on Consair Bosun, then continues with Diemonshark's attack which damages Consair Bosun's armor. In addition, the Blast from this attack also hit Djinn Renova who was behind Consair Bosun. Finally, Enrage Consair Bosun was active after being attacked by Djinn Renova. This made his Speed increase and immediately got a chance to attack. Although Enrage is already active, Consair Bosun Ke Diemonshark misses again. Now it's Kulu Mastermind's turn, his attack kills Djinn Renva, and the Blast from this attack also hits Adelade Brightwing.
because there is no Taunt monster, Silvershield Shariff who is a Snipe monster now targets Djinn Oshanus, but his attack misses. Both of Pelacor Albares' attacks targeting Diemonshark also missed. The third round ended on Adelade Brightwing's turn. Before attacking Diemonshark, Adelade Brightwing repair 2 Armor Consair Bosun.

The fourth round began with successive attacks from Flying Squid, Diemonshark and Djinn Oshanus targeting Consair Bosun. Consair Bosun died after being punched by Djinn Oshanus. Then after that Adelade Brightwing also died after being attacked by Kulu Mastermind. Silvershield Shariff is now in first place, but cannot illuminate because it is a Range monster. Pelacor Albares' attack targeting Diemonshark again missed all. The fourth round ended with 2 opponent monsters remaining.
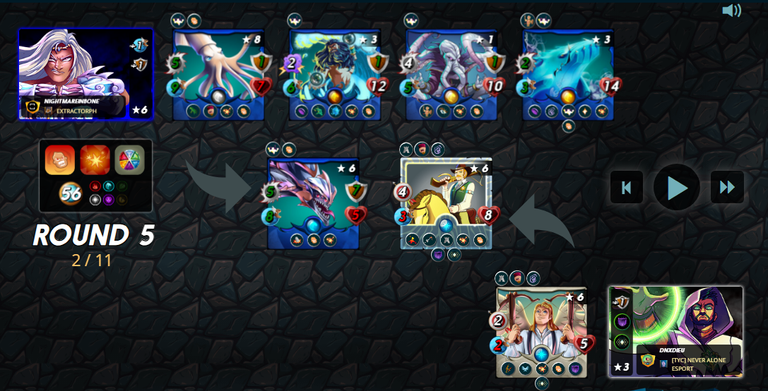
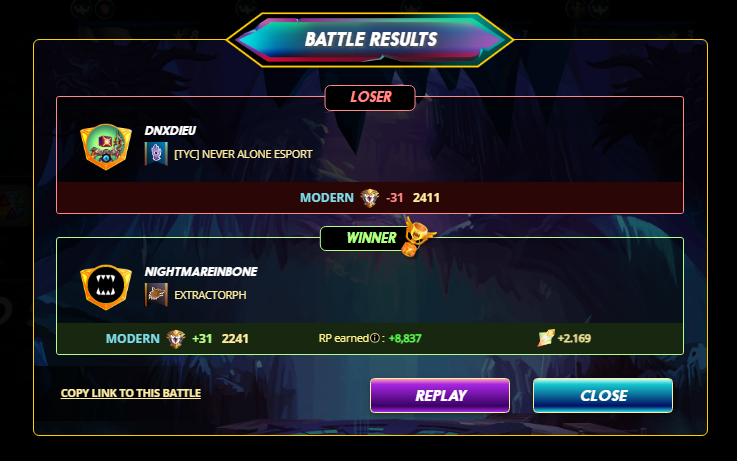
Just like the previous round, the fifth round started with consecutive attacks from my monsters. Flying Squid, Diemonshark, Djinn Oshanus and finally Kulu Mastermind targeted Silvershiled Shariff, and along with Kulu Mastermind's attack, both Silvershield Shariff and Pelacor Albares died. I won this battle with the remaining 5 monsters that are Diemonshark, Flying Squid, Dinn Oshanus, Kulu Mastermind and Baakjira.
You can see the final result of this battle in the picture below.
STRATEGY DISCUSSION
The strategy I applied was very effective in this battle. Even without Neutral monsters, I can still assemble a line-up with other monster alternatives. Baakjira can replace Runi. If this battle is a normal battle, maybe I would prefer Runi to be side by side with Taunt monsters, because Runi has a Reflection Shield.
In the Taking Sides rulesets, if all elements are open, then you can consider using Summoners from Dragon elements, so you can combine 2 elements at once. However, if the Dragon element is unavailable, you only need to adjust other rulesets with the choice of Summoners and monsters you have. Memorizing all the types of monsters you have will make you faster in thinking and strategizing.
Ok guys, I think my post is enough here, thank you for visiting my blog, don't forget to upvote and leave a comment. If you want to start playing Splinterlands and don't have an account yet, don't hesitate to use my referral:
https://splinterlands.com?ref=anif1908
Credits:
The wonderful divider by kyo-gaming
Thumbnail created using canva
All images taken from Splinterlands website

Yay! 🤗
Your content has been boosted with Ecency Points, by @anif1908.
Use Ecency daily to boost your growth on platform!
Support Ecency
Vote for new Proposal
Delegate HP and earn more
Support Splinterlands by Submitting a positive review about Splinterlands on Gam3s & also nominate Splinterlands for the People's Choice Awards on Gam3s. Don't forgot to take screenshot & save those after you finish all those task, there will reward in future 😉 .Thank you
Thanks for sharing! - @underlock
