Splinterlands - Gold League Battles [ENG/ESP]
Hey guys!


Battle #1

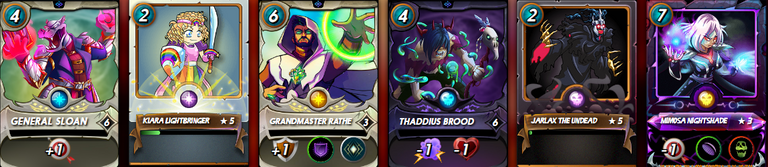
I chose Mimosa as my Summoner over the others, despite her high Mana and her useless Ranged debuff and Void effect, to deprive my opponent from healing. Luckily it worked with the Haunted Spirit.
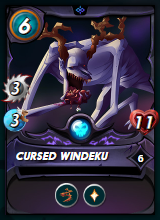
You can’t assemble a "Melee only" team without Thorns or Healing. The Cursed Windeku has both.
From the second position is where I had my doubts; shall I use my Mana in Sneak and Opportunity Monsters? It could’ve worked, but with a Blast rule, I rather try to control the damage received, than the one dealt.For that matter I put Venator Kinjo. His Reflection Shield prevents Blast damage, his Camouflage prevents attacks from enemies with Opportunity, and he can also slow down my opponent’s cards, which was useful for the following Monsters.
Both the Chicken and the Ram are there to prevent more Blast damage to useful Monsters.
The Silent Sha-Vi, an amazing Sneak Monster. He is a little bit Mana expensive, but with his Speed, you make sure you attack first, which is very useful in a Blast rule. Actually, it took down the Undead Badger, before it could attack.
It is a tough choice to position a Monster with no chance of attack, so I had my doubts with the Pelacor, but the strategy worked quite well. His Backfire ability took down the enemy Sha-Vi and damaged the Skeleton.
All the Monsters that mattered in that team survived, so it was quite an impecable win.
Battle #2

- My chosen Summoner was Kiara Lightbringer. She has no abilities, but she only requires two points of Mana to be used, which in this case is invaluable.
- As always, my predilect tank for short Mana battles is the Pelacor Conjurer. Cheap to summon, high evasion and, at this level, Magic Reflect.
- I positioned the Dax Paragon in the second position, to prevent healing and to inflict more damage to possible Magic attackers. It was all useless though. It would’ve been better to use the Harpy.
- The Divine Healer is a great card for the Pelacor; is very cheap to Summon, heals the tank and slow the enemy Monsters, benefiting the Pelacor’s evasion.
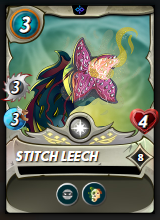
- Here I was between the Leech’s Leech effect and Uraeus’s Poison, but I went with the Leech because of that extra point of attack. Poison is useful, but is not a certainty and I rather be certain in such a short battle.
- And of course the free Mana Monsters covering the back.
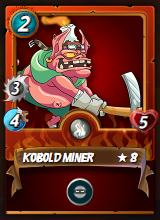
Extra battle: This is another short Mana battle, but in this case with the Death Splinter. You are not going to learn much from my lineup, I hesitated a lot here, but my oponent however, assembled a very good lineup, in my opinion. The Cerberus is definitely one of the best tanks in the game, for low Mana battles, starting with his healing ability. He is also cheap to summon and gets the Retaliate ability later on. The other card that stands out is the Kobold Miner that costs two points of Mana to summon and deals a nice amount of damage.
The Thumbnail was done in Canva.
This is it for this post people, thanks for reading!
ESPAÑOL
¡Hola gente!
Batalla #1
- Elegí a Mimosa como mi Summoner sobre los demás, a pesar de su alto maná y su inútil debilitamiento a distancia y efecto de Void, para privar a mi oponente de la Sanación. Por suerte funcionó con el Haunted Spirit.
- No puedes armar un equipo de “Only Melee” sin Thorns o Healing. El Cursed Windeku tiene ambos.
A partir de la segunda posición es donde tenía mis dudas; ¿Usaré mi maná en Sneak y Opportunity Monsters? Podría haber funcionado, pero con una regla de Explosión, prefiero controlar el daño recibido que el infligido. - Por lo demás puse a Venator Kinjo. Su Reflection Shield previene el daño de Blast, su Camouflage previene los ataques de enemigos con Opportunity, y también puede ralentizar a las cartas de mi oponente, lo cual fue útil para los siguientes Monstruos.
- Tanto el Pollo como el Carnero están ahí para evitar más daño de explosión a los monstruos útiles.
- El Silent Sha-Vi, un asombroso Monstruo con Sneak. Es un poco caro en maná, pero con su velocidad, te aseguras de atacar primero, lo cual es muy útil en una regla de explosión. De hecho, derribó al Undead Badger antes de que pudiera atacar.
- Es una elección difícil posicionar un Monstruo sin posibilidad de ataque, así que tenía mis dudas con el Pelacor, pero la estrategia funcionó bastante bien. Su habilidad Backfire derribó al Sha-Vi enemigo y dañó al Esqueleto.
Todos los Monstruos que importaban en ese equipo sobrevivieron, por lo que fue una victoria bastante impecable.
Batalla #2
- Mi invocador elegido fue Kiara Lightbringer. No tiene habilidades, pero solo requiere dos puntos de Maná para ser utilizada, lo que en este caso es invaluable.
- Como siempre, mi tanque predilecto para batallas cortas de Maná es el Pelacor Conjurer. Barato de invocar, alta evasión y, en este nivel, Magic Reflect.
- Coloqué al Dax Paragon en la segunda posición, para evitar la sanación y para infligir más daño a los posibles atacantes mágicos. Aunque todo fue inútil. Habría sido mejor usar la Arpía.
- El Sanador Divino es una gran carta para el Pelacor; es muy barato de Invocar, cura el tanque y ralentiza a los Monstruos enemigos, beneficiando la evasión de Pelacor.
- Aquí estaba entre el efecto Sanguijuela del Leech y el Veneno de Uraeus, pero elegí al Leech por ese punto extra de ataque. El veneno es útil, pero no es una certeza y prefiero estar seguro en una batalla tan corta.
- Y, por supuesto, los Monstruos de Maná gratuitos que cubren la espalda.
Batalla extra: Esta es otra batalla corta de Maná, pero en este caso con el Death Splinter. No vas a aprender mucho de mi alineación, dudé mucho aquí, pero mi oponente, sin embargo, armó una muy buena alineación, en mi opinión. El Cerberus es definitivamente uno de los mejores tanques del juego, para batallas con poco Maná, comenzando por su capacidad de sanación. También es barato de invocar y obtiene la habilidad Retaliate más adelante. La otra carta que se destaca es el Kobold Miner que cuesta dos puntos de Maná para invocar y causa una buena cantidad de daño.
La Miniatura se hizo en Canva.
Esto es todo por este post gente, ¡gracias por leer!