Dark Blood Legionnaire Alvar || Splinterlands Art
In his lore, Legionnaire Alvar resonates with a very powerful aura. He has a strong and dominant demeanor. His sword is massive and runs red with blood. He gives off a chaotic vibe. I wanted to redesign Legionnaire Alvar to match his lore.
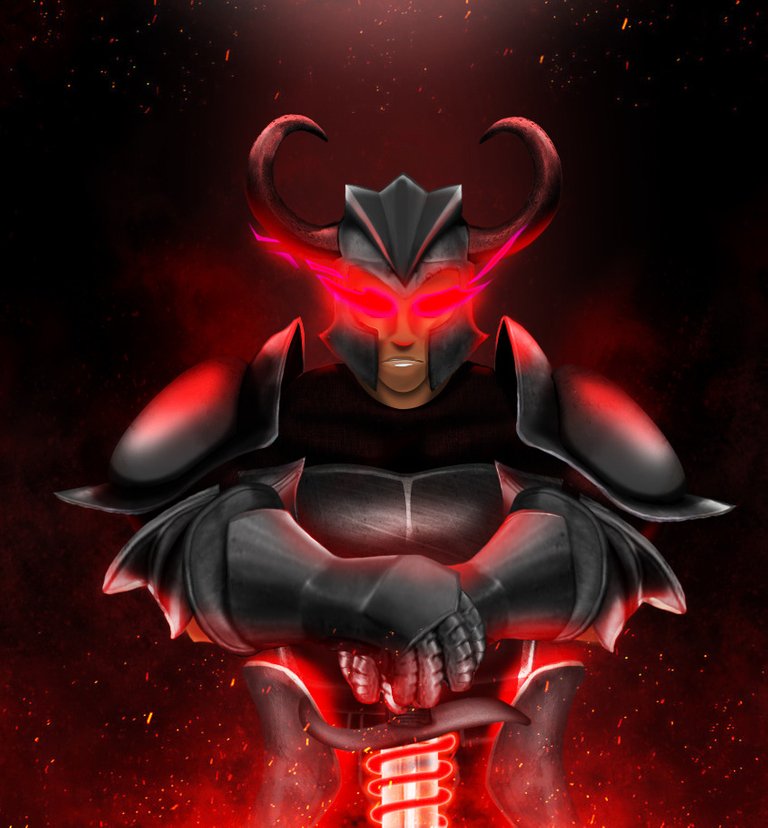

Alvar Veralyn glared at the two prisoners kneeling before him, a dwarf and an elf. His plate armor gleamed beneath the harsh glare of the sun, and his massive sword ran red with blood. His Chaos Legionnaires stood in a rough circle around their general and the prisoners. The corpses of the fallen littered the plains of the battlefield.
-Lore
I pictured Alvar to be dark and grungy. With a lot of bloody accents. He is a bit demonic and his aura should match the vibe. However, I love his original design. He looks strong and angry. But his armor and overall colors don't match his lore. He should be darker, and redder. That is what I did.

I used only one metallic texture to make the entire design. He is mostly armor, so there was very little I could add to it.
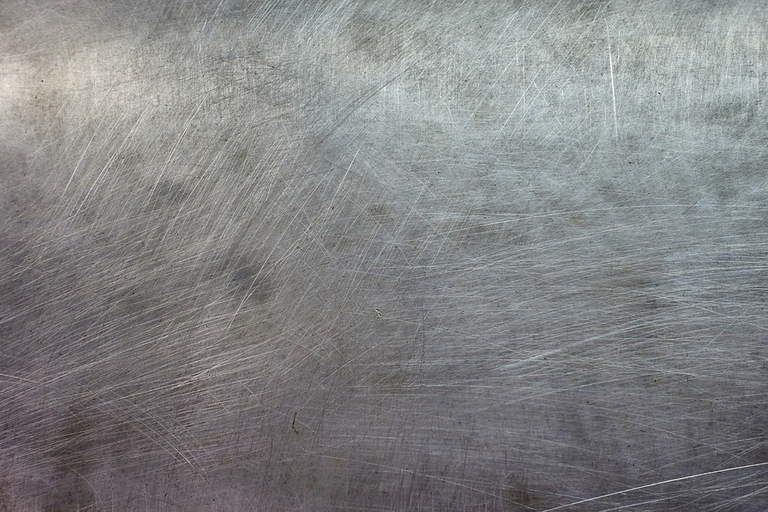
This is a free to use, no attribution required image I found on pixabay. It has a "used" look and very metallic. The good thing about using such textures is that you can transform them into any shape as you like. You can cut them, rotate them, shape them, and each time they will look a little different since the "scratches" on the metal are different everywhere.
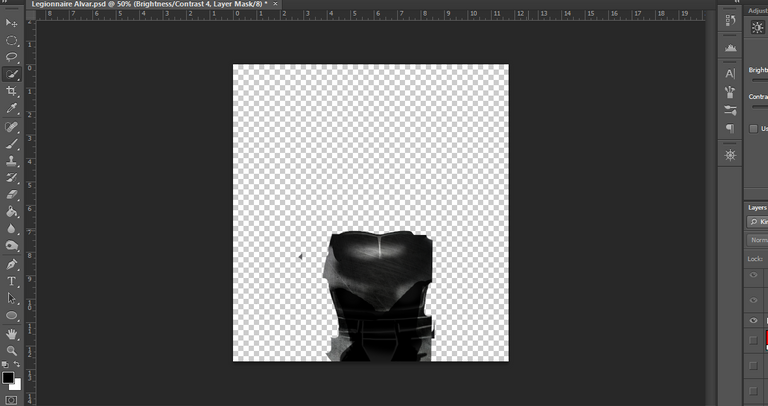
This is the entire chest plate that runs all the way down to beneath the sword. I had to shape it. Give it some highlights and shadows. And then I used another masking layer to make it dark. Using another adjustment masking layer I created depth so that each segment looks separate. Although it is the same picture.
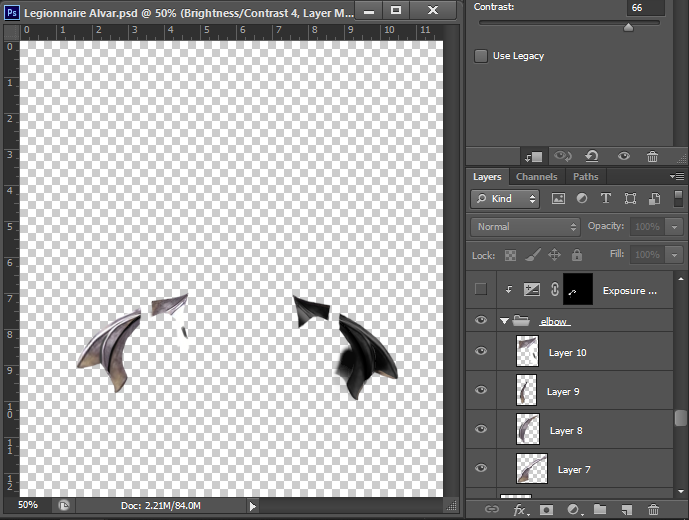
The elbows were the most complicated part. At first, I only shaped the entire arm and then tried adding shadows to it. The end result was choppy and very bad. So, I decided to make each segment separately. Here you can see I have cut out each element of the elbow separately. Used a brush to mark the area and used the eraser to cut them out.
Then, I added lines with white and black brushes, and then added shadows and highlights to make it dark and give it depth. You can see the before and after on the left and right elbow. This probably took the most time.
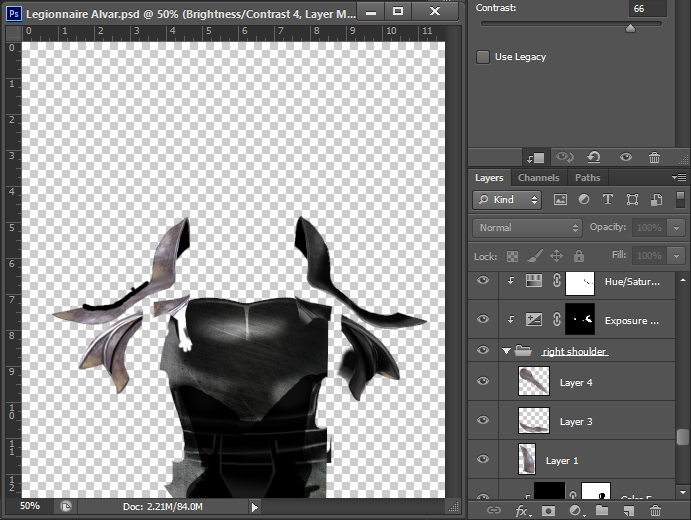
I used the same technique (mark and cut) to create the shoulder plates. At first, I created the right shoulder in 3 segments, then added a fourth segment beneath all the other layers to create the inside and much darker part of the shoulder plate.
Then I put them in a group and added 2 adjustment mask layers to give them shadows to create depth and make them look less 2D. To create the other shoulder I copied the entire thing and flipped it. Did some minor transforming so they don't look completely identical.
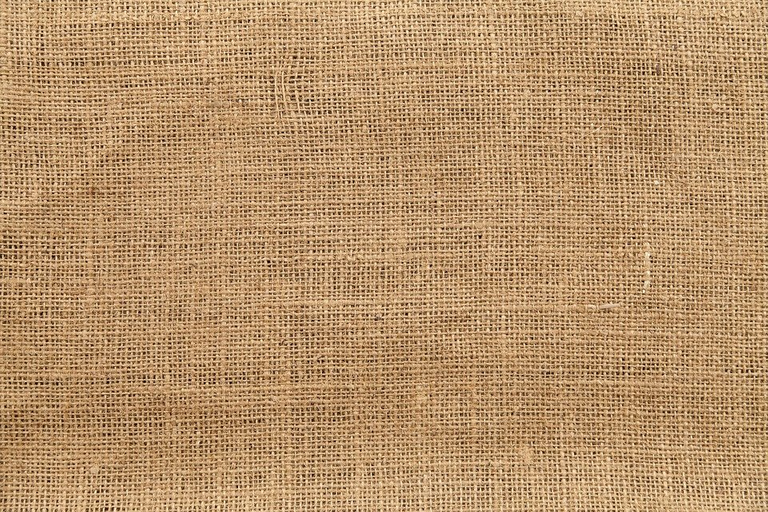
For the cloth, I used this free to use, no attribution required Jute Texture I found in pixabay. I could extend it to cover the entire cloth part but it wouldn't look realistic. So I had to merge it multiple times together, then remove the edges, give it some shadows and color it dark red.

I should have created all the elements first and then colored them later all together. Doing them separately consumed a lot of time and energy. But hey, I guess that's how we learn, right?
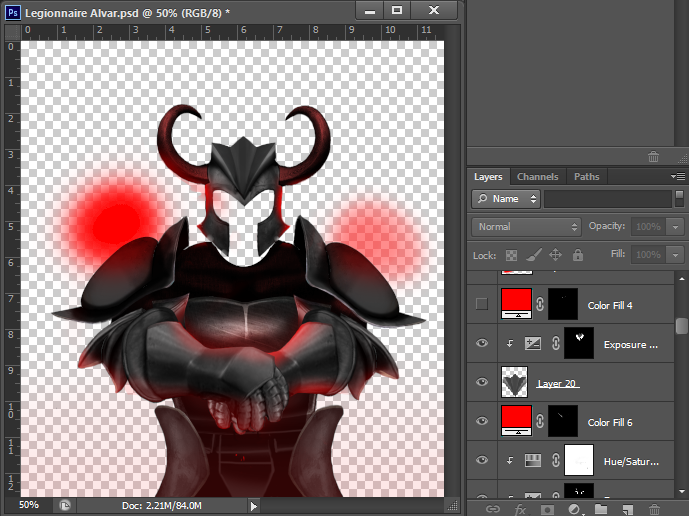
From there on, it was adding more and more elements and shading them with adjustment masks or painting them with a white bright brush. Once all the pieces were in place, I started adding the red highlights wherever I thought it would be.
For the shape on the helmet and the round shoulders, I had to create a separate shape with the pen tool since creating exact angles with shadows was very difficult for me. I decided it was much better to create the entire thing from scratch.
I felt like leaving the face as it is wouldn't do justice to Alvar's character. I felt like giving him a more demonic look by adding some flare made sense here.
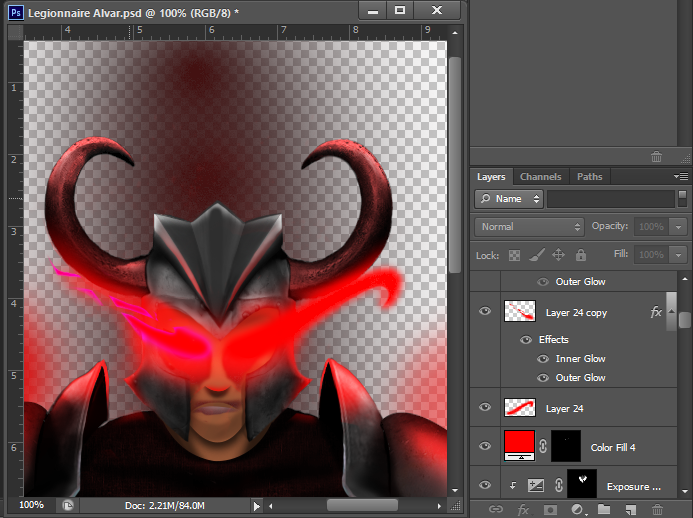
I created a custom shape shooting out from his eyes using the pen tool and then added glow using the blending option. To make it pop I added two different colors to the inside of the glow and the outside. Then to give it a more dynamic look, I simply erased parts of the flare and they automatically got the glows because of the bleeding layers.
To really sell Alvar's character, I added a dark background with a lot of red mist and bloody splatter around him. I found some sparks elements and added them separately to the top and bottom of the picture along with a white and red highlight respectively. Without the highlights, there would be little reason for the character to have shadows or highlights on his armor.
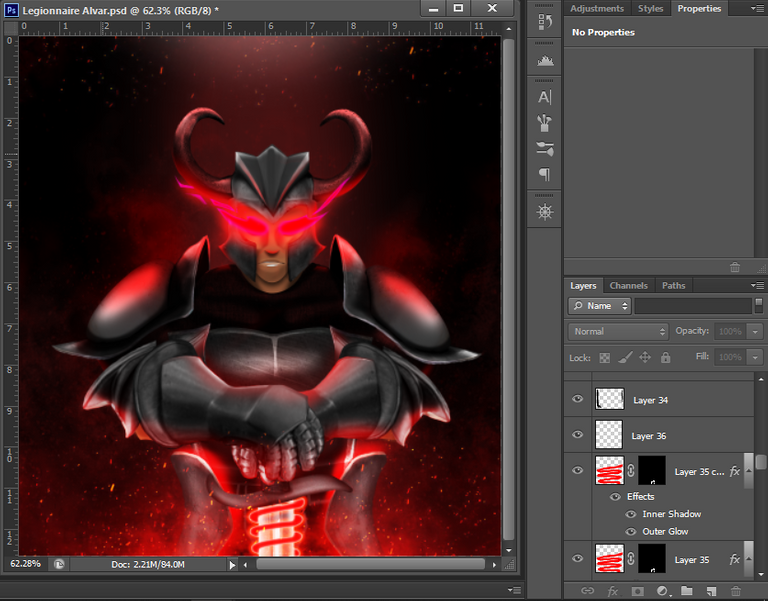
Finally, to match Legionnaire Alvar's lore, I added a red line of blood that spirals around his sword. There is also a reddish hue and highlight on his blade. I created the sword guard from scratch using the pen tool and making it a shape then added highlights and shadows to it.


Affiliate links
Rising Star
Exode
Huobi
Appics
Splinterlands
Actifit
Binance
Ionomy
Cryptex
Thanks for sharing! - castleberry#6859

Thank you @splinterlands and @castleberry!
You are very welcome!
Clearly displaying a blast creativity! The way you are using your photoshop tools, mask, layer adjustments, hues/saturation and a lot more prove to be a master of the software and your own art style. Keep sharing!
!1UP
Thanks @japex1226 ! I'm still refining my shadows. I feel like they're very mediocre. I bet you can guess the process I used. Can you spare me a few tips for improvements?
You're welcome bud! I'm really an expert myself too I'm still learning, but try exploring the layer blending options. You should see it beside the opacity in the layers panel. Play with multiply and overlay, it could boost the overall mood lighting on your work.
!PGM
100 PGM token to send 0.1 PGM three times per day
500 to send and receive 0.1 PGM five times per day
1000 to send and receive 0.1 PGM ten times per day
Discord
Support the curation account with a delegation 10 HP - 50 HP - 100 HP - 500 HP - 1000 HP
I just tried using the layer blending options on this file. Wow! What a difference. Before I always tried playing around with brush sizes and softness with a mix of lighter and darker colors, but with the blending options it is so much cleaner and more efficient! Thanks a lot!
Ohh sorry my comment lack the word NOT.. What I'm trying to say is I am NOT really an expert too and I'm still learning but I am very glad that helps you with your future art post keep sharing bud!
You have received a 1UP from @japex1226!
@monster-curator, @oneup-curator, @pob-curator, @vyb-curator, @ccc-curatorAnd look, they brought !PIZZA 🍕
Delegate your tribe tokens to our Cartel curation accounts and earn daily rewards. Join the family on Discord.
@blind-spot! The Hive.Pizza team manually curated this post.
PIZZA Holders sent $PIZZA tips in this post's comments:
curation-cartel tipped blind-spot (x1)
Join us in Discord!
It is amazing how you make the pieces one by one so that it has that 3d shape, your very beautiful drawing is totally incredible
Thank you so much @marriakjozhegp. I am working on refining my skills. It is still the best I have done so far!
Wow, that is some awesome artwork!
Keep up the great work!
Cheers,
@andy-plays
!gif amazing
Via Tenor
Thank you! I am glad you liked it!