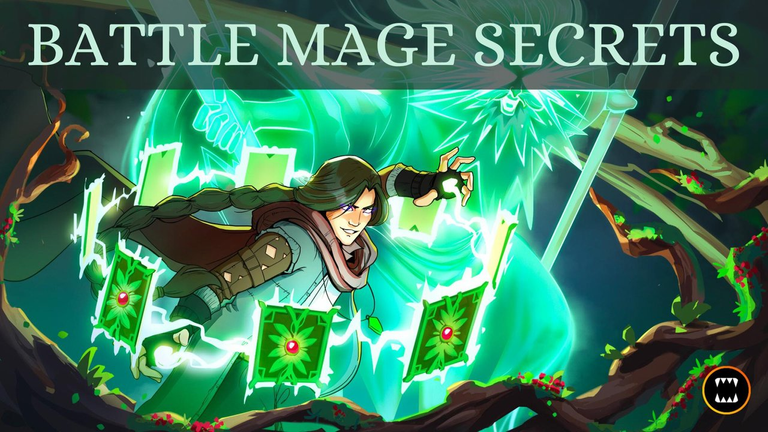
A Bit Off the Mark - Battling with Aim True!
This week's brand new Battle Mage Secrets challenge features the Aim True ruleset! Aim True is an interesting ruleset because when it is in effect, every attack will hit its target. This changes the impact speed has on a battle - while it will still determine attack order, there is no more missing based on a speed disadvantage. Any monsters with Dodge, Flying, or Phase are a bit less effective compared with their normal selves in battles with this ruleset as well.
Our battle for this week shows off a fight with this Aim True rule, as well as a few monsters which work well while it is in effect. Buckle up - this is a fun one!
If you wanted to jump right to the action, the Battle Link is right here. Want to hear some more about the lineup? Read on further!

First up: the ruleset. As you may expect from the subject of this week's challenge, we have the Aim True ruleset. To go along with it, we also have Fog of War and Melee Mayhem. This is an interesting combination because Fog of War usually makes is less likely that we will want to use melee monsters, but Melee Mayhem encourages them - a bit of a dilemma!
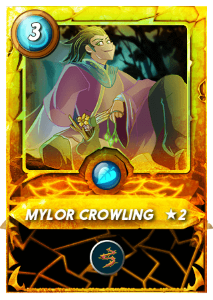
In the end, I decided that Melee Mayhem outweighed Fog of War, and that my opponent was likely to select a team with plenty of melee attackers. Assuming that they do, this makes Mylor Crowling an obvious choice. Thorns is amazing against lineups heavy on melee damage, as it will dish out counter damage to the opposing monsters whenever they manage to land a melee attack. And remember - thanks to Aim True, they should be managing to land a melee attack every time it's their turn!
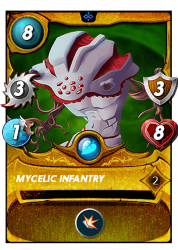
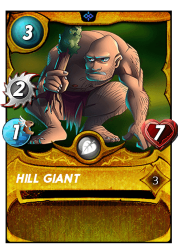
I started off my team with my tank and secondary tank, and was careful to select monsters which took advantage of the ruleset. Mycelic Infantry and Hill Giant are both bulky tanks with 1 speed. Speed isn't BAD in Aim True, but it is important to remember that a monster with high speed will tend to have a higher mana cost - no need to pay for that speed if we don't need it. Thanks to Aim True and Melee Mayhem, both of these guys will be able to attack from any position, and won't have to worry about missing. Mycelic Infantry also has the handy Shield ability, which will help it to weather any melee or ranged attacks that may happen to come its way.
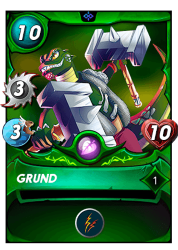
Up next was the heavy hitter on my team - Grund! Grund hits for a whooping 6 melee damage per turn, and thanks to Melee Mayhem will be able to strike even from all the way back in the third position. My plan for this battle was for Mycelic Infantry and Hill Giant to hold the front line, while Grund and Thorns damage did work on the enemy monsters.
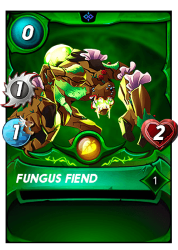
By this point I was out of mana, but whenever you have slots on your team left you can always bring along a Fiend! Fungus Fiend doesn't really do a whole lot, but it also doesn't cost anything to bring into battle. And thanks to Melee Mayhem it may even be able to contribute a little bit of damage from the back line.

With the lineup set, it's off into battle! When I see the selected teams I am concerned - my opponent had brought a small amount of melee damage so Thorns isn't completely useless, but they have a substantial amount of magic damage on their team. This means that they will both be able to deal full damage to Mycelic Infantry, as well as avoid any counterattacks from Thorns on those monsters. On the bright side they did pay a premium for some high speed monsters, which could potentially come back to bite them. We'll have to see how it goes!
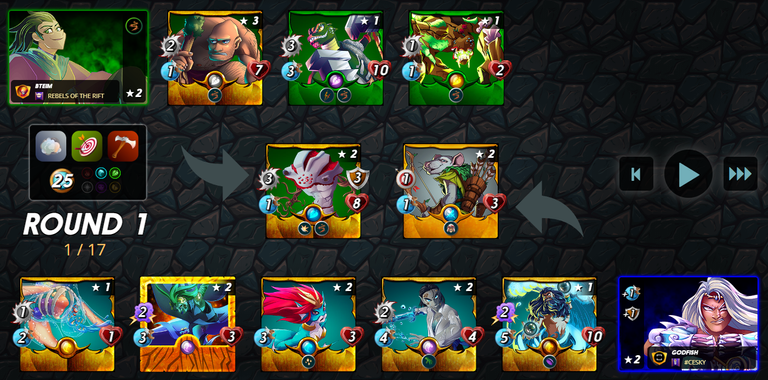
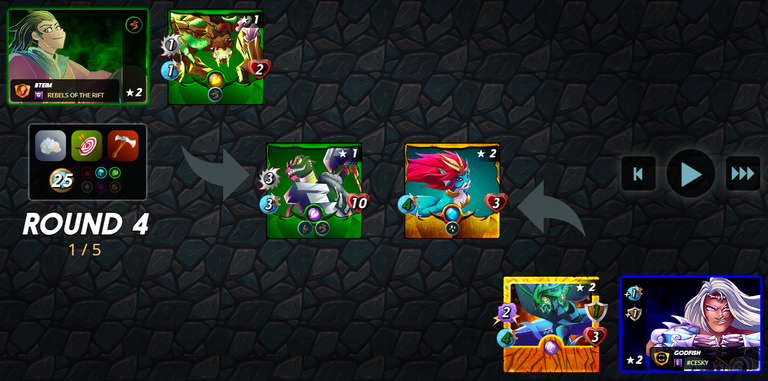
In the first round of battle things start off about the way I expect - my Mycelic Infantry takes havy damage, and while the opposing Venari Marksrat goes down, that also means that the enemy Djinn Oshannus gets a rather nice stat increase. I do have Grund going for me - he is well protected in the back, and with Aim True in play he'll be able to high Djinn Oshannus no matter how much of a speed differential there is.
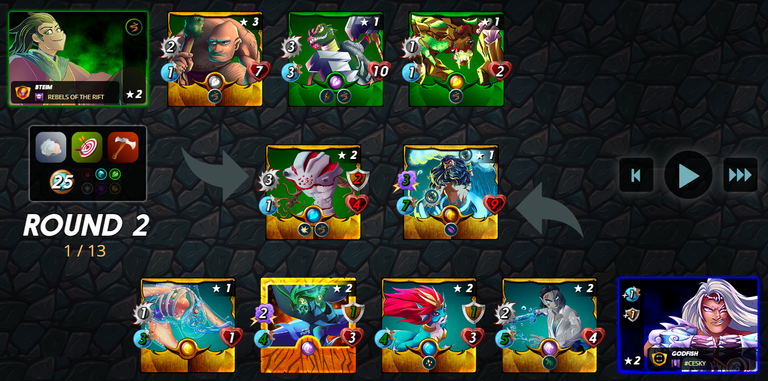
It is a bit if a slugfest, but by the start of round 4 my team is able to make a breakthrough - my opponent's Djinn Oshannus and Tide Biter have both gone down, and with them the bulk of the enemy team's damage. On my side of the battlefield, Grund still has full health and is putting out plenty of melee damage.
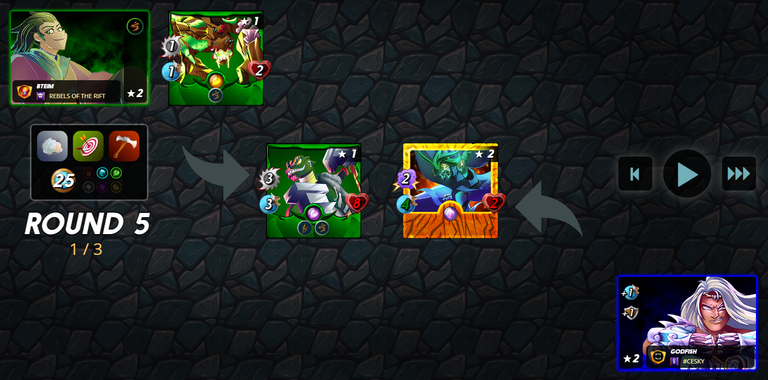
One turn later the outcome is clear - the enemy Merdaali Guardian goes down and my Grum is poised to finish off the the lone Coral Wraith. Victory! And again, if you wanted to see the whole battle for yourself, you can see it right here.
While my attempt to preemptively counter my opponent's plan did not quite hit the mark, my chosen monsters and strategy were enough to prevail in the end. My front line of Mycelic Infantry and Hill Giant were able to buy enough time for Grund's high damage melee attacks to mow through the enemy monsters.
Aim True is a nice change of pace because it changes the way that monster stats and abilities have an effect on the battlefield. Recognizing the differences and choosing your monster lineup to maximize your lineup of monsters can make the difference between victory and defeat.

Thank you so much for reading all the way to the end. Interested in seeing some more of my writing in the future? Be sure to give me a follow! In the meantime, if you'd like to see some of my recent posts:
Aiming False - Not Quite the Battlemage Challenge! - A non-Battlemage Challenge battle writeup, featuring Yodin!
Splinterlands Economics: Causation - A look at causation, and how we can apply it to Splinterlands!
Splinterlands Economics: Ceteris Paribus - An introduction to the concept of Ceteris Paribus, and how we can apply it to Splinterlands!
Thinking about giving Splinterlands a try but haven't signed up yet? Feel free to use my referral link: https://splinterlands.com?ref=bteim, and be sure to reach out to me if you have any questions!
All images used in this article are open source and obtained from Pixabay or Unsplash. Thumbnails borrowed with permission from the Splinterlands team or made in Canva.
https://twitter.com/1467643672636190720/status/1633996665094033408
The rewards earned on this comment will go directly to the people( @bteim ) sharing the post on Twitter as long as they are registered with @poshtoken. Sign up at https://hiveposh.com.
Thanks for sharing! - Underlock#8573
