Small Strategy - Battling with Close Range!
This week's Battle Mage Secrets challenge features Close Range! Close Range is always an interesting ruleset to play with as it breaks one of the basic rules of the game - under usual conditions, ranged attackers can't use their attacks in the first position, but in the Close Range ruleset they can. One of the most frustrating situations in a Splinterlands battle is to lose the battle when you have a strong ranged attacker as your last monster standing - in most fights, it can't attack since it is stuck in that first slot. In Close Range battles, that is one thing you won't have to worry about!
The obvious winners in the Close Range ruleset are the ranged monsters. Ranged attackers can be a little bit of a liability because they might get stuck at the front, and under this ruleset this downside risk is eliminated. With ranged becoming a stronger strategy, anti-ranged monsters also become quite a bit better since they have a greater chance of countering your opponent's strategy. Headwinds, Return Fire, or extra armor? All very nice to have in Close Range battles!
If you wanted to jump right to the action, the Battle Link is right here. Want to hear some more about the lineup? Read on further!
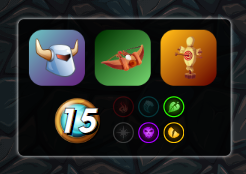
First up: the ruleset. Of course, we have Close Range, which means that ranged attackers are able to attack from the first position. To go along with it we have Armored Up and Target Practice, which grant 2 additional armor and the Snipe ability to monsters in this battle. Notably, we have a relatively small mana budget and limited splinters at our disposal - just 15 mana, and a choice between Earth, Death, or Dragon. Oh, and one more thing - this is a Rebellion-only tournament battle.
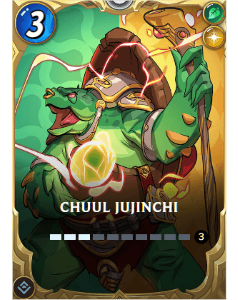
Given the low mana cap, I wanted to spend as little mana as possible on my summoner in order to be able to get as much monster into my lineup as possible. Chuul Jujunchi fits the bill here. While I won't be able to take advantage of the dual summoner benefits in this fight due to the splinter restrictions, Chuul fills my summoner slot at a very reasonable cost of just 3 mana.

For my first monster I wanted as much bulk as possible. Usually in battles with the Target Practice ruleset you want to have bulk in the second position, but due to the low mana cap I expected for most of the action to be taking place in the very front. Zebajin has plenty of bulk with 10 health, which should work well with the healing that I plan on bringing along with my support monster. Zabajin also happens to be a magic attacker, which is perfect for the Armored Up ruleset - extra armor matters a lot less when you are using magic damage!
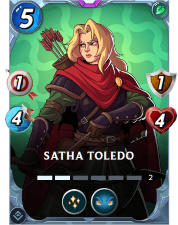
For my second (and last!) monster I wanted some support to help keep Zebajin along for as long as possible. Satha Toledo comes with the Tank Heal ability, and pitches in some ranged damage as well. Ranged attackers can be a bit of a liability, especially in the second position, but as I mentioned at the start, Close Range makes it much safer to have a ranged attacker even relatively close to the front of your team.

With the lineup set, it's off into battle! When I see the selected teams I am not sure what to think. On one hand, the opposing team has no sustain or healing, which means that any damage my monsters land should stick around. On the other hand, the enemy tank mas a much higher amount of damage than my Zebejain, and their ranged damage at the back of their lineup looks as though it will just barely beat out my Satha Toledo.

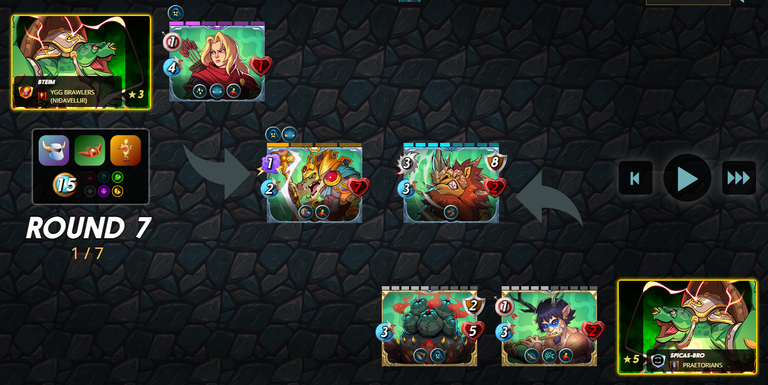
Thanks to my Tank Heal and the additional armor on both sides, the battle starts off slowly. By the beginning of round 7, all of the opposing attackers are on critically low health. Unfortunately, so is Satha Toledo, which means that my team's healing is about to come to an end.
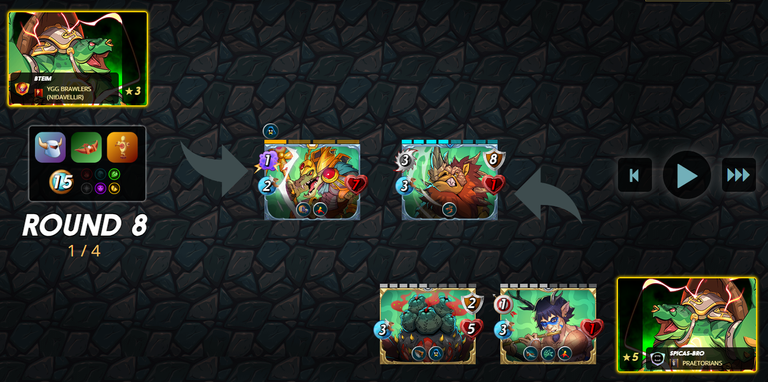
One more round and Satha goes down. But the attacking enemy monsters are now on only a single point of health! This battle is looking as though it will be awfully close, but the math does seem to be working out in my favor.
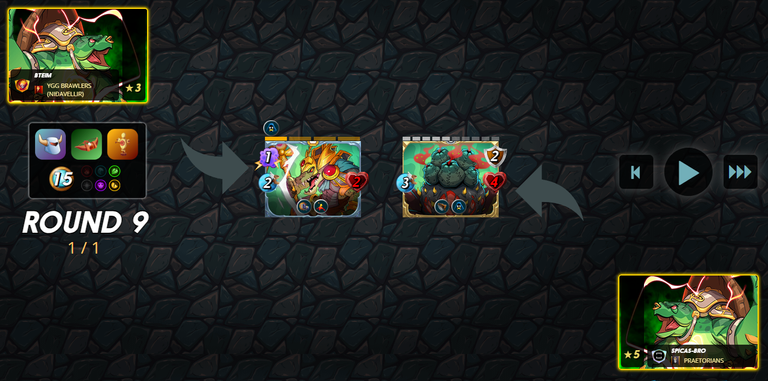
It turned out that the math was right - by the beginning of round 9 all of the opposing attackers were taken down, and the battle was all but over. And again, if you wanted to see the whole battle for yourself, you can see it right here.
While my ranged healer never even made it into the front position, but the presence of Close Range in the battle ruleset changed the battlefield enough that bringing it along on my team in the first place was a viable plan. This battle ended up being awfully close, but in the end my strategy of a bulky tank backed up with a healer was enough to outlast the enemy team.

Thank you so much for reading all the way to the end. Interested in seeing some more of my writing in the future? Be sure to give me a follow! In the meantime, if you'd like to see some of my recent posts:
A Few Maneuvers - Epic Battles in Splinterlands! - A Splinterlands battle analysis, featuring the newest ruleset in the game!
Splinterlands Economics: Causation - A look at causation, and how we can apply it to Splinterlands!
Splinterlands Economics: Ceteris Paribus - An introduction to the concept of Ceteris Paribus, and how we can apply it to Splinterlands!
Thinking about giving Splinterlands a try but haven't signed up yet? Feel free to use my referral link: https://splinterlands.com?ref=bteim, and be sure to reach out to me if you have any questions!
All images used in this article are open source and obtained from Pixabay or Unsplash. Thumbnails borrowed with permission from the Splinterlands team or made in Canva.
Checkout our BDVoter Daily Hive Showcase & Participate into our Daily giveaway to win various prize.
Thanks for sharing! - @yonilkar
