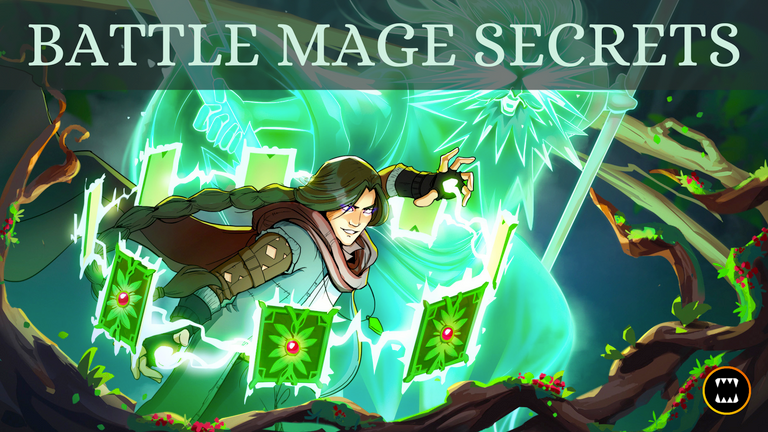
Splinterlands Battle Mage Secrets Weekly Challenge - Earthquake Ruleset
RULESET: Earthquake

Description: All non-flying units take 2 physical damage at the end of every turn.
Snared units are considered non-flying. Since the damage given is physical, it can be reduced to 1 if the unit has the shield ability.
This is one of my favorite rules when it comes to rulesets because it challenges a player to think of the lineup he or she will come up with. Although all rules needs thinking, this rule just makes the decision-making easier for reasons we'll cover below.

The Strategy

In a battle with the earthquake rule, the basic strategy we have are: 1) use a summoner with flying ability, 2) go with an all-flying lineup, or 3) go with a mix of monsters with flying and monsters with shields.
For this battle, we'll go with strategy #1 so we can freely choose monsters.
Looking more into the ruleset, besides earthquake, we also have the "Keep Your Distance" rule which prevents players from using melee monsters. So basically, it means we'll be dealing with range and magic elements. We need to consider as well that monsters with no damage can also be used.
Looking further at the active elements, we have water, death, and dragon. Range elements are particularly strong when life is active, but since we don't have that this battle, it makes our decision process easier since we have to choose between range and magic attacks to deal damage. If the opponent's monster doesn't have a flying ability, then it will take damage from the earthquake rule as well.
The Summoner
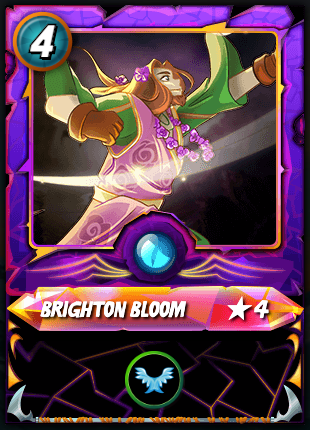
One of the reasons I like the earthquake rule is because of this dragon summoner - Brighton Bloom - because of its flying ability.
Given also that it's a dragon summoner, we have the choice of selecting which other active element to use in combination with dragon monsters.
Since we don't have life elements active for this battle, we'll go with water elements.
1st Slot - Health Buffer Kelp Initiate

Since we'll be dealing with range and magic attacks, it's important that we choose well what monster we put on tank. I chose Kelp at tank because of its 5 health and 5 speed. Its 5 speed plus the flying ability it gets from the summoner gives it the higher chances to evade range attacks from slower monsters.
2nd Slot - Void Legendary Monster Lord Arianthus
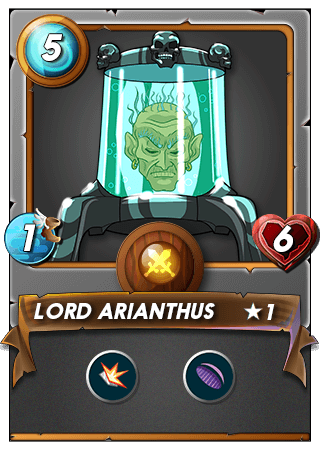
I've only discovered this monster because from the battles I fought. Having fought this monster at tank for magic attacks was very tough. I'm applying what I learned from those battles by putting this monster at second.
3rd Slot - Legendary Monster, Djinn Oshannus

Usually, I put Djinn at second, but since I'm using a different strategy for this battle, I placed it at 3rd.
4th Slot - Blast Magic Monster - Ruler of the Seas

One of my favorite legendary monsters because of its blast ability and 3 speed. We want to take down the opponent's tank as quickly as we can.
5th Slot - Sneaky Magic Monster Coral Wraith
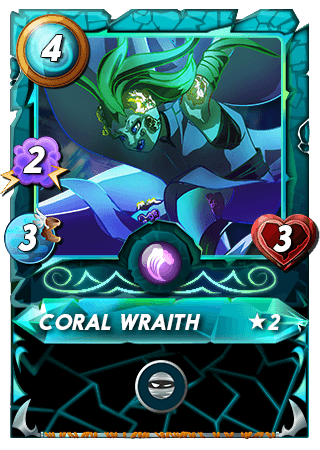
One of the toughest monster I've also faced. Having a sneaky monster helps deal with tank healers usually located at rear positions.
6th Slot - Rust Monster Noa the Just
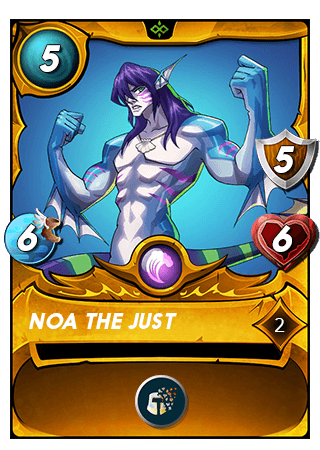
A gold card I just got from two seasons prior. Since opponent may use armor to shield or prevent damage from earthquake, removing it from their monsters helps in moving the battle in our favor. Plus, having its 6 speed can help it evade monsters should the opponent use sneak attacks.
This completes our lineup.
The Battle
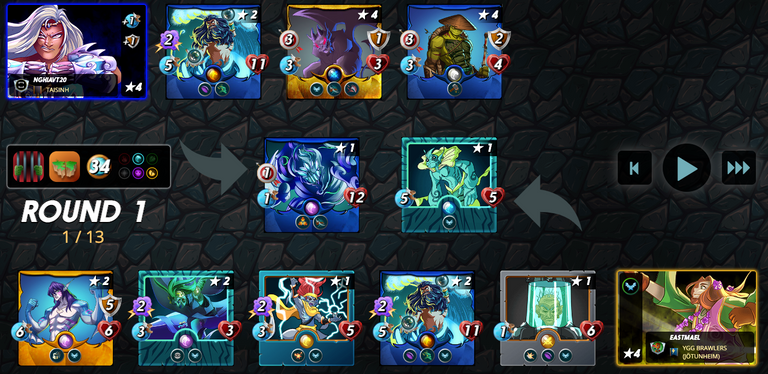
Looking at the initial lineup, the opponent didn't go with an all flying lineup, instead chose to use a summoner that adds armor. Having Noa the Just voided these armors.
After buffs applied:
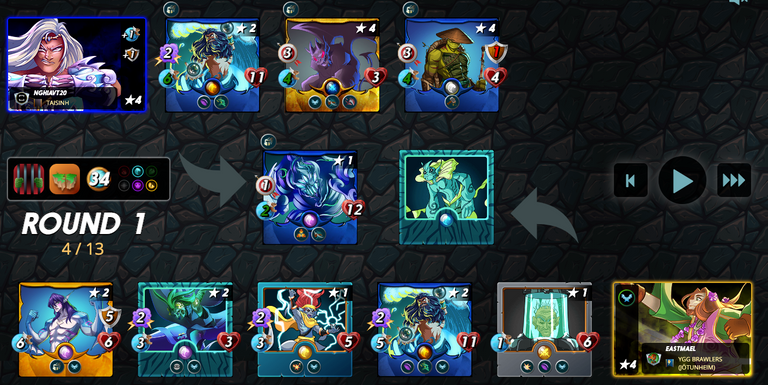
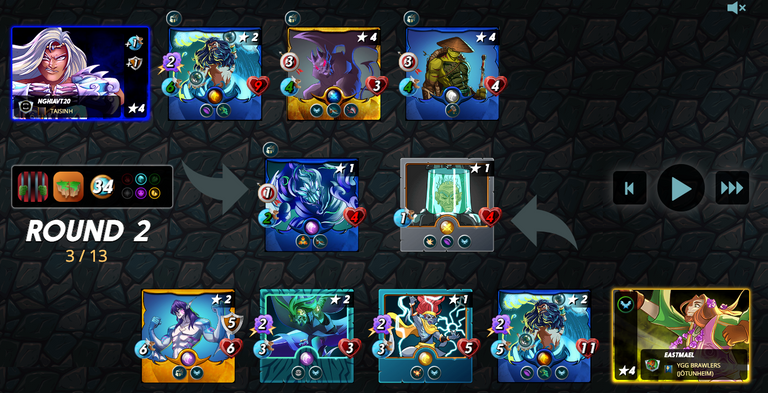
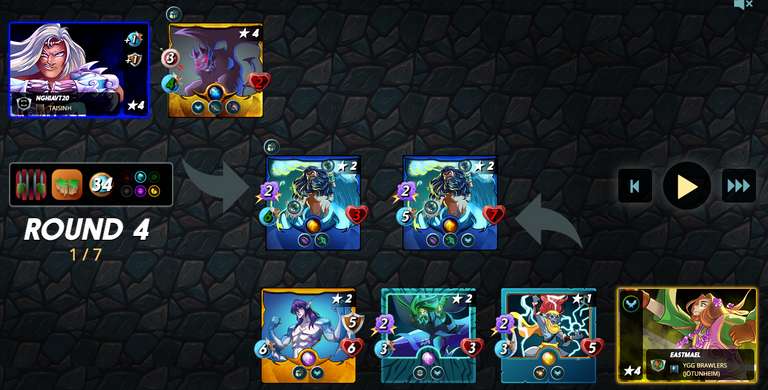
End of Round 1

Kelp Initiate wasn't able to evade any magic and range attacks, as such the opponent was able to take it down easily on the first round, but it did serve its purpose to provide buffer. Ruler of the Seas's blast damage also wasn't able to do its magic blast's damage because of the opponent's Djinn monster at second. In addition, the opponent used a monster with taunt ability which prevented Coral Wraith in doing its sneak attack. Nevertheless, it dealt its 2 magic damage to the monster at tank.
After earthquake dealt its damage.
Let's see how Round 2 goes.
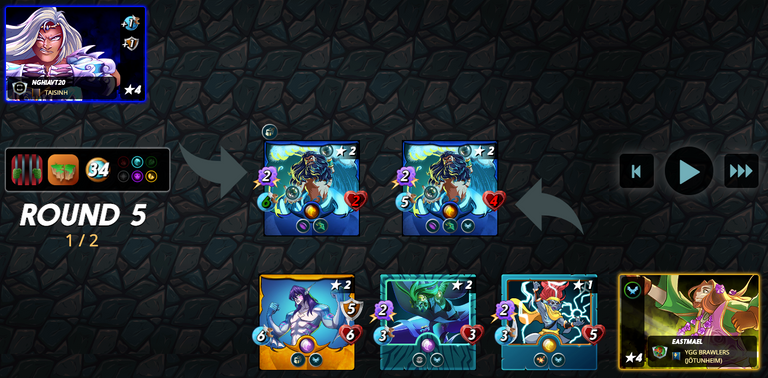
End of Round 2
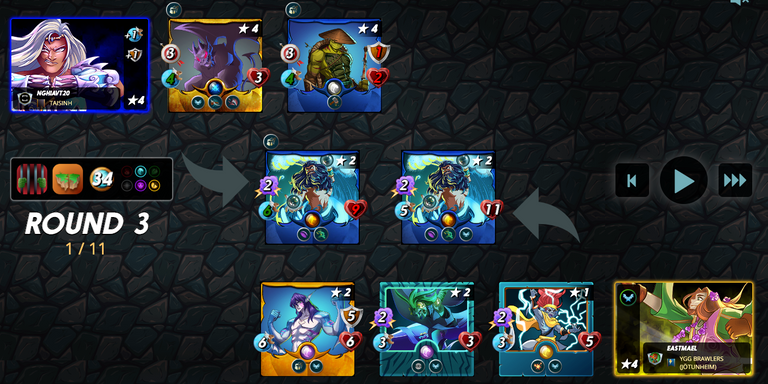
We were finally able to take down the opponent's taunt monster at tank and now two Djinns face each other. Taking the taunt monster down also meant Coral Wraith can now do its sneak attack to monsters at the last position (given that it doesn't have the camouflage ability).
After earthquake does its damage.
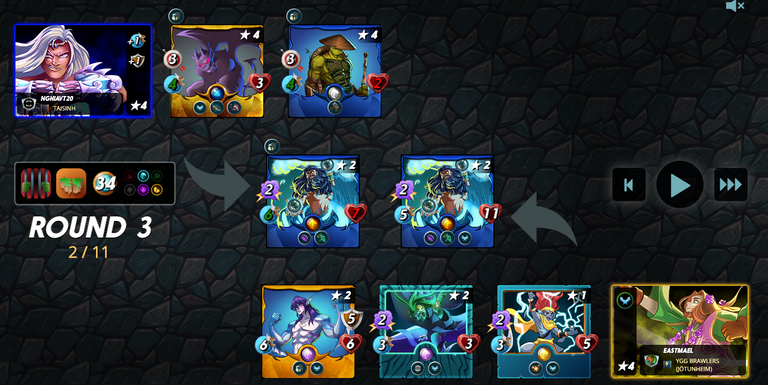
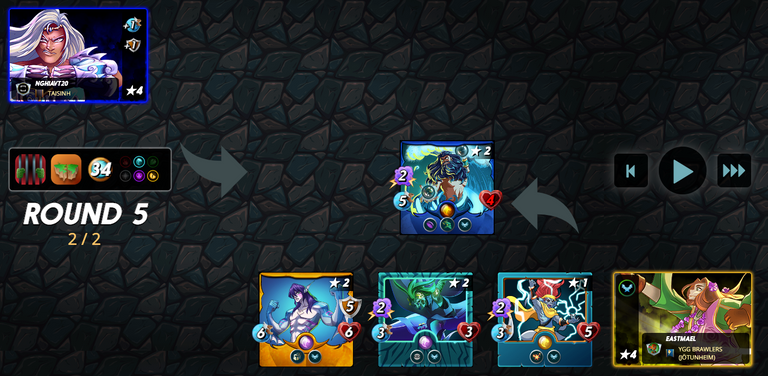
End of Round 3
Coral wraith was able to take down the monster at rear dealing it with a 2 magic damage. Despite it also having the repair ability, magic attacks bypass armor to hit the opponents health directly.
After earthquake does its damage.
Opponent's Djinn now only has 3 health.
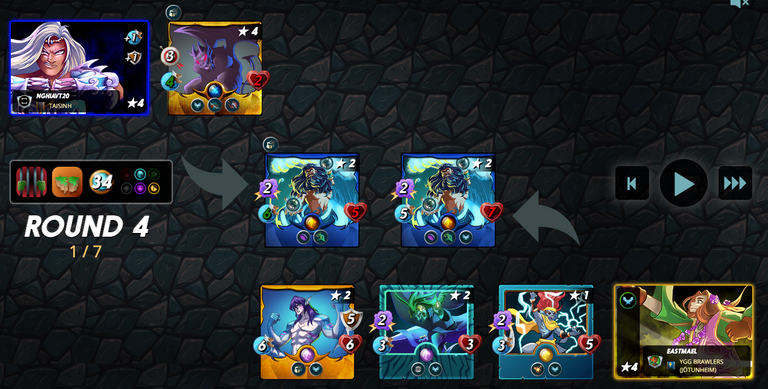
End of Round 4
Djinn's phase ability helped both sides in avoiding magic attacks, but the Djinn we have got hit by the opponent's 3 range damage from its Gargoya devil. Gargoya having the flying ability helped it deal this damage (as the flying ability description says - has an increased chance of evading melee or ranged attacks from monsters who do not have the flying ability - which basically means monsters with flying ability has an increased chance of dealing damage to each other).
End of Round 5
Since the opponent's Djinn doesn't have the flying ability, earthquake did the last blow to end the battle.
Battle Result
We get a nice +27 boost to ranking and 0.431 SPS to our SPS HODL stash!

Do you know you can win a Chaos Legion pack and many other things just by following some simple steps ?? Check out our Latest Daily Showcase and Participate our latest Giveaway. Thanks
Thanks for sharing! - @alokkumar121
