[EN/PT] Battle Mage Secrets! Melee Mayhem
[EN]
Hello, Splinters Fanatics!
Another week has passed and we're back for another Battle Mage Secrets, where we reveal the best secrets depending on the Ruleset chosen. This week we're going to show you the best strategies for battling when the Ruleset Melee Mayhem  is present. Before we start, we need to know how this ruleset works:

| Monsters with melee damage can attack from any position to the first position. |
Melee Damage monsters can only attack from the first position, unless they have the ability Reach  , which allows them to attack from the first second position, or have the abilities Opportunity
  or Sneak
  , which allows them to attack the monster with the lowest health or the monster in the last position.
As all attacks from Melee monsters will be directed at the first position, there's nothing better than Countering our opponent or reducing the damage dealt. To do this, we can use tanks with the ability Shield  , which reduces the damage Melee
  and Ranged
  by half.
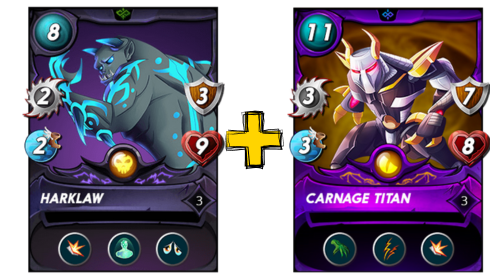
When there's a lot of mana available, a monster that has the ability Shield that I really like is Carnage Titan, plus it has Double Strike. So combining it with another monster that has this ability is an excellent idea to resist Melee and Ranged damage for longer.
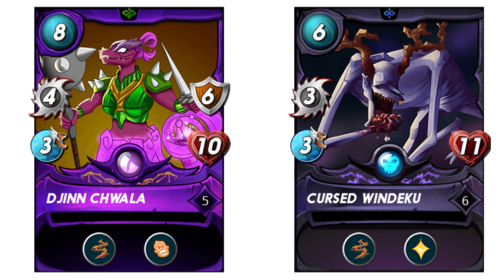
Another possibility is to choose monsters with the ability Thorns  , which is the natural counter to monsters with Melee damage, in order to place it in the first position.
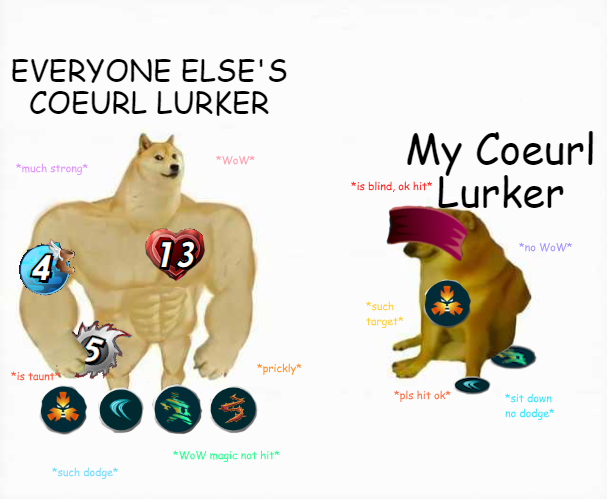
There are players who prefer to appeal to speed, so that the opponent misses several attacks. An ideal monster for this situation is Coeurl Lurker combined with Summoners and monsters that increase speed, it will become a real monster. However, every time I've used it I've been a bit frustrated and this image below represents me perfectly:
And finally, others prefer to use monsters with Magic damage  as a surprise element, so be prepared for all these situations. This is Splinterlands magic, just one Battle Rule generates countless possibilities.
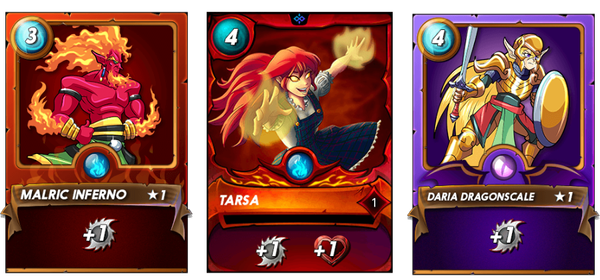
With regard to summoners, if you use the Ruleset Melee Mayhem to your advantage. The best Summoners are those that increase Melee damage, giving greater synergy to the team, so the more monsters with this damage the better.
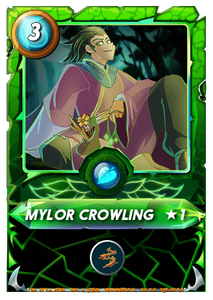
Another excellent summoner is Mylor Crowling, which grants all allied monsters the ability Thorns , but its rent or purchase price is quite high. But if you're willing to have better win rates, it's an excellent investment.
Next, to put the secrets revealed so far into practice, there's nothing better than a battle in which the Ruleset Melee Mayhem is active.

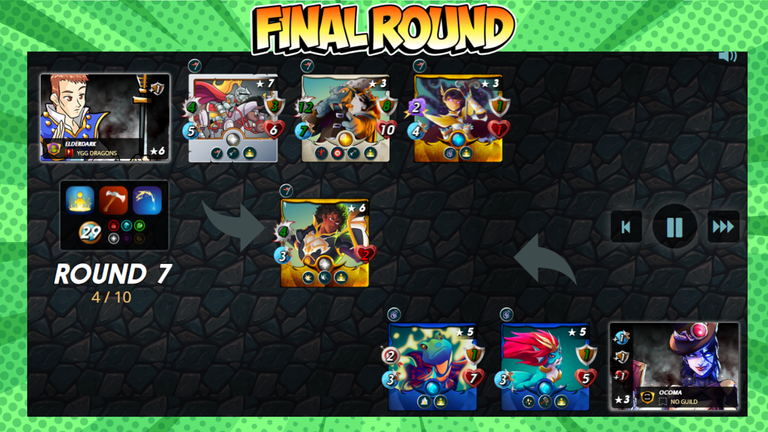
The battle took place in the Wild format in the Gold League, because I'm tired of losing in the Modern format, so I've decided that I'm going to play alternately, in the format that's easiest to win at the moment. The active Ruleset were: Born Again  , Melee Mayhem and Weak Magic
  , plus 29 mana available.

With the low amount of mana, Splinters and Rulesets were available. The best option was the Life Splinter with Summoner Tyrus Paladium, which grants (+1) Armor to all allied monsters. Life Splinter is one of the best when it comes to low mana, and combining Armor, with the ability Void Armor  and Rebirth
  is great, because when the monster is defeated it comes back to life with (1) Health, but with all its Armor.
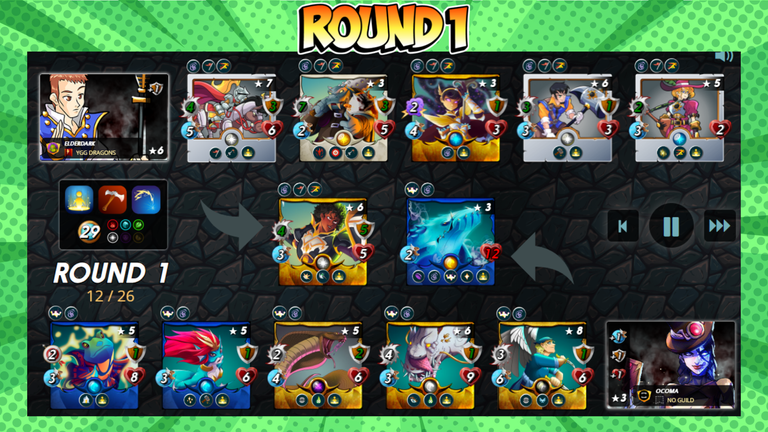
My opponent chose the powerful Summoner Lux Vega, which grants (+1) Armor, Health and Speed. Using the great Baakjira my opponent used an incredible barrier, even though my team was totally Melee damage. The enemy backline is full of Melee damage monsters, which was also our strategy.
Below is our line-up strategy:
 | In the first position I climbed a tank with the ability Shield  , as I mentioned earlier tanks with this ability are great for resisting the opponent's Melee and Ranged damage. , as I mentioned earlier tanks with this ability are great for resisting the opponent's Melee and Ranged damage. |
 | I then climbed another monster with Melee damage, which has the ability Inspire  , to increase the Melee damage of everyone on our team by (+1). This Knight also has the ability Piercing , to increase the Melee damage of everyone on our team by (+1). This Knight also has the ability Piercing  , which pierces any armor and can damage the enemy monster's Health. , which pierces any armor and can damage the enemy monster's Health. |
 | Next, I climbed a very offensive monster that has the abilities Piercing and Bloodlust  , when it engages the second ability there's no one to hold it back. It's an excellent monster when the Melee Mayhem ruleset is active. , when it engages the second ability there's no one to hold it back. It's an excellent monster when the Melee Mayhem ruleset is active. |
 | Soon after, I deployed a magic damage monster that has the ability Slow  , to slow down the enemy team. , to slow down the enemy team. |
 | In the next position I climbed a monster that has Melee damage and has a support ability to repair the armor of the most damaged allied monster |
 | Finally, another monster with melee damage that can support the team by increasing speed. |
Let's go to battle!
It's no news that the Summoner Lux Vega is undoubtedly powerful and quite versatile, as she increases Health, Armor and Speed by (+1), and is also Splinter Neutral. Well, my team got (+1) Armor thanks to the Summoner, Tyrus Paladium, and also nullified and increased speed thanks to the support monsters that granted Slow and Swiftness  .
.
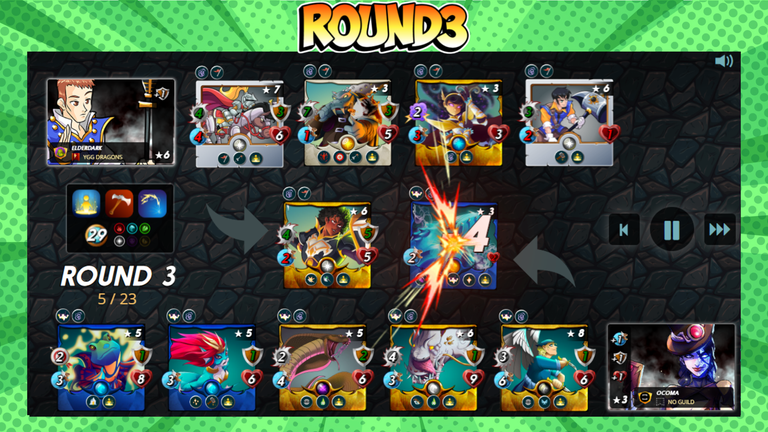
Right away, she's a huge barrier that can't be broken down by any team on the field, even with all the attacks aimed at her. Its vitality is enormous and, in addition, it receives healing and Armor repair support from Merdaali Guardian, which makes it even more impossible to defeat Baakjira.
Click Here to Watch the Full Battle!
In the following rounds, my monster from the last position was defeated, which increased our team's speed. However, Baakjira was defeated but returned due to the ability Rebirth  , and soon regenerated his health due to his Healing ability and the supply of Merdaali Guardian. Fortunately, Baakjira was defeated by the offensive Jared Scar. Now we can breathe a sigh of relief, as we now have a chance of defeating the opponent.
With the enemy tank defeated, the monsters in the enemy backline were being defeated one after the other. And the person most responsible for this was Jared Scar, with his ability Bloodlust, which once it gets going there's no stopping it.
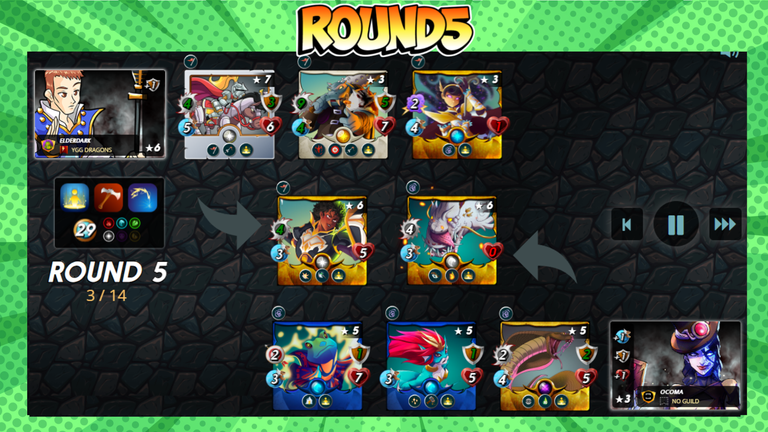
Without any more monsters with a lot of health and reasonable damage, there's no doubt that we've won this battle, but if we didn't defeat Baakjira in time, you can be sure that the outcome would be different.

Today's post reveals some battle mage secrets for the Ruleset Melee Mayhem . This Ruleset makes it possible to abuse Melee damage monsters in any position, a monster that stood out in this battle was Jared Scar, which I basically only use in these types of Ruleset that allow you to attack from any position.
If you've made it this far thank you very much for your time and if in any way this content has been useful please leave your upvote and reblog!

[PT]
Olá, Splinters Fanaticos!
Mais uma semana se passou e estamos de volta para mais um Battle Mage Secrets, onde são revelados os melhores segredos em função do Ruleset escolhido. Essa semana vamos mostrar as melhores estratégias para batalhar quando o Ruleset Melee Mayhem estiver presente. Antes de começar temos que saber como esse conjunto de regra funciona:
| Monstros com dano Melee podem atacar de qualquer posição a primeira posição. |
Monstros de Dano Melee somente podem atacam da primeira posição, a menos que possuam a habilidade Reach , que permitindo atacar da primeira segunda posição, ou tenha as habilidades Opportunity ou Sneak , que permite atacar o monstro de menor saúde ou o monstro da última posição.
Como todos os ataques de monstros Melee serão direcionados para a primeira posição, então nada melhor que Counterar nosso oponente ou reduzir o dano causado. Para isto, podemos utilizar tanques com habilidade Shield , que reduz os danos Melee e Ranged pela metade.
Quando houver muito mana disponível, um monstro que possui a habilidade Shield que gosto bastante é Carnage Titan, além disso ele possui Double Strike. Então, combinar com outro monstro que possui essa habilidade é uma excelente ideia para resistir mais tempo ao danos Melee e Ranged.
Outra possibilidade é escolher monstros com a habilidade Thorns , que é o counter natural de monstros com dano Melee, a fim de colocá-lo na primeira posicão.
Há jogadores que preferem apelar para a velocidade, com a finalidade que o oponente perca vários ataques. Um monstro ideal para está situação é Coeurl Lurker combinado com Invocadores e monstros que aumentam a velocidade ele virá um verdadeiro monstro. Porém, todas as vezes que o utilizo ficou um pouco frustado é essa imagem abaixo me representa perfeitamente:
E por fim, outros preferem utilizar monstros com dano Mágico como elemento surpresa, então esteja preparado para todas essas situações. Essa é mágica de Splinterlands, apenas uma Regra de batalha gera inúmeras possibilidades.
Com relação aos invocadores, caso utilize o Ruleset Melee Mayhem ao seu favor. Os melhores Invocadores são os que aumentam o dano Melee dando uma maior sinergia ao time, então quanto mais monstros desse dano melhor.
Outro excelente invocador é Mylor Crowling que concede a todos os monstros aliados a habilidade Thorns , porém seu aluguel ou valor de aquisição é bastante elevado. Mas, se está disposto a ter melhores taxas de vitória é um excelente investimento.
A Seguir para colocar em prática os segredos revelados até aqui, nada melhor do que uma batalha em que o Ruleset Melee Mayhem esteja ativo.
A batalha aconteceu no formato Wild na Liga Gold, pois estou cansado de perder no formato Modern, então decide que vou jogar de maneira alternada, no formato que esteja mais facil de vencer no momento. Os Ruleset ativos foram: Born Again , Melee Mayhem e Weak Magic , além disso contou com 29 de mana disponível.
Com a baixa quantidade de mana, os Splinters e os Rulesets disponíveis. A melhor opção foi o Splinter Vida com Invocador Tyrus Paladium, que concede (+1) de Armadura a todos os monstros aliados. O Splinter de Vida é uns dos melhores quando o assunto é baixa mana, além disso combinar Armadura, com a habilidade Void Armor e Rebirth é ótimo, pois quando o monstro for derrotado ele retorna a vida com (1) de Saúde, porém com toda sua Armadura.
Já meu adversário meu oponente escolheu a poderosa Invocadora Lux Vega, que concede (+1) de Armadura, Sáude e Velocidade. Utilizando o grande Baakjira meu oponente utilizou uma incrível barreira, mesmo meu time sendo totalmente de dano Melee. A backline inimiga esta repleta de monstros de dano Melee, que também foi nossa estratégia.
Abaixo segue nossa estratégia de escalação:
| Na primeira posição escalei um tanque com a habilidade Shield , como havia mencionado anterior tanques com essa habilidade são ótimos para resistir os dano Melee e Ranged do oponente. |
| Na sequência escalei outro monstro com dano Melee, que possui a habilidade Inspire , para aumentar em (+1) o dano Melee de todos o nosso time. Esse Cavaleiro ainda possui a habilidade Piercing , que fura qualquer armadura podendo dar dano na Saúde do monstro inimigo. |
| Em seguida, escalei um monstro bastante ofensivo que possui as habilidades Piercing e Bloodlust , quando ele engata a segunda habilidade não tem quem o segure. É um excelente monstro quando o Ruleset Melee Mayhem está ativo. |
| Logo após, escalei um monstro de dano mágico que possui a habilidade Slow , para deixar o time inimigo mais lento. |
| Na próxima posição escalei um monstro que possui dano Melee e tem uma habilidade de suporte para reparar a armadura do monstro aliado mais danificada |
| Por fim, outro monstro com dano melee e que tem dar suporte ao time aumentando a velocidade. |
Vamos a Batalha!
Não é novidade que a Invocadora Lux Vega é sem dúvida poderosa e bastante versátil, pois ela aumenta em (+1) Saúde, Armadura e Velocidade, além disso é do Splinter Neutro. Pois bem, meu time conseguiu (+1) de Armadura graças ao Invocador, Tyrus Paladium, e ainda anulou e aumentou a velocidade graças aos monstros de suporte que concederam Slow e Swiftness .
Logo de imediato uma grande barreira impossível de ser derrubada por todo time em campo, mesmo com todos os ataques direcionado para ela. Sua vitalidade é enorme e, além disso, recebe suporte de cura e reparação de Armadura por Merdaali Guardian, o que torna ainda mais impossível derrotar Baakjira.
Clique Aqui Para Assistir a Batalha Completa!
Nas rodadas que se segue meu monstro da última posição foi derrotado, ele aumentava a velocidade de nosso time. Porém, Baakjira foi derrotado mais retornou devido a habilidade Rebirth , e logo regenerou sua saúde devido sua habilidade de Cura e o suprte de Merdaali Guardian. Felizmente, Baakjira foi derrotado pelo ofensivo Jared Scar. Agora podemos respirar aliviado, pois assim temos uma chance de derrotar o oponente.
Com o tanque inimigo derrotado, os monstros da backline inimiga estavam sendo derrotados um após o outro. E o maior responsável por isso foi Jared Scar, com sua habilidade Bloodlust, que depois que engrena não tem como parar.
Sem mais monstros com muita saúde e dano razoável não resta dúvida que vencemos essa batalha, mas caso não derrotassemos Baakjira a tempo pode ter certeza que o resultado seria outro.
No post de hoje foram revelados alguns segredos dos magos de batalhas para o Ruleset Melee Mayhem . Este Ruleset possibilita abusar de monstros de dano Melee em quaisquer posição, um monstro que se destacou nessa batalha foi Jared Scar, que só utilizo basicamente nesses tipos de Ruleset que permite atacar de qualquer posição.
Se chegou até aqui muito obrigado pelo seu tempo e se de alguma forma este conteudo foi útil deixe seu upvote e reblog!

Splinterlands | The best #Play2earn game there is!
Rising Star | The journey of a star in the music world! START FREE!
Imagens: @splinterlands

Obrigado por promover a comunidade Hive-BR em suas postagens.
Vamos seguir fortalecendo a Hive
Your post was manually curated by @Shiftrox.
Delegate your HP to the hive-br.voter account and earn Hive daily!
🔹 Follow our Curation Trail and don't miss voting! 🔹
Yay! 🤗
Your content has been boosted with Ecency Points, by @elderdark.
Use Ecency daily to boost your growth on platform!
Support Ecency
Vote for new Proposal
Delegate HP and earn more
!1UP Good work!
!PGM !PIZZA !PIMP
You must be killin' it out here!
@underlock just slapped you with 1.000 PIMP, @elderdark.
You earned 1.000 PIMP for the strong hand.
They're getting a workout and slapped 1/1 possible people today.
Read about some PIMP Shit or Look for the PIMP District
You have received a 1UP from @underlock!
@monster-curator, @oneup-curator, @leo-curator, @ctp-curator, @bee-curator, @pimp-curator, @vyb-curator, @pob-curator, @neoxag-curator, @cent-curator
And they will bring !PIZZA 🍕.
Learn more about our delegation service to earn daily rewards. Join the Cartel on Discord.
$PIZZA slices delivered:
@curation-cartel(3/20) tipped @elderdark
underlock tipped elderdark
Thanks for sharing! - @libertycrypto27
