Move Funds from Hive over to the Terra Network and Back
I made my first Crypto baby steps on the Hive (well back on the day Steem) blockchain. As a long time travel blogger I was super intrigued to get rewarded for my content. In 2017 I also grew more and more frustrated with conventional social media platform. So I signed up. For the same reasons I reason signed up for LOOP Finance (well back the day it was called TRYBE) and I started posting there as well. Which was very lucrative for me as it turned out – since they’re offering this incredible Airdrop.
A few days ago I wanted to reinvest the airdrops I received from LOOP but I needed UST (Terra) to pay for the transactions. I always have some liquid Hive sitting around, so I made it my mission to figure out how to move funds from Hive to LOOP. The same steps can also be applied to move crypto the other way around by reversing the steps.
Below you’ll find all the tools I used and steeps written out to make this transaction happen.
#1 Move Hive from your wallet to Hive Engine using Leodex
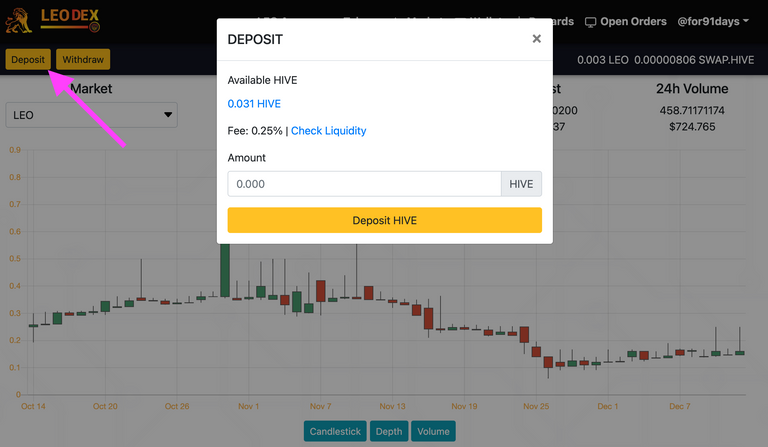
Head over to Leo DEX, on the upper right you’ll find a button to initiate the transfer from your HIVE Wallet to Hive Engine. Hit Deposit and a window will pop up tell you how much Hive you have available on your HIVE Wallet. Choose an amount and then press the yellow button (deposit HIVE). After that your money is on the HIVE Engine. I choose Leo DEX over depositing directly through HIVE Engine because of the deposit fee (0.25% vs 0.50%) and now worries Leo DEX is tied into the HIVE Engine. To confirm this transaction I used the HIVE Keychain browser add-on.
12 at 20.26.33.png](https://images.hive.blog/768x0/https://files.peakd.com/file/peakd-hive/for91days/23tcP5UcQ4acR3QiHYwuuLsRpirAid5dKe3KTjBpTnKff37wRTagq4ARxcrSmFBKMQPeY.png)
You can stay on Leo DEX and do step #2 but for some reason I personally like trading on Hive Engine better. The funds from your HIVE Wallet will show up on Leo DEX / Hive Engine as SWAP.HIVE – Head over to the Tokens Tab and trade your SWAP.HIVE for DEC – Dark Energy Crystals (a cryptocurreny for Splinterlands, which is an NFT Card Play2Earn online game).
#3 DEC Import to Splinterlands and Transfer Out to Binance Smart Chain
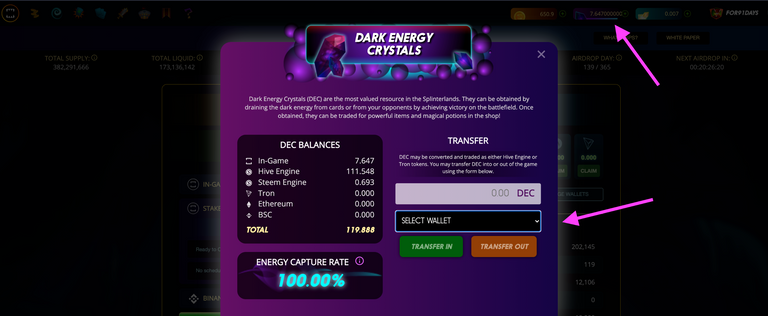
For this step you need to have a Splinterlands account, in case you don’t have one please sign up here: Splinterlands. And no worries, you don’t need to actually play or buy the starter pack in order to proceed. Once you’re logged in look for the DEC tab on top of the page – this DEC window pops up then (see screenshot). Under your DEC balances you should see your HIVE Engine amount you traded from step #2. Type in the amount, cleck the select wallet and chose HIVE Engine and then hit Transfer In. This will move your funds from HIVE Engine over to the Splinterlands eco system. Now we need to get those DEC tokens over to the Binance Smart Chain.
#4 Move DEC to the BSC (Binance Smart Chain) with Metamask
Metamask is a browser add-on and functions as a wallet mostly for the Ethereum blockchain but me personally I use it mostly to talk to the Binance Smart Chain (BSC) to invest into DeFi projects and to swap tokens which is much cheaper on BSC compared to swaps on Ethereum. And we need to do a swap (see next step). I should mention that you need to set up the Binance Smart Chain on Metamask manually before continuing.
Now with Metmask installed and correctly set up for BSC open again the DEC Tab (see step #3). Enter your DEC amount again but this time you choose from the wallet options Binance Smart Chain and then Transfer Out! Metamask will pop up and you need to sign this transaction.
#5 Trade DEC For USD (Terra) on PancakeSwap
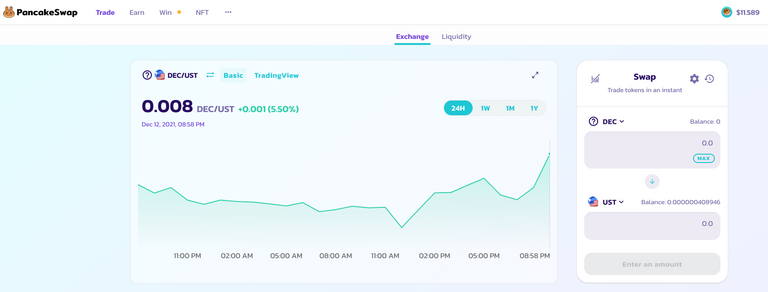
I promise, we’re almost there .. almost. Now you need to head over to PancakeSwap and connect your Metamask, use the link and it will open the DEC swap page. Dec should be on top and reflect your balance from Splinterlands, if not wait a minute or two. And change CAKE for UST. Proceed with the swap, Metamask will pop up again – you need to sign it and pay a small fee (make sure you have some BNB for the fees, I always hold around 15 USD in BNB to make sure I can pay for transactions)
#6 Bridge UST from BSC to the Terra Network
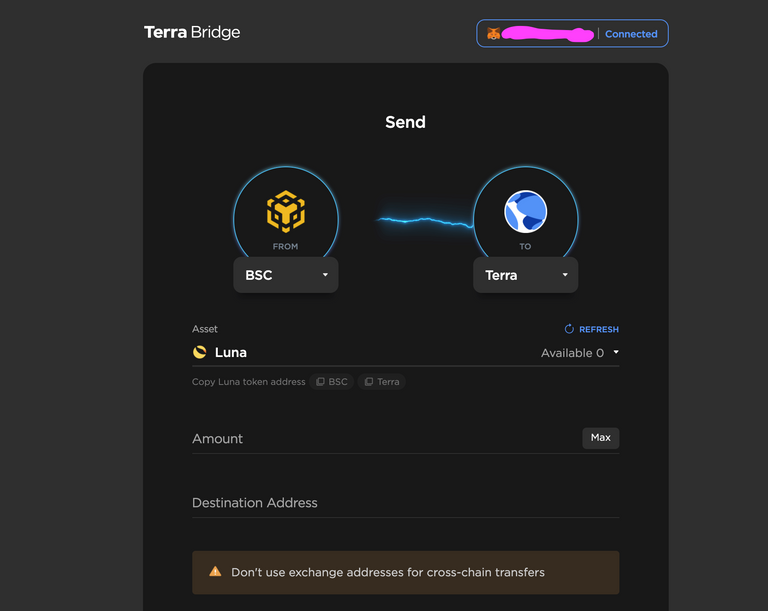
By now you should be holding your UST on the Binance Smart Chain – now we need to bridge UST over to the Terra Network. For this you need the Terra Station Browser add onTerra Station Browser add on additional to Metamask. You’ll find the bridge via the link. Make sure you’re connected to your Metamask Wallet. Choose BSC on the left and Terra on the right, as seen in the image above. The asset in this case is UST and enter the amount. Now please add the address of your Terra Wallet as destination address and press next and sign the transaction via Metamask.
You now got your HIVE funds on the Terra Network as UST– I’m kind of loling because in my head it was all straight forward but now looking at all the steps written out, it seems very complex. But to be honest, once all your wallets are set up, the whole process takes less than 10 minutes.
I than went over the LOOP Dex, made some swaps, claimed my airdrops and staked them via their farms for some passive income. If you write about Crypto you should consider writing on LOOP as well.
Hope this was helpful and if you know how to make the process easier, please leave a comment. And please keep in mind, this is how I was doing it and I’m pretty sure that there are many other ways to transfer these funds.
thanks, this was in fact extremely helpful !
Posted Using LeoFinance Beta
Glad it was useful to you, thank you for the comment.
Hehe the steps sound logica actually the question is more..
How much eth fees you had to eat in all.of these transactions. But..happy with trybe then.?
Fees were very minimal because I used the Binance Smart Chain und paid BNB = to some USD cents. And LOOP (formerly known as TRYBE) is pretty smooth, the only difference is that you need to blog about Cypto. Before they accepted any kind of posts.