BATTLE MAGE SECRETS Weekly Challenge! RULESET: AIMLESS


After debuting for the first time last week, the Battle Mage Secrets Weekly Challenge has returned as Aimless as ever! Yeah, yeah, I know you've read the title already, this week's ruleset is Aimless, indeed
Let us see what this ruleset does before we get into the nitty-gritty of the line-up and the battle itself.
So the Aimless ruleset is pretty straight-forward - All Monsters have the Scattershot ability, and the if you happen to be unaware what the Scattershot ability does - here's it in a nutshell - this Monsters attacks hit a random enemy target. It has to be noted that this ability only affects Ranged Monsters.
Alright, we've got a good idea of what the Aim True ruleset practically does, so let's see now how it can be effectively utilized
There are two options to approach this ruleset as far as I'm concerned:
- Option 1: as pictured above. Try to avoid using any Ranged attackers in the battle or at least as low of a number as possible, this is done to try to lower the RNJesus effect of hoping for your Monster to land their shots exactly where they have to. So the best Monster to use in order to avoid that are those with abilities such as Opportunity, Sneak, Reach, Retaliate even.
- Option 2: YOLO. Yes, you go full YOLO mode and stack up your team with heavy-hitters. Pairing them with additional Speed and abilities such as Piercing would definitely be a plus. And what Summoner has both +2 Speed and Piercing, that's right - Jacek. I normally hate his RNG nature but when the ruleset is already there, I always use him and it turns out fine in most cases.
Now that we have a decent understanding of the featured Ruleset and its potential advantages and disadvantages, let us have a look at the battle I have chosen to showcase.
<>>>>>>>>>>>>>>>>>>>>>>>>>>>>>>>>>>>>BATTLE<<<<<<<<<<<<<<<<<<<<<<<<<<<<<<<<<<<<<<>
- The line-up of the Battle and the Ruleset:
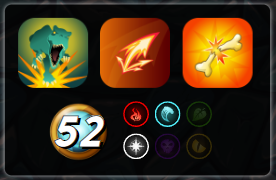
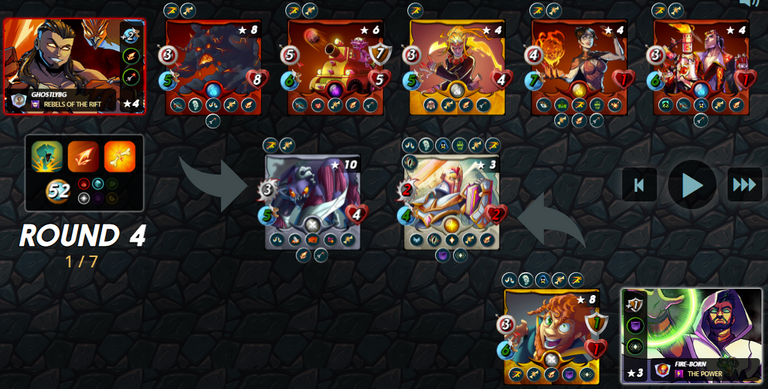
The rulesets for this battle are Stampede (The Trample ability can trigger multiple times per attack if the trampled Monster is killed), Aimless (we already know what it does) and Tis but Scratches (All Monsters have the Cripple ability). The mana budget is 52 which is an above-average amount but so I cannot choose whatever Monsters I have available and I will need to pick more carefully. 3 Splinters are available - Fire, Water and Life. I will go with Fire. This is a Diamond level battle and I can choose between a level 4 Jacek and a level 8 Tarsa (I've maxed both just recently). I will go with Jacek for reasons I have already explained.
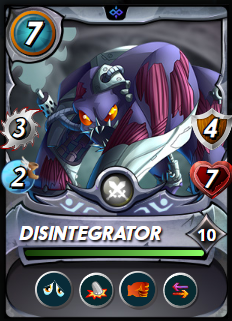
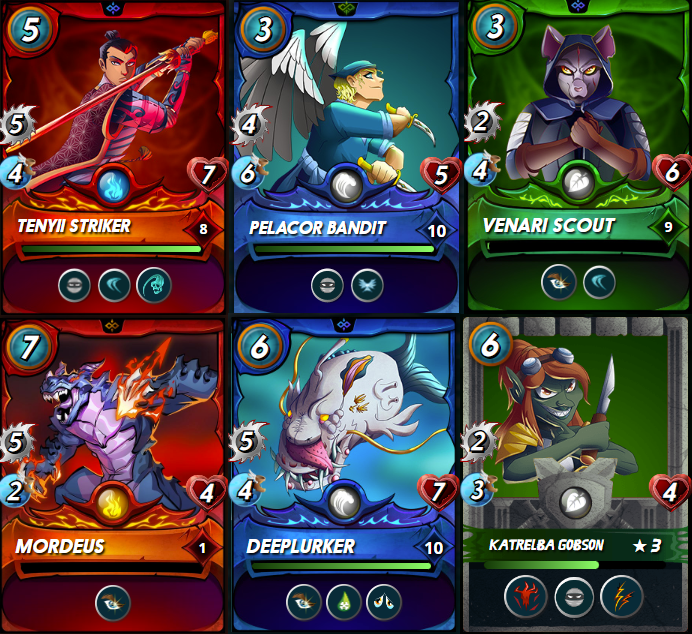
First in the line-up is the Disintegrator. It is at max level so it has a total of 4 pretty cool abilities: Demoralize (Reduces the Melee attack of all enemy Monsters), Trample (When a Monster with Trample hits and kills its target, it will perform another attack on the next Monster on the enemy Team), Knock Out (Does double damage when attacking an enemy that is stunned), Retaliate (When hit with a Melee attack, Monsters with Retaliate have a chance of attacking their attacker). First of all even though the Ruleset is Aimless we still need a tank to take the hits in the first position, and the fact that the Disintegrator has Trample also plays with the other ruleset we have - Stampede. Demoralize and Retaliate also can be really helpful.
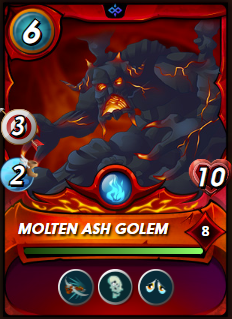
The 2nd spot goes to the Molten Ash Golem. It is a beefy Archer with Demoralize, Close Range (Monsters with the Close Range ability can perform ranged attacks from the first position) and Weaken (Reduces the Health of all enemy Monsters). It also has a decent amount of Ranged damage with its 3 attack. So generally it is here to soak scatter shots and act as a tank if it has to.
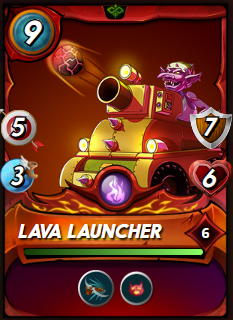
The 3rd place in the line-up goes to a favorite Monster of mine - the Lava Launcher. It has Close Range and Stun. It's a destroyer with its 5 Ranged Attack if it happens to land on a low-health victim, and also has a very good amount of armor. Also stunning enemies is never a bad thing.
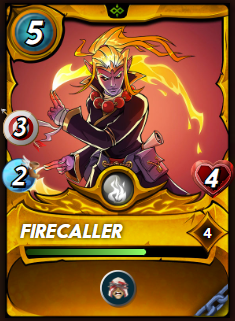
Following immediately after is one of the new soulbound cards which have recently been introduced into the game - the Firecaller. I still have it just at level 4 but that's enough because I am more more interested in its main ability - Martyr (When this Monster dies, adjacent Monsters get +1 to all stats). It's place is obvious - in the middle of the pack so if it dies - it can buff the Monsters adjacent to it. It has only 4 health so that's generally not too hard to happen.
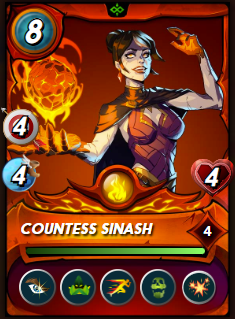
The 5th place in the line-up goes to Countess Sinash. Countess Sinash is a great Ranged Attacker specifically for the abilities she has - Opportunity (Monsters with the Opportunity ability may attack from any position and will target the enemy Monster with the lowest health), Swiftness (All friendly Monsters have increased Speed), Camouflage (This Monster cannot be targeted for attacks unless it's in the first position) and Blast (Does additional damage to Monsters adjacent to the target Monster) . Hopefully she'll get luck and survive until the end because due to recent changes, Camouflage is no longer invincible to Scatter Shot.
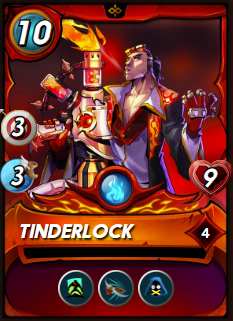
Last but definitely not least is one of the Fire Monsters which made its debut with the release of Riftwatchers - Tinderlock. It is a Monster which is destined to always be in the back of pack due to its Last Stand (Gains increased stats if it's the only Monster on the team alive) ability which could enable the Monster to win the battle by itself. Its two other abilities Close Range and Silence are also really good. Close Range specifically since without it Last Stand would not work in most scenarios.
It is time for a quick round by round analysis:
- So the Summoner I am going with for this battle (as I have already mentioned) is my very own Jacek. Against me I have an semi-gold team lead by a level 3 Rathe. Generally I feel I have a pretty big advantage over the enemy team but let's see how this plays out.
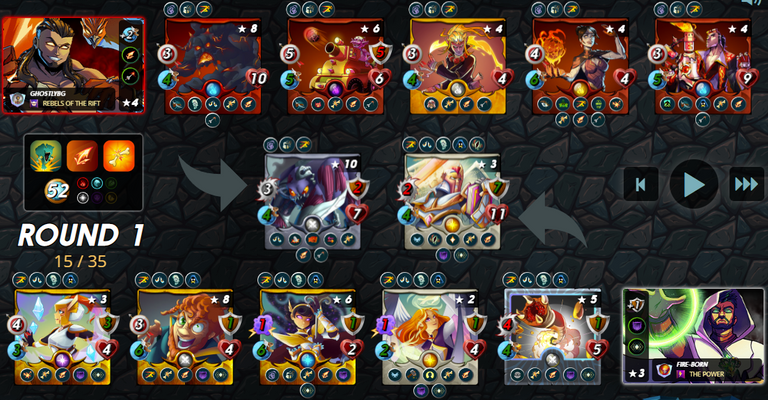
- After 1 there are still no casualties on the battlefield but the enemy Monsters have definitely taken a bit of a beating. It is very likely some of them lose their lives during Round 2.
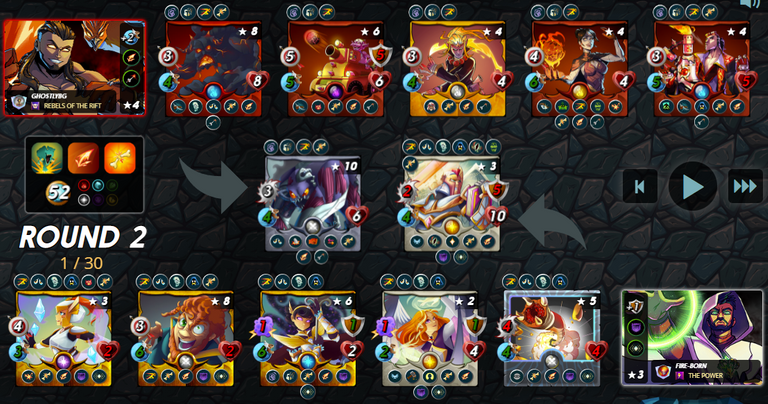
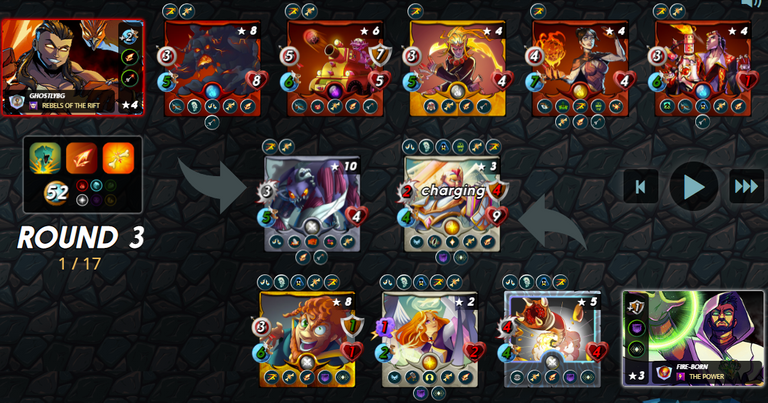
- At the start of Round 3 you can see that my team is still alive and well, apart from the Tinderlock who is left with just 1 HP. On the other hand the enemy team suffered 3 casualties one of which (the Supply Runner) got revived, and that is why he is still on the battlefield.
- Round 4 - everything is clear at this point. Both enemy Monsters are at 1 Lady Sinash Blast hit with Piercing away from dying simultaneously. That was a pretty quick battle.
- I definitely dominated in this battle, Splintertools.io actually shows that I, indeed, had big advantage in terms of my chance to win the battle 96% to 4% for the enemy. Well 4% is not 0% so they still could have been extremely lucky, thankfully they were not.

Well this was definitely a fun battle, and a fun way to showcase the Aimless ruleset. See you next week with another exciting post related to the brand new Battle Mage Secrets Weekly Challege!
Over and Out,
0
0
0.000
https://twitter.com/767266850/status/1636141983499419651
The rewards earned on this comment will go directly to the people( @ghostlybg ) sharing the post on Twitter as long as they are registered with @poshtoken. Sign up at https://hiveposh.com.
Do you know you can win a Chaos Legion pack and many other things just by following some simple steps ?? Check out our Latest Daily Showcase and Participate our latest Giveaway. Thanks
Thanks for sharing! - @cieliss

Excellent post and format, you explained well the strategy and the rule to play.