
Another week, another Battle Mage Secrets challenge. This time around I will be showcasing a battle featuring the Explosive Weaponry ruleset. The Nimbledook Scout in the thumbnail does get the Blast ability at max level so she is very fitting for the occasion.
Let us see what this ruleset does before we get into the nitty-gritty of the line-up and the battle itself.
The Explosive Weaponry ruleset is pretty straight-forward - All Monsters have the Blast (Does additional damage to Monsters adjacent to the target Monster) ability.
Now that we've got a good idea of what Explosive Weaponry ruleset practically does, let's see now how it can be effectively utilized.
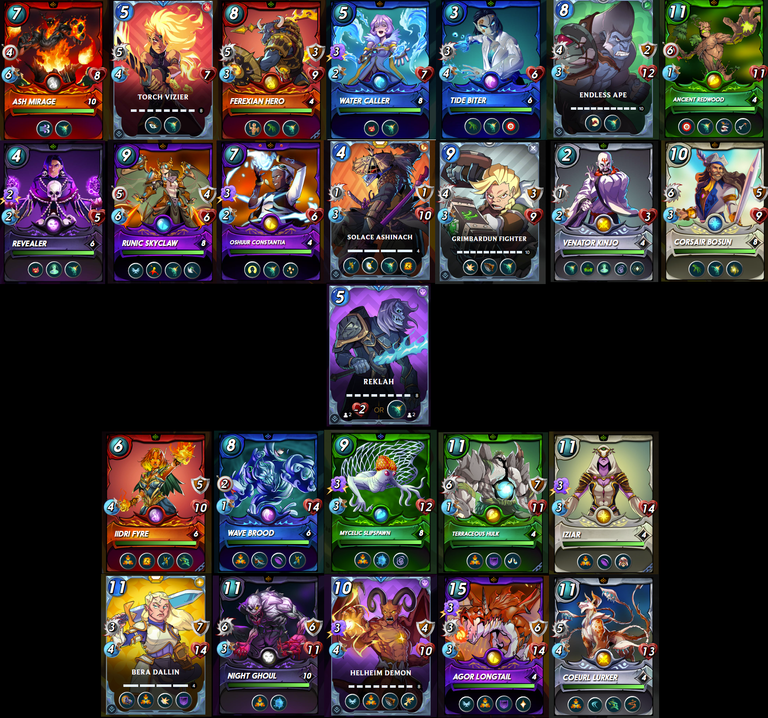
So, I do have a few things to mention regarding this ruleset. First of all, the first two rows show all of the Monsters with the Reflection Shield (This Monster doesn't take damage from Blast, Magic Reflect, Thorns, or Return Fire) ability currently available in Modern. They are very important specifically for this ruleset as their strategic placement in your line-up will more often than not make the difference between winning and losing. Normally these Monsters are place where you expect that the enemy fire will be focused. That's generally the Main Tank position or another one specific to the battle itself as other rulesets in conjunction with this one, can have an important impact on the way the battle progresses. If, for whatever reason, you don't have access to the Monsters listed in the first two rows, then Reklah is the Summoner for you (3rd row). His ability to place 2 Reflection Shields on any two Monsters before the beginning of the battle is of crucial importance and can turn the tides of battle immediately. Lastly, in rows 4 and 5, I have placed Monsters with the Taunt (All enemy Monsters target this Monster (if they are able to)) ability. These are often used in this ruleset to direct a large portion of the Blast damage to the Monster with Taunt so you can successfully neutralize it by placing a Monster with Reflection Shield next to it. This is definitely often very needed so you can succeed in beating your opponent at the splash damage game.
Now that we have a decent understanding of the featured Ruleset and its potential advantages and disadvantages, let us have a look at the battle I have chosen to showcase.
<>>>>>>>>>>>>>>>>>>>>>>>>>>>>>>>>>>>>BATTLE<<<<<<<<<<<<<<<<<<<<<<<<<<<<<<<<<<<<<<>
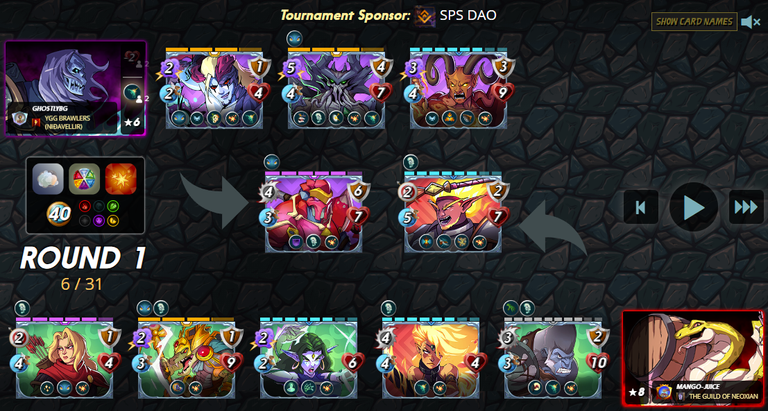
- The line-up of the Battle and the Ruleset:

The rulesets for this battle are Fog of War (Monsters lose the Sneak, Snipe and Opportunity abilities), Taking Sides (Neutral Monsters may not be used in battles) and Explosive Weaponry. The mana budget is 40 which is an average amount of mana so it does not give me the ability to play whatever combinations of Monsters I want. The available Elements are Fire, Earth, Death and Dragon. I have decided to give the Death Element a shot this time around. The battle is from a Gold-level Rebellion only Tournament I played in a couple of days ago, as I could not find any newer battle. The fact that it is Rebellion only will definitely have a big impact on the Monsters I will include in my line-up.
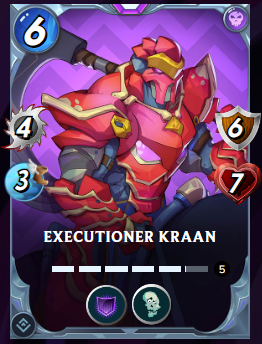
In the tanking spot I have placed a Monster I almost never get the chance to play otherwise as I do have him leveled yet and, to be honest, I rarely see a fitting opportunity to include him in my line-up - Executioner Kraan. He is a 6-mana Melee Monster with 4 Attack, 3 Speed, 6 Armor and 7 Health (at level 5). The abilities he has are Void Armor (Magic attacks hit this Monster's armor before its Health) and Weaken (Reduces the Health of all enemy Monsters). He also gains Oppress (Does double damage when attacking an enemy that has no attacks) at level 6 (max).
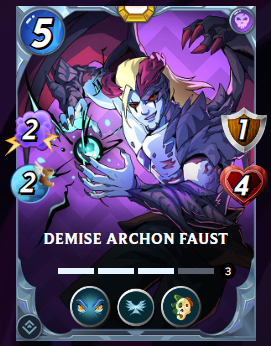
The 2nd spot goes to another Monster I don't get to play that often - Demise Archon Faust. He is s a pretty good caster for the Death team with 2 Magic Attack, 2 Speed, 1 Armor and 4 Health (at level 3) for 5 mana. The stats are not that impressive, however, he has some pretty good abilities - Lookout (Adjacent Units receive 1 less damage from attackers with Sneak, Snipe and Opportunity. Additionally all units take half damage from ambushes as long as a Lookout unit is on your team), Flying (Has an increased chance of evading Melee or Ranged attacks from Monsters who do not have the Flying ability) and Life Leech (Monster's health increases each time it damages an enemy Monster's health in proportion to the damage dealt).
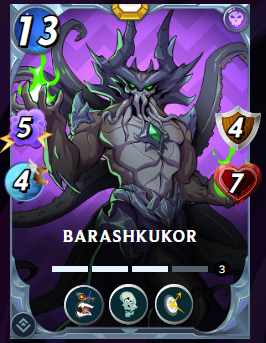
Next in the line-up is another Rebellion Death Legendary - Barashkukor. First of all, that's probably my favorite name this set, as it just rolls off the tongue when you attempt to say or even write it. He is a very expensive Monster, at 13 mana, but it is for a good reason. He has 5 Magic Attack, 4 Speed, 4 Armor and 7 Health (at level 3). He also has the following 3 abilities - Fury (This Monster does double damage to targets with the Taunt ability), Weaken and Magic Reflect (When hit with Magic damage, does reduced Magic damage back to the attacker).
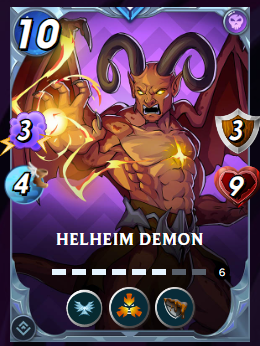
Finally, the last member of my Suicide Squad is the Helfeim Demon. He is a 10-mana Rebellion rare card with 3 Magic Attack, 4 Speed, 3 Armor and 9 Health (at level 6). He also has the following 3 abilities - Flying, Taunt (All enemy Monsters target this Monster (if they are able to)), Corrosive Ward (When hit with a Melee attack, unit does 2 armor damage to the attacker, and max armor of the attacker is reduced by 2). I've placed him in the last spot so I can direct a good portion of the enemy attacks at him.
It is time for a quick round by round analysis:
The Summoner I am going with for the battle is, obviously, Reklah. I placed his 2 Reflective Shields on the Monsters in the 2nd and 3rd spots so in this way no damage I take either in front or at the back is splashed onto the Monsters next to the Main tank and Taunt Monsters. My opponent, on the other had, has decided to go with a mix of Fire and Earth Monsters with the help of one of the new dual-element 3-mana Summoners - Brewmaster Abraxas. Let's see how this goes.
After one round I have managed to take down the main tank Monster in the enemy team, while my tank is still alive thanks to the fact that most of the enemy damage is directed at my last Monster.
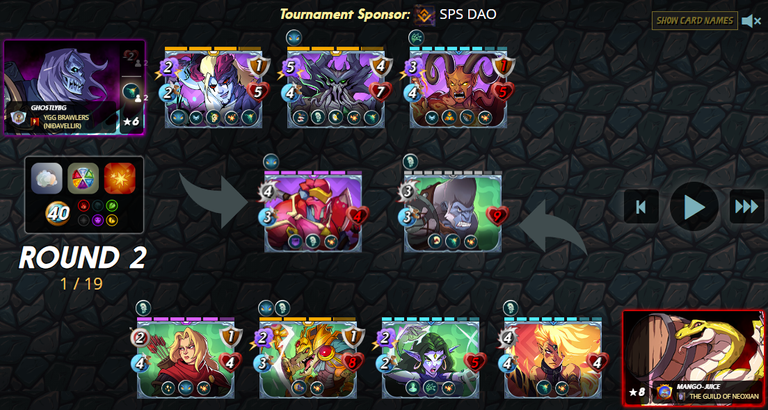
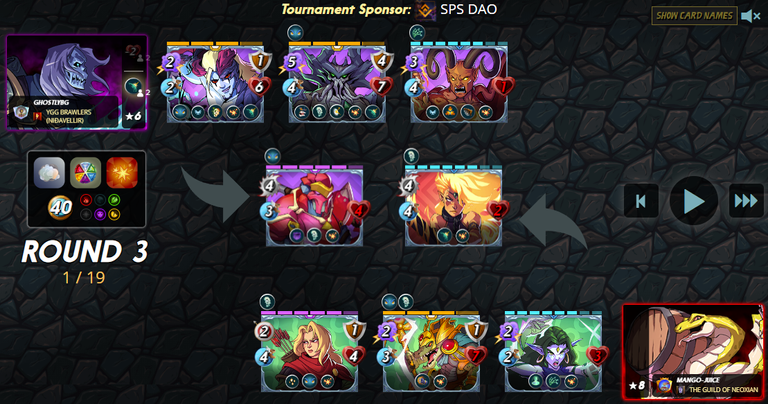
Round 3 - even though my enemy has a healer, he did not manage to keep his Main Tank spot Monster up. Barashkukor's 5-damage Magic Attack is pretty hard to recover from.
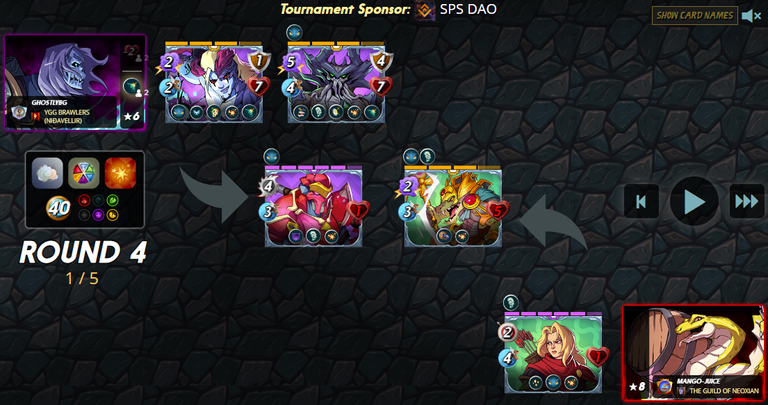
Round 4 - All that's left for my team is to finish off the remaining two enemy Monsters. One hit by Barashkukor will demonstrate what killing two birds with one stone looks like in the world of Praetoria.
Well this was definitely a fast but fun battle, and an entertaining way to showcase the Explosive Weaponry ruleset. See you next week with another exciting post related to the brand new Battle Mage Secrets Weekly Challenge!
Over and Out,

Referral

Congratulations @ghostlybg! You have completed the following achievement on the Hive blockchain And have been rewarded with New badge(s)
Your next target is to reach 1750 replies.
You can view your badges on your board and compare yourself to others in the Ranking
If you no longer want to receive notifications, reply to this comment with the word
STOPDelegate Tokens and HP to Fallen Angels to earn weekly rewards!
Delegate | Join to the guild
Checkout our BDVoter Daily Hive Showcase & Participate into our Daily giveaway to win various prize.
Thanks for sharing! - @underlock
