
Another week, another Battle Mage Secrets challenge. This time around I will be showcasing a battle featuring Ferocity ruleset. The Rebellion Death Legendary Barashkukor is a very suitable character to put on the cover page. It does not only look very ferocious but it also has the Fury ability as part of its arsenal. What's this Fury ability you may ask? You'll find out in exactly one second.
Let us see what this ruleset does before we get into the nitty-gritty of the line-up and the battle itself.
The Ferocity ruleset is pretty straight-forward - All Monsters have the Fury ability. Fury - This Monster does double damage to targets with the Taunt ability
Now that we've got a good idea of what Ferocity ruleset practically does, let's see now how it can be effectively utilized.

The most important thing that has to be remembered about this ruleset is that it is often very easy to forget that it is in play and then the chances that this will cost you the victory in the battle become very high. So whatever you do, do not play Taunt Monsters. I have listed all Taunt Monsters currently available in the Modern format in the screenshot above. There could be one exception though. Iziar at level 3 and 4 has the Martyr (When this Monster dies, adjacent Monsters get +1 to all stats) ability. So if your plan includes Iziar being taken down really quickly and then buffing more important Monsters on both sides, then it makes sense to be played and sacrificed.
Now that we have a decent understanding of the featured Ruleset and its potential advantages and disadvantages, let us have a look at the battle I have chosen to showcase.
<>>>>>>>>>>>>>>>>>>>>>>>>>>>>>>>>>>>>BATTLE<<<<<<<<<<<<<<<<<<<<<<<<<<<<<<<<<<<<<<>
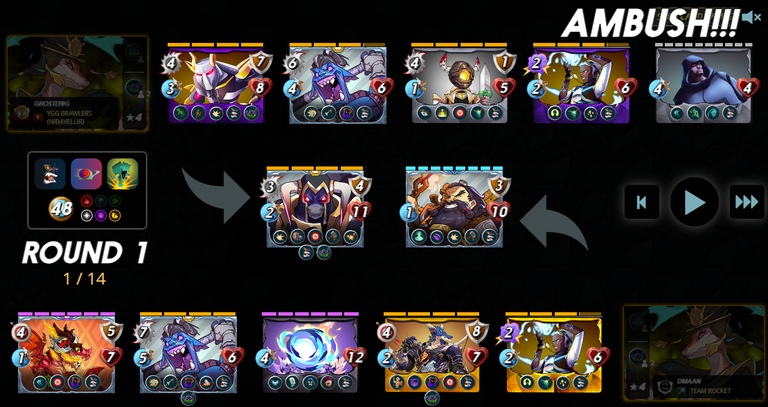
- The line-up of the Battle and the Ruleset:

The rulesets for this battle are Ferocity (All Monsters have the Fury ability), Reverse Speed (Monsters with the lowest Speed attack first and have the highest chance of evading attacks) and Stampede (The Trample (When a Monster with Trample hits and kills its target, it will perform another attack on the next Monster on the enemy Team) ability can trigger multiple times per attack if the trampled Monster is killed) ability). The mana budget is 48 which is an above average amount of mana so it does give me the ability to play a bit beefier Monsters in this battle. The available Elements are Fire, Life, Death and Dragon. I have decided to give the Dragon Element a shot this time around. I have chosen to showcase a ladder battle from earlier today.
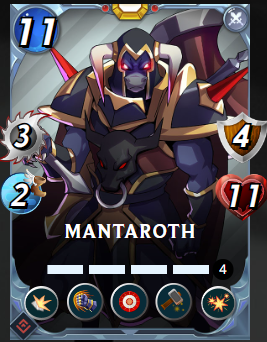
In the tanking spot I have placed Mantoroth. He's a pretty beefy boy with 4 Armor and 11 Health at the cost of 11 Mana which makes him susceptible to Giant Killer (does double damage against targets that cost 10 or more mana). He also has 3 Melee Attack and 2 Speed. In terms of abilities - at max level he has the following ones (in order of appearance): - Shield (reduced damage from Melee and Ranged attacks), ARMORED STRIKE (Any unit with this ability gains an ADDITIONAL Melee attack using its Armor stat. This allows characters to improvise with deadly force, using their gauntlets, shields, helmets, or perhaps physical attributes (spikes, hard shells, etc) as weapons!), True Strike (this Monster's attacks cannot miss), Repair (restores some armor to the friendly Monster whose armor has taken the most damage) , Blast (does additional damage to Monsters adjacent to the target Monster). He is definitely shaping up to be a pretty interesting card, especially with the New Ability - Armored Strike and the fact that he is a Neutral Card, so he can be included in any Element.
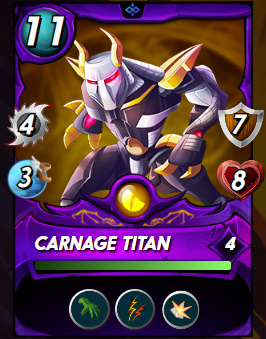
The 2nd place in the line-up goes to a Monster which is still one of the best off-tank Monsters in the game - the Carnage Titan. It has three great abilities for an off-tank - Reach (Melee attack Monsters with the Reach ability may attack from the second position on the team), Double Strike (Monster attacks twice each round) and Shield (Reduced damage from Melee and Ranged attacks). It also packs a powerful punch with its 4 Melee attack.
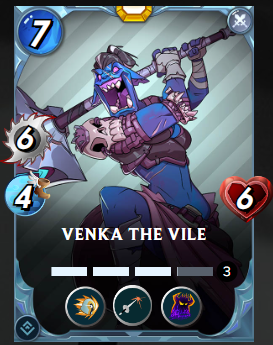
Next in the line-up is the newest Rebellion airdrop and the Grim Bardun Smith killer (and all no-attack Monsters in general). She has a new ability - Charge (The Monsters will use Melee Attacks from any position and will target the Enemy Monsters in the first position). Bear in mind that just as other abilities, it is affected by Taunt, so that's one way to keep your GBS, Bakjeera, etc. safe. Her other abilities are Piercing (If Melee or Ranged attack damage is in excess of the target's Armor, the remainder will damage the target's Health), Oppress (Does double damage when attacking an enemy that has no attacks) and Trample (When a Monster with Trample hits and kills its target, it will perform another attack on the next Monster on the enemy Team) (at level 4). She can single-handedly wipe the whole Enemy team in certain situations.
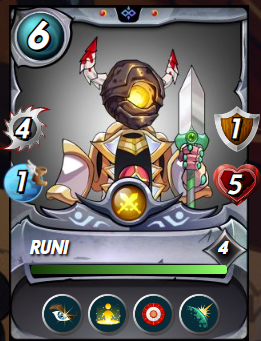
Following immediately after is my very own Runi. Runi has True Strike as an ability so it is incapable of missing in general but I actually have picked it for its general utility with Opportunity (Monsters with the Opportunity ability may attack from any position and will target the enemy Monster with the lowest health) and Rebirth (When this Monster dies it will self-resurrect with 1 Health once per battle). I have brought it in to help kill off enemy targets left at low health by the rest of my team as it will be the last to act with its base Speed of 1.
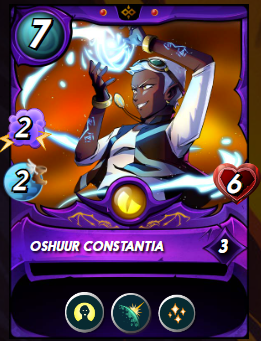
In the 5th spot I have placed Oshuur Constantia. I've got her here to support my front line Monster through her Tank Heal (Restores a portion of the unit in the first position's health each round) ability as long as possible. She can also take a hit or two if it gets to that, while healing herself in the meantime. What's important is that she has the Reflection Shield (This Monster doesn't take damage from Blast, Magic Reflect, Thorns, or Return Fire) ability so she does not suffer any damage when her Magic Attacks are reflected back to her. She also has Resurrect (When a friendly unit dies it is brought back to life with 1 Health. This ability can only trigger once per battle) which is definitely one of the other top tier abilities.

The last spot goes to the Chaos Agent. This Monster is actually a great tank under certain circumstances as well as a great card to be placed in the last spot and slow down potential enemy Sneak play. One of the rulesets which definitely help the Chaos Agent is Equalizer as it has the potential to provide it with a lot more health than what it starts with. In addition to the health amount, the set of abilities of the Chaos Agent at max level - Dodge (Has an increased chance of evading Melee or Ranged attacks), Phase (Magic attacks can miss this Monster (using the same hit/miss calculation as for Melee and Ranged attacks)) and Backfire (If an enemy misses this monster with an attack, the attacker takes 2 damage), make it really hard to hit but not only that, it also has the ability the deal damage back to the attackers.
It is time for a quick round by round analysis:
The Summoner I am going with for the battle is Akane. I have chosen her so I can try to nuke the enemy front-line Monster before they are able to blink thanks to the fact that she provides the Ambush ability to two Monsters I choose. I've chosen Mantaroth and the Carnage Titan. My enemy has the same idea as me, however, they have decided to use GBS in the front and that is not the wisest of ideas right now since everyone is hyped about playing Venka as she is the newest tool in the toolbox. Let's see how this battle goes.
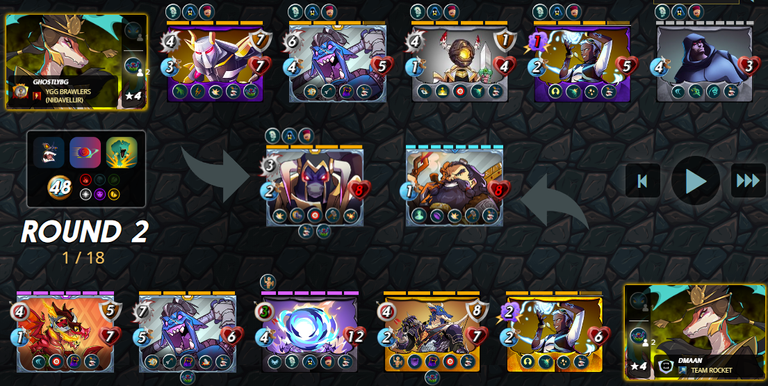
After the Ambush phase, my Mantaroth and their GBS are at the same amount of health. Bear in mind that my Venka will do double damage to the GBS though thanks to Oppress.
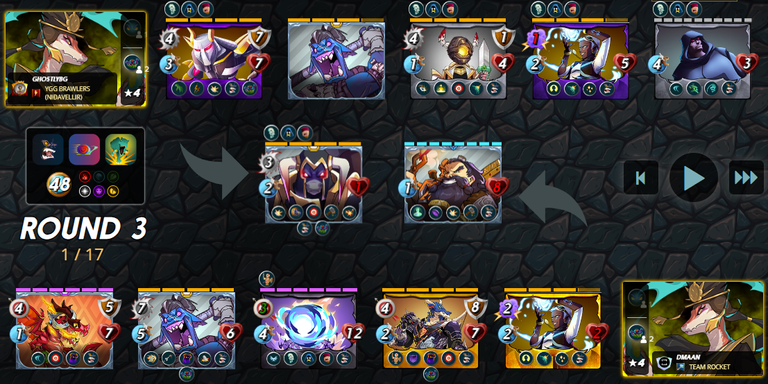
Round 3 - my Mantaroth is about to die and the enemy GBS is still alive and kicking thanks to a lucky dodge against my Venka last round. However, my Runi has been doing some work on the enemy Oshuur, and she is also on the verge of dying.
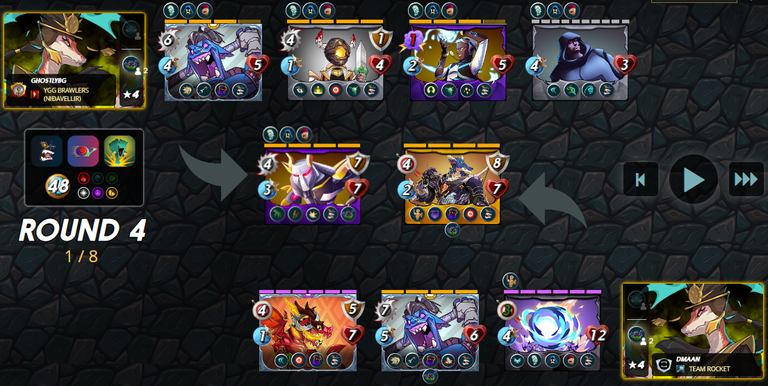
Round 4 - I have lost my Mantaroth while the enemy has lost both their GBS and Oshuur.
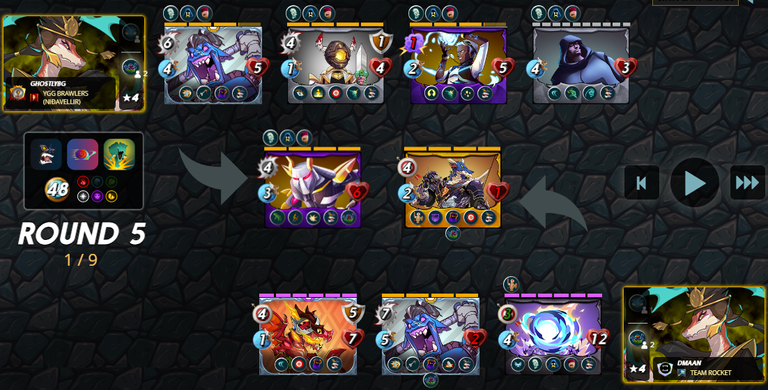
Round 5 - We're still battling it out but my team definitely has an advantage. The enemy Venka is about to die thanks to the backline infiltration my Runi has managed to pull off.
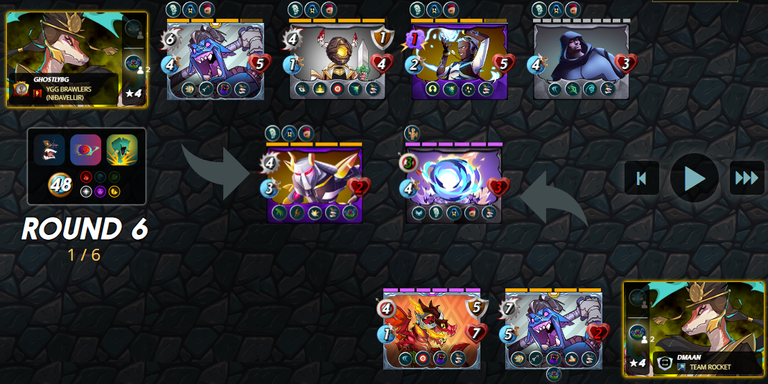
Round 6 - The enemy Venka is still alive thanks to the fact that my Runi got distracted by an enemy with a lower amount of health.
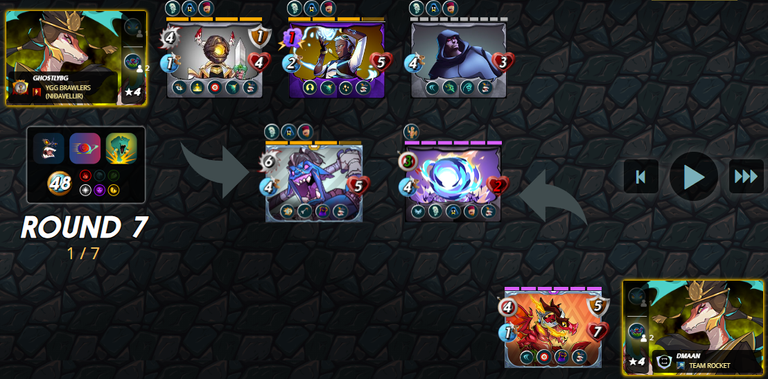
Round 7 - My team is clearly winning at this point in the battle.
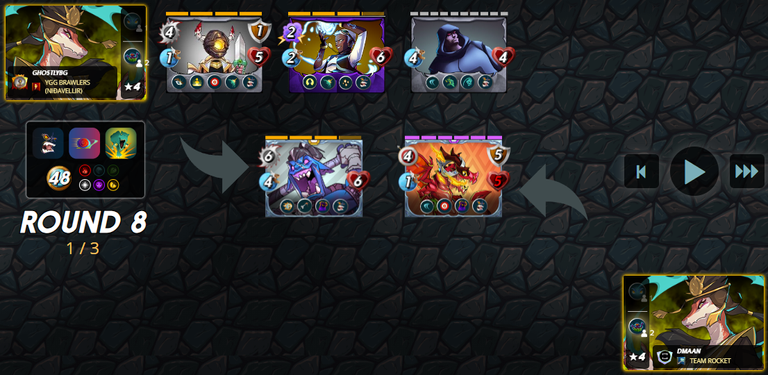
Round 8 - All that's left for my team is to finish off the remaining enemy Monster. This was a pretty fun battle (at least for me).
Well this was definitely a fast but fun battle, and an entertaining way to showcase the Ferocity ruleset. See you next week with another exciting post related to the brand new Battle Mage Secrets Weekly Challenge!
Over and Out,
Referral

!LOLZ
!PIZZA
!PGM
lolztoken.com
One. It's a trick question.
Credit: reddit
@ghostlybg, I sent you an $LOLZ on behalf of speedtuning
(5/6)
$PIZZA slices delivered:
@speedtuning(7/10) tipped @ghostlybg
Checkout our BDVoter Daily Hive Showcase & Participate into our Daily giveaway to win various prize.
Thanks for sharing! - @cieliss
