Watch Dragons Fight
Hello fellow Splinterlands players. Today we have a look at Dragons. This post is part of the weekly Battle Challenge.

They never fight alone
When you chose to send a Dragon summoner into battle you also have to align them with another splinter.
Among the available splinters the Dragons might be deselected but if they are available they will never be the only choice. Whichever splinter you align them with makes those cards available as well.
Taken aside the summoner (de)buffs any specific splinter might bring to the battle field this adds even more cards to select your team from.
Line them up with different splinters for different strategies and tactics to keep your opponents guessing what comes next when they see your battle history before the match.
The Battle
Rules

We are fighting a 99 mana match in silver league. All splinters but Death are available, there is no healing and stampede allows for trample to be triggered multiple times.
Strategy
So no limit mana but no healing either. This calls for armor, preferably void, so magic can not bypass it. Instead of healing we will work with repair. Adding resurrection to the mix because it brings back a monster with only one health but full armor and that is what we rely on.
Since trample only applies to melee attack, we can almost ignore the stampede. As long as we have the armor to interrupt the stampede, only very few monsters can trigger it. Right now I could only name Desert Dragon with its piercing ability to qualify for that category.
We have to keep the sum of armor and health is above 5 (maybe 6, if there is inspire involved) and stampede should not concern us.
For this reason we will not rely on it ourselves. Most likely our opponent will take similar steps to avoid the stampede thread. With 99 mana the other team will most likely have lots of health and even armor so counting on multiple trample attacks will most likely fail.
Lineup
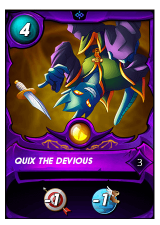
At the moment of this battle the only silver league summoner available to me is Quix. Debuffing the ranged attacks is a nice bonus but more important is the speed debuff to the other team.
We want to go for armor with repair and resurrection. Life splinter brings a lot of support for that.

The first strategic element is Agor Longtail. It brings the void armor and lots of health underneath. Additionally it is a taunt so it will draw all the attacks.
To absorb some blast damage we will put it in last position and place a high health monster next to it.
That way blast only goes to one side and will need more hits to take out an adjacent target.

We add Arkemis and put it in tank position. It brings protection i.e. +2 armor boost and lots of health.
Putting it in tank position will separate the incoming damage between Arkemis and Agor because the opposing tank will not attack a taunt in rear position.
To soften the blow Arkemis's halving ability will further reduce the incoming damage.

With Adelade we will get the needed repair action for Agor and if needed the resurrection.
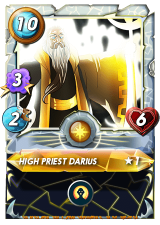
Darius gives us additional resurrection. That is another 8 armor and one health hitpoint for Agor.
With three magic attack we also have a sure damage dealer in case we encounter a combination of silence and void which would render Adelade's attacks useless.

In for a penny, in for a pound. With Oshuur Constantia we can now revive Agor three times. As long as Arkemis is still there we get 9 Hitpoints back each time.
There is also a nice bonus included when using this card, we will get to that when we have a look at the result.

Finally we add the Chaos Dragon to the team in case the other team has a taunt. We will get around that with scattershot. Maybe we get lucky and take out a support unit fast enough for the other taunt to lose value.
The blast damage helps a lot with that and three magic attack means we get at least some damage through in case of silence and void.
Speaking of blast, we will place this one next to Agor as a blast absorber.
Fight

Watch the Battle
The other team had similar thoughts, placing a void armor tank and having resurrection in back row. If you suspect magic attacks, that is a valid strategy, because most magic monsters go for the tank.
Those few magic sniper attacks will encounter the Djinn Oshannus with void and high speed phase as a defense so there really is no need for a taunt.
Placing Diemonshark in second position can be justified by the thought that once the tank is gone, the other tank will most likely be down on health or gone as well which gives the opportunity for stampede to trigger on low health support units.

After one round we can see where this is going.
Our scattershot already damage the other back row. Agor is holding up with still 2 armor after a repair and 7 health without any resurrection needed so far.
All the other team's attacks are drawn to Agor while the other tank is already down to only 4 health left and only one resurrection available after that.

At the beginning of round three each team had one resurrection triggered. We still have two of them left while it is "gone for good" from here on for the other team.
Round three itself brings a devastating blow to the opponent. Because of its high speed, Diemonshark can not attack after it took tank position. Its turn already passed.
Arkemis can hit for halving its damage and the magic attacks all bypass its armor and take it out immediately.

At this point it is almost over. Djinn Oshannus will stand its ground for maybe even two rounds but the back row is already damaged by the scattershot with blast.
Agor is still drawing all the fire and one resurrection trigger is still left.
Our tank is still up and healthy, once Arkemis hits Oshannus for halving its damage, the tank can make its stand for at least 5 or 6 more rounds.
Result

Let us skip the remaining two rounds and have a look at the result.
While on Dragon focus the usage of four Dragon cards gives a nice boost to the reward shares.
There is a 20% boost for using Alpha/Promo cards. We are in modern so Alpha is no option. Arkemis counts as a promo card, that is nice.
And Oshuur Constantia, which already gave us a focus bonus, also gives a Promo card bonus. Isn't that neat?
Conclusion
Our strategy worked very well. Of course there is always some luck involved with scattershot.
But I dare say, regardless of where those shots land this victory was not lucky.
So I leave you with my initial statement:
Thank you for reading, maybe we'll see each other on the battlefield.
Special-Opps wants you

We are looking for active players to fill the novice, bronze, and gold foil frays who will contribute at least 100 DEC per week to buildings. Our Guild has an active Discord chat with channels for all the important topics. We like to talk shop but also all sorts of things, from good card deals to resources and strategy and sometimes also off-topic chatter.
Membership rewards include weekly card giveaway drawings and free card packs for long term memberships.

Header image designed in canva.
Divider designed by freeztag as free to use.
Special-Opps logo and animation designed by @appbap, used with permission.
Guild-Buildings screenshot from baronstoolbox.
All other images are screenshots from the game.
https://twitter.com/1132724169207160832/status/1610948776323072001
The rewards earned on this comment will go directly to the people( @hannes-stoffel ) sharing the post on Twitter as long as they are registered with @poshtoken. Sign up at https://hiveposh.com.
Thanks for sharing! - Underlock#8573
