Splinterlands: Rebellion has made the Noxious Fumes fights easier

Splinterlands is a complex game and it allows for various different cards and strategies. Each fight is different as there are various different rulesets applied and this can give specific cards an advantage depending on how you use them. In this post, I talk about a neutral card and dragon card that I have been using in the Rebellion deck. This is a part of the weekly social media challenge.
Featured Cards
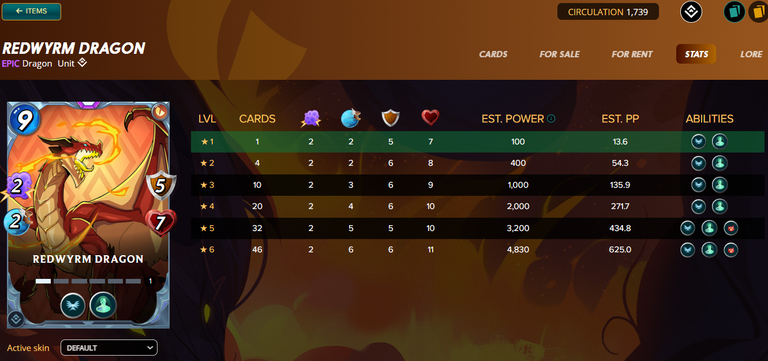
Redwyrm Dragon is a epic dragon card that costs 9 mana. This card has the flying ability and immunity from the start and learns stun at level 5. This card can be quite helpful in matches with poison or earthquake. It's a nice card for those specific rulesets.
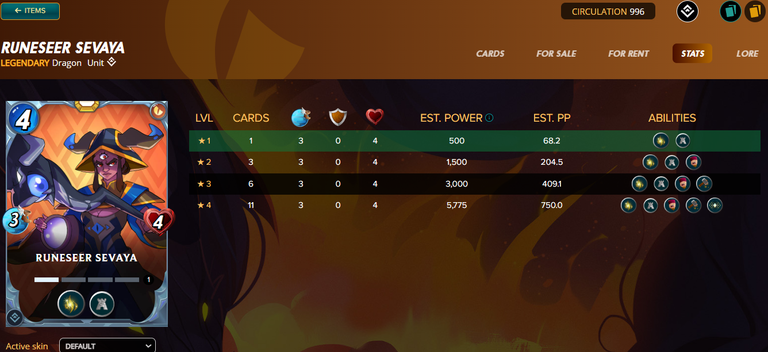
Runeseer Sevaya is a legendary neutral card that costs 4 mana. It starts with protect and clease. It learns blind at level 2, repair at level 3, and amplify at level 4. This is a great support monster with so many useful ability. The cleanse is very useful for this fight.
Rule set, Battle and Plan

The ruleset this time is Noxious Fumes and Weak Magic. This means that all monsters are poisoned and magic attacks will hit the armor first. There are 36 mana available and I am left with the choice of life or dragon splinter.
| Splinter | Mana Cost | Position | Reason |
|---|---|---|---|
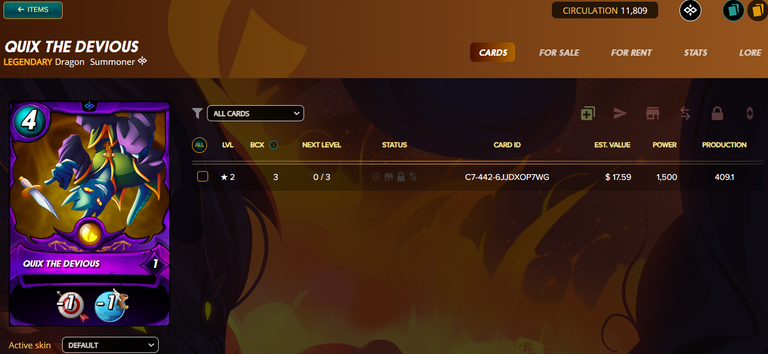
| Quix the Devious | 4 | Summoner | -1 range and health |
| Vruz | 2 | 1st | Martyr |
| Uriel the Purifier | 11 | 2nd | Heal, flying and charge |
| Venari Marksrat | 3 | 3rd | Martyr |
| Redwyrm Dragon | 9 | 4th | Immunity and Flying |
| Runeseer Sevaya | 4 | 5th | Protect and Cleanse |
| Naga Assassin | 2 | 6th | Backfire |
| Total Mana: | 35 |
I used Quix the Devious as my summoner for the -1 speed and health. This will let my monsters attack first and reduce range damage. My lineup starts off with Vruz so I can get martyr on Uriel and Venari Marksrat for the same reason in the 3rd spot. Then I have a cleanse monster to remove poison on Uriel after Vruz dies. Next I have my immunity monster in the fourth spot to get one martyr buff. In my last spot, I have a filler with backfire to get some extra damage on any sneak monsters.
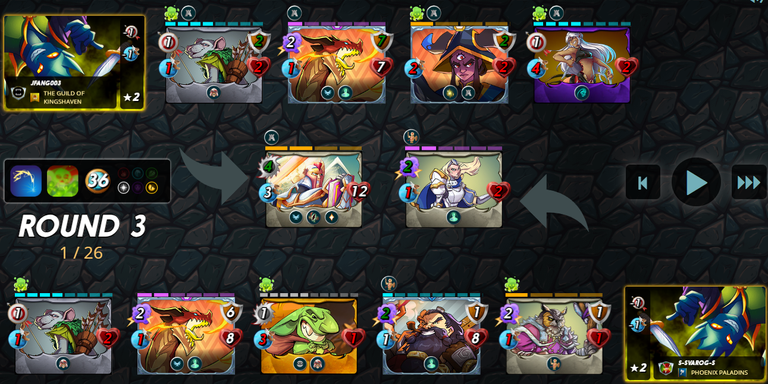
Round 1
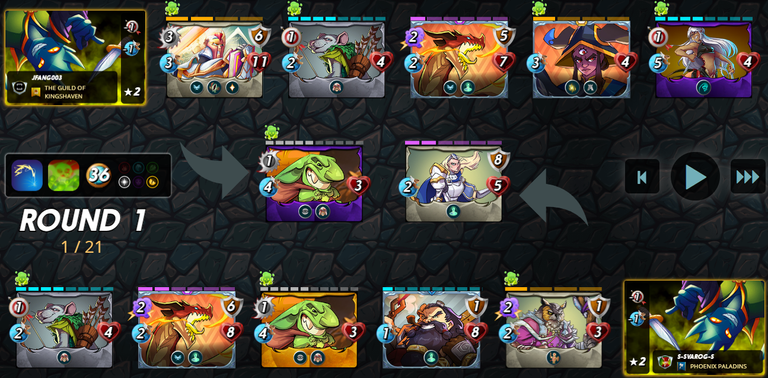
It looks like my opponent focused on immunity and martyr while I went with a cleanse, heal and immunity combination with martyr. It will really depend on whether or not my Uriel dies or not. My opponent also used weapons training so I think this match can go either way.
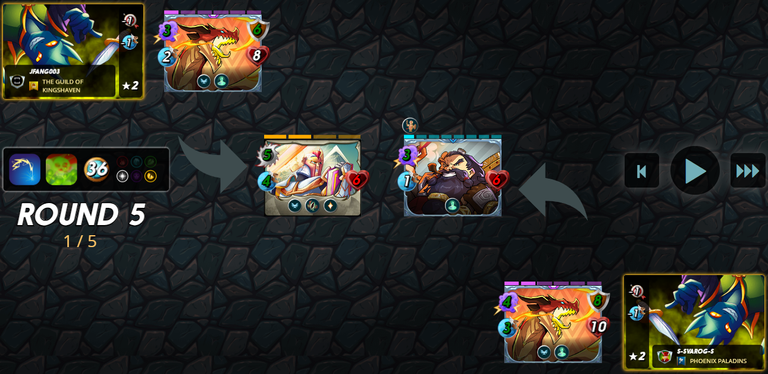
Round 3
I skipped over to Round 3 because not much happened other than my Vruz dying. My Uriel is still alive and it's being buffed slowly by that martyr. The rest of my monsters are going to die though.
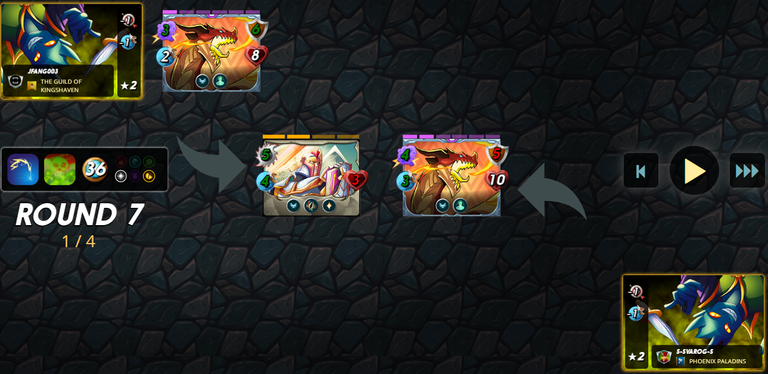
Round 5
Two rounds later, all that is left is my Uriel and immunity monsters. It's going to come down to whether or not my Uriel will miss or not. If it doesn't I lose because my opponent will finish off my Uriel otherwise I win because I can outheal the damage.
Round 6
I didn't miss so this match is my win now.
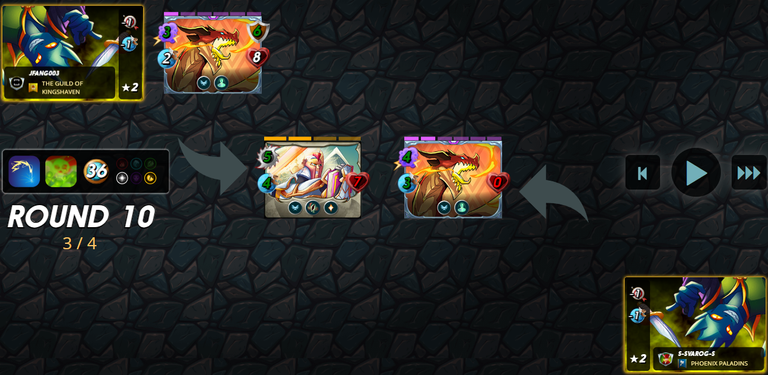
A few rounds later I was able to win the match.
Conclusion
The battle this time around went exactly as I expected. I wasn't expecting all the immunity monsters combined with weapons training and the martyrs, but I was able to finish off my opponent before he was able to kill off my Uriel. Either way, my strategy worked out with Martyr and cleanse on Uriel with his heal ability. The immunity monster also stayed alive to deal some extra damage and it made the difference between the win and loss in this match.
You can see my entire match here.
What did you think of my match? Was there anything you would have done differently? I think it is quite interesting to see how different players use the same card.
Posted Using InLeo Alpha
Thanks for sharing! - @underlock
