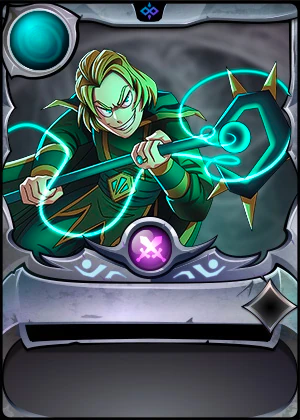
Week 270 | My Splinterlands Art Contest Entry | Magi of Chaos

Feeling the season yet? 😅 My invitation list for Christmas parties is piling up. 😆 We just had our family Christmas party meeting, and some of our relatives from Canada are already here in the Philippines to celebrate with us. Also, they are too old for the bitter Winter weather. They are much happier celebrating Christmas here. That is just a little update from me.
For this week, I chose Magi of Chaos.
Art Process
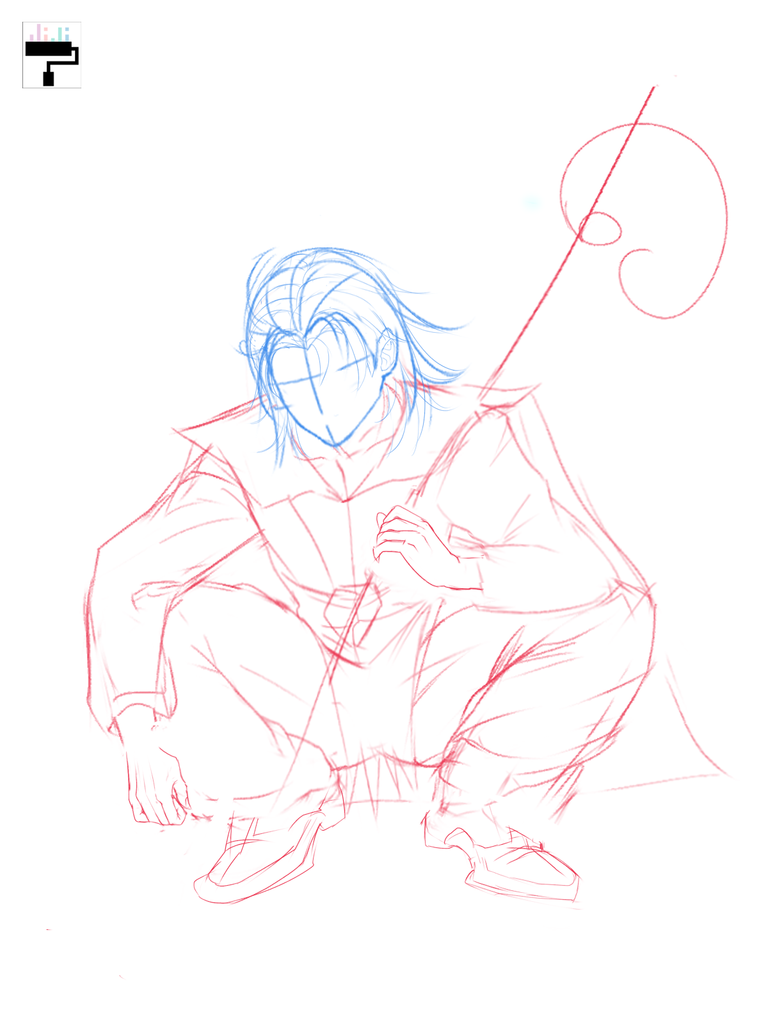
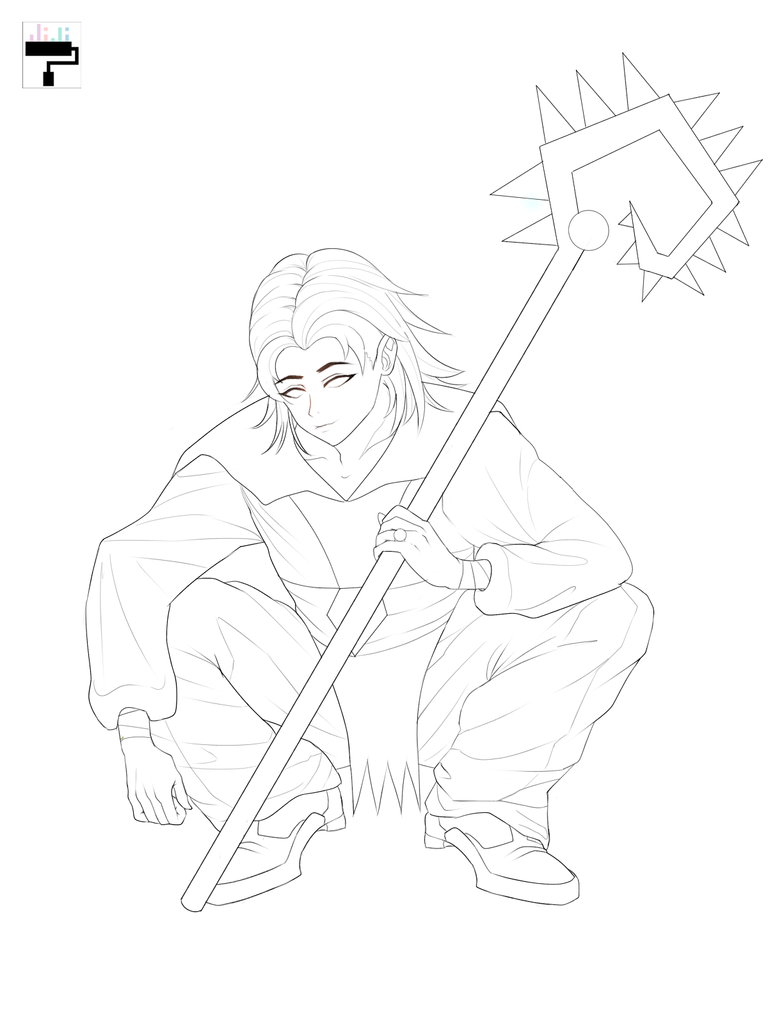
I try to draw some poses that would challenge me. This time, I chose a pose that I was not familiar with. Usually, I go with standing or sitting position. A good reference helped me in sketching this pose. I am always struggling with the fingers so a lot of my time sketching that. I separated the head and the body into different layers so it is easier to adjust the parts. Once the sketch was done, I moved to lineart. I used a pencil brush for this part. I separated the body and the staff into different layers so that it is easier to erase the lines that are overlapping.
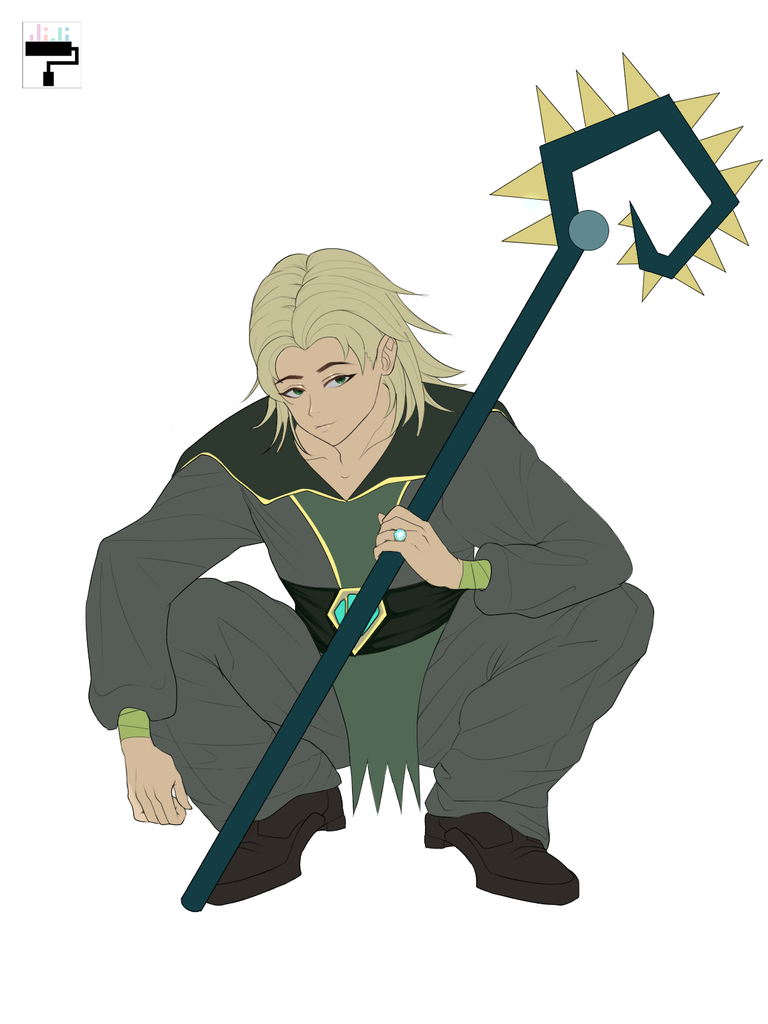
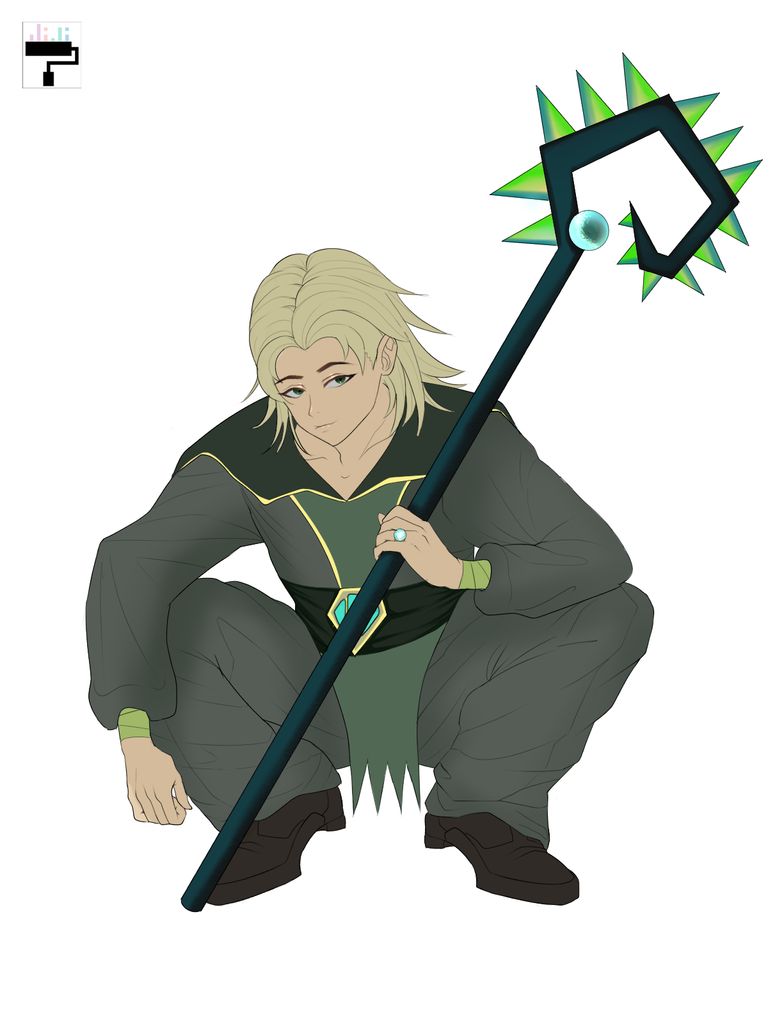
The dark green looks good with the yellow hair. I chose darker shades. I chose different shades of green for the clothing to make variations. I then applied shading first on the staff with shades of blue, green, and yellow. I started putting light shades on the clothing too.
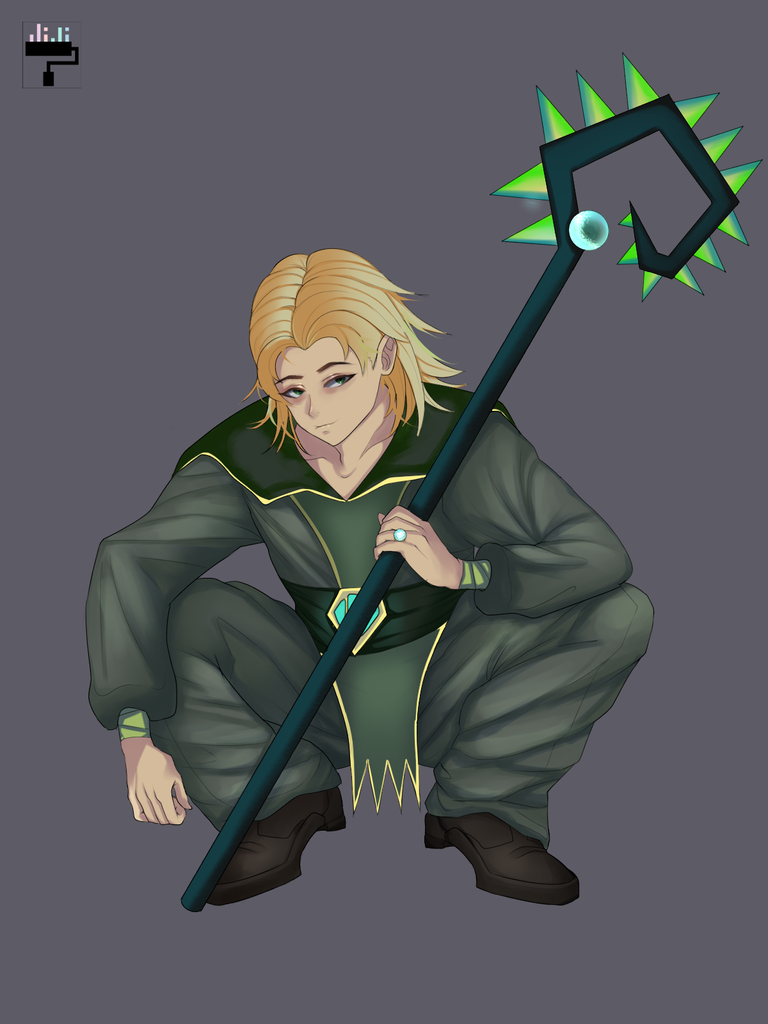
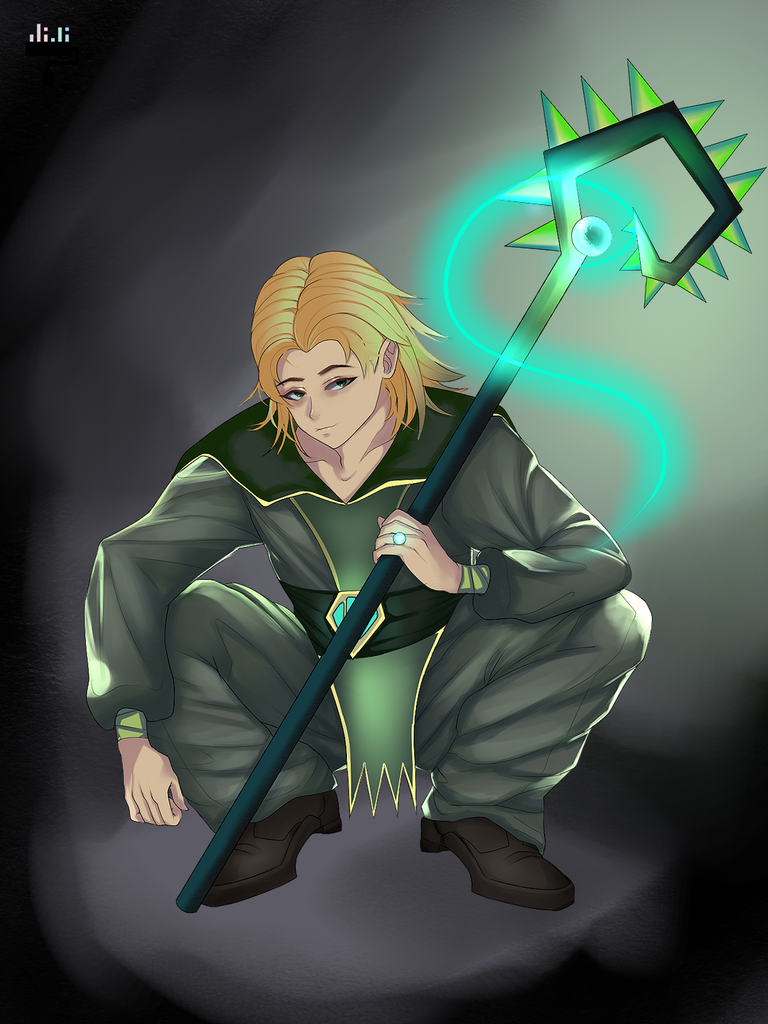
I chose a gray background since the character is already colorful. I applied more shadows on the clothing foldings of the top and pants. Applied green glows on the clothing, hair, and shoes. The glowing swirl is a special brush downloaded from the asset store. To not make the background flat, I brushed it with black adding texture to it.
Final Art
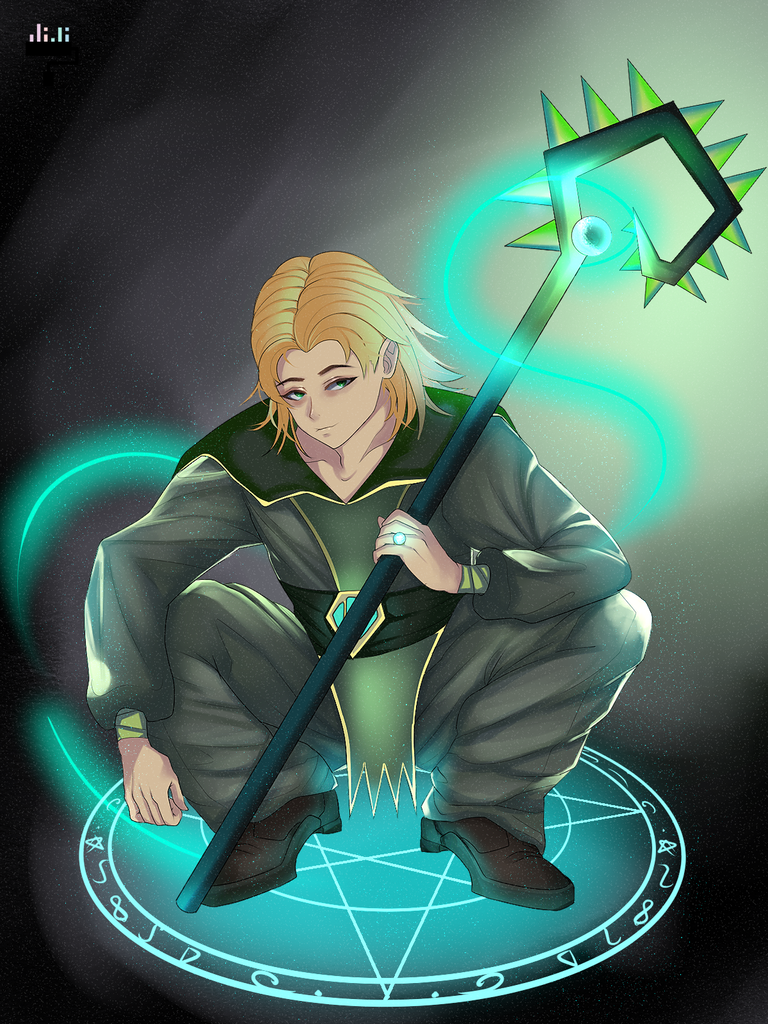
I added a magic circle by looking in the asset store. It was in color red, so I had to alpha lock the image and color it in cyan blue to match the character. Added glows and dust for details. Lastly, I added noise monochrome to apply texture.
Thanks for reading~ 💖
Software: Clip Studio Paint Pro
That is it for this art blog. I will see you at the next one!
📸 All photos are owned and taken by me, otherwise credited. Dividers by
nane-qts. ©️jijisaurart
Reference here
👾 NFT Showroom: nftshowroom.com/jijisaurart
🥰 Open for commissions!!!
Excellent work!
Thanks, Castle🍓!
!PIZZA
Congratulations @jijisaurart! You have completed the following achievement on the Hive blockchain And have been rewarded with New badge(s)
Your next target is to reach 350 posts.
You can view your badges on your board and compare yourself to others in the Ranking
If you no longer want to receive notifications, reply to this comment with the word
STOPTo support your work, I also upvoted your post!
Check out our last posts:
Another amazing work.
I started to browse through the cards. I might upload my first entry soon. :D
Yehey! Exciting to see! Just don't forget to comment on SPL post to get curated. 😊 Good luck.
!PIIZZA
thanks. I will start slowly though. I still feel like wearing a mitten on my drawing hand. hehehe
Please upvote this comment to support upvote-suggestor @bhattg
@bhattg: wow great art work thanks for sharing.
symmetrical yung thorns. 😆
ganda ng gawa mo sa sapatos ah. 😁
Actually, I forgot the laces haha. But it is okay, andyan na ih. 😆
!PIZZA
haha oki na yan. laceless daw. 😆
$PIZZA slices delivered:
jijisaurart tipped demotry
jijisaurart tipped castleberry
@jijisaurart(3/5) tipped @solumviz
Nice! Drawing that magic circle under him was a superb idea. It elevates the painting!
Thanks, Sol! It is an image btw 😁
!PIZZA
uwu!!! I really liked this version of the character. Best of luck
Thank you, Mario!
!PIZZA