An incredible battle with everything going against you | The importance of using the right cards [EN-ES]
Cover created in Canva

Siempre he comentado que cada vez que les traigo una batalla es porque realmente vale la pena observarla, esto es debido a varios factores, uno de los más comunes es que, cada vez que tengo todas las probabilidades en mi contra y gano, me gusta traer esta información, ya que es una sorpresa el poder ganar una batalla de este tipo, sin embargo, muchas veces no es un golpe de suerte, puesto que en cada batalla que juego trato de analizar rápidamente todos los puntos posibles para colocar todas las probabilidades de ganar a mi favor.
Es por esta razón que, en esta oportunidad les traigo una batalla donde realmente tenía absolutamente todo en contra, mi oponente practicamente neutralizo el tipo de ataque que utilicé en la misma, pero, con la gran diferencia de que, una de las reglas de la batalla estaba a mi favor y utilizando el conjunto de cartas correctas para esta, pude obtener una victoria increíble, así que no se despeguen de este post.
Si quieren saber el conjunto de cartas que utilice, presten mucha atención, de esta forma sabrán de qué forma pense para enfrentar a mi oponente....

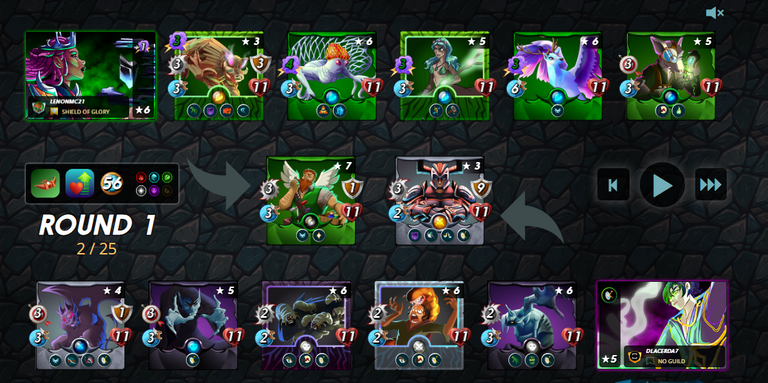
Reglas y Costo de mana

Como siempre antes de describir mis pensamientos al momento de alinear mis cartas, lo primero que tomo en consideración son las reglas de la batalla y la cantidad de mana disponible que poseo para poder invocar a mis monstruos al campo, recuerden que, parte de las normas que utilizo para poder alinear a mis cartas, es tener en cuenta las reglas de batalla, la cantidad de mana y las ultimas batallas que ha jugado mi oponente, esto con la finalidad de tratar de discernir cual será su movimiento para nuestra pelea.
 | Esta es la primera regla de batalla para esta pelea, no es que sea muy relevante, pero, es igual de importante tomarla en cuenta, así que, lo que hace esta regla es permitir que, todos los monstruos con ataque de rango o distancia, puedan atacar desde la primera posición como un tanque de batalla, algo que es genial, ya que lo normal es que, este tipo de cartas con este ataque, no puedan atacar desde una primera posición. |
 | Esta es una regla que me gusta mucho y es super importante para esta batalla, lo que hace la misma es otorgarles a todas las cartas en el campo, la misma cantidad de puntos vitales que la carta con un puntaje de salud más alto, lo que quiere decir que, si por ejemplo yo tengo una carta en mi lado del campo con 11 puntos de vida y es la carta con más puntos vitales de todo el campo, todo el resto de cartas obtendrán la misma cantidad de puntos, algo que se puede aprovechar muy bien, tomando en cuenta que, podremos utilizar cartas que normalmente tienen muy pocos puntos de vida y son extremadamente útiles en el campo de batalla. |
 | La cantidad de mana como ya lo he dicho en reiteradas ocasiones, es muy importante que la tomemos en cuenta, esto es debido a que, es gracias a esta cantidad que podremos invocar más o menos monstruos en el campo hasta abarcar los 7 espacios disponibles que tenemos para nuestros monstruos e invocador y gracias a esto utilizar a nuestros mejores monstruos para poder ganar, así que, en esta oportunidad la cantidad de mana disponible es de 56 puntos, los cuales son más que suficientes para utilizar mis mejores cartas con los Splinters disponibles. |
Lo que pense para alinear mis cartas
Antes de mencionar porque forme a mis cartas de esta forma, debo decir que casi siempre o dependiendo de la cantidad de mana disponible, refuerzo con más poder o menos según el caso mi línea de frente, esto quiero decir que, si la cantidad de mana es alta puedo colocar hasta 2 cartas que me ayuden a reforzar la defensa, pero, sin descuidar el ataque, pero para explicarlo mejor, hablare de mi alineación y lo que pense para colocar mis monstruos...
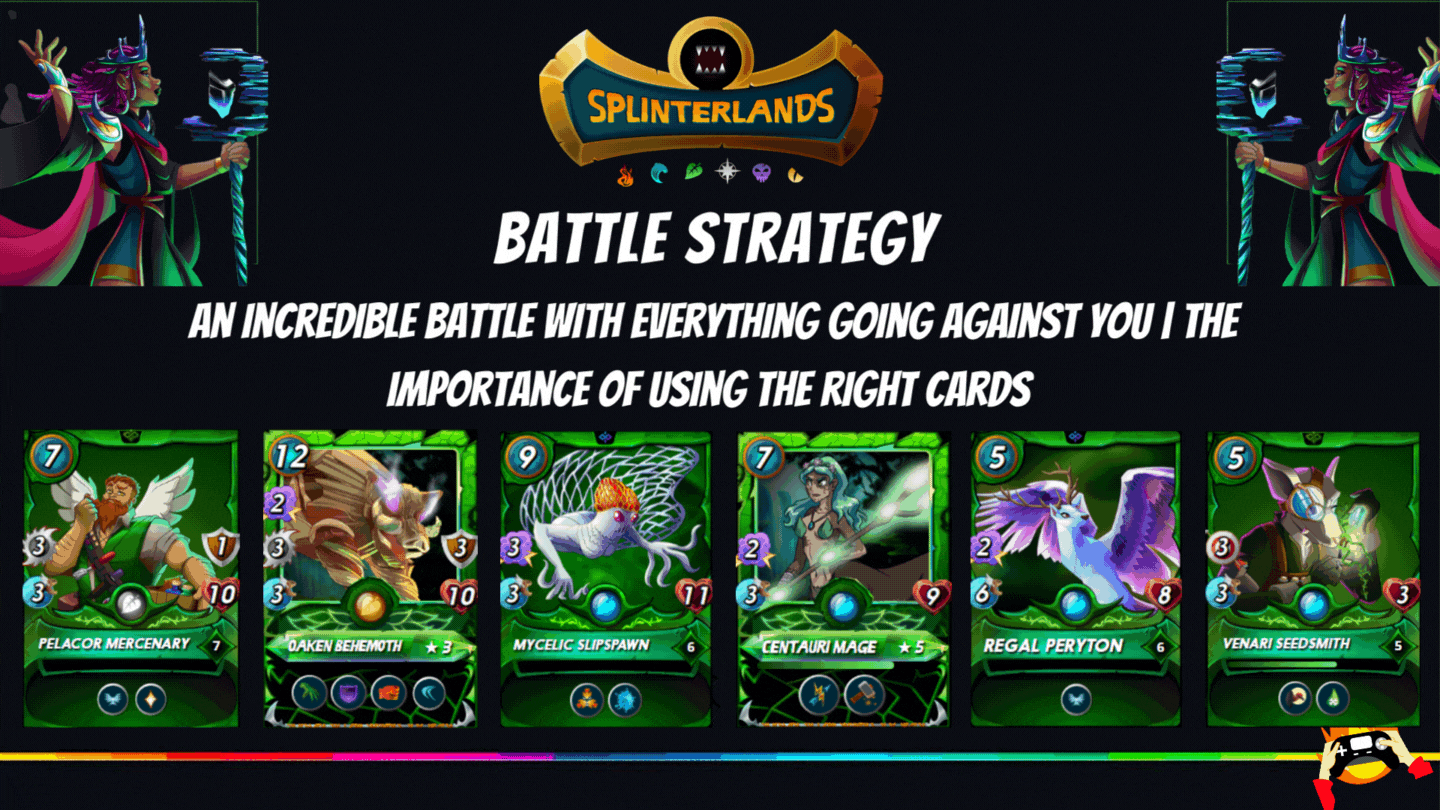
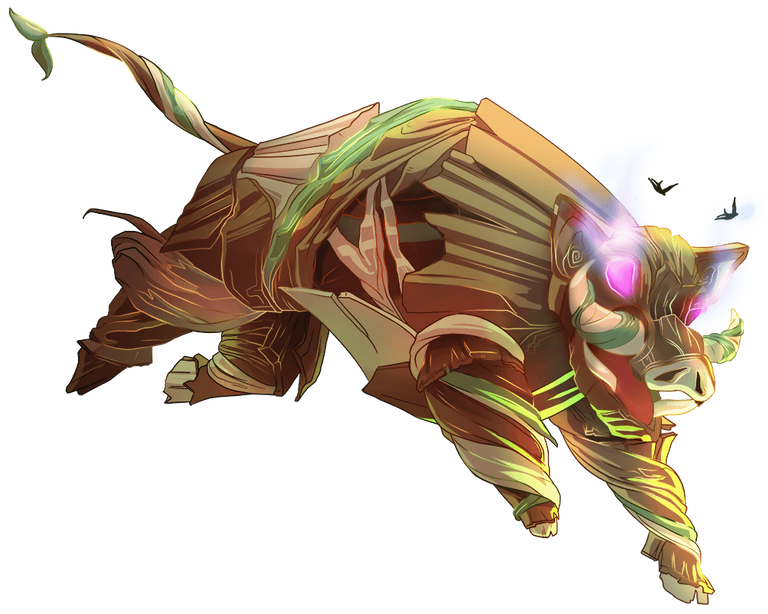
- Pelacor Mercenary y Oaken Behemoth: Esta dupla al frente me permitio tener un poder abrumador y resistente al frente y a pesar de que mi oponente practicamente se adelantó a mi ataque magico al neutralizarlo, esto no fue suficiente para vencerlos, así que, lo que pense en ese momento fue que, debido a la cantidad de mana disponible, necesitaba 2 buenas cartas al frente que resistieran y le dieran batalla a mi oponente, ademas, tanto “Pelacor Mercenary como Oaken Behemoth” lograron con su poder de ataque debilitar grandemente a las cartas de mi oponente.
 |  |
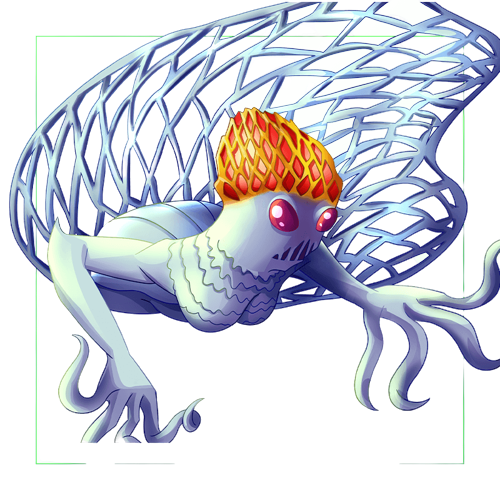
- Mycelic Slipspawn: Esta carta es muy buena y al colocarla en la 3era posición de mi alineación, me asegure de crear un especie de distracción para darle aún más resistencia y tiempo al resto de mi equipo para que atacara, mi pensado de colocarlo en esta posicion no fue algo en especial, solo fue un señuelo para atraer el mayor número de ataques hacia ella con su habilidad “Taunt”, pero, también funciono como una fuerte arma ofensiva, ya que gracias a mi invocadora “Obsidian”, esta obtuvo +1 punto adicional de ataque magico, dándole un total de 4 puntos.
 |
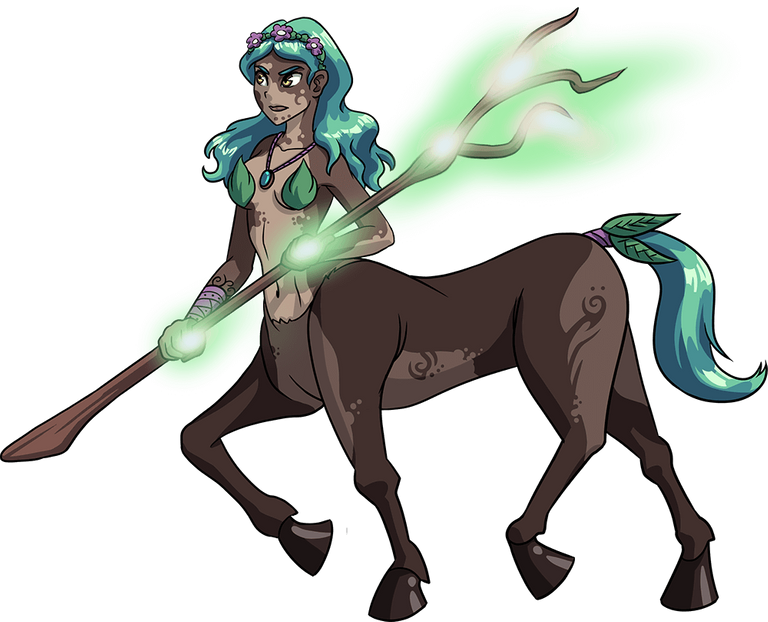
- Centauri Mage y Regal Peryton: Estas cartas fueron un arma ofensiva bastante importante en mi formación, a pesar de que 95% de mis cartas tenía un ataque magico, puede soportar cada ataque devuelto de mi oponente y parte de esta gran defensa fue gracias a mi “Centauri Mage”, esto es debido a su habilidad llamada “Repair”, la cual repara el escudo de las cartas en mi equipo que haya obtenido el mayor daño en la última ronda, por otro lado, “Regal Peryton” fue un monstruo netamente ofensivo y rápido en su ataque, mi idea al colocarlos en sus posiciones respectivas era aprovechar el poder maximo de ataque magico, para dañar gravemente a mi oponente.
 |  |
- Venari Seedsmith: Esta fue la última carta que coloque en mi formación y fue una de las más importantes que seleccione, ya que sus grandes habilidades, poder de ataque y su posicion en el campo, me permitirían tener una especie de seguro si es que el resto de mis cartas fueran derrotadas en la batalla, todo esto es debido a sus habilidades como ya mencione, siendo una de ellas la famosa “Scavenger”, donde Venari cada vez que un monstruo deja el campo de batalla, este gana +1 punto adicional de vida, ademas, su segunda habilidad es mortífera y aumenta la posibilidad de derrotar a sus enemigos, esta habilidad es “Poison”, la cual tiene un 50% de probabilidades de envenenar a las cartas objetivo de ataque, quitándole en cada ronda -2 puntos de vida, una bestialidad, tomando en cuenta que mi Venari, tiene +3 puntos de ataque de rango.
 |
Imagen de Batalla
En esta sección compartire la imagen completa de mi batalla y anexare el link de la misma para que puedan verla
Consideraciones finales
Espero que esta batalla les sirva para poder copiar la estrategia en caso de que se encuentren con un escenario muy parecido, recuerden, los pasos para armar una estrategia con altas probabilidades de ganar son muy sencillas y son las siguientes:
Primero: Observar las “Reglas de la batalla, cuando las identifiques, ya sabrán a ciencia cierta que cartas jugar y con que habilidades.
Segundo: Prestar mucha atención a la cantidad de mana que tengan disponible, esto también les permitirá pensar de forma más rapida las mejores cartas a utilizar, que tengan una cantidad de mana acorde al costo asociado a la batalla.
Tercero: Observar con detenimiento de forma rapida, las ultimas alineaciones que ha tenido nuestro oponente, esto nos ayudara a contrarrestar de cierta forma un equipo que haya jugado con mucha frecuencia, al menos más de 3 veces.
Con estas recomendaciones es más que suficiente para poder armar un equipo competitivo en cada batalla, con 2 minutos aproximadamente para poder formarlo, lo unico que les dará agilidad para esto es la práctica, así que espero que esto les ayude, sé que muchos en HIVE son experimentados en “Splinterlands”, sin embargo, parte de mis intereses como inversor del juego es que más usuarios se nos unan y que por supuesto los más nuevos aprendan a jugar correctamente.
Sin más por el momento, nos vemos en la próxima guerreros.

I have always commented that every time I bring you a battle is because it is really worth watching, this is due to several factors, one of the most common is that, every time I have all the odds against me and I win, I like to bring this information, since it is a surprise to win a battle of this type, however, many times it is not a stroke of luck, since in every battle I play I try to quickly analyze all possible points to place all the odds of winning in my favor.
It is for this reason that, in this opportunity I bring you a battle where I really had absolutely everything against me, my opponent practically neutralized the type of attack that I used in it, but, with the great difference that, one of the rules of the battle was in my favor and using the right set of cards for this one, I could obtain an incredible victory, so do not take off from this post.
If you want to know the set of cards I used, pay close attention, this way you will know how I thought to face my opponent.....
Rules and mana cost
As always before describing my thoughts at the time of aligning my cards, the first thing I take into consideration are the rules of the battle and the amount of mana available that I have to summon my monsters to the field, remember that part of the rules I use to align my cards, is to take into account the rules of battle, the amount of mana and the last battles that my opponent has played, this in order to try to discern what will be his move for our fight.
| This is the first battle rule for this fight, not that it is very relevant, but, it is just as important to take it into account, so, what this rule does is to allow that, all monsters with range or distance attack, can attack from the first position as a battle tank, something that is great, since the normal thing is that, this type of cards with this attack, can not attack from a first position. |
| This is a rule that I really like and is super important for this battle, what it does is to give all the cards on the field, the same amount of vital points as the card with the highest health score, which means that, If for example I have a card on my side of the field with 11 health points and it is the card with more vital points of the entire field, all the other cards will get the same amount of points, something that can be used very well, taking into account that we can use cards that normally have very few health points and are extremely useful on the battlefield. |
| The amount of mana as I have already said on several occasions, is very important to take into account, this is because, it is thanks to this amount that we can summon more or less monsters in the field to cover the 7 available spaces we have for our monsters and summoner and thanks to this use our best monsters to win, so, this time the amount of mana available is 56 points, which are more than enough to use my best cards with the Splinters available. |
What I thought to align my cards
Before mentioning why I formed my cards in this way, I must say that almost always or depending on the amount of mana available, I reinforce with more or less power depending on the case my front line, this means that, if the amount of mana is high I can place up to 2 cards that help me to reinforce the defense, but without neglecting the attack, but to explain it better, I will talk about my alignment and what I thought to place my monsters...
- Pelacor Mercenary and Oaken Behemoth: This duo up front allowed me to have an overwhelming and resistant power up front and even though my opponent practically overtook my magic attack by neutralizing it, this was not enough to defeat them, so, what I thought at that moment was that, due to the amount of mana available, I needed 2 good cards up front to resist and give battle to my opponent, besides, both "Pelacor Mercenary and Oaken Behemoth" managed with their attack power to greatly weaken my opponent's cards.
| |
- Mycelic Slipspawn: This card is very good and by placing it in the 3rd position of my lineup, I made sure to create a kind of distraction to give even more resistance and time to the rest of my team to attack, my thought of placing it in this position was not something special, it was just a decoy to attract the largest number of attacks towards it with its ability "Taunt", but, it also worked as a strong offensive weapon, because thanks to my summoner "Obsidian", it got +1 additional point of magic attack, giving it a total of 4 points.
|
- Centauri Mage y Regal Peryton: These cards were a very important offensive weapon in my formation, although 95% of my cards had a magic attack, it can withstand every attack returned from my opponent and part of this great defense was thanks to my "Centauri Mage", this is due to its ability called "Repair", which repairs the shield of the cards in my team that has obtained the highest damage in the last round, on the other hand, "Regal Peryton" was a purely offensive monster and fast in its attack, my idea to place them in their respective positions was to take advantage of the maximum power of magic attack, to seriously damage my opponent.
| |
- Venari Seedsmith: This was the last card that I placed in my formation and was one of the most important that I selected, since its great abilities, attack power and its position in the field, would allow me to have a kind of insurance if the rest of my cards were defeated in battle, all this is due to their skills as I mentioned, one of them being the famous "Scavenger", where Venari every time a monster leaves the battlefield, it gains +1 additional point of life, in addition, his second ability is deadly and increases the possibility of defeating his enemies, this ability is "Poison", which has a 50% chance of poisoning the target cards attack, taking away in each round -2 points of life, a bestiality, taking into account that my Venari, has +3 points of ranged attack.
|
Battle Image
In this section I will share the complete image of my battle and I will attach the link to it so you can see it.
Final considerations
I hope this battle will help you to copy the strategy in case you encounter a very similar scenario, remember, the steps to build a strategy with a high probability of winning are very simple and are as follows:
First: Observe the "Rules of Battle, when you identify them, they will know for sure which cards to play and with which skills.
Second: Pay close attention to the amount of mana you have available, this will also allow you to think more quickly about the best cards to use, which have an amount of mana according to the cost associated with the battle.
Third: Take a quick close look at the last lineups of our opponent, this will help us to counter a team that has played very often, at least more than 3 times.
With these recommendations is more than enough to build a competitive team in each battle, with approximately 2 minutes to form it, the only thing that will give you agility for this is practice, so I hope this helps you, I know that many in HIVE are experienced in "Splinterlands", however, part of my interests as investor of the game is that more users join us and of course the newer ones learn to play correctly.
Without further ado, see you next time warriors.


If you are new, I invite you to register in this LINK

Proud Member of "Shield of Glory".
Join the Discord Official community server in English
https://twitter.com/leninmiguel21/status/1568409263608893440
The rewards earned on this comment will go directly to the people( @lenonmc21 ) sharing the post on Twitter as long as they are registered with @poshtoken. Sign up at https://hiveposh.com.
Sounds interesting ☺️
Some very good food for thought here, not just with the weekly battle content, but also some formatting and design elements to help make my writing stand out. This looks very nicely put together!
Me encantan tus publicaciones, te esmeras en ponerlo fácil 😅
@tipu curate 6
Upvoted 👌 (Mana: 0/55) Liquid rewards.