The importance of putting the rules in your favor together with your summoner [EN-ES]
Cover created in Canva

Ya hace varios meses que no publicaba en mi blog una estrategia de juego, sin embargo, recientemente buscando cumplir con mi misión diaria, he realizado una batalla que vale la pena compartir con ustedes, ya que, utilizando el invocador adecuado en conjunto con las reglas adecuadas, pude obtener una muy buena victoria contra un muy poderoso equipo con poder magico del “Splinter de Agua”, el cual muchas veces es algo complicado de derrotar, puesto que sus ataques van directo a los puntos de vida.
En tal sentido y basándome en lo anterior, en esta oportunidad explicare en detalle cómo fue mi batalla y que fue lo que pense para poder amar esta formación, teniendo una desventaja importante, ya que, debido a las reglas de batalla, no podría utilizar mis cartas más fuertes del “Splinter de Agua”, ya que muchas de ellas se enfocan en atacar “Cuerpo a Cuerpo”, así que solo me quedaba la opción de atacar a distancia.
Para saber más sobre esta estrategia, quédate hasta el final de este post…

Las reglas de la batalla y la cantidad de mana

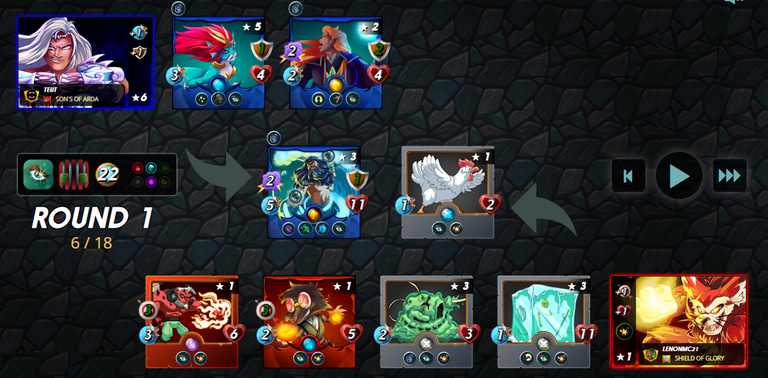
Primero tengo que resaltar las reglas de batalla que me tocaron y la cantidad de mana para esta batalla, puesto que, en base a estas, se determina la estrategia y la formación que se utilizara en la en la misma, adicional a esto, debemos observar que tipo de alineación ha utilizado nuestro oponente en las últimas batallas, con el fin de deducir que mazos tiene y cual es la probabilidad de que utilice uno u otro para nosotros actuar en consecuencia. Esto último, no lo podre resaltar en el post, ya que por obvias razones no pude realizar captura de pantalla de esto, es muy complicado, pero, lo que sí puedo analizar como ya comenté, son las reglas, así que, a continuación, las reglas de la batalla:
 | Esta regla es muy sencilla de deducir, solo se trata de que todos los monstruos en ambos lados del campo de batalla, obtienen la habilidad llamada “Opportunity”, la cual, les brinda a todas las cartas en el campo la oportunidad de atacar a la carta más débil del oponente basándose en cuál de estas tiene la menor cantidad de puntos vitales, nada muy complicado, aunque puede que sea al principio algo difícil de manejar. |
 | Con esta regla es que comienza lo complicado de la batalla y de las decisiones que debemos tomar para idear una formación ganadora, para entender el contexto, esta regla lo que causa es que, todas las cartas que poseen un ataque del tipo “Cuerpo a Cuerpo”, no se pueden utilizar en la batalla, lo que reduce nuestras opciones a solo utilizar cartas con ataques mágicos o de rango y en su defecto cartas que no posean ningun tipo de ataque, haciendo un poco más complicado nuestro proceder. |
 | Esta es otra constante importante a tomar en cuenta en una batalla, ya que, dependiendo de la cantidad de mana disponible que tengamos, podremos usar una u otras cartas que nos puedan ayudar en la misma, en este especifico caso, contaba con una cantidad de mana algo reducida, siendo la misma de tan solo “22 puntos”, lo que limita el uso de algunas de mis mejores cartas para luchar, tomando en cuenta que, algunas de ellas sobrepasan los 6 puntos de mana, dejándome casí sin opciones. |
La clave de mi alineación
La clave de mi estrategia y formación se redujo a un par de cartas que lograron neutralizar los poderosos ataques que mi oponente coloco con su “Splinter de Agua” liderados por su invocador “Kelya Frendul”. Esta sencilla pero muy efectiva formación, me brindo el tiempo suficiente para poder obtener la victoria en base a la resistencia y a la ofensiva dada por mi invocador y por mi tanque elegido para esta batalla. En tal sentido, las cartas que me ayudaron a obtener tan importante victoria, son las siguientes:
Yodin Zaku: Debo resaltar que, el invocador que elegí para esta batalla no pudo ser mejor, puesto que mi objetivo era obtener una ofensiva que me permitiera acabar rápidamente con las cartas de mi oponente, mientras mi tanque lograba resistir en la primera posición los ataques mágicos propinados por mi adversario. Así que, sin lugar a dudas mi “Yodin logro hacer una gran diferencia en la ofensiva de esta batalla inclusive utilizando cartas con muy bajo mana.
Gelatinous Cube: En muchas de mis publicaciones he resaltado lo poderosa e increíble que es esta carta del tipo común, la cual me ha dado muchísimas victorias en mi camino por “Splinterlands” desde que la poseo claro está, teniendo en cuenta esto, en esta ocasión no fue diferente y mi “Gelatinous Cube” pudo hacer la diferencia entre mi oponente y yo, ya que, pudo resistir facilmente todos los ataques de mi adversario, mientras mi línea trasera cumplía su objetico de ataque.
Mi equipo
Ahora que, logre resaltar las 2 cartas decisivas que lograron hacer la diferencia en esta batalla, es el momento de resaltar a toda mi formación y su desempeño en cada una de sus posiciones:
 | Yodin ZakuMi invocador elegido para esta complicada batalla, donde su funcion era muy sencilla, brindarme la ofensiva que necesitaba para poder acabar con las cartas de mi oponente de la forma más rapida posible, con el unico fin de ayudar a mi tanque “Gelatinous Cube” a resistir los ataques de mi adversario en el menor tiempo posible. | |
Furious ChickenSe preguntarán porque coloque esta carta en la primera posición, pues la respuesta es muy sencilla, lo unico que pense fue en otorgarle puntos adicionales de vida a mi “Gelatinous Cube”, así que, con la derrota de mi “Chicken”, mi poderosos y resistente “Gelatinous Cube” ganaría +1 punto adicional de vida, gracias a su poderosa habilidad llamada “Scavenger”. |  | |
 | Gelatinous CubeUno de los pilares de mi estrategia y la carta defensiva más importante de mi formación, ya que su objetivo como ya lo he comentado en reiteradas ocasiones, era resistir el mayor tiempo posible en la primera posición, mientras mi equipo en la línea trasera se encargaba rápidamente de acabar con las cartas de mi oponente, su habilidad de “Scavenger” en conjunto con sus muy buenos puntos de vida, lo convierten en el candidato perfecto para utilizar en este tipo de reglas. | |
Creeping OozePor mi simple que parezca, esta carta siempre causa un gran impacto en cualquier estrategia de batalla y aunque sea presa fácil en muchos de los casos, con su habilidad “Slow”, la cual, disminuye en -1 punto la velocidad de todos los monstruos de mi adversario, puede hacer la diferencia entre ganar o perder, así este en el campo durante una sola ronda completa, ademas, tal cual como mi “Furious Chicken” y mi “Gelatinous Cube”, su segunda función era brindar el suficiente tiempo a mis cartas en la línea trasera para que atacaran. | 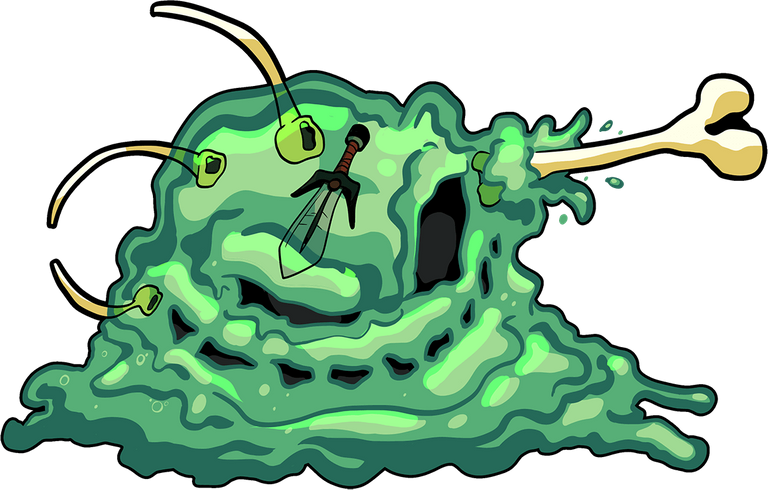 | |
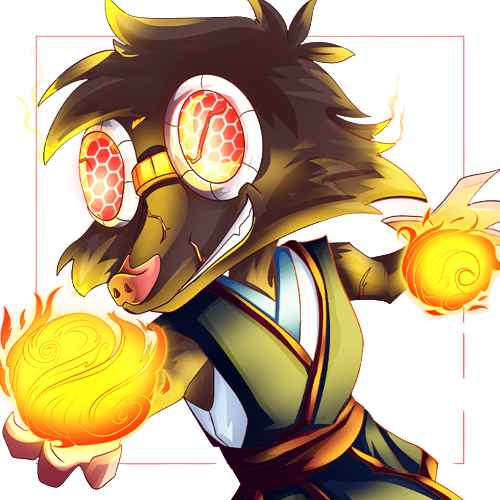 | Scavo FireboltEsta carta a simple vista puede parecer muy sencilla, sin embargo, cuando la utilizas en conjunto con el “Yodin Zaku”, puede convertirse en una pesadilla, puesto que, en tan solo su nivel 1, posee un ataque de rango de +2 puntos y si tomamos en cuenta que una de las habilidades del “Yodin Zaku” es aumentar en +1 punto el ataque de mis cartas a distancia y brindar adicionalmente la habilidad de “Blast”, lo convierte en el arma ofensiva perfecta para este tipo de batallas. | |
Fire DemonEsta es otra carta realmente poderosa y antigua, solo la tengo en nivel 1, pero, con este nivel fue más que suficiente para poder derrotar a las poderosas cartas de mi oponente, ya que, igual que mi “Scavo Firebolt”, en tan solo su nivel 1 posee +2 puntos de ataque de rango y contando con todos los beneficios brindados por mi invocador “Yodin Zaku”, hace que esta sea la dupla victoriosa en mi línea trasera que derrotaría a mi oponente con cartas en un nivel superior a las mías. | 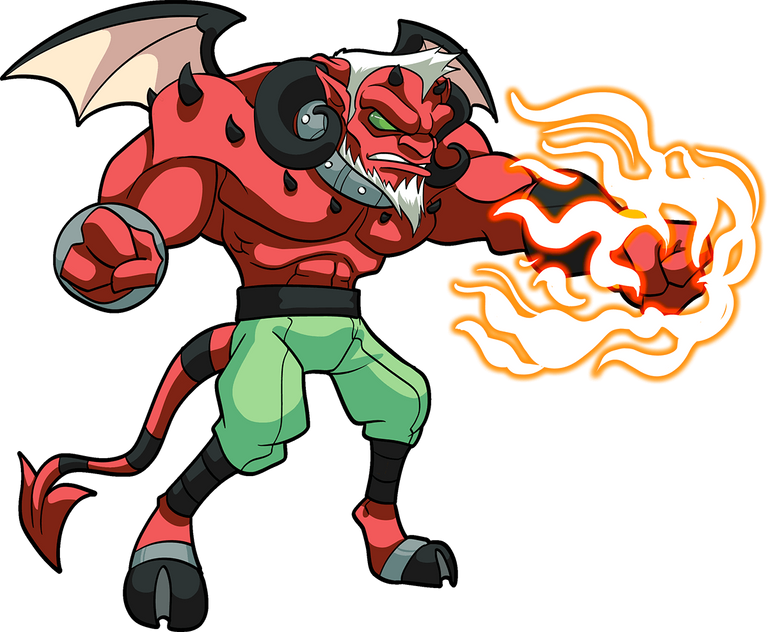 |
Ultimas consideraciones a tomar en cuenta
Este tipo de batallas pueden presentarse muy a menudo en nuestras misiones diarias que, recuerden que pasaran a ser a partir de la siguiente temporada “Enfoques diarios”, ademas, deben tener en cuenta que esta especifica formación, así como las que he publicado anteriormente en mi blog, dejaran de funcionar una vez el formato “Moderno/Salvaje” entre en vigencia, una vez esto suceda, comenzare a publicar formaciones y estrategias de batalla para ambos formatos, aunque, puedo proponerme hacerlo antes de que salga la misma para que estén preparados.
Con respecto a la estrategia como tal, espero que puedan sacarle el provecho y que puedan replicarla para que las probabilidades de obtener una victoria en contra de sus oponentes se incrementen, sin embargo, también debo aclarar que, no todo es 100% infalible, puesto que, nuestro oponente también puede estar preparado para este tipo de situaciones, lo importante es que, antes de presentar a nuestra alineación en una batalla, evaluemos todas las posibilidades que tenemos para combatir, para esto, solo deben tener en cuenta 3 cosas:
Reglas de batalla: A partir de estas comenzaran a pensar que tipo de cartas pueden jugar para aprovechar las reglas a su favor.
El Costo de Mana Esta es una constante importante, puesto que, si conoces tu mazo, rápidamente puedes buscar cartas que se adecuen a la cantidad de mana establecida para esa batalla.
Las alineaciones del oponente: No porque que lo esté nombrando de ultimo, quiere decir que no sea importante, siempre debemos observar los últimos equipos que ha utilizado nuestro adversario para así hacernos una idea de lo que podría utilizar para la siguiente batalla y de esa manera contrarrestar su ataque y estrategia.
Espero que estas recomendaciones les sirvan y puedan aprovecharlas para mejorar, recordando que, mi intención es ayudar a esos nuevos usuarios que se están uniendo al juego para que comprendan el modelo de juego y todos sus aspectos, desde su economía, hasta su jugabilidad.
Sin más por el momento, nos vemos en la próxima guerreros.

It has been several months since I last published in my blog a game strategy, however, recently, looking to fulfill my daily mission, I have done a battle that is worth sharing with you, since, using the right summoner in conjunction with the right rules, I could get a very good victory against a very powerful team with magic power of the "Splinter of Water", which is often somewhat complicated to defeat, since their attacks go straight to the life points.
In this sense and based on the above, this time I will explain in detail how was my battle and what I thought to be able to love this formation, having an important disadvantage, since, due to the rules of battle, I could not use my strongest cards of the "Splinter of Water", since many of them focus on attacking "Melee", so I only had the option of attacking from a distance.
To know more about this strategy, stay until the end of this post....
Battle rules and mana quantity
First I have to highlight the battle rules that I played and the amount of mana for this battle, since, based on these, we determine the strategy and the formation to be used in it, in addition to this, we must observe what type of alignment has used our opponent in the last battles, in order to deduce what decks he has and what is the probability of using one or the other for us to act accordingly. The latter, I can not highlight it in the post, since for obvious reasons I could not take a screenshot of this, it is very complicated, but, what I can analyze as I said, are the rules, so, here are the rules of the battle:.
| This rule is very simple to deduce, it just means that all the monsters on both sides of the battlefield get the ability called "Opportunity", which gives all the cards on the field the opportunity to attack the opponent's weakest card based on which of them has the least amount of vital points, nothing too complicated, although it may be a little difficult to handle at the beginning. |
| With this rule is that begins the complicated of the battle and the decisions we must make to devise a winning formation, to understand the context, this rule causes that all cards that have an attack type "Melee", can not be used in battle, which reduces our options to only use cards with magical attacks or range and otherwise cards that do not have any type of attack, making it a little more complicated to proceed. |
| This is another important constant to take into account in a battle, since, depending on the amount of available mana we have, we can use one or other cards that can help us in the same, in this specific case, I had a somewhat reduced amount of mana, being the same of only "22 points", which limits the use of some of my best cards to fight, taking into account that some of them exceed 6 points of mana, leaving me almost without options. |
The key to my lineup
The key to my strategy and formation came down to a couple of cards that managed to neutralize the powerful attacks that my opponent placed with his "Water Splinter" led by his summoner "Kelya Frendul". This simple but very effective formation, gave me enough time to obtain the victory based on the resistance and the offensive given by my summoner and my chosen tank for this battle. In this sense, the cards that helped me obtain such an important victory are the following:
Yodin Zaku: I must emphasize that the summoner I chose for this battle could not have been better, since my goal was to obtain an offensive that would allow me to quickly finish off my opponent's cards, while my tank was able to resist in the first position the magical attacks of my opponent. So, without a doubt my "Yodin" managed to make a big difference in the offensive of this battle even using cards with very low mana.
Gelatinous Cube: In many of my publications I have highlighted how powerful and incredible is this card of the common type, which has given me many victories in my way through "Splinterlands" since I own it of course, taking into account this, this time was no different and my "Gelatinous Cube" could make the difference between me and my opponent, since it could easily resist all the attacks of my opponent, while my back line fulfilled its objective of attack.
My equipment
Now that I have highlighted the 2 decisive cards that made the difference in this battle, it is time to highlight my entire line-up and their performance in each of their positions.
| Yodin ZakuMy summoner was chosen for this complicated battle, where its function was very simple, to give me the offensive I needed to finish with my opponent's cards as quickly as possible, with the sole purpose of helping my tank "Gelatinous Cube" to resist the attacks of my opponent in the shortest possible time. | |
Furious ChickenYou may wonder why I put this card in the first position, because the answer is very simple, the only thing I thought was to give additional life points to my "Gelatinous Cube", so, with the defeat of my "Chicken", my powerful and resistant "Gelatinous Cube" would gain +1 additional life point, thanks to its powerful ability called "Scavenger". | | |
| Gelatinous CubeOne of the pillars of my strategy and the most important defensive card of my formation, since its objective, as I have already mentioned on several occasions, was to resist as long as possible in the first position, while my team in the back line was quickly in charge of finishing with my opponent's cards, its "Scavenger" ability together with its very good life points, make it the perfect candidate to use in this type of rules. | |
Creeping OozeAs simple as it may seem, this card always makes a big impact on any battle strategy and although it is easy prey in many cases, with its "Slow" ability, which slows down all of my opponent's monsters by -1 point, it can make the difference between winning and losing, even if it is on the field for a single full round, plus, just like my "Furious Chicken" and my "Gelatinous Cube", its second function was to provide enough time for my cards in the back line to attack. | | |
| Scavo FireboltThis card at first glance may seem very simple, however, when used in conjunction with the "Yodin Zaku", it can become a nightmare, since, at only level 1, it has a ranged attack of +2 points and if we take into account that one of the abilities of the "Yodin Zaku" is to increase by +1 point the attack of my ranged cards and additionally provide the ability to "Blast", it becomes the perfect offensive weapon for this type of battles. | |
Fire DemonThis is another really powerful and old card, I only have it at level 1, but, with this level it was more than enough to be able to defeat the powerful cards of my opponent, since, just like my "Scavo Firebolt", in only its level 1 it has +2 rank attack points and counting with all the benefits provided by my summoner "Yodin Zaku", makes this the victorious duo in my back line that would defeat my opponent with cards at a higher level than mine. | |
Final considerations to be taken into account
This type of battles can occur very often in our daily missions that, remember that they will become from next season "Daily Approaches", also, you must keep in mind that this specific formation, as well as those that I have previously published in my blog, will stop working once the "Modern/Wild" format comes into effect, once this happens, I will begin to publish formations and battle strategies for both formats, although, I can propose to do it before the same comes out so that you are prepared.
Regarding the strategy as such, I hope you can take advantage of it and that you can replicate it so that the chances of getting a victory against your opponents increase, however, I must also clarify that not everything is 100% infallible, since our opponent can also be prepared for such situations, the important thing is that, before presenting our lineup in a battle, we evaluate all the possibilities we have to fight, for this, you should only take into account 3 things:
Battle rules: From these you will start to think about what kind of cards you can play to take advantage of the rules in your favor.
The Cost of Mana This is an important constant, since, if you know your deck, you can quickly look for cards that fit the amount of mana set for that battle.
The opponent's lineups: Just because you are naming it last, does not mean that it is not important, we must always observe the last teams that our opponent has used in order to get an idea of what he could use for the next battle and thus counter their attack and strategy.
I hope these recommendations will help you and you can take advantage of them to improve, remembering that my intention is to help those new users who are joining the game to understand the game model and all its aspects, from its economy to its gameplay.
Without further ado, see you next time warriors.


If you are new, I invite you to register in this LINK
Proud Member of "Shield of Glory".
Join the Discord Official community server in English
https://twitter.com/leninmiguel21/status/1530127591797145603
The rewards earned on this comment will go directly to the people(@lenonmc21) sharing the post on Twitter as long as they are registered with @poshtoken. Sign up at https://hiveposh.com.
buena batalla excelente eleccion con yodin con el oportunista siempre buscara al mas debil y con la explosion afectaba a tres cartas a la vez, me gusto la estrategia.