Edith's Miracle - Going the Distance - Battle Mage Secrets / MIlagre de Edith [ENG-PT]

Banner made by me, using Canva
All the images of the banner are from @Splinterlands
Clique aqui para ler o post em português!
English
Hello everyone!
In the Battle Mage Secrets of this week, we have Going the Distance as the ruleset to be shown.
With this rule, only monsters with Range attack can be used in the battle.

As simple as it seems, there are still a lot strategies we can make.
Starting with summoner, we can choose those increase our team's attack, if we want to be more offensive.


And if we want the opposite, more defensive, we can put one that reduce the attack of the opponent monsters.


Another good idea is looking for summoners that provides abilities like Flying or Blind. Both gives a chance to every attack of your opponent miss.

There is also the possibility to use summoners that give armor to your team, protecting them from some attacks.


And last but not least(my favorite), is the use of summoners that provides Return Fire ability. It causes half of the damage applied by Range attacks reflected back to the monster that attacked.

Some of the abilities mentioned above, are present in monsters that can be used instead of the summoners, so you can make a lot of combos with positive and negative effects.
For example, instead of using a summoner that reduce the attack of the opponent, we can use one that gives Return Fire, combined with a monster with Headwinds ability, which reduces the attack of all the opponent Ranges.

Or simply using a summoner that reduce the attack with a monster that do the same, combining a -2 attack to their monsters.
For the monster choices, starting with the tanker, the ideal is to put some monster that has any other type of attack besides Range, it can be Meele or Magic. This way, it can cause some damage to the opponent, since Ranges cannot attack from the first position.


Unless the monster has the Close Range ability, which allows them to attack from that position.


As for the back line, you can put monsters that directly attack the tanker. It's also a good idea looking for the few options that have support abilities, such Tank Heal and Repair.


Or you can place a lot of monsters which have Snipe ability to eliminate the enemy backline first. In this case, there is the possibility of a monter with Triage appears, another very interesting support ability.


Now you know what you need to play against this ruleset, so let's show a practical example.
I rented a small amount, so I didn't have too many options and needed to build a team with what I had.
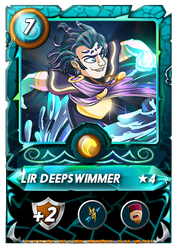
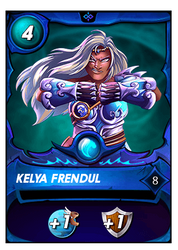
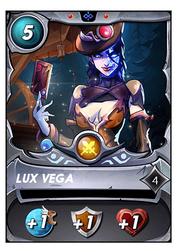
So I decided to put two monsters with a considerable amount of life to hold off the attacks, 2 Snipes to eliminate the backlines, and finally the main card, my Gladiator Edith Emberstar.

Because she has a high attack, I thought she could eliminate the enemy tanker without difficulties, since one of the rules was Unprotected, which remove the armor of all the monsters.

My opponent used Conqueror Jacek as summoner, which gives Scattershot ability, so all the attacks would be random.
The first attacks were directed at my Edith and I felt scared with this. She eliminated his frontline monster and activated her Bloodlust, while my Snipes eliminated another one.

At this point, I thought it was the end of me, even her eliminated another monster and activated Bloodlust a second time. One more attack to the frontline monster and it was the end for me in the battle.

But the opponent's monster with the greatest speed attacked Edith, and left the one in front with 1 life. Soon after it was her turn to attack, eliminating the third monster.
With this, she became the first to attack, because when there is equality in speed between two monsters, the one with the higher rarity attacks first.
And then, the miracle happened...

Click here to watch the full battle!
In this post, you have learned how to play correctly with the Going the Distance ruleset. It seems simple, but there are many details to analyze and build the best team possible.
You also saw how the power of a Gladiator on the field can change the course of the game, because as its Bloodlust is activated, the priority of attacks can change, making a match that seems lost turn completely in your favor.
If you are reading this, thank you very much! And see you soon!
All the images are from @Splinterlands
Divider By: @freeztag
Are you not playing Splinterlands yet? Click HERE and play with me!

Português
Olá a todos!
No Battle Mage Secrets dessa semana, temos Going The Distance como regra de batalha a ser apresentada.
Essa regra faz com que apenas monstros que possuam ataque tipo Range possam ser utilizados.
Por mais simples que pareça essa regra, ainda assim há muitas estratégias que podemos fazer.
Começando pelo invocador, podemos escolher os que aumentam o ataque de nosso time, caso desejemos ser mais ofensivos.
E se quisermos ser defensivos, podemos escolher o inverso, que reduzam o ataque do nosso oponente.
Outra boa opção é procurar por invocadores que forneçam a habilidade de Flying ou Blind. Ambas lhe dão a probabilidade do seu oponente errar qualquer um de seus ataques.
Há também a possibilidade de usar invocadores que dão armadura ao seu time, protegendo eles de alguns ataques.
E por fim, mas não menos importante(inclusive a minha preferida), é o uso de invocadores que fornecem a habilidade Return Fire. Ela faz com que metade dos danos causados por range seja refletido de volta ao monstro que atacou.
Algumas das habilidade citadas acima, estão presentes em alguns monstros que podem ser usados ao invés dos invocadores, assim podendo formar diversos combos com efeitos tanto positivos, quanto negativos.
Por exemplo, ao invés de usar um invocador que reduza o ataque do oponente, podemos optar por um que possua a habilidade Return Fire, que reflete parte do dano aplicado a um monstro, junto com um monstro que possua Headwinds, que reduz o ataque Range de todos os monstros do oponente.
Ou simplesmente podemos usar tanto um invocador que reduza o ataque, quanto um monstro que faça o mesmo, reduzindo em 2 o ataque deles.
Indo para a escolha dos monstros, começando com o tanker, o ideal é colocar algum monstro que possua qualquer outro tipo de ataque além do Range, seja ele Meele ou Mágico. Assim, ele poderá causar algum dano ao oponente, já que Ranges não conseguem atacar da primeira posição.
A não ser que o monstro possua a habilidade Close Range, que lhes permitem atacar dessa posição, independente do tipo de ataque que ele possua.
Quanto a linha de trás, você pode optar por colocar monstros que ataquem diretamente o tanker. Também vale a pena procurar pelas poucas opções que possuem habilidades de suporte, como Tank Heal e Repair.
Ou você pode colocar diversos monstros que possuam a habilidade de Snipe, para eliminar primeiramente a linha de trás inimiga. Nesse caso, há a possibilidade dele aparecer com um monstro com Triage, outra habilidade de suporte muito interessante.
Agora que você sabe do que precisa para jogar com esse tipo de regra de batalha, vamos para um exemplo prático.
Eu estava com poucas opções de cartas para jogar, pois havia alugado uma pequena quantidade, então tive que me virar com o que eu tinha.
Decidi arriscar colocando dois monstros com uma quantidade de vida considerável para segurar os ataques, 2 Snipes para eliminar a linha de trás, e por final a carta principal, minha Gladiadora Edith Emberstar.
Como ela possui um ataque alto, achei que ela pudesse dar conta de eliminar o tanker inimigo sem grandes dificuldades, já que uma das regras era a Unprotected, que impede que os monstros em campo tenham armaduras.
Meu oponente usou o Conqueror Jacek como invocador, o que faria com que todos os ataques de seu time fossem para qualquer monstro meu aleatoriamente.
Já no início tomei um susto, pois os primeiros ataques foram direcionados até a minha Edith. Ela eliminou o monstro da linha de frente dele e ativou seu Bloodlust, enquanto meus Snipes eliminam outro.
Neste momento, achei que fosse o meu fim, mesmo eliminando mais um monstro e ativando o Bloodlust uma segunda vez. Bastava um ataque no monstro da frente apenas, para minha derrota ser decretada.
Mas o monstro do oponente com maior velocidade atacou a Edith, e deixou o da frente com 1 de vida. Logo após era a vez dela atacar, eliminado o terceiro.
Com isso, ela se tornou a primeira a atacar, pois quando há igualdade em velocidade entre dois monstros, o que possuir a maior raridade ataca primeiro.
E então, o milagre aconteceu...
Clique aqui para ver a batalha completa!
Neste post, você aprendeu como jogar corretamente com a regra de batalha Going the Distance. Apesar de parecer simples, há muitos detalhes a serem analisadas para que você possa criar o melhor time possível para buscar a vitória.
Você também viu como o poder de um Gladiador em campo pode mudar o rumo do jogo, pois conforme seu Bloodlust é ativado, a prioridade nos ataques mudam, fazendo com que uma partida que pareça perdida vire totalmente a seu favor.
Se você chegou até aqui, meu muito obrigado pela leitura! E até mais!
Todas as imagens são do: @Splinterlands
Divisor do: @freeztag
Não joga Splinterlands ainda? Clique AQUI e venha jogar comigo!

Obrigado por promover a comunidade Hive-BR em suas postagens.
Vamos seguir fortalecendo a Hive
Your post was manually curated by @michupa.
Delegate your HP to the hive-br.voter account and earn Hive daily!
🔹 Follow our Curation Trail and don't miss voting! 🔹
Obrigado!
Muito bom
!DHEDGE
Valeu!
This post has been selected for upvote from our token accounts by @crazyphantombr! Based on your tags you received upvotes from the following account(s):
- @dhedge.bonus
- @dhedge.bee
- @dhedge.pob
- @dhedge.cent
- @dhedge.neoxag
- @dhedge.waiv
- @dhedge.oneup
@crazyphantombr has 4 vote calls left today.
Hold 10 or more DHEDGE to unlock daily dividends and gain access to upvote rounds on your posts from @dhedge. Hold 100 or more DHEDGE to unlock thread votes. Calling in our curation accounts currently has a minimum holding requirement of 150 DHEDGE. The more DHEDGE you hold, the higher upvote you can call in. Buy DHEDGE on Tribaldex or earn some daily by joining one of our many delegation pools at app.dhedge.cc.
Batalha incrível man, teve muita sorte também! Parabéns pelo post, excelente qualidade!
Valeu! Dei sorte no final mesmo kkkk
!1UP Good work!
!PGM !PIZZA
Valeu!
You have received a 1UP from @underlock!
@monster-curator, @oneup-curator, @bee-curator, @pimp-curator, @thg-curator, @vyb-curator, @pob-curator, @neoxag-curator, @cent-curator
And they will bring !PIZZA 🍕.
Learn more about our delegation service to earn daily rewards. Join the Cartel on Discord.
$PIZZA slices delivered:
@curation-cartel(2/20) tipped @lincemarrom
Do you know you can win a Chaos Legion pack and many other things just by following some simple steps ?? Check out our Latest Daily Showcase and Participate our latest Giveaway. Thanks
Thank you!
Thanks for sharing! - @underlock
