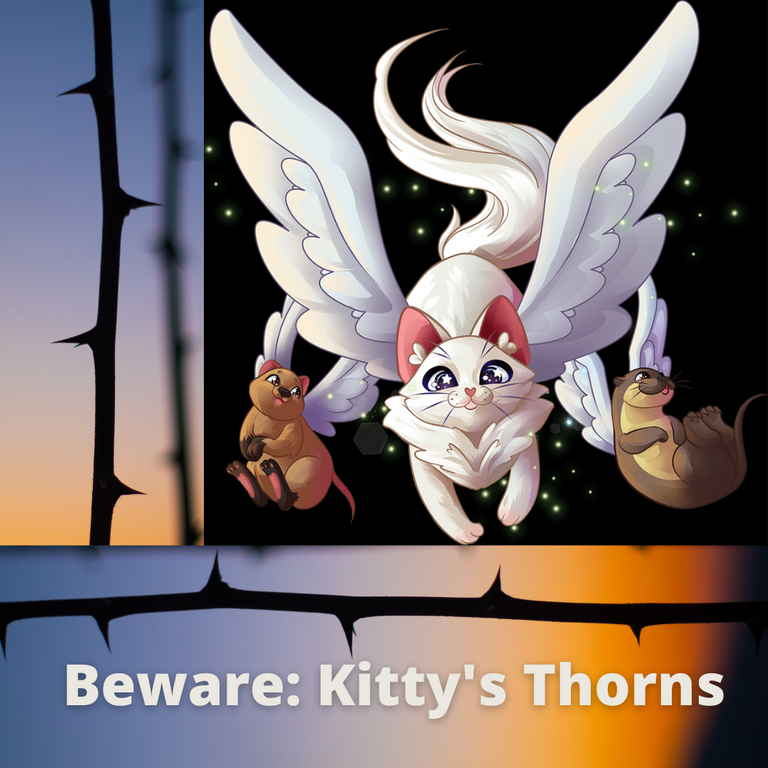
Strategy Chat - Beware: Kitty's Thorns.
You know, when I think of dragons - I think of beasts with horns and with a dangerous smirk covering their faces - ready to chomp and kill. What I don't think of is a cute little kitty cat! But, as it turns out, that's my favourite dragon in the Splinterlands world. You see, she may not look like the beast - but she'll certainly make a meal out of any opponent.
This week, I paired her with the most used dragon in the splinter, the thorny Djinn Chawala. Together, they're a formidable pair - and, as you'll see as we develop into this blog - I found a way to make them even better - the INSPIRE ability.
To do this, let's start with Byzantine Kitty:
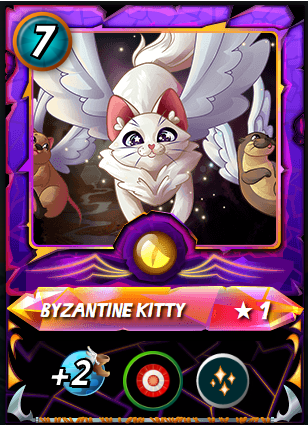
On it's surface, you'd see this card and your jaw should drop. It is an absolute battle changer and there are a few things about this guy that I love.
This guy gives every one on your team +2 boots. That's key because it means you may well get all the early hits in, and if that's enough to drop your opponent's tank or back-line supports - you'll be ahead straight away and it will be a difficult hole for your opponent to come back from. Also, it is likely to lead to extra dodge's each battle too - and we all know, if we frustrate our opponent with dodging their attacks, that can also contribute to the shift towards us in terms of claiming victory.
Did you notice this guy has true strike? What that means is, if you play arrows, those arrows can't miss. It's a guaranteed bullseye! Over and over and over again - literally, you can't miss. That's absolutely key to staying on target for a win, pun intended.
Then there's HEAL. Fancy having your tank's health topped up at the end of every round? Then this is the guy to do it - we all know how powerful healing is; in fact, it's game changing - so by playing Kitty, you're likely to have the ability to heal yourself into a match winning position, and if you combine it with other healers in the game, it's likely your opponent will not have the grunt to come anywhere near to dropping your tank. And if he does, you've probably well and truly started smashing through his attack.
Let's face it, this guy is amazing! - and, even though his mana cost is quite high, the advantage you gain by having him on the field will easily offset any mana limitations that you feel you might come across.
Now, the truth is - this card is expensive to buy outright. You'd need over $350 USD. That's expensive in anyone's language, but, as a rental - it's cheap as chips. I usually rent this guy level one, which allows me to play him in Silver league with bronze limit caps. Ideally I'd like to have him La little bit higher to get maximum return from him.
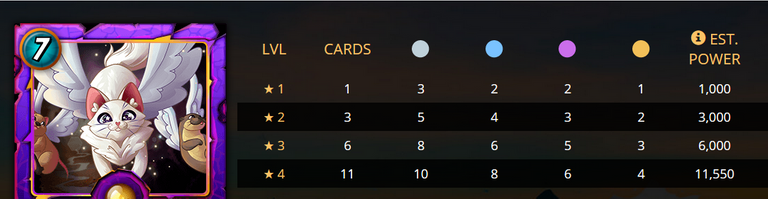
Now, on any given day (perhaps not the end of season) you can pick up a Level 1 Kitty for around 7.5 DEC per day. I actually rented mine this time around for 6.9 per day! But, it did make my wonder, what would a Level 2 set me back?
And the answer - too much. At 300 DEC a day, this card is certainly better than a Level 1, but it's just beyond my budget to stretch that far. I can see value in it though-

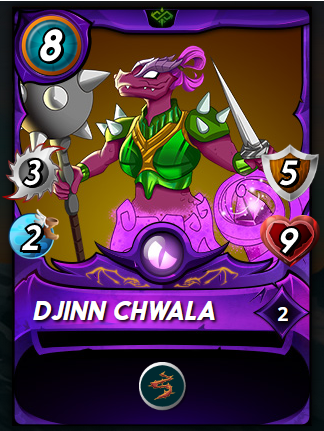
The next consideration is how to make this Kitty even more powerful, and the answer to that is Djinn Chwala. My Djinn Chwala is actually Level 5, I purchased a heap of these cards for cheap card power, but I'll only explore him as Level 2, given that is the cap that my Level 1 Kitty would place on him. As you can see, he's a super tank with 3 melee, 5 armour and 9 health. He's ready for battle, but what makes him even more difficult for an opponent to face is his THORNS. In a nutshell, I want my thorns to hurt my opponent's tank, along with my melee - to really do some huge damage - even without the rest of my team taken into account.
It brings me to my final piece of the strategic puzzle. Getting the ruleset right:

This ruleset is very interesting for a KITTY battle because it has high mana limits. At 56 mana, the 7 mana for a summoner is easily covered as the truth is, I probably won't ever be playing that much mana in a battle. The other part of this ruleset which is key is that magic will hit armour before health - in essence, making magic far less dangerous. For me, this will be the key to this battle as my Djinn Chwala is a beast with his armour - and when he is played with River Hellondale to allow him to be revived - he'll be even stronger with more longevity!
My Backrow:

Looking at my backrow, you'll note that I'm playing a mix of hard-hitting and strategy.
There are a number of parts of this line that I like.
The first is The Flying Squid
Like the other cards, his speed will be raised up to +5. This means he will be getting in the early attacks. His Melee attack is strong at +4 and he is a destructive off-tank.
The Squid has the REACH ability, this means that he is able to sit in the off-tank position, with his high health to protect him from an early death. Behind Djinn Chwala, he'll combine to be pure damage.
The 7 Mana River Hellondale is a key part of this line up - yes, her +2 magic is a handy attacking feature, but I actually like her because of her Resurrect ability, which will revive my Djinn Chwala and the magic hitting armour ruleset will make him all the most difficult to get down.
In the fourth position I have the Deeplurker, who I pair with the Feasting Seawood. I quite deliberately took this pair together because they both have the opportunity skill. The theory is, if one hits armour, the next will do the destroying hit - and by taking out his low health guys, they're usually some of the most deadly back-liner supports.
My final position allows me the opportunity to play the Demented Shark - I choose him not for his attacking ability, but the INSPIRE skill he brings to the battle. He gives my other four melee attackers and extra piece of damage - and that's not a bad thing to have! His 1 armour and high health will also allow him to survive a number of SNEAK attacks - giving me some longevity that others in my team might not have.
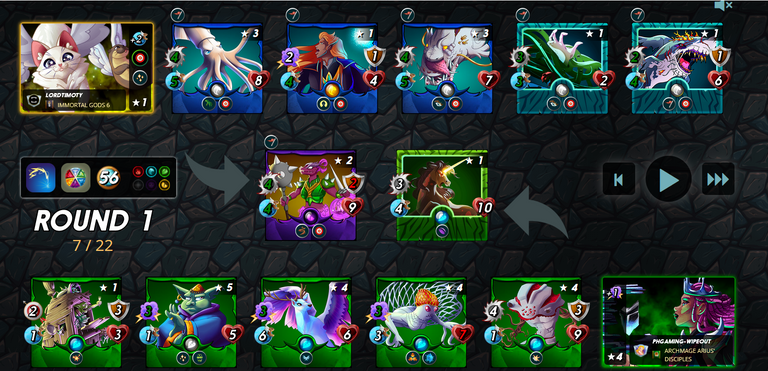
This is how the battle gets underway. Right from the start, I was actually feeling rather confident - figuring my opponent's magic attack was weakened with the ruleset of magic hits armour first!
Ok, let's have a look at how the battle went, have a look at this video. It's an interesting battle and worth a look:
As you can see, this battle was on from the start. My opponent played a TAUNT card in the middle of his team, this is such a good strategy for him, as it splits my attack. Ideally in any battle, I'd prefer to have one target. This fact alone is going to mean this battle won't be over quickly - and the longer it goes, the more risky for me.
At the end of round 1, you can see, the initial hits have taken a lot of my opponent's health - and I managed to destroy his tank. The battle looks good for me, largely because my Djinn died, and was resurrected by River Hellondale, before Kitty came in with +3 in healing. In short, my team barely took a scratch in that opening exchange.
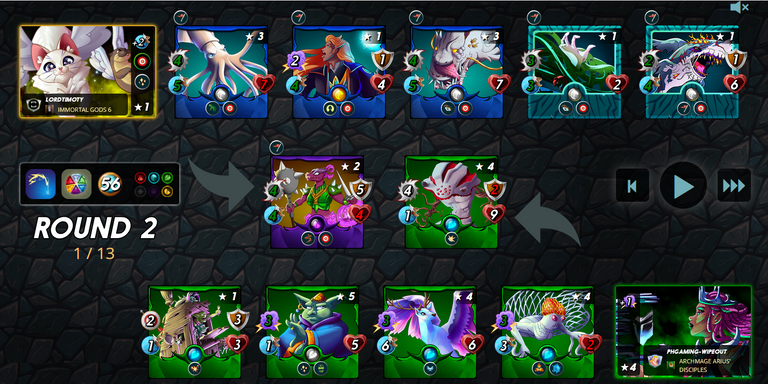
As Round 2 went by, it was actually rather uneventful. I was able to drop his TAUNT beast in the backrow, and take the armour from his BLAST goblin. My Djinn also lost his armour. At this point, Round 3 is set to be the round where the biggest losses occur. Let's have a look:
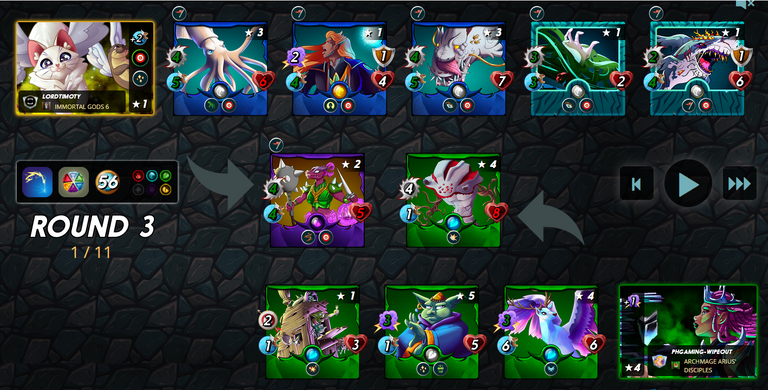
As can be seen, Round 3 was deadly for my opponent, I was able to drop his tank and his goblin. This has left his final two cards in an incredibly exposed position. From here, I know I can't lose and it's just about going through the motions to finish the battle off.
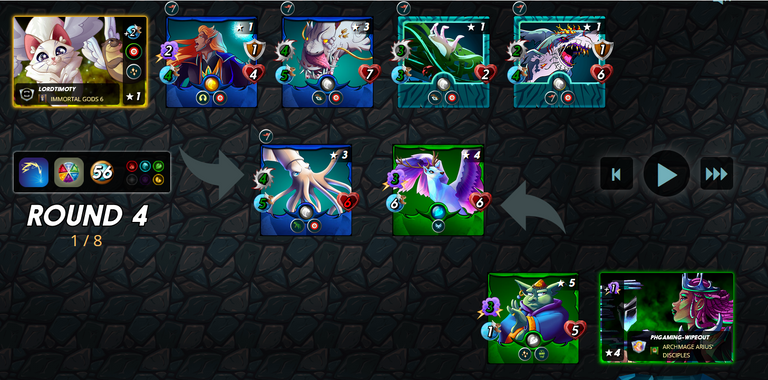
As it turned out, my Squid and Deeplurker killed my opponent's Pyrton, before my River Hellondale and Feasting Seawood took out the Goblin. The match was wrapped up on the final hit of Round 4.
So what's the verdict?
- I don't play DRAGONS often, and that's a shame given their so versatile and have many attacking options. I learned through this battle about the importance of speed to get the upper hand, and that's a significant learning. The other aspect of this battle which was interesting was max health - you see, three times Kitty healed my tank, totaling 9 healing across the battle. All in all, that's like having a second tank out the front!
- My biggest issue with dragons is I need to have a higher level summoner, because the truth is, my water splinter would have allowed me to play much higher level cards with additional skills - My River Hellondale, for instance, should also have given my inspire - but her level was capped and I didn't have access to this skill.
- The plan really needs to be to invest, and I think I found the card. There is a +1 magic dragon summoner that I have my eye on, and, if I can level him up fairly cheaply, he will be a way of gaining access to a versitile 'Alric'.
- Overall, I need more time and more thought in the Dragon splinter, to understand how I can be more dangerous in it.
Thanks for joining me, for another Splinter Chat! This blog was put together as part of Splinterlands' weekly 'Share-Your-Battle' challenge. Have you put yours together yet?
LordTimoty

Don't forget, you can click here and sign up with my affiliate link.
Wow!!my favourite Dragon combination 🥰
I love this combo too; but I feel as I play in the higher leagues, or aim too - the cost of the Level 2 Kitty is going to mean I play this combo less and less.
Thanks for sharing! - @alokkumar121

Kitty is powerful and expensive summoner