Battle Mage Secrets - Target Practice! [PT/EN]
Read this post in English by clicking here
Olá Splinters, bem vindos de volta!
Nossas batalhas sempre serão recheadas de desafios e cabe a cada jogador encontrar as melhores peças para compor um time imbatível! Cada batalha será uma grande oportunidade de testar novas composições e criar boas estratégias para derrotar nossos inimigos, porém algumas regras podem mudar tudo o que conhecemos.
Em variáveis distintas, vai se sair melhor aquele que fizer uma boa leitura sobre as melhores possibilidade e construir um time que possa ter um bom desempenho contra o adversário. Muitas possibilidade estão em nossas mão, basta escolher as certas para conseguir vencer!
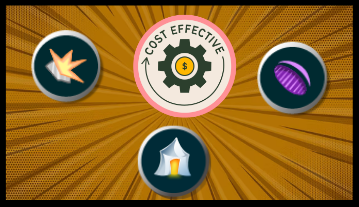
Hoje vamos falar sobre um regra que muda a dinâmica de nossas partidas, principalmente para monstros que não possuem ataque melee. Venha conferir um pouco sobre a regra de batalha Target Practice!

Como mencionado anteriormente, essa regra de batalha tem o poder de mudar a dinâmica em nossas batalhas pois todos os monstros em campo que não possuem ataque melee, terão naturalmente a habilidade Snipe.

| Ataca monstros inimigos com ataque de ranged, Magia ou nenhum ataque que não esteja na primeira posição. |
Dito isso, quando essa regra esta ativa, precisamos escolher bem qual vai ser o monstro que irá ocupar essa posição que vai receber uma boa quantidade de danos. Monstros com Void e Shield serão muito eficazes. Além disso, monstros que possuem a habilidade Triage também irão ser ótimas escolhas, pois poderão restaura a vida desse monstro a cada rodada.
Porém, dentro dessa dinâmica imposta pela regra de batalha, devemos ficar atentos ou mesmo supor que o adversário vai escalar um time para nos surpreender. Ele poderá fazer isso abrindo mão de monstros com ataque mágico ou ranged e escolhendo monstro de ataque melee com habilidade Opportunity e sneak. Isso poderá ser o fim da sua batalha se você apenas se preparou para um tipo de ataque, será surpreendido em pontos vulneráveis.

Além dos cuidados, existe uma estratégia muito utilizada quando essa regra esta ativa, que é utilizar um monstro com a habilidade Martyr em campo para aumentar os status dos monstros adjacentes. Essa é uma estratégia interessante de estar usando sempre que for possível!
Bem, dadas as dicas, é hora do duelo!

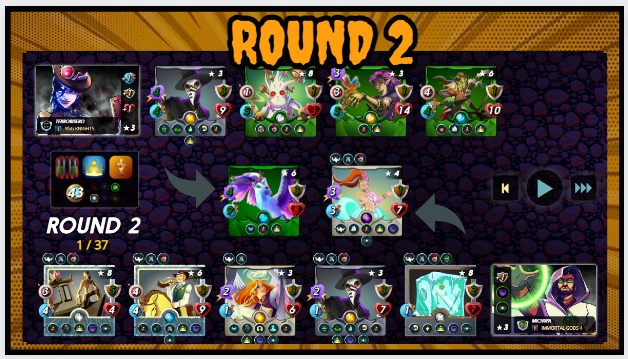
Nessa batalha temos algumas regras vão ser muito impactantes na nossa forma de jogar. Primeiro é que monstro de ataque melee não serão utilizados, isso obriga ao time atacar o segundo monstro na linha de trás pois a regra Target Practice também esta ativa. Para finalizar, os monstros vão morrer duas vezes na mesma batalha! Uma boa quantidade de mana esta disponível e é hora de ver quais summoners foram para essa batalha!
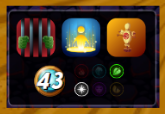
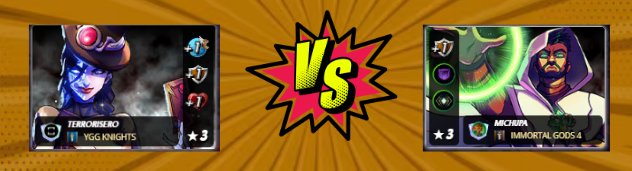
Summoners
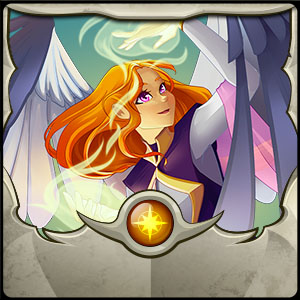
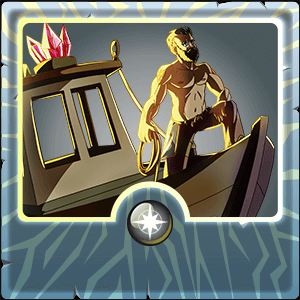
Meu adversário escolhe ter mais velocidade e escudos em seus monstros. Eu escolho um summoner que vai me proteger atrás dos escudos independente de quais tipos de ataque serão usados, isso me adiciona uma segurança.
Meu time:
| Monstro | Objetivo |
|---|---|
 | Meu primeiro tank foi escolhido para dar uma ajuda na linha de trás restaurando a vida do monstro mais afetado. Além disso, é um monstro que possui um bom ataque e quantidade de vida. |
 | O segundo monstro é o que iria sofrer mais danos nessa partida, então, optei por um que possuísse bastante vida. |
 | Um monstro para causar danos com envenenamento e também para impedir que o monstro pudesse ser curado. |
 | Esse monstro foi importante na restauração dos escudos e também para dar mais uma chance ao primeiro monstro qu for morto do meu lado do campo. |
 | Um monstro que possui um poderoso ataque e adiciona mais escudos ao time. |
 | Outro monstro com uma boa quantidade de ataque e que poderia adicionar mais um pouco de suporte ao time. |
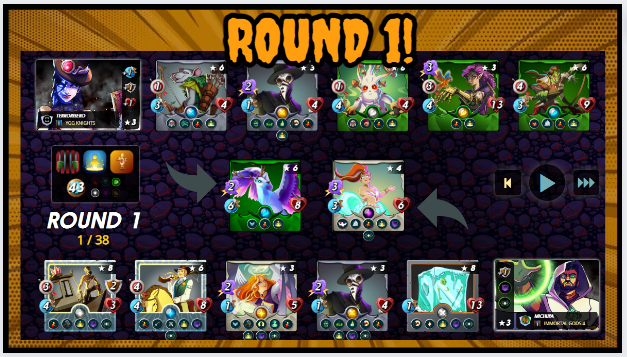
Round por round!
Uma coisa importante que notei no primeiro round foi a vantagem inimiga ao possuir mais velocidade em seus monstros. Isso poderia ser muito eficiente ao eliminar meus monstros primeiro e como bem observado, meus monstros sofreram nesse primeiro round.
Já logo no inicio da partida, o dr Blight inimigo já impediu meu monstro de se curar e minha primeira estratégia foi por água a baixo.
O segundo round eu basicamente assisti os monstros inimigos serem melhorados pela habilidade Martyr. Isso deixou dois monstros inimigos com muito poder de ataque e ainda bem que eu me protegi com escudos!
O terceiro round foi interessante quando notei que meus monstros já estavam mirando no monstro mais poderoso inimigo. Isso me deu uma esperança de que poderia vencer essa batalha. Outro ponto interessante foi que a minha escolha de colocar um monstro que restaura a sua vida a cada rodada foi eficiente, pois depois que ele foi ressuscitado algumas vezes, pode aumentar sua vida e permanecer mais algum tempo em campo.

Só na quarta rodada que meu monstro da segunda posição foi derrotado. Essa batalha esta bem disputada.

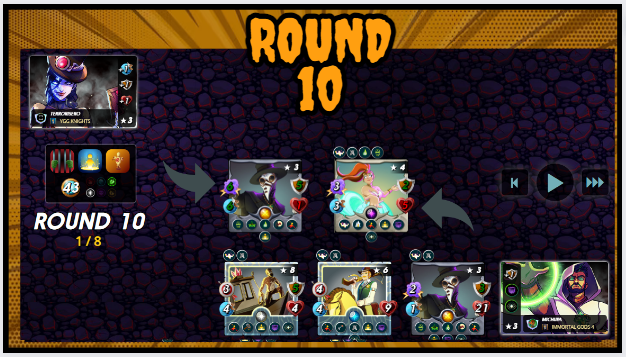
Depois de algumas rodadas, chegamos ao sétimos round e só resta um inimigo para ser derrotado e eu estou em uma grande vantagem!

E foi apenas no décimo round que a batalha termina. Eu escolhi bem meus monstros e equilibrei muito bem o ataque e defesa do meu time e isso me garantiu a vitória!
Para assistir a essa batalha completa, clique aqui
E por aqui eu encerro este post. Obrigado por passar um pouco do seu tempo com minhas palavras e pensamentos. Até a próxima!

[EN]
Hello Splinters, welcome back!
Our battles will always be full of challenges and it is up to each player to find the best pieces to compose an unbeatable team! Each battle will be a great opportunity to test new compositions and create good strategies to defeat our enemies, but some rules can change everything we know.
In different variables, the one who reads the best possibilities and builds a team that can perform well against the opponent will do better. Many possibilities are in our hands, just choose the right ones to win!
Today we're going to talk about a rule that changes the dynamics of our games, especially for monsters that don't have a melee attack. Come check out a little about the Target Practice battle rule!
As mentioned previously, this battle rule has the power to change the dynamics in our battles as all monsters on the field that do not have a melee attack will naturally have the Snipe ability.
| Attacks enemy monsters with ranged attack, Magic or no attack that is not in first position. |
That said, when this rule is active, we need to choose carefully which monster will occupy this position and receive a good amount of damage. Monsters with Void and Shield will be very effective. Furthermore, monsters that have the Triage ability will also be great choices, as they can restore that monster's health each round.
However, within this dynamic imposed by the battle rules, we must remain alert or even assume that the opponent will choose a team to surprise us. He can do this by giving up monsters with magic or ranged attacks and choosing melee attack monsters with Opportunity and sneak skills. This could be the end of your battle if you only prepared for one type of attack, you will be surprised at vulnerable points.
In addition to precautions, there is a strategy often used when this rule is active, which is to use a monster with the Martyr ability on the field to increase the status of adjacent monsters. This is an interesting strategy to use whenever possible!
Well, given the tips, it's duel time!
 4934342c15ad6da2c77b9c0f56&
In this battle we have some rules that will be very impactful on the way we play. Firstly, melee attack monsters will not be used, this forces the team to attack the second monster in the back row as the Target Practice rule is also active. To top it off, the monsters will die twice in the same battle! A good amount of mana is available and it's time to see which summoners went into this battle!
Summoners
My opponent chooses to have more speed and shields on his monsters. I choose a summoner who will protect me behind shields regardless of what types of attack will be used, this adds security to me.
My team:
| Monster | Objective |
|---|---|
| My first tank was chosen to help the back line by restoring the health of the most affected monster. Furthermore, it is a monster that has a good attack and amount of life. |
| The second monster is the one that would suffer the most damage in this match, so I opted for one that had a lot of health. |
| A monster to deal damage with poison and also to prevent the monster from being healed. |
| This monster was important in restoring shields and also in giving another chance to the first monster that was killed on my side of the field. |
| A monster that has a powerful attack and adds more shields to the team. |
| Another monster with a good amount of attack and that could add some more support to the team. |
Round by round!
One important thing I noticed in the first round was the enemy's advantage in having more speed in their monsters. This could be very efficient in eliminating my monsters first and as noted, my monsters suffered in this first round.
Right at the beginning of the game, the enemy Dr. Blight already prevented my monster from healing and my first strategy went down the drain.
The second round I basically watched enemy monsters get buffed by the Martyr skill. This left two enemy monsters with a lot of attack power and I'm glad I protected myself with shields!
The third round was interesting when I noticed that my monsters were already targeting the most powerful enemy monster. This gave me hope that I could win this battle. Another interesting point was that my choice to place a monster that restores your life every round was efficient, because after it has been resurrected a few times, it can increase its life and remain on the field for a while longer.
It wasn't until the fourth round that my monster in second position was defeated. This battle is well contested.
After a few rounds, we reached the seventh round and there is only one enemy left to defeat and I have a big advantage!
And it was only in the tenth round that the battle ended. I chose my monsters well and balanced my team's attack and defense very well and that guaranteed me victory!
To watch this full battle, click here
And here I end this post. Thank you for spending some of your time with my words and thoughts. To the next!
Credits:
Thumbnail background image: Source
Image editor: Canva
Screenshots taken from the game Splinterlands
Click on the image and use my referral link!


Obrigado por promover a comunidade Hive-BR em suas postagens.
Vamos seguir fortalecendo a Hive
Obrigado por ajudar a crescer a nossa comunidade Portuguesa no HIVE
!1UP
Click this banner to join "The Cartel" discord server to know more.
You have received a 1UP from @lipe100dedos!
@monster-curator, @oneup-curator, @leo-curator, @bee-curator, @pimp-curator, @thg-curator, @vyb-curator, @pob-curator, @neoxag-curator, @fun-curator
And they will bring !PIZZA 🍕.
Learn more about our delegation service to earn daily rewards. Join the Cartel on Discord.
$PIZZA slices delivered:
@curation-cartel(2/20) tipped @michupa
Yay! 🤗
Your content has been boosted with Ecency Points, by @michupa.
Use Ecency daily to boost your growth on platform!
Support Ecency
Vote for new Proposal
Delegate HP and earn more
Support Splinterlands by Submitting a positive review about Splinterlands on Gam3s & also nominate Splinterlands for the People's Choice Awards on Gam3s. Don't forgot to take screenshot & share those on Splinterlands GAM3 Awards Challenge! Comment section to earn some delicious upvote from Splinterlands.
Thanks for sharing! - @alokkumar121
