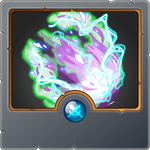
Battle Mage Secrets - Up to Eleven!! [PT/EN]
Read this post in English by clicking here
Olá Splinters, bem vindos de volta!

Existem condições de batalhas que podemos dizer que são oportunidades. Mesmo em regras que dificultam as nossas escolhas ou mesmo que restringem algumas de nossas cartas preferidas, vão haver oportunidades. Cada dificuldade nos colocam em um patamar de concentrar a nossas criatividade e construir composições incríveis!
Claro que algumas regras de batalhas são difíceis de lidar, porém outras, acrescentar ainda mais poder em nossas escolhas e cada monstro ou summoner escolhido poderá fazer uma grande diferença na batalha e tudo isso só depende de nós! Algumas regras, como a que vamos falar hoje, nos poupa o trabalho de escolher algum monstro que tenha aquela habilidade específica, isso poderá ser muito eficiente.
Hoje vamos falar sobre a regra Up to Eleven, então cuidado com aquelas habilidade que refletem danos!

Up to Eleven é uma regra que adiciona Amplify as todos os monstros em campo, vamos entender o que essa habilidade faz:

| Acrescenta danos a monstros que possuem Magic reflect, Thorns e Return Fire. |
Então se um monstro que possuem qualquer uma das habilidades citadas acima e um monstro ataca-lo, ele levará um dano a mais do que levaria. Essa é uma habilidade muito importante em partidas que usamos essas habilidades que causam danos passivos.
Mas é importante que você saiba de uma coisa!
Se em uma partida que essa regra esta ativa você não utilizar nenhuma das habilidades que causam danos, essa habilidade será inútil. Então, é muito importante que você leve em consideração usa-la, pois se seu oponente colocar algum monstro que possui esse tipo de habilidade, você estará em desvantagem e deixando de usar um bom recurso da batalha.
Alguns monstros que possuem mais de um tipo de habilidade que causam danos serão muito eficazes. Eu particularmente adoro o LORD ARIANTHUS no level 3. Ele possui 2 tipos de danos passivos e mesmo não tendo ataque, pode ser um monstro que causa muitos danos em campo, além de ser muito robusto. Ele também sofrerá menos danos, pois possui a habilidade Shield e Void e por conta disso, será uma ´timo escolha no formato Wild!

Por esse motivos, esse monstro pode ser incrivel no campo de batalha!
Mas existem outros monstros que podem cumprir essa função então vamos ver um pouco disso em uma batalha!


Nessa batalha temos apenas 31 d mana para criar nosso time. Não é uma quantidade muito boa, mas também não é ruim, cada escolha precisa ser bem feita para não nos comprometer. Temos 3 regras e cada uma delas definem muito bem nossas escolhas. A primeira regra fazem com que monstros ressuscitem. Já as outras duas podem implicar uma com a outras pois teremos amplify no time e também thorns, ou seja, monstros com ataque melee estrão em extrema desvantagem e é bom evita-los.
Summoner:
Nessa batalha eu estarei enfrentando um dos summoners mais temidos de Splinterlands, o Yodin. E não é por menos, esse summoner tem grandes poderes e capacidades de adicionar danos ao monstros inimigos. Mas eu estou confiante, pois escolhi um monstros que adiciona um toque extra de velocidade ao meu time e deixará as coisas mais favoráveis para enfrentar esse temido summoner inimigo!

Meu time!
| Monstro | Objetivo |
|---|---|
 | Meu tank escolhido para essa partida é um monstro que possui boas defesas contra ataques mágicos e podia refletir danos. Era bem provável que a maioria dos monstros inimigos seriam de ataques mágicos, então essa foi a minha aposta. |
 | Eu adicionei esse monstro com a habilidade Matyr para usufruir do seu duplos aumento de status que poderia ser adicionados ao meus monstros. |
 | Em qualquer ocasião esse monstro estará no meus time pois adicionam muito benefícios e nessa ocasião ainda seria muito bem utilizado quando muitos monstros morrem e ele e terá sua vida aumentada de uma forma bem eficiente. |
 | Mais um monstro com a habilidade Martyr para adicionar melhores status aos monstros adjacentes. |
 | Esse monstro contará com a habilidade Blast que poderá ser útil para causar mais danos ao inimigo e também retira dois de armadura adversária. |
 | Escolhido apenas para completar os espaço vazio. |
Round por round!
No primeiro round eu já consigo notar que a minha escolha foi muito útil, pois adicionar mais velocidade a um time que joga contra o Yodim é de suma importância. Com essa velocidade extra, eu consegui derrotar alguns monstros antes mesmo que eles atacassem e isso me livrou de alguns ataques.
A velocidade também me deu outra vantagem, a esquiva. Isso foi eficiente pois me poupou vida de monstros e danos por Blast.

No segundo round, um dos monstros com Martyr foi derrotado duas vezes e isso aumentou o status de meus monstros com uma força sem igual. O meu tank ficou com ainda mais velocidade e se esquivando de ataques inimigos com ainda mais eficiência.

Esse foi um round muito bom, pois consegui eliminar uma boa quantidade de monstros inimigos e também consegui me esquiar de alguns ataques bem poderosos.

Mais uma vez esse round foi perfeito, derrotei alguns monstros e não levei danos. A parte ruim é que agora o Grum esta bem mais forte, depois de ter seus status elevados pelo Martyr e um ataque seu bem sucedido poder destruir alguns monstros meus.

Depois de alguns rounds, finalmemnte chegamos ao ponto em que o Grum esta prestes a ser morto. Mas apesar desse ser o único monstro do inimigo em campo, eu o não subestimo, pois sei que se ele acertar algumas sequências de ataque poderia me derrotar, mas não isso que aconteceu e eu consegui derruba-lo.

Para assistir essa batalha, clique aqui
[EN]
Hello Splinters, welcome back!
There are battle conditions that we can say are opportunities. Even in rules that make our choices difficult or even restrict some of our favorite cards, there will be opportunities. Each difficulty puts us at a level where we can concentrate our creativity and build incredible compositions!
Of course, some battle rules are difficult to deal with, but others add even more power to our choices and each monster or summoner chosen can make a big difference in the battle and it all depends on us! Some rules, like the one we're going to talk about today, save us the trouble of choosing a monster that has that specific ability, this can be very efficient.
Today we're going to talk about the Up to Eleven rule, so be careful with those skills that reflect damage!
Up to Eleven is a rule that adds Amplify to all monsters on the field, let's understand what this ability does:
| Adds damage to monsters that have Magic reflect, Thorns and Return Fire. |
So if a monster that has any of the skills mentioned above and a monster attacks it, it will take more damage than it would otherwise. This is a very important skill in games where we use these skills that cause passive damage.
But it's important for you to know one thing!
If in a match where this rule is active you do not use any of the skills that cause damage, this skill will be useless. So, it is very important that you consider using it, because if your opponent places a monster that has this type of ability, you will be at a disadvantage and failing to use a good battle resource.
Some monsters that have more than one type of ability that deals damage will be very effective. I particularly love LORD ARIANTHUS at level 3. He has 2 types of passive damage and even though he doesn't have an attack, he can be a monster that causes a lot of damage on the field, in addition to being very robust. He will also suffer less damage, as he has the Shield and Void abilities and because of this, he will be a great choice in the Wild format!
For these reasons, this monster can be incredible on the battlefield!
But there are other monsters that can fulfill this role so let's see some of that in a battle!
 e0e51ad9ef877b202c84048&
In this battle we only have 31 d mana to create our team. It's not a very good amount, but it's not bad either, each choice needs to be made well so as not to compromise us. We have 3 rules and each of them defines our choices very well. The first rule makes monsters resurrect. The other two can imply each other as we will have amplify on the team and also thorns, that is, monsters with melee attacks are at an extreme disadvantage and it is best to avoid them.
Summoner:
In this battle I will be facing one of the most feared summoners in Splinterlands, Yodin. And no wonder, this summoner has great powers and capabilities to add damage to enemy monsters. But I'm confident, because I chose a monster that adds an extra touch of speed to my team and will make things more favorable to face this feared enemy summoner!
My team!
| Monster | Objective |
|---|---|
| My chosen tank for this match is a monster that has good defenses against magical attacks and could reflect damage. It was very likely that most of the enemy monsters would be magical attacks, so that was my bet. |
| I added this monster with the Matyr ability to take advantage of its double status boost that could be added to my monsters. |
| On any occasion this monster will be on my team as they add a lot of benefits and on this occasion it would still be very well used when many monsters die and its life will be increased in a very efficient way. |
| Another monster with the Martyr ability to add better stats to adjacent monsters. |
| This monster will have the Blast ability, which can be useful to cause more damage to the enemy and also removes two of the opponent's armor. |
| Chosen only to fill the empty space. |
Round by round!
In the first round I can already see that my choice was very useful, as adding more speed to a team that plays against Yodim is extremely important. With this extra speed, I was able to defeat some monsters before they even attacked and this saved me from some attacks.
Speed also gave me another advantage, dodging. This was efficient as it saved me life from monsters and Blast damage.
In the second round, one of the monsters with Martyr was defeated twice and this increased the status of my monsters with unparalleled strength. My tank had even more speed and dodged enemy attacks even more efficiently.
This was a very good round, as I managed to eliminate a good number of enemy monsters and I also managed to dodge some very powerful attacks.
Once again this round was perfect, I defeated some monsters and took no damage. The bad part is that now Grum is much stronger, after having his stats raised by Martyr and his successful attack being able to destroy some of my monsters.
After a few rounds, we finally reach the point where Grum is about to be killed. But even though this is the enemy's only monster on the field, I don't underestimate it, because I know that if it hits a few attack sequences it could defeat me, but that's not what happened and I managed to knock it down.
To watch this battle, click here
Credits:
Thumbnail background image: Source
Image editor: Canva
Screenshots taken from the game Splinterlands
Click on the image and use my referral link!


Obrigado por promover a comunidade Hive-BR em suas postagens.
Vamos seguir fortalecendo a Hive
!1UP Good work!
!PGM !PIZZA !PIMP
BUY AND STAKE THE PGM TO SEND A LOT OF TOKENS!
The tokens that the command sends are: 0.1 PGM-0.1 LVL-0.1 THGAMING-0.05 DEC-15 SBT-1 STARBITS-[0.00000001 BTC (SWAP.BTC) only if you have 2500 PGM in stake or more ]
5000 PGM IN STAKE = 2x rewards!
Discord
Support the curation account @ pgm-curator with a delegation 10 HP - 50 HP - 100 HP - 500 HP - 1000 HP
Get potential votes from @ pgm-curator by paying in PGM, here is a guide
I'm a bot, if you want a hand ask @ zottone444
$PIZZA slices delivered:
@curation-cartel(5/20) tipped @michupa
underlock tipped michupa
You have received a 1UP from @underlock!
@monster-curator, @oneup-curator, @bee-curator, @pimp-curator, @thg-curator, @vyb-curator, @pob-curator, @pal-curator, @fun-curator
And they will bring !PIZZA 🍕.
Learn more about our delegation service to earn daily rewards. Join the Cartel on Discord.
Thanks for sharing! - @yonilkar
