Mastering the Reverse Speed Ruleset: My Fiery Strategy!
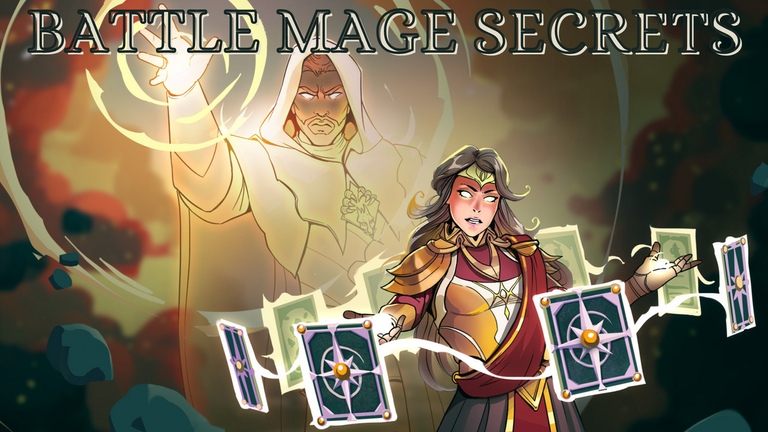
Greetings, fellow Splinterlands strategists! Today, I'm excited to share my insights into building a formidable team for the reverse speed ruleset. While Earth is often my go-to choice for this ruleset, the absence of the Earth splinter led me to explore the fiery realm of Fire. Join me on this journey as I reveal my strategy, card choices, and tactical considerations for battling in reverse speed.

RULESET: Reverse Speed

Description:
Units with lower speeds will attack before units with higher speeds. Attack Accuracy based on speed will also be reversed.
Units with the Bloodlust ability will increase speed after killing a unit.
Avoid using Slow as this will help your opponent.
The Strategy
Choosing the Right Summoner: Tarsa
When it comes to the reverse speed ruleset, choosing the right summoner is paramount. In this fiery adventure, I opted for Tarsa, a summoner known for providing the entire team with increased melee damage and an extra health point. This added durability and damage boost would prove to be invaluable in the battles to come.
The Sluggish Yet Resilient Frontline: Tusk the Wide
As the cornerstone of my strategy, I placed Tusk the Wide at the forefront of my team. Not only is he one of the slowest melee monsters available, but he also boasts magic protection, making him a formidable tank. Tusk's ability to soak up damage while providing a sturdy presence on the battlefield is a key component of my strategy.
Shielding the Team: Ferox Defender
To ensure the survival of my team in the face of reverse speed chaos, I enlisted the aid of Ferox Defender. His ability to provide the entire team with a shield is invaluable, offering protection against enemy assaults. Additionally, his repair ability can help sustain the team's longevity throughout the battle.
Unleashing the Fury: The Forgotten One
Every team needs a heavy hitter, and in this fiery lineup, that role falls to the mighty Forgotten One. With a whopping seven damage and piercing ability, he's a force to be reckoned with. The ability to bypass enemy armor ensures that he can deal significant damage even in the face of tough opponents.
Dual Strikes and Versatility: Drybone Raider
To round out my damage-dealing lineup, I chose Drybone Raider. His double strike ability, allowing him to attack twice, coupled with a total of four attacks (two ranged and two melee) each dealing three damage, provides unparalleled versatility. Drybone Raider can adapt to various situations, making him a valuable asset.
Final Thoughts: Adapt and Conquer
In the reverse speed ruleset, adaptability and strategic card choices are the keys to victory. While Earth might be my preferred choice, delving into the fiery domain of Fire allowed me to craft a powerful team capable of triumphing over my opponents. Tarsa's buffs, Tusk's resilience, Ferox Defender's protection, the Forgotten One's might, and Drybone Raider's versatility combined to create a winning formula.
Remember, Splinterlands is a world of endless possibilities and strategic opportunities. Embrace the challenges of different rulesets, experiment with card combinations, and adapt to emerge victorious in battle and it is not always that the most expensive team wins...
The Summoner
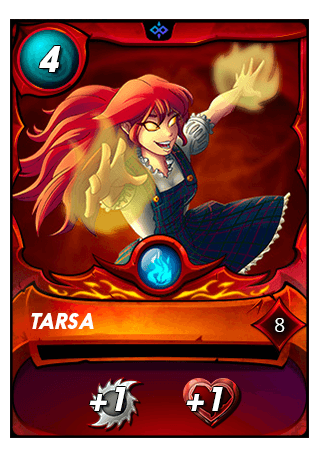
Tarsa is a rare Chaos Legion set summoner that doesn't seem to get much love as it is the second cheapest summoner in the game at thirty four cents per BCX which is only more expensive than General Sloan at thirty two cents. Despite her bargain basement price Tarsa can be a very powerful summoner under certain rulesets when used correctly. This battle is an example of using Tarsa to beat a much more expensive summoner: Lily Shieldpaw that starts at ten dollars and ninety cents per BCX. Of course Lily is a legendary summoner so if we take a maxed out copy of Tarsa at forty two dollars and fifty cents it is still much cheaper than Lily at one hundred fourteen dollars and eleven cents. It also should be noted that it is not just the browser, the whole team from my opponent is much more expansive than my team.
1st Slot - Tank
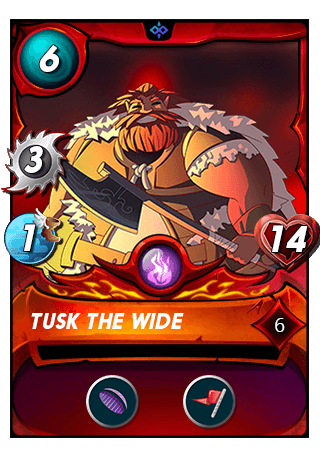
Tusk the Wide is an epic Chaos Legion Core set member that doesn't seem to be played much, but in Reverse Speed ruleset it is a great monster to play. It comes with a speed of one which is the fastest in this ruleset and it has a base health of fourteen and three melee damage. It also comes with void and inspire abilities both of which are key to this play.
2nd Slot - Secondary Tank

Antoid Platoon is a common Chaos Legion Core set monster that comes with a base speed of two, three melee damage and three shield. It starts at five health and builds it up with his scavenger ability. It also has a shield ability which is very useful against melee monsters as we have a secondary ruleset active Melee Mayhem.
3rd Slot - Melee Damage Dealer Monster
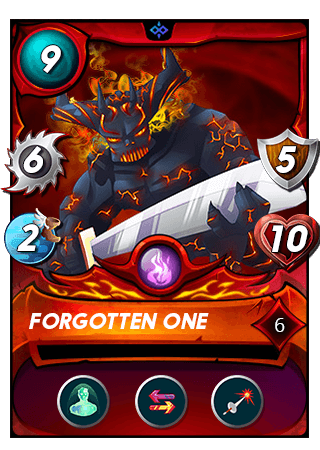
Forgotten One is an epic Chaos Legion core set monster that is important as a major damage dealer in this battle. It comes with a base speed of two, melee damage of six, five shield and ten health points with Immunity, Retaliate and Piercing abilities all for only nine mana.
4th Slot - Armor Repair Monster
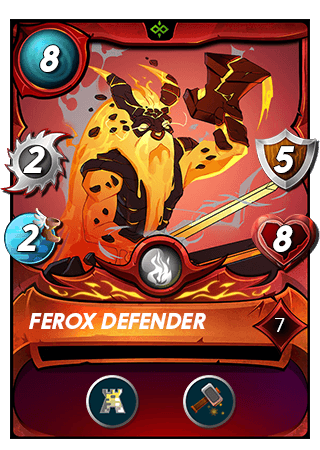
Ferox Defender is a new soulbound reward card that I don't have maxed out for Diamond or even Gold League yet, however this is such a useful monster that provides armor to the whole team and does shield repair that I like using it in battles even without it being leveled up for the Gold league yet.
5th Slot - Double Strike Monster
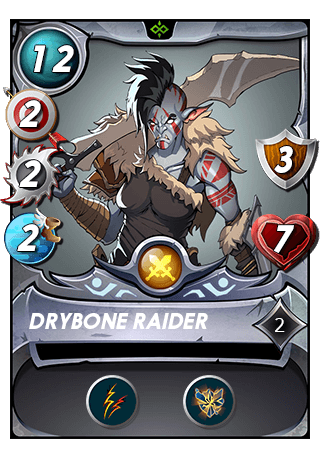
Drybone Raider is another new soulbound reward card that I only have leveled for the Silver league, but I like using it in Champion league because of it's unique set of abilities. It comes with double strike and shatter even at level two. It also has ranged and melee attack which is great in this ruleset.
6th Slot - Rear Tank and Demoralize Monster

Molten Ash Golem is a rare Chaos Legion set member that comes with a base speed of two, ten health and three ranged attack. It also boasts demoralize weaken and close range abilities.
THE BATTLE
As we can see our opponent brought in a fully leveled and much more expensive team to the board. It has six legendary cards out of seven on the board and has a pricey Riftwatchers card Agor Longtail, most expensive Chaos Legion set promo card: Doctor Blight as well as a pricey Riftwatchers airdrop card Oshuur Constantia none of which I have in my collection. Let's see how my humble partially leveled up reward and Chaos Legion set team fairs against this fearsome lineup!
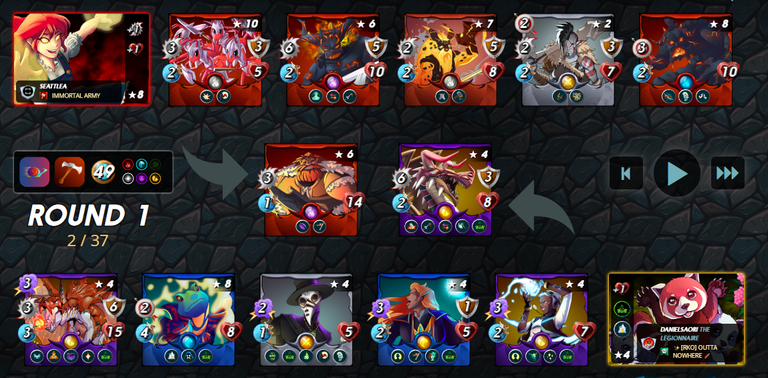
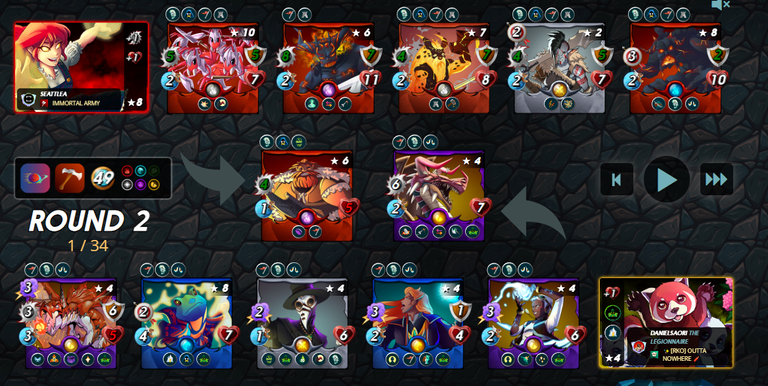
In the first round we managed to kill Agor Longtail twice, but with double resurrect and double triage it is back up to six armor and five health at the start of round two.
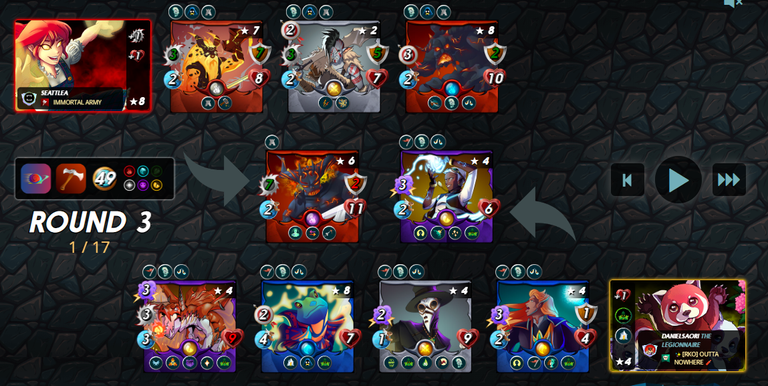
In round two we managed to take out their front tank but lost our first and second tank and Agor Longtail is up to nine health now...
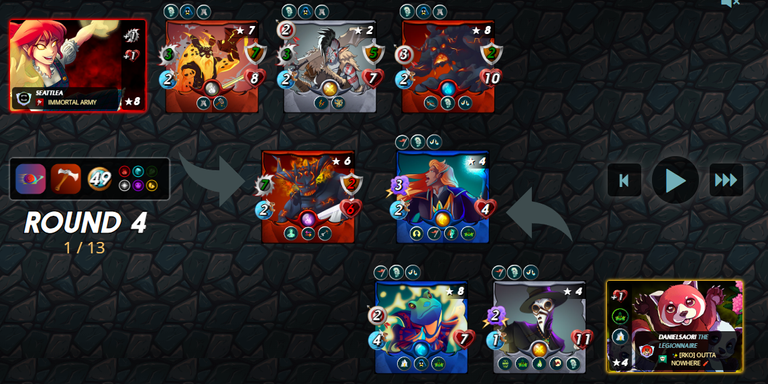
Round three was a very good round for us as we took out Oshuur Constantia and most importantly Agor Longtail
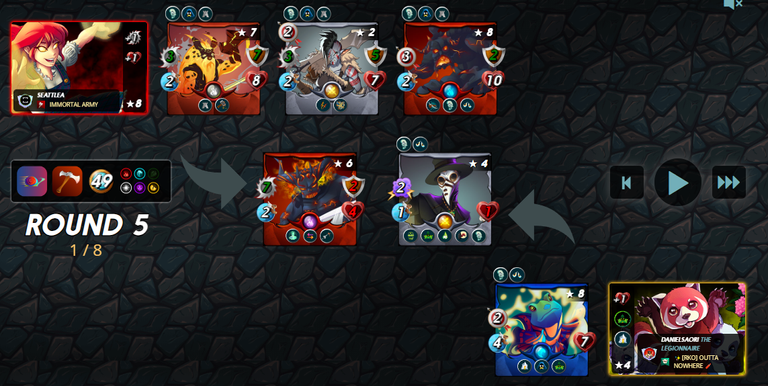
Fourth round was the decisive one where we took out another monster without loosing any on our side and took down Doctor Blight health down by ten points!
And without loosing any more monsters we have dispatched a much more expensive team!

Important victory against a much higher rated opponent!

l
Thanks for sharing! - @underlock
