Share Your Battle - Diemonshark

I'm back for another weekly battle share! Water is my favorite splinter overall so I can't refuse an opportunity to try out new strategies.
This week we're taking a look at the big mana frontline Diemonshark!
Card Details
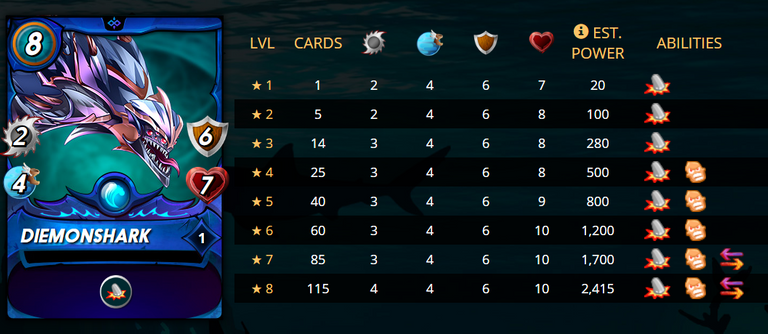
Diemonshark provides a huge toolkit in an 8 mana package. At level 1 it has more raw stats than most other high mana front line cards. 6 armor and 7 health provide a beefy 13 points of damage absorb which make it a great tank for a water team. The 2 attack is about standard for most tanks and Diemonshark picks up an extra damage at only level 3 making it great in lower rank battles.
Diemonshark gets the trample ability at all levels which can really help tear through teams that are full of small health cards. At level 4 it picks up enrage which really enhances the potency of the card. Finally at level 7, retaliate is picked up which completes the full tank package in higher ranked battles.
Being able to take multiple hits and dish out some damage is the core strength of Diemonshark. It works best when enhanced by other
melee buffs to make trample/enrage/retaliate even more effective.
Unfortunately I'm still only silver rank so I won't get to try out a full kit on Diemonshark but it's still a great card in high mana battles even at level 1.
Battle
You can watch the battle replay here
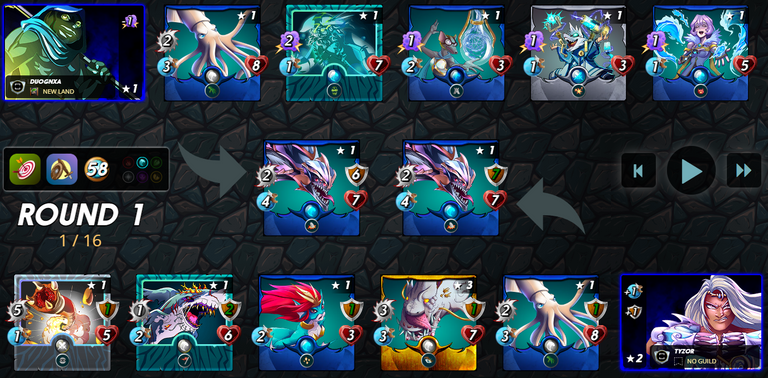
The ruleset for this battle almost seems tailored exactly to Diemonshark. We can only choose water splinter, commons/rares, and melee/ranged always hit. At 58 mana, we have lots of room to fill out our line up. As a bonus, most high value magic damage cards are epic or legendary so we won't be seeing many on the opponent's side.
My lineup
| Card | Notes |
|---|---|
 | Kelya is an amazing all-around summoner that will compliment our melee-based lineup. The extra speed and armor will really help us. |
 | The signature card of this week is going right to the front. It's our main tank, the goal is to have Diemonshark survive for a few rounds to really scale it's damage. |
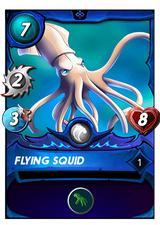 | Since we are building a melee-oriented team, we want to maximize the damage our cards do each round. Flying squid is solid damage and health with reach for our second slot. |
 | I include Deeplurker in almost every water lineup. It's fairly cheap to rent a higher level copy and it provides backline striking damage for a melee team. Being able to pick off support cards behind enemy lines is important. |
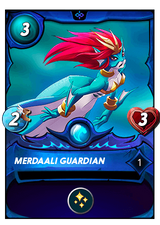 | I didn't feel great about picking a 3 mana card for a high mana battle but a heal/support card is so important in almost every lineup. Merdaali will really help our Diemonshark go an extra round at least. |
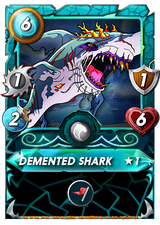 | Demented Shark is usually an auto-include in most melee lineups for me. I know that it won't provide any attacks in the backline but with 4 other melee on the team it's the same as having a 4 damage attacker. |
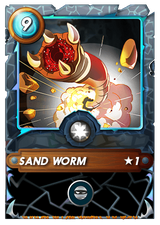 | The final slot will go to Sand Worm, an absolute powerhouse sneak damage monster. In this ruleset it can't miss meaning we will have 6 damage on the backline every round. |
Our opponent chose Bortus and went very magic damage heavy. I didn't expect to face a lot of magic damage so the new Riftwatcher cards caught me off-guard. We'll see if the melee synergy of our team can still close out a win.
Round 1
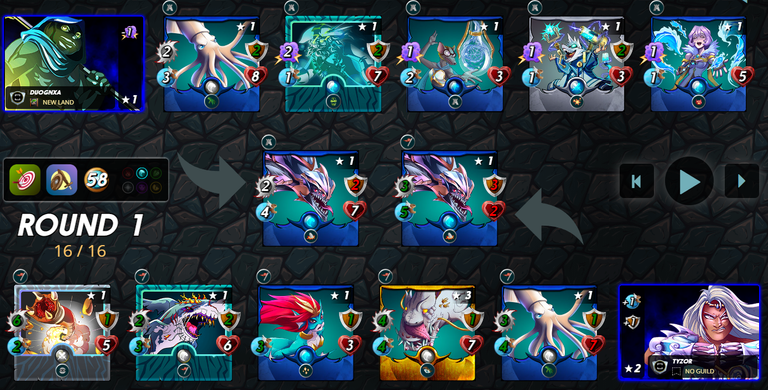
Diemonshark performs like a champion in the first round, taking all the enemy hits and stays standing. Luckily the Captain's Ghost doesn't apply affliction so our healing will still be effective. Our major advantage is speed because all our cards are faster than the opponent. Sand worm tears through the shield of Water Caller setting up a kill for next turn.
Round 2
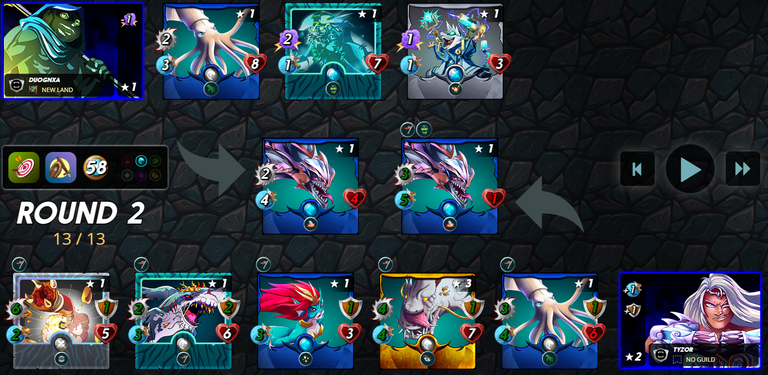
Deeplurker pulls off a crucial kill on the enemy Venari Wavesmith which removes all the shield from the enemies. Sand worm cleans up the backline leaving only 4 cards left for our opponent. Our Diemonshark is still standing at the end of the round with only 1 hp!
Rounds 3-5

The enemy Diemonshark goes down and Sand worm snipes the Technomancer leaving only 2 cards left to clean up. From here our team secures the win in Round 5!
Summary
This battle really showed the strength of Diemonshark's tanking capabilities. Even with a magic-heavy enemy team the high health and shields allowed Diemonshark to efficiently mitigate damage from both physical and magic sources. I'm glad I choose to go with a healing option in the Merdaali Guardian over something like repair.
With the new Riftwatchers cards, Diemonshark might see less play as there are now some great options for high mana battles. The weakness of the card in my opinion, is that you have to build a team around it making it co-dependent on other abilities. This restricts your choices which can be tough in more open rulesets, especially ones where magic is very strong.
Images in this article are all taken from splinterlands.com
If you're new to Splinterlands and want to see what's it's all about, you can check it out using my referral here