MITIGATE DAMAGE - SPLINTERLANDS [PT-BR/ENG]


(nativo)
Existem muitas habilidades que modificam o tipo de ataque das suas cartas em Splinterlands, fazendo com que você possua mais possibilidades de estratégias para vencer o inimigo.
Mas é extremamente importante aprendermos que criar um time com várias unidades que atacam alvos diferentes pode ser uma péssima ideia por causar um efeito de "dano mitigado" que pode ser extremamente prejudicial para sua vitória.
O post de hoje abordará esse assunto visando expor alguns erros que devemos evitar e estratégias que podemos utilizar para forçar que o time inimigo cause "dano mitigado".

TIPOS DE ATACANTES
Como disse anteriormente, existem diversos tipos de atacantes em Splinterlands e cada um define o seu alvo de acordo com alguns critérios ou habilidades que possuem. Eu vou expor esses tipos de atacantes para que todos possam compreender do que estou falando.
TIPO DE ATAQUE | EXPLICAÇÃO |
|---|---|
   | Estas são as unidades que atacam exclusivamente a linha de frente do oponente. Unidades corpo a corpo somente podem atacar da 1ª posição; Unidades a distância podem atacar da 2ª posição em diante e Unidades mágicas podem atacar de qualquer posição. |
 | Esta habilidade faz com que a unidade ataque o inimigo com menor vida, sendo a mais difícil de se proteger por conta da sua característica perigosa de eliminar o alvo mais fraco. |
 | Esta habilidade permite que unidades corpo a corpo realizem ataques da 2ª posição focando o inimigo que está na linha de frente. |
 | Esta habilidade faz com que a unidade ataque o inimigo da última posição da composição inimiga. |
 | Esta habilidade faz com que a unidade ataque o primeiro inimigo que seja um mago, arqueiro ou que não possua tipo de dano. |
 | Esta habilidade faz com que a unidade realize um ataque TOTALMENTE ALEATÓRIO. |
Entender cada um desses tipos de ataque é EXTREMAMENTE IMPORTANTE para seu processo estratégico de formação de equipe, pois são eles quem permitem que você ataque alvos específicos e quebrem as estrégias e combos do oponente.
Porém fazer isso da forma errada e misturar todos esses tipos de ataque pode fazer com que você simplesmente não consiga eliminar nenhum inimigo por falta de dano concentrado.
MITIGAR OU CONCENTRAR?
Vão existir situações em que você será incentivado a mitigar o seu dano para ter maiores chances de vitória, enquanto outras partidas o dano concentrado será a melhor opção. Conseguir identificar isso é um processo que você aprende ao decorrer da sua jornada em Splinterlands, mas existem alguns indicadores que facilitam essa decisão.
MITIGAR | CONCENTRAR |
|---|---|
 |  |
 |  |
Esses são apenas alguns exemplos que podem te ajudar nessa tomada de decisão se você deve ou não espalhar o seu dano na hora de criar uma composição.
Vamos observar na prática para entender o quanto essa decisão errada pode impactar no seu jogo.

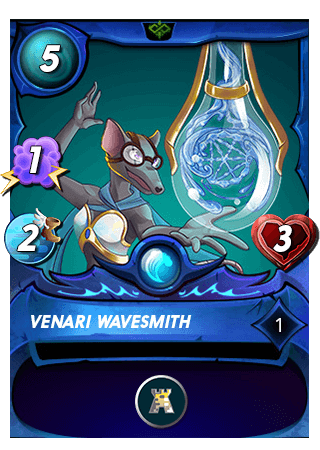
Enquanto minhas unidades realizam três ataques em alvos diferentes (sendo totalmente reduzidos pela armadura criada pelo Wavesmith), o oponente tem todo o seu dano concentrado contra a minha linha de frente. Isso faz com que meu Golem seja eliminado antes de conseguir ser curado Goblin Psychic.

Enquando eu optei pela estratégia errada e que foi totalmente counterada pela armadura do Wavesmith, meu oponente optou pela estratégia certa pois focou totalmente na linha de frente e impediu com que eu conseguisse curá-la devidamente.
Para assistir esse confronto completo basta CLICAR AQUI!
CONTROLE SEU OPONENTE
Se mitigar o dano de maneira descoordenada pode te fazer perder uma partida, que tal FORÇAR o oponente a descoordenar seus ataques? Bem, isso é de certa forma possível.

Utilizando um posicionamento estratégico e cartas com a habilidade Taunt  você poderá prever mais facilmente aonde o oponente atacará. Nesse exemplo mostrado acima eu optei por uma linha de frente bem resistente, forte e rápida (ignorando os debuffs de velocidade cof cof) para conseguir aplicar bem o buff da regra Spreading Fury
  mas sem que ela corresse o risco de morrer na primeira onda de ataques.
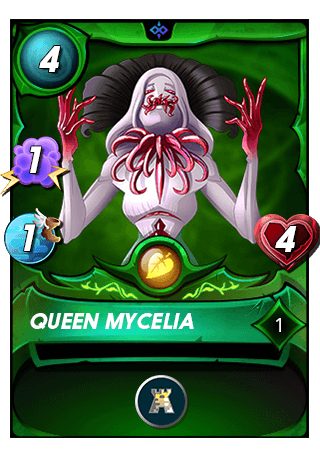
Para evitar isso eu posicionei o Mycelic Slipspawn para atrair os ataques das unidades da linha traseira, além disso, protegi a Queen com o escudo da outra Queen e deixei a Wood Nymph prontificada para curar a linha de frente para deixá-la viva o máximo possível.
Minha composição não poderia ter dado mais certo, pois o Mycelic atraiu a atenção de três unidades enquanto a Queen teve que lidar apenas com as duas unidades físicas do oponente.

Isso fez com que ela conseguisse evitar os 5 de dano das unidades de ataque a distância e permanecesse viva durante o primeiro round, recebendo sua cura e garantindo a sobrevivência por um maior tempo.

No segundo round ela permaneceu viva graças a sua habilidade de Fly e aos danos que continuaram sendo desviados pelo Slipspawn. Novamente a cura entrou e a Queen foi se reestabelecendo no campo de batalha enquanto as unidades inimigas iam caindo uma a uma.

Nesse momento boa parte do dano do oponente já havia sido eliminado, tornando agora quase impossível que a Queen morresse para os ataques inimigos. Essa estratégia de forçar a mitigação do dano adversário permitiu que minha linha de frente permanecesse viva o combate inteiro através da sua esquiva e curas recebidas.
Para assistir esse confronto completo basta CLICAR AQUI!
CONSIDERAÇÕES FINAIS
Controlar seu oponente pode ser uma ótima forma de impedi-lo de ganhar, o que consequentemente resulta na sua vitória. Espero que tenha ficado claro os conceitos de mitigar e concentrar dano e o quão importantes eles são para que você tenha um bom desempenho em suas partidas de Splinterlands.
Tendo esse conhecimento em mente você poderá tomar melhores decisões ao procurar quais cartas comprar, para já ir se preparando para a Ranqueada Moderna que chegará nos próximos meses. Faça boas compras e escolha corretamente as cartas que mais vão agregar em suas composições!

Muito obrigado a todos que leram até aqui, espero que tenham gostado. Se vocês curtirem meus conteúdos, peço que deixem o seu voto na postagem e sigam o meu perfil para poderem acompanhar as futuras postagens.


(translate google)
There are many abilities that modify the type of attack of your cards in Splinterlands, making you have more possibilities of strategies to defeat the enemy.
But it is extremely important to learn that creating a team with several units that attack different targets can be a bad idea because it causes a "mitigated damage" effect that can be extremely harmful to your victory.
Today's post will address this subject in order to expose some mistakes that we should avoid and strategies that we can use to force the enemy team to cause "mitigated damage".
TYPES OF ATTACKERS
As I said before, there are several types of attackers in Splinterlands and each one defines their target according to some criteria or abilities they have. I'm going to expose these types of attackers so everyone can understand what I'm talking about.
TYPE OF ATTACK | EXPLICATION |
|---|---|
| | These are units that exclusively attack the opponent's front line. Melee units can only attack from 1st position; Ranged units can attack from 2nd position onwards and magic units can attack from any position. |
| This ability causes the unit to attack the enemy with the lowest health, being the most difficult to protect due to its dangerous characteristic of eliminating the weakest target. |
| This skill allows melee units to perform 2nd position attacks by focusing the enemy on the front lines. |
| This ability causes the unit to attack the enemy of the last position of the enemy composition. |
| This ability causes the unit to attack the first enemy that is a mage, archer, or has no damage type. |
| This ability causes the unit to perform a TOTALLY RANDOM attack. |
Understanding each of these attack types is EXTREMELY IMPORTANT to your strategic team building process, as they are the ones who allow you to attack specific targets and break your opponent's strategies and combos.
But doing it the wrong way and mixing all these types of attacks can make you simply not able to eliminate any enemy due to lack of concentrated damage.
MITIGATE OR CONCENTRATE?
There will be situations where you will be encouraged to mitigate your damage to have a better chance of winning, while in other matches concentrated damage will be the best option. Being able to spot this is a process you learn as you journey through Splinterlands, but there are a few pointers that make that decision easier.
MITIGATE | CONCENTRATE |
|---|---|
| |
| |
These are just a few examples that can help you in making that decision whether or not you should spread your damage when creating a composition.
Let's observe in practice to understand how this wrong decision can impact your game.
While my units perform three attacks on different targets (being fully reduced by the armor created by Wavesmith), the opponent has all their damage concentrated against my front line. This causes my Golem to be eliminated before it can be healed Goblin Psychic.
While I opted for the wrong strategy which was fully countered by Wavesmith's armor, my opponent opted for the right strategy as it focused entirely on the frontline and prevented me from being able to properly heal it.
To watch this full match just CLICK HERE!
CONTROL YOUR OPPONENT
If mitigating damage in an uncoordinated way can make you lose a game, how about FORCE the opponent to uncoordinate their attacks? Well, that's somehow possible.
Using strategic placement and cards with the ability Taunt you will be able to more easily predict where your opponent will attack. In this example shown above I opted for a very tough, strong and fast frontline (ignoring the speed debuffs cough cough) to be able to apply the buff from the Spreading Fury rule well but without her risking dying in the first wave of attacks.
To avoid this I positioned the Mycelic Slipspawn to attract the attacks of the back line units, in addition, I protected the Queen with the shield of the other Queen and left Wood Nymph ready to heal the frontline to keep her alive as long as possible.
My composition couldn't have gone any better, as Mycelic attracted the attention of three units while Queen only had to deal with the opponent's two physical units.
This made her able to avoid the 5 damage from ranged units and stay alive during the first round, receiving her healing and ensuring survival for a longer time.
In the second round she remained alive thanks to her Fly ability and the damage that continued to be deflected by Slipspawn. Again the cure came in and the Queen was reestablishing itself on the battlefield while the enemy units were falling one by one.
By this time most of the opponent's damage had already been eliminated, making it now almost impossible for the Queen to die to enemy attacks. This force mitigation of enemy damage strategy allowed my frontline to stay alive the entire combat through their dodge and incoming heals.
To watch this full match just CLICK HERE!
FINAL CONSIDERATIONS
Controlling your opponent can be a great way to stop them from winning, which ultimately results in your victory. I hope the concepts of mitigate and focus damage are clear and how important they are for you to perform well in your matches of Splinterlands.
With this knowledge in mind, you'll be able to make better decisions when looking for which cards to buy, in order to get ready for the Modern Ranked that will arrive in the coming months. Make good purchases and choose correctly the cards that will add the most to your compositions!
Thank you so much to everyone who read this far, I hope you enjoyed it. If you like my content, I ask you to send your vote on the post and follow my profile so you can read future posts.
Shared on Facebook.
!1UP good work!
Congratulations @underlock! You have completed the following achievement on the Hive blockchain and have been rewarded with new badge(s):
Your next target is to reach 1000 comments.
You can view your badges on your board and compare yourself to others in the Ranking
If you no longer want to receive notifications, reply to this comment with the word
STOPTo support your work, I also upvoted your post!
Check out the last post from @hivebuzz:
Support the HiveBuzz project. Vote for our proposal!
I like that you showed a good and bad example of the topic you're addressing. Even though you lost, the match was clearly still useful for you. That said, my goodness is there a lot to dig into here, and it's certainly given me some ideas for the future ;P
!PGM
BUY AND STAKE THE PGM TO SEND A LOT OF TOKENS!
The tokens that the command sends are: 0.1 PGM-0.1 LVL-2.5 BUDS-0.01 MOTA-0.05 DEC-15 SBT-1 STARBITS-[0.00000001 BTC (SWAP.BTC) only if you have 2500 PGM in stake or more ]
5000 PGM IN STAKE = 2x rewards!
Discord
Support the curation account @ pgm-curator with a delegation 10 HP - 50 HP - 100 HP - 500 HP - 1000 HP
Get potential votes from @ pgm-curator by paying in PGM, here is a guide
I'm a bot, if you want a hand ask @ zottone444
I created a mantra: "if I lost a game for a really silly, sad or strange reason, make this game a content for post and make defeat a victory!" 🤣
You have received a 1UP from @marianaemilia!
@monster-curator, @oneup-curator, @pimp-curator, @thg-curator, @vyb-curator, @pob-curator, @neoxag-curatorAnd they will bring !PIZZA 🍕
Learn more about our delegation service to earn daily rewards. Join the family on Discord.
PIZZA Holders sent $PIZZA tips in this post's comments:
@curation-cartel(3/20) tipped @underlock (x1)
Please vote for pizza.witness!
Yay! 🤗
Your content has been boosted with Ecency Points, by @underlock.
Use Ecency daily to boost your growth on platform!
Support Ecency
Vote for new Proposal
Delegate HP and earn more
Congratulations @underlock!
You raised your level and are now a Minnow!
Check out the last post from @hivebuzz:
Support the HiveBuzz project. Vote for our proposal!
You explained everything very well, and I often use this strategy, too.
Great Splinterlands post!
!PGM
@tipu curate
Upvoted 👌 (Mana: 26/46) Liquid rewards.
BUY AND STAKE THE PGM TO SEND A LOT OF TOKENS!
The tokens that the command sends are: 0.1 PGM-0.1 LVL-2.5 BUDS-0.01 MOTA-0.05 DEC-15 SBT-1 STARBITS-[0.00000001 BTC (SWAP.BTC) only if you have 2500 PGM in stake or more ]
5000 PGM IN STAKE = 2x rewards!
Discord
Support the curation account @ pgm-curator with a delegation 10 HP - 50 HP - 100 HP - 500 HP - 1000 HP
Get potential votes from @ pgm-curator by paying in PGM, here is a guide
I'm a bot, if you want a hand ask @ zottone444
Thank you for the words and Tipu curation!