Splinterlands Sneak Monster Ideas Part 2 - Melee Mayhem and Silenced Summoner Ruleset
This is my second blog on how to use sneak monsters for battles. In this battle the ruleset was Melee Mayhem (melee monsters can attack from any position) and Silenced Summoner (summoners give no buffs, debuffs or grant any abilities).

Splinterlands Sneak Ability Battle Ideas Part 2
In this instance, same as shown in my previous blog, I also used 2 Splinterlands Sneak Monsters for battle.
For this particular battle, my strategy was to make use of Demented Shark to give a +1 melee attack buff to all melee monsters and to keep them protected against enemy's first melee and archer attacks and furthermore, I could keep him protected in second position from early attacks and this monster could still do its attacks from second position due to the Melee Mayhem ruleset. I used Venari Wavesmith to give +2 armour protection to all my monsters. I was less worried about magic attacks as there would be no added +1 magic buff for enemy's magic monsters due to the Silenced Summoner ruleset. Here are the summoner and monsters I used in this 28 mana battle:
Alric Stormbringer
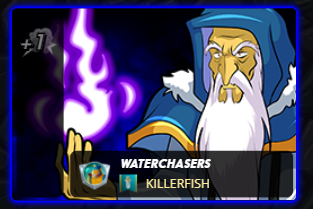
I used Alric Stormbringer of the Water Splinter for this battle as I wanted to use Demented Shark to get the +1 melee buffs for all my melee monsters. As this ruleset was for Silenced Summoners, Alric Stormbringer would not give any +1 magic buffs to magic monsters. As enemy could also not use a magic +1 buffs on his monsters I felt more confident with a strategy that utilizes Demented Shark to give +1 melee attack to my melee monster.
Frost Lion
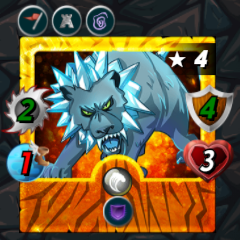
Frost Lion is an excellent card to place in first position to was early enemy attacks, especially magic attacks due to its Void Armour ability which means magic attacks will have to hit armour first. As I had used Venari Wavesmith, all my monsters had additional +2 armour for further protection. Frost Lion would provide protection from early attacks to Demented Shark (a more important monster for this battle due to its +1 melee buffs on all my melee monsters).
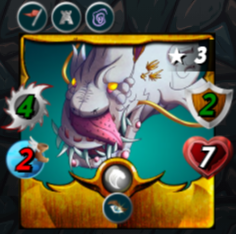
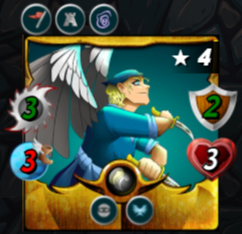
Demented Shark
(The Star)

Demented Shark is the second placed monster for this battle. This monster is vital for my strategy of using sneak monsters for this battle as it gives them +1 melee attack buff to kill of the rear enemy monsters faster. For this strategy to work I need the sneak monsters to kill off the rear enemy monsters fast so they can then focus on killing off enemy's front monster which is usually has high life and in my case and strategy would be the last one alive as my main attacks are going for the enemy rear monsters first. In Silenced Summoner ruleset, it is always a strategy to have monsters that give buffs to your monsters and debuffs to enemy monsters. To me the Demented Shark is a very underrated card in Splinterlands. It is actually a very useful card in Melee Mayhem ruleset where it can be placed protected in 2nd or 3rd position and give the +1 melee buff and still attack from that position because as Demented Shark does not have the Opportunity or Sneak ability, if not for the Melee Mayhem ruleset, it can only attack from the front position so it is not usually used for other ruleset battles.
Venari Wavesmith
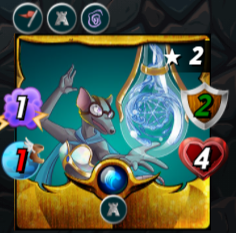
Venari Wavesmith is the card I placed in the 3rd position. I selected it especially for the +2 armour buff that it gives to all my monsters. I wanted to keep it protected in 3rd position due to its low 4 health and to keep it alive for as long as possible to keep that +2 armour on all my monsters. This is a very popular card and is very useful in almost every battle due to it +2 armour protection for all your monsters. This is definitely a must-have card in Splinterlands.
Deep Lurker
Deep Lurker is my 4th placed card. This is a new Chaos Legion Water Splinter Opportunity attack monster and at level 3 already has 3 attack (+1 melee buff), 7 health and 3 speed. It costs 6 mana to use this monster. If I had only 3 mana left after placing all my monsters, I would have used another sneak monster Uraeus which has 2 melee sneak attack but lower 2 health and 2 speed. It is a good idea to use at least 1 Opportunity attack monster in your battles as these monsters will target enemy's low health monsters which sometimes are the troublesome cards like those that slow your speed (Creeping Ooze was used by the opponent in this battle) or healers that usually have low health too. In this battle, if I had not killed off opponent's Creeping Ooze with my Opportunity ability monster, it would maybe have been more difficult to kill off enemy's rear Axemaster which has 4 speed and is difficult to hit with slow speed monsters.
Sabre Shark
(Co-Star)

Sabre Shark is my 5th placed monster. This is a Sneak ability monster. It has high speed of 4 and with the added +1 melee buff from the Demented Shark it has 3 attack. Venari Wavesmith plays an important role here to protect both my Sneak attack monsters in the rear as both my Sneak attack monsters at the rear have low health of 3 and need that additional armour protection in case the opponent also used sneak attacks for the battle. Both my Sneak attack monsters have 4 speed with is great as they sometimes can avoid taking damage from slow speed melee and archer enemy monsters and they can hit similar and lower speed monsters on the enemy side too.
Pelacor Bandit
(Co-Star)
Pelacor Bandit is my last placed monster. This monster has similar abilities and stats with Sabre Shark. The only difference is that Pelacor Bandit has the Flying ability which makes it harder for melee and archer attacks to hit it due to its fast speed too. This is a great choice as a rear monster to guard against rear attacks, except if enemy has magic Sneak attack which is the only type of monster I hoped that the enemy did not use in this battle. For a Sneak strategy, both Sabre Shark and Pelacor Bandit are excellent monsters to use in battle as a tag-team.
You may also be interested to view my previous blogs on using:
Splinterlands Sneak Monster Ideas - Against Llama, Kron and Flesh Golem
Splinterlands Earthquake Ruleset Battle - Protect The Queen!
Splinterlands Earthquake Ruleset Battle - Protect The Queen! Part 2
Malric Inferno in an Up Close & Personal ruleset battle
Mylor Crowling in an Up Close & Personal ruleset battle
I am sorry that its a long blog on one battle but I like explaining things in little more detail and I hope that this also gives you an idea to form your own strategies in your battles. Every monster chosen for your battle has to be carefully thought out and in my case I always keep in mind to protect my important cards against the 1st snipe, opportunity and sneak attacks in the game, unless its a ruleset where no snipe and sneak can be used or when all abilities are lost.
Hope this blog has been helpful especially for newbies to the Splinterlands game. This is a fun game with huge investment potential for NFT collectors. If you have been thinking of joining this game, you can use my Splinterlands referral link.
It takes only $10 to play the game with unlocked starter cards. This will unlock rewards that you can earn on a daily basis with daily quests and also at season end which is every 15 days.
Splinterlands is great for NFT investors as history has shown that the cards give great returns on investment and it is an awesome card game too.
For a start my advice is not to rush into buying cards immediately. Battle with other players first to see what cards bring value and are most effective in battles. You can also buy packs which contain the latest new cards with great price growth potential. Feel free to drop me a comment should you need any assistance or advice.
Thanks for sharing! - @libertycrypto27
