⚙ How It's Made - Wooden Kelya - Splinterlands Art Contest Week 210

In this post, I'd like to show you how I created a project that combined my passions and gave me a lot of fun.
As a dwarf, I have a set of rather strange, seemingly incompatible skills that sometimes unexpectedly blend to create surprising results. Such was the case with this card. It combines my three hobbies:
1.Card games
I've been playing since I was 12 yo. It started with Pokemons, then I had a long episode with Magic the Gathering, Poker, and HeartStone, until I finally discovered @splinterlands. I'm amazed at how engaging the gameplay is and how incredibly it combines technology, economics, and great management.2.Video making
For a while, it was my hobby and even my job. Thanks to this project, I was able to grab my camera again, build a small set and have fun with editing like in the old days. I didn't even know how much I missed it.3.Woodworking ( that's how I got my nickname)
I've been doing this for a few months now and I'm having so much fun! I saw a video on Facebook where a craftsman was showing the wonders he creates with the laser and that was it! Without much thought, the same day, I bought my first machine and that's how it started. I create boxes, clocks, lamps, and other items that I give to my family and friends.
The effect of combining these three things in the video:
The effect of combining these three things in the video:
When I came up with the idea of making the card I knew it could be something unique, but I didn't know how difficult the task was. I didn't count exactly, but I think the project took me more than 50 hours in total because I had to figure out and execute many things for the first time. In this post I will describe the whole creation process, which is divided into 3 main steps. I hope you will enjoy it!
Graphic Design (1/3)
Graphic Design (1/3)
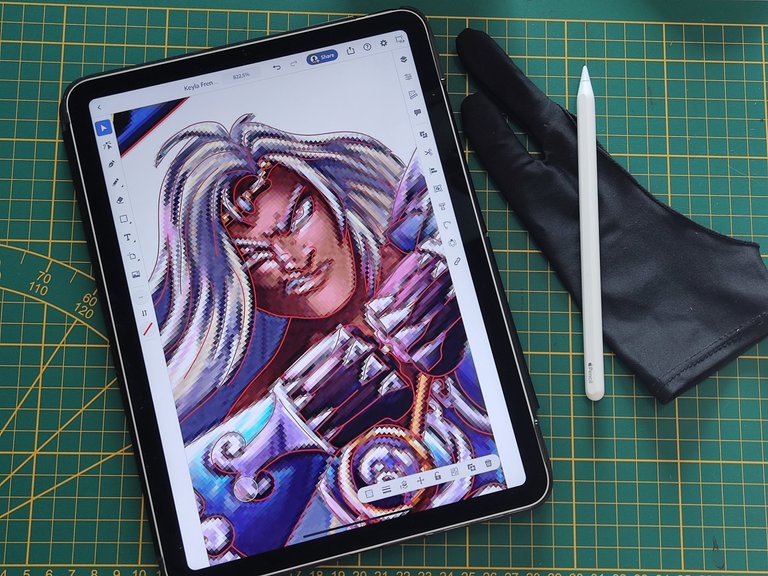
Because the images of cards that are available on the web are very small, they need to be redrawn into vectors. This makes it possible to work with a laser, which requires a proper file format.
I think the easiest way to do it is Adobe Illustrator on a tablet with a pen because it gives you the ability to accurately represent the lines. It takes a lot of time because details matter, but there are no shortcuts here if you want a good result.
When the vectors are ready they can be transferred to the laser control program. I use LightBurn, which I recommend to everyone because compared to others it is very intuitive and well-designed.
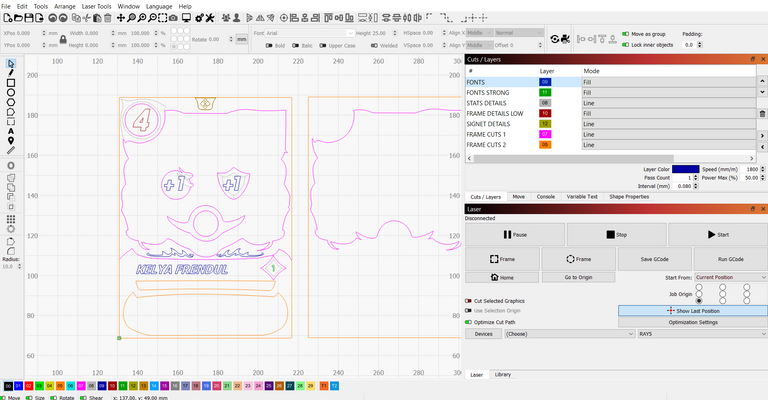
Once the vector file is opened, the real fun begins! You need to sort and properly group all the lines into layers. This way the laser will know whether to cut, engrave or just draw a given line. When the design is ready you can move on to the next step.
Cutting & Engraving (2/3)
Cutting & Engraving (2/3)

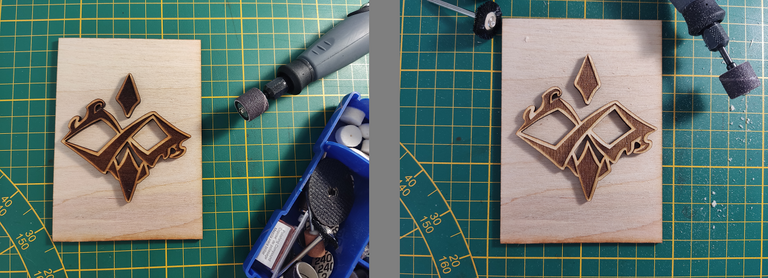
This stage is the most time-consuming because it requires a ton of testing and tweaking of laser settings. Almost every element requires different power settings and passing speeds. The line between looking great and failing is very thin here. Just 5% power is enough to make the pieces look bad.
I wanted the card to have depth, so it is made of 4 layers, and each layer requires different settings. An extra factor is the wood itself because each piece can behave differently. It is not guaranteed that what was done today can be repeated tomorrow. To get good results I did dozens of tests of various elements of the project. This takes a lot of time because my laser is quite slow.
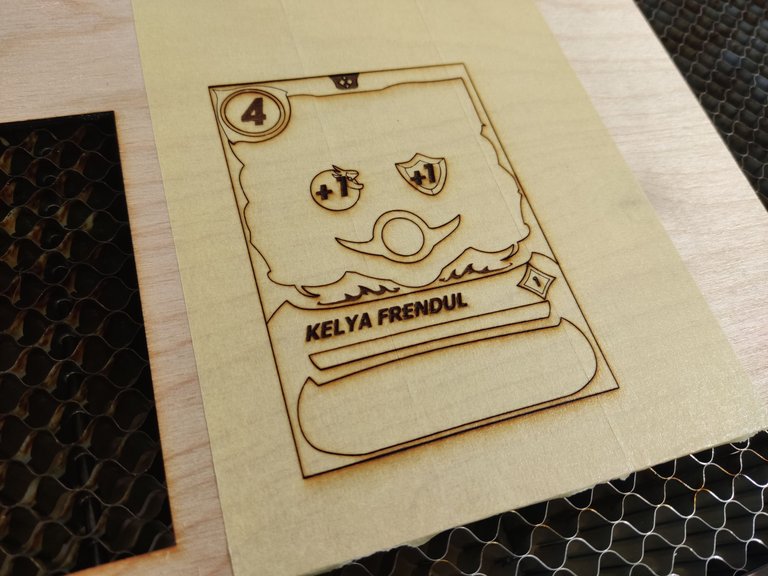
For example, it takes about 20 minutes to engrave a full Kelya character with details and cuts. If the result was poor I made changes in the program and tried again. In the photo below you can see the elements I was not satisfied with. And this is only a part of these elements, more went to recycling.
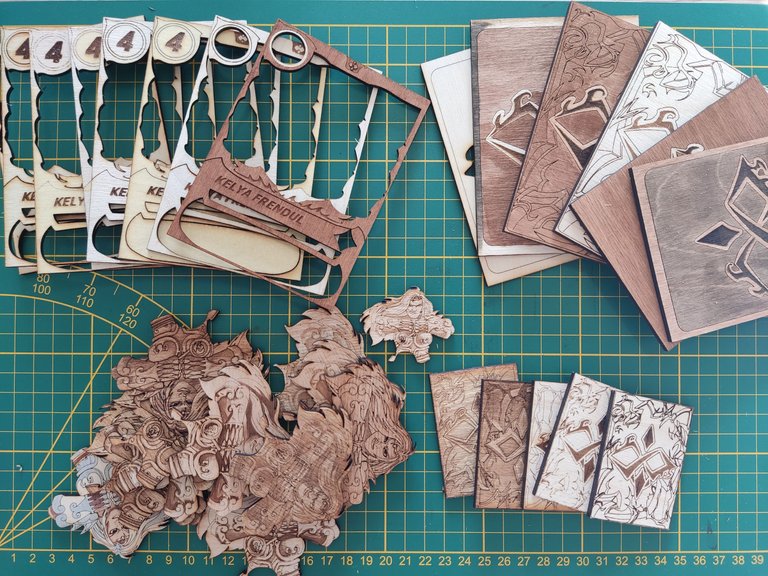
In total, I think I did more than 30 tests of the character, about 30 tests of the frame and stats, and about a dozen attempts to make a back of the card. I also made two prototypes, which allowed me to learn lessons and improve the design. It was worth all that time because I was able to achieve well-detailed parts and shapes.
When I finally decided I was happy with the result I could move on to the next step.
Painting and assembling (3/3)
Painting and assembling (3/3)
The laser can leave some slight burn marks, so at first, I grind and clean the parts that need it. When everything is smooth I can get down to painting. This is precise work for which my dwarf fingers are not exactly perfect. However, I find it incredibly relaxing and I just love doing it. I put on my headphones, lock myself in the workroom and just disappear for a few hours.
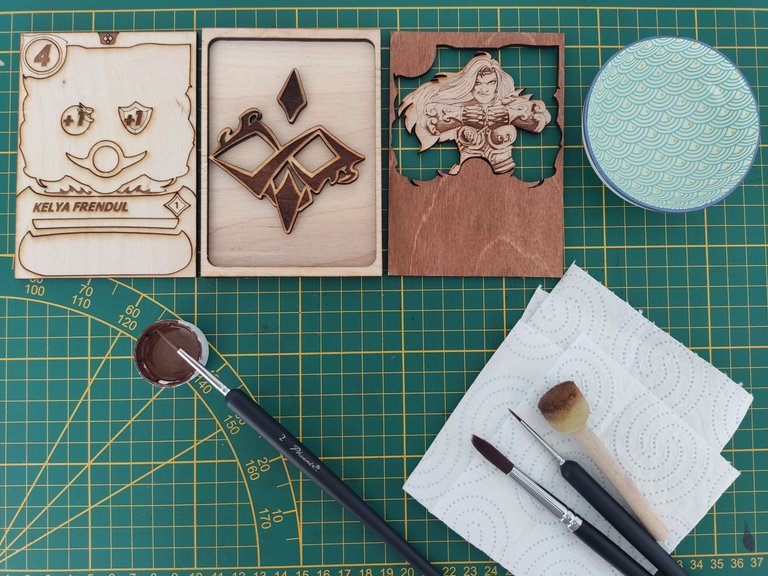
I paint each piece at least twice to give it a deep, natural color. After the first coat, the wood dries overnight and is ready for another painting the next day.
In this project, I used chestnut, beech, and wenge colors. With these, I was able to achieve a nice contrast of smaller elements and give the card enough depth.
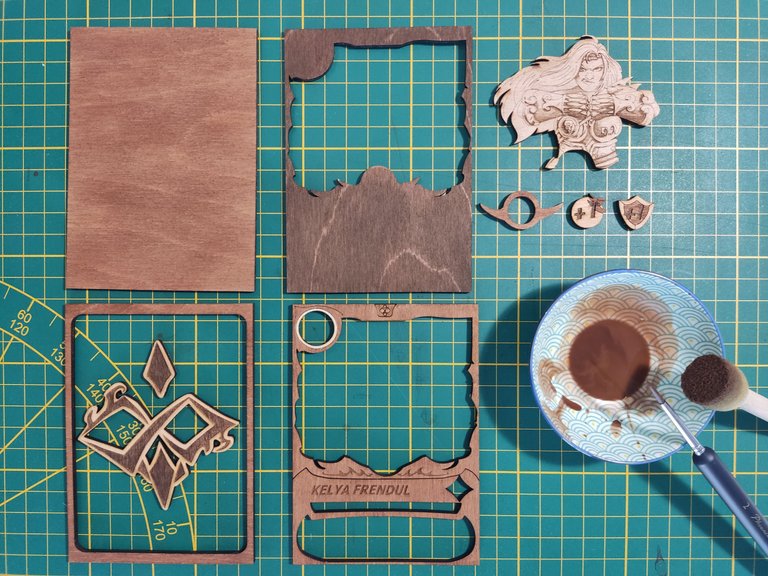
Once dry, it's time for assembling with glue. This is also a precise job that requires attention to detail. After painting, the wood tends to warp, so all pieces must be joined very carefully and allowed to stick together. To make sure nothing deforms I use clamps and leave each piece for a minimum of several hours.


After assembling the wooden pieces, I add a small little gem, which is a glass cabochon. After placing the water element graphic under it, it acts as a magnifying glass. It's seemingly a small thing but I like to take care of such details.

The assembled card is ready for varnishing to protect it from dust and stains. From this point on, everything is done with gloves because I don't want to leave any marks on it. I clean the card of all particles and unnecessary remains. Then I put two coats of matte varnish and one coat of glossy. This gives cool light reflections and adds extra elegance to the card.
Bonus step!
When the card was finished I decided it deserved a worthy presentation! Therefore, I stepped into a very expensive and very fancy video studio located on my kitchen table.
Bonus step!
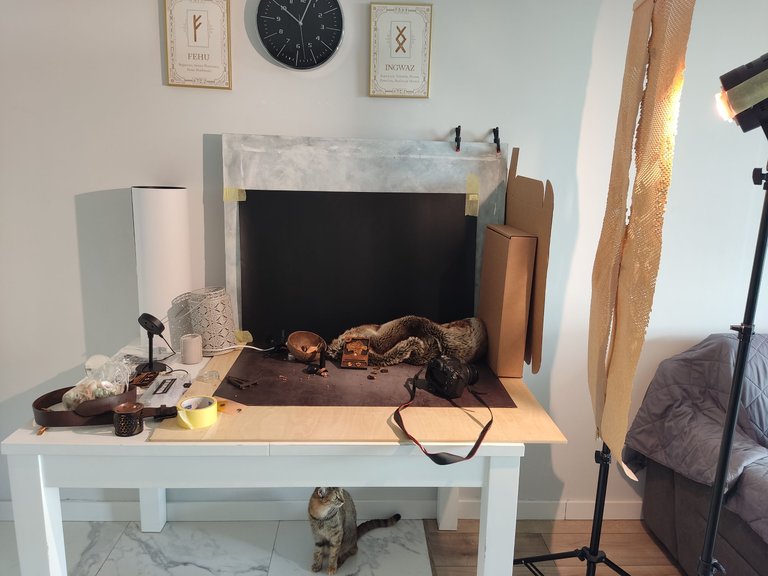
Since I ran a marketing business I have some equipment that I was able to use. I built a simple set, arranged the light, and just had fun taking simple shots and some photos.
Then I played around with editing, which took a few extra hours. I have to build a library of transitions and effects from scratch, so this time I relied on simple cuts and the result came out quite well.

Recently, I have been doing too many things in my life that I just had to do, and far too few of those were done out of pure passion and just for pleasure. Your warm welcome and comments under yesterday's video reminded me that we should always do what our heart tells us to do.
Therefore, more cards will certainly be created, and I already have an idea to show my appreciation for your support and get you engaged in the process of their making. I'll let you know about it soon.
Therefore, more cards will certainly be created, and I already have an idea to show my appreciation for your support and get you engaged in the process of their making. I'll let you know about it soon.
Ps.
Thank you @imril for the encouragement to submit a post to the Splinterlands Art Contest. I'm not sure if it fits the rules, but we'll see.
Ps. 2
I hope you enjoyed reading this post. If you made it all the way here then I sincerely thank you for your time! I'm grateful and want to let you know that...

https://twitter.com/1573564483460628480/status/1580507157262659584
The rewards earned on this comment will go directly to the people( @wooden-dwarf ) sharing the post on Twitter as long as they are registered with @poshtoken. Sign up at https://hiveposh.com.
Absolutely beautiful man! Great talent! Will try this one too. thanks for sharing!
No problem, feel free to let me know if you will need some help 😉
This is awesome!
This can be a great souvenir or giveaway items for Splinterlands players. 😍
!1UP
Thank you! I plan to do a giveaway soon so I hope to make someone happy with it🙂
You have received a 1UP from @thecuriousfool!
@monster-curator, @oneup-curator, @vyb-curator, @pob-curator
And they will bring !PIZZA 🍕.
Learn more about our delegation service to earn daily rewards. Join the Cartel on Discord.
PIZZA Holders sent $PIZZA tips in this post's comments:
@curation-cartel(9/20) tipped @wooden-dwarf (x1)
You can now send $PIZZA tips in Discord via tip.cc!
Congratulations @wooden-dwarf! You have completed the following achievement on the Hive blockchain and have been rewarded with new badge(s):
Your next target is to reach 600 upvotes.
You can view your badges on your board and compare yourself to others in the Ranking
If you no longer want to receive notifications, reply to this comment with the word
STOPCheck out the last post from @hivebuzz:
Support the HiveBuzz project. Vote for our proposal!
Thanks for sharing! - castleberry#6859

Thank you @castleberry! That's huge and I'm very grateful!🙏
That was an incredible post. I'm sorry i didn't see it until now. Keep up the great work and if you continue with this kind of effort in your posts... you are going to do very well here! Keep up the great work.
Thank you, such a comment means a lot to me🙏
I'm having a great time creating these cards, so I'll definitely keep working on it.
All the best to you!
Esto es realmente asombroso amigo, todo el trabajo es increíble 😍