[ESP-ING] Angel of Light Wings // Splinterlands Social Media Challenge
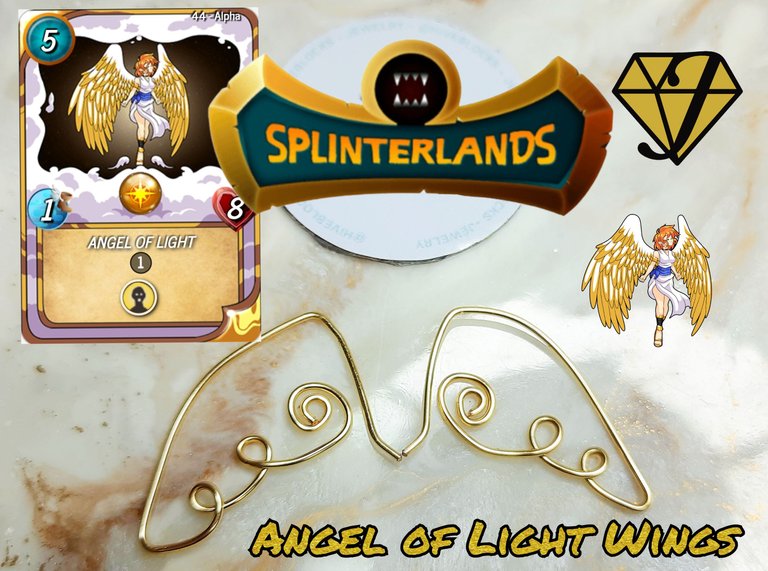


Un saludo, mi gente maravillosa de @jewelry hoy vengo a participar en el desafio de arte de Splinterlans para ello realice unos "Zarcillos de Angel of Light" motivados al personaje que lleva ese nombre Angel of Light, está carta me parece muy interesante ya que es muy poderosa, representa a un ser divino un angel 👼, se relaciona con la magia divina y la justicia.
Uno de sus principales poderes es la capacidad de curar a sus aliados, tiene un buen ataque y puede infringir mucho daño a sus enemigos, es muy útil para equipos que buscan una estrategia de curación y defensa.
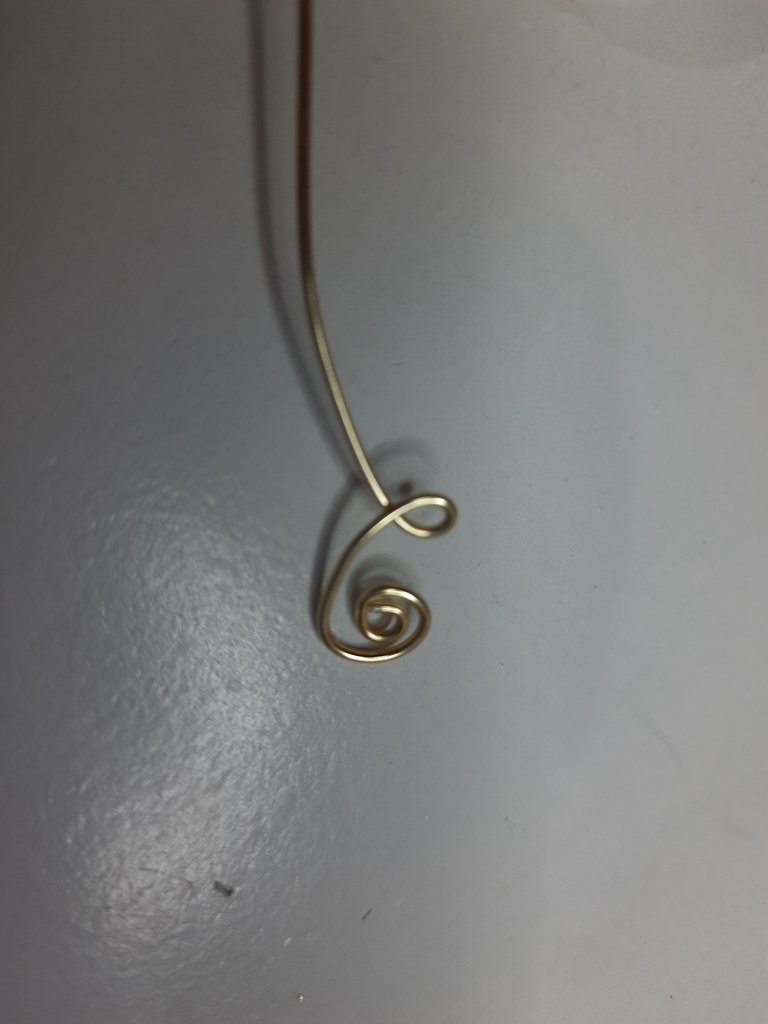
Me pareció una abuela idea realizar unas alas en zarcillos para así poder exhibirlas en cualquier momento, las alas representan a los ángeles, pájaros y seres libres, por ello me gustaría llevar las mías que mejor en forma de zarcillos, así que les invito a ver el proceso como los realice.

Greetings, my wonderful people of @jewelry today I come to participate in the challenge of Splinterlans art for it I made some "Angel of Light tendrils " motivated to the character that bears that name Angel of Light, this card seems very interesting to me because it is very powerful, it represents a divine being an angel 👼, it is related to divine magic and justice.
One of his main powers is the ability to heal his allies, he has a good attack and can inflict a lot of damage to his enemies, it is very useful for teams looking for a healing and defense strategy.
I thought it was a great idea to make some wings in tendrils so I can display them at any time, the wings represent angels, birds and free beings, so I would like to wear mine better in the form of tendrils, so I invite you to see the process as I make them.
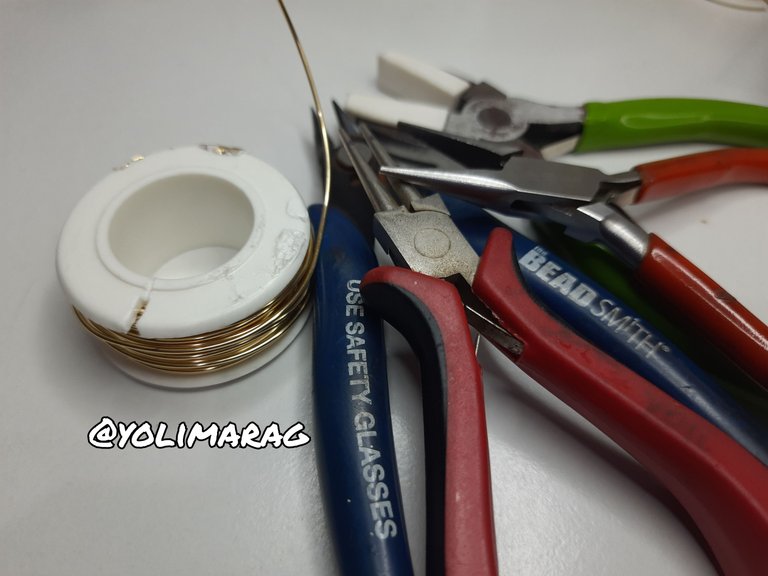
Materiales:
👼 Pinzas de Bisutería
👼 Alambre Dorado #18
👼 Creatividad
Materials
👼 Fashion Jewelry Clips
👼 Golden Wire #18
👼 Creativity
Paso a Paso / Step by Step
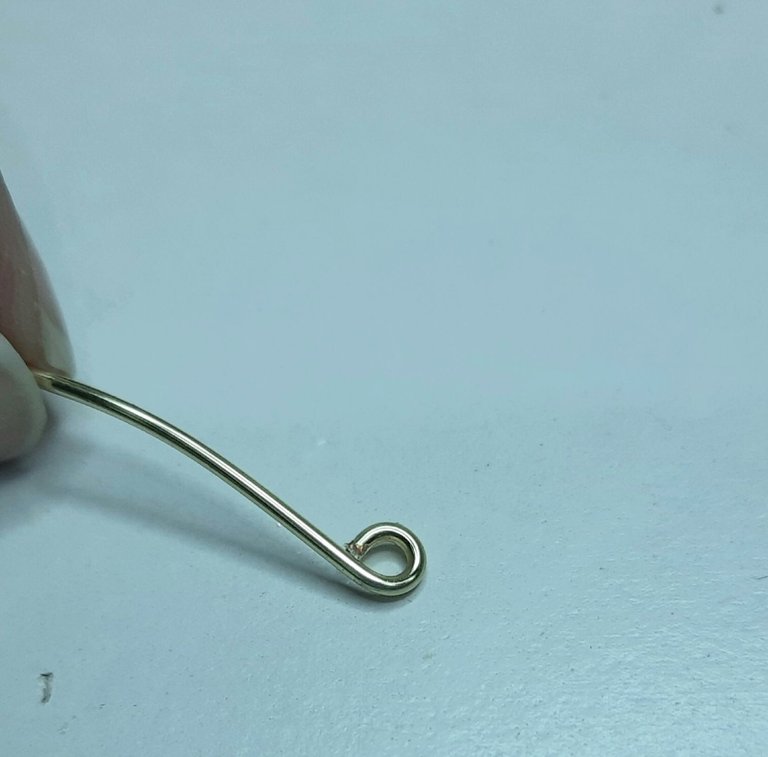
Lo primero que haremos será tomar nuestro alambre número #18 y con la pinza redonda hacemos un pequeño círculo.
The first thing we will do is take our #18 wire and with the round pliers we will make a small circle.
 |  |
|---|
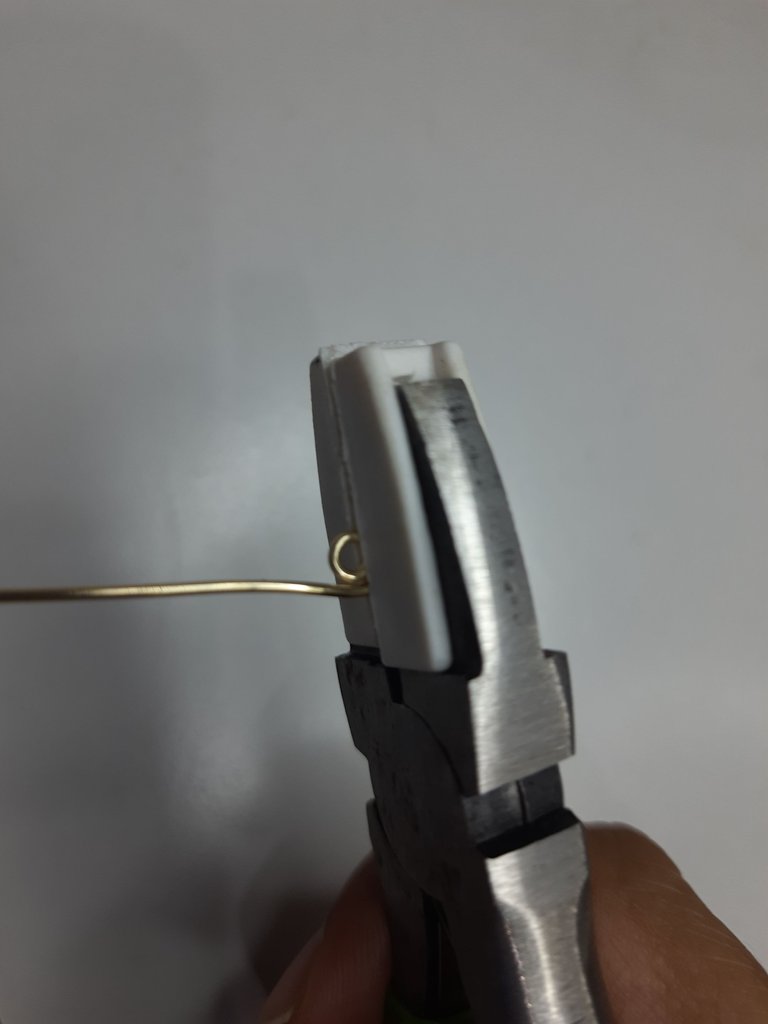
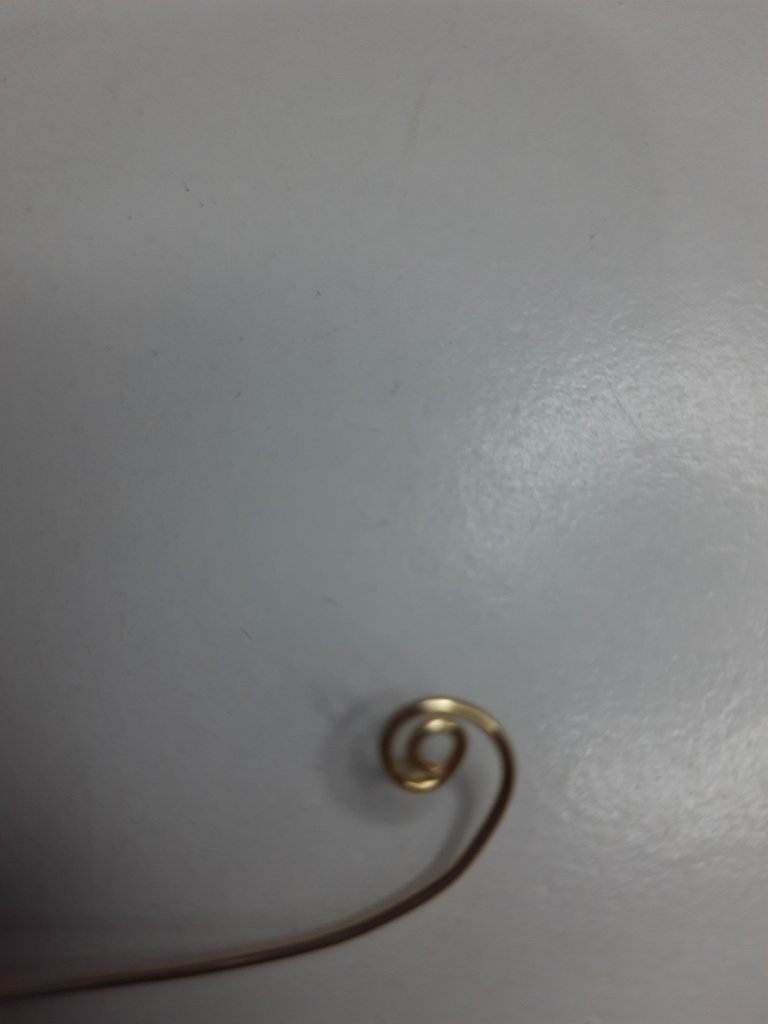
Ahora tomamos nuestra pinza de silicón y vamos a tratar de formar un pequeño espiral que no quede apretado, sino más bien un poco suelt.
Now we take our silicone clamp and we will try to form a small spiral that is not tight, but rather a little loose.
 |  |
|---|
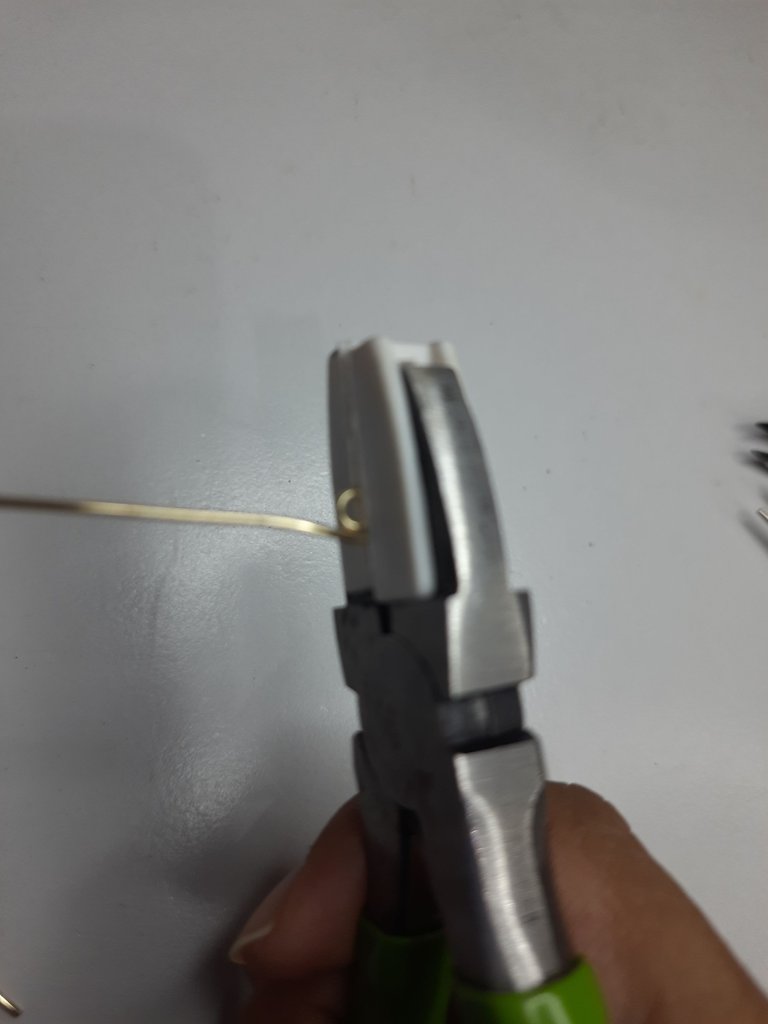
Para el espiral daremos unas dos o máximo tres vueltas.
For the spiral we will give about two or maximum three turns.
 |  |
|---|
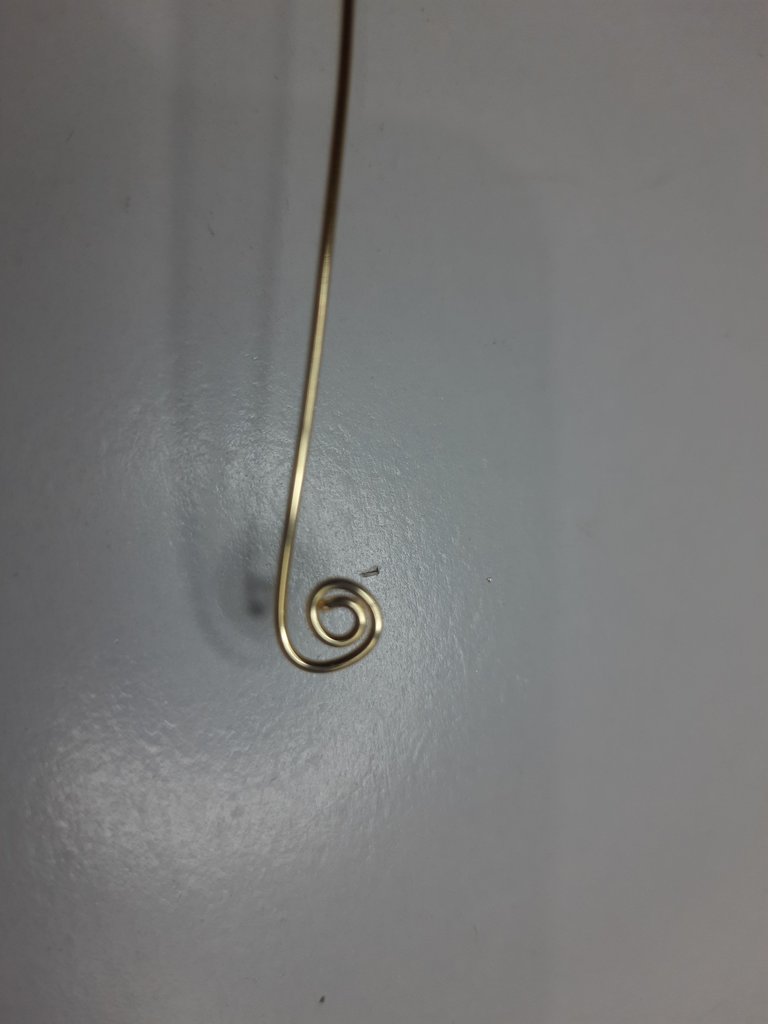
Vamos a dejar como un centímetro y vamos a dar vuelta al alambre con nuestras manos y formaremos como una letra e corrida, tal como se muestra en la foto.
We are going to leave about one centimeter and we are going to turn the wire with our hands and form a running letter e, as shown in the picture.
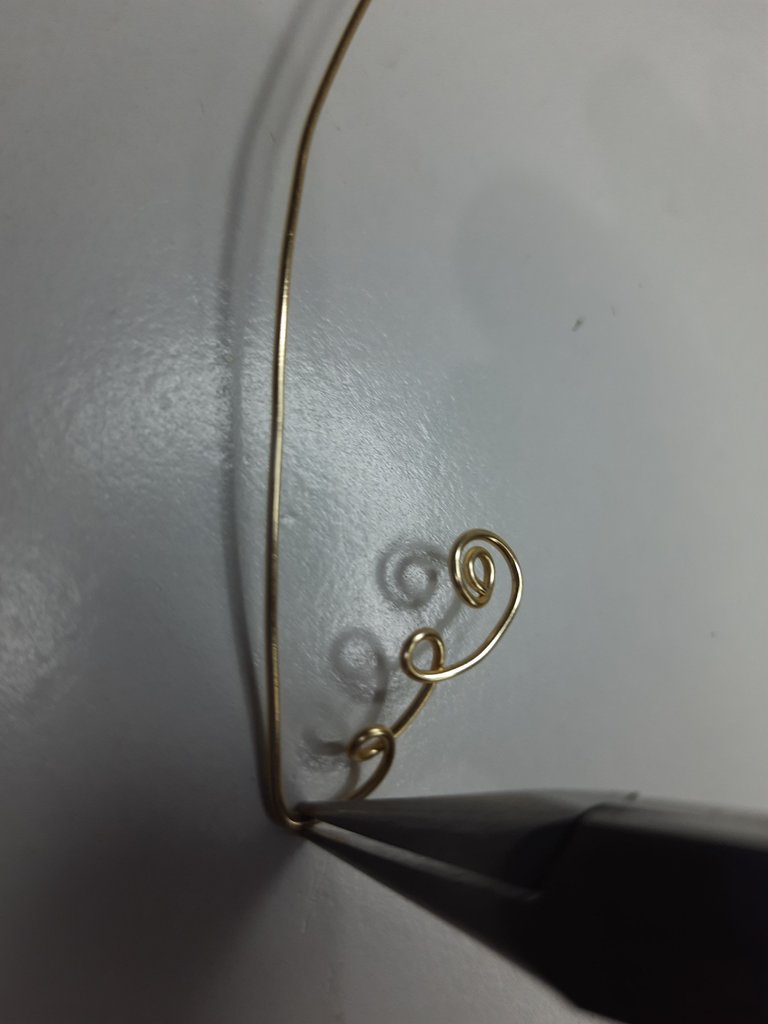
A medio centímetro con el alambre vamos a realizar otra letra "e" corrida pero más pequeña.
At half a centimeter with the wire we are going to make another letter "e" running but smaller.
|  |  |
|---|
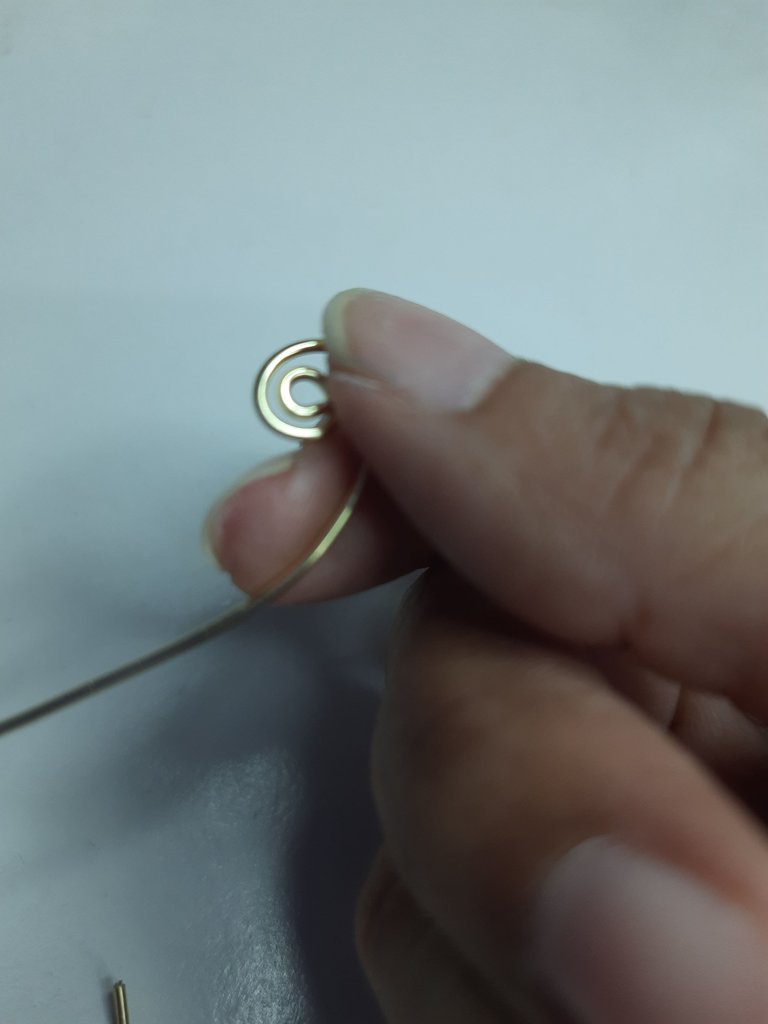
Dejando 0.5 centímetros vamos con la pinza plana a llevar nuestro alambre hacia arriba formando un pequeño pico.
Ahora con nuestro dedo gordo vamos a darle una pequeña forma curvada al alambre.
Leaving 0.5 centimeters, we are going to use the flat pliers to bring our wire upwards forming a small pit.
Now with our thumb we are going to give a small curved shape to the wire.
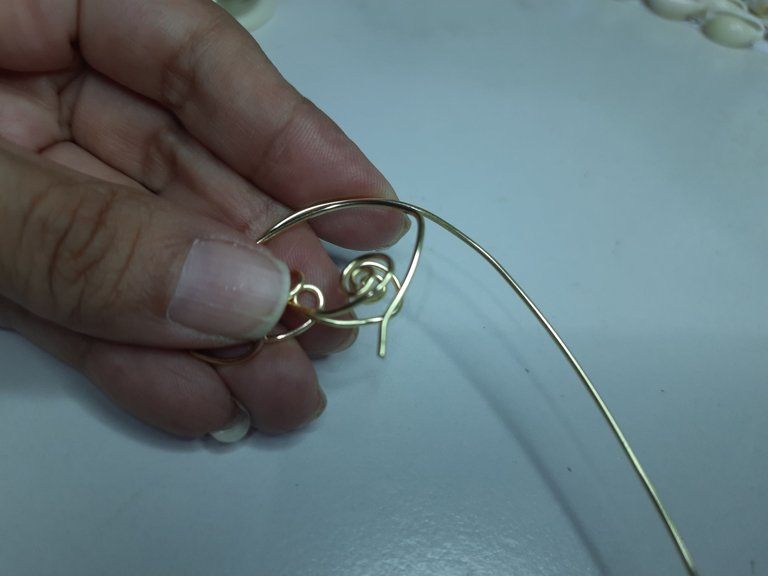
Para la parte de arriba, igual con la pinza plana daremos un pequeño toque y bajamos un poco el alambre y la parte del anzuelo le daremos la forma igual con la pinza plana.
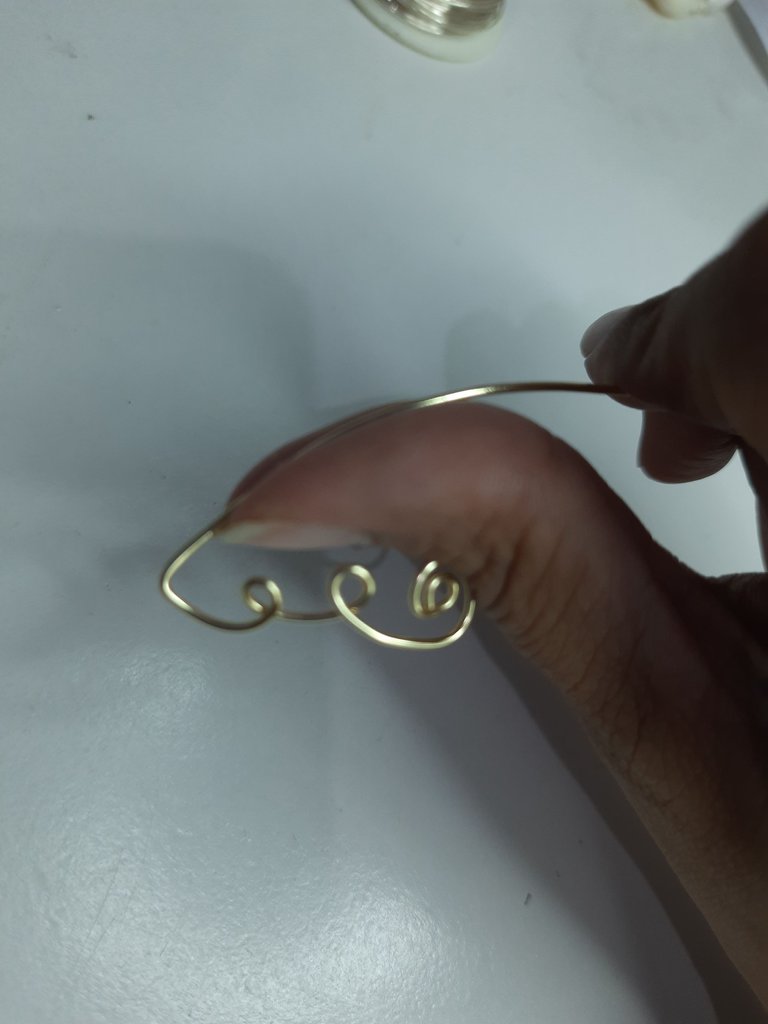
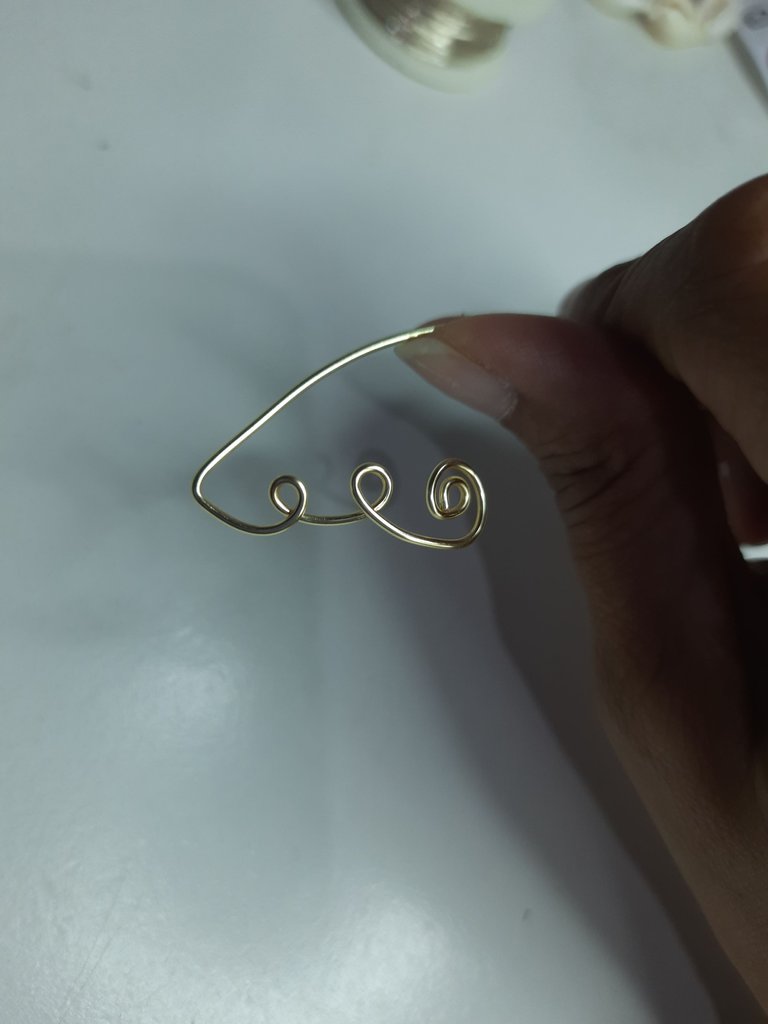
Para hacer la parte de atrás del segundo zarcillo nos dejamos llevar por la medida del primero.
For the top part, the same with the flat pliers we will give a little touch and lower the wire a little and the part of the hook we will give the same shape with the flat pliers.
To make the back of the second tendril, we will follow the size of the first one.
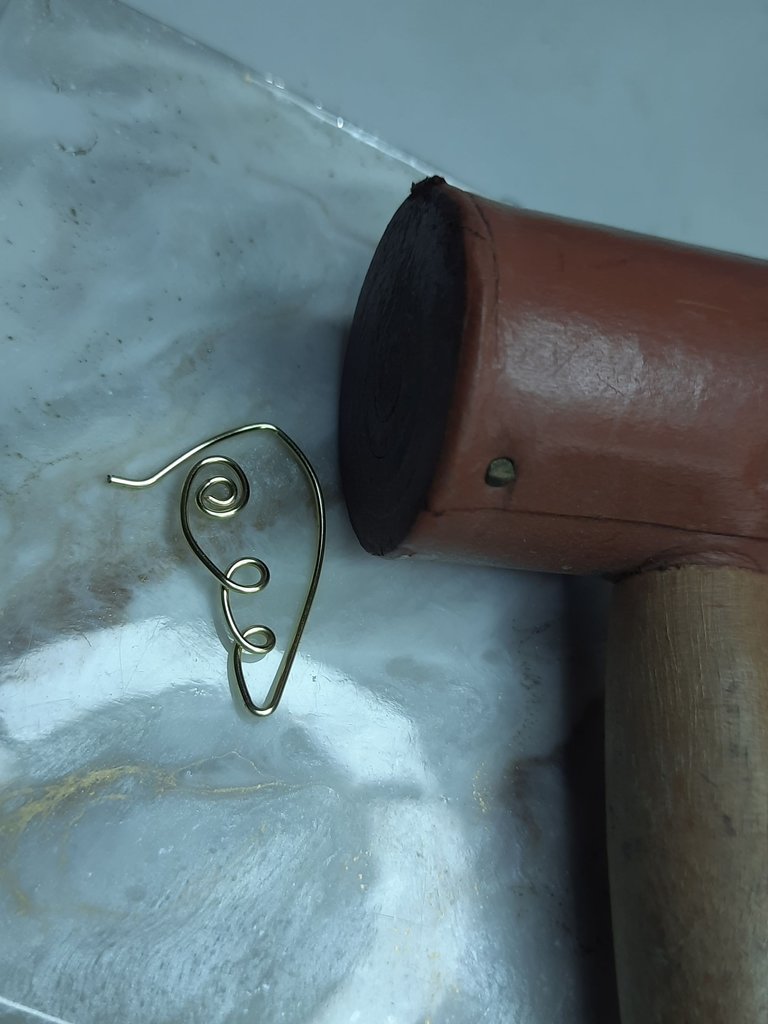
Por último tome un martillo de cuero y le di unos toque pequeños, como para aplanar un poco, y al tenerlos así, los tenemos listos.
Finally, I took a leather hammer and gave them a few small touches, as if to flatten them a little, and having them like that, we have them ready.
Resultado: / Result:

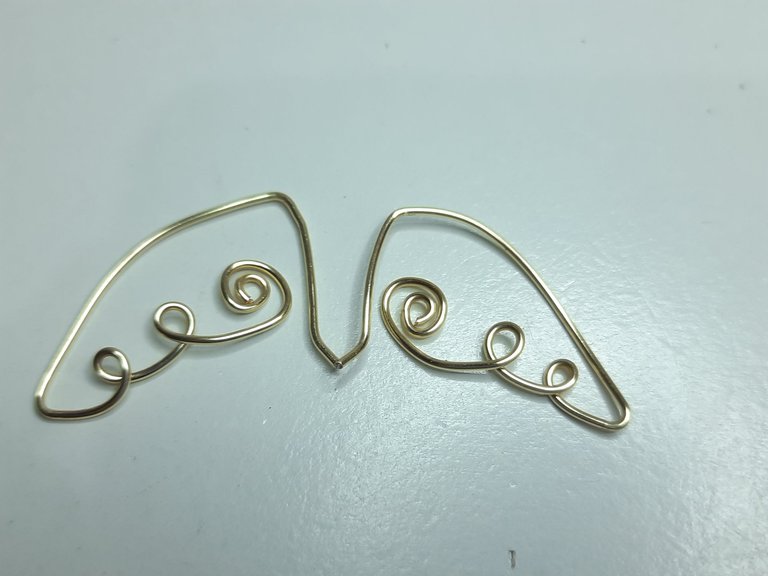
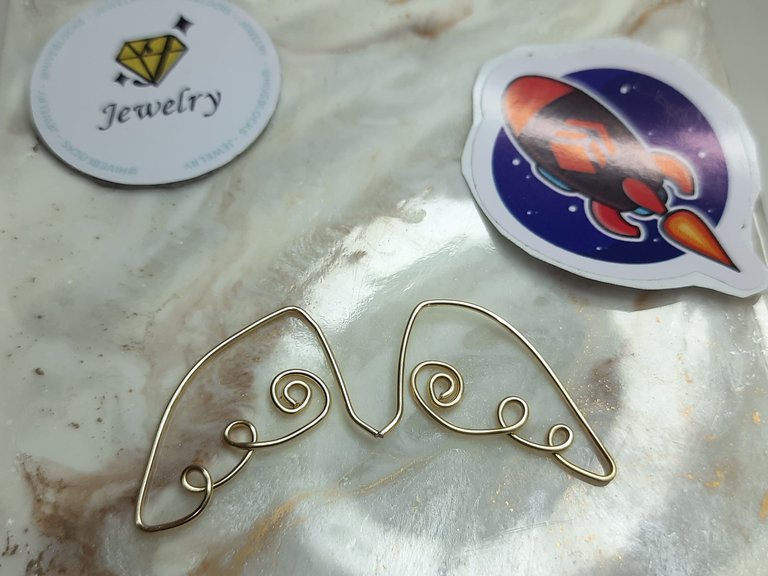

Y así ha quedado nuestro sencillo tutorial, espero que sea de su agrado, tanto como me ha gustado a mi esta pequeña y hermosa creación.
Gracias por estar aquí y ser parte de mi blog y de la comunidad @jewelry 😉
And this is how our simple tutorial turned out, I hope you like it as much as I liked this beautiful little creation.
Thank you for being here and being part of my blog and the @jewelry community 😉.

Les invito a suscribirse a la comunidad de @Jewelry y poder así mostrar todas sus creaciones de accesorios, tanto de adultos como de niños; nos encanta ver y apoyar a todos los artesanos, manualistas y orfebres, puedes crear accesorios para damas, caballeros y niños, así que tu creatividad es el límite 😉
I invite you to subscribe to the @Jewelry community to showcase all your accessory creations for both adults and children; we love to see and support all the artisans, crafters and goldsmiths, you can create accessories for ladies, gents and kids, so your creativity is the limit 😉.
"Los accesorios tienen el poder de hacer sentir a la mujer única y especial"
Accessories have the power to make a woman feel unique and special"
Fotos principal editada con Canva.
Separadores de mi Autoría
Fotos de mi Autoría derechos reservados
Cámara: Samsung M31
Traducido con www.DeepL.com/Translator (versión gratuita)
Photos edited with Canva
Separators by me
Photos by me Author's rights reserved
Camera: Samsung M31
Translated with www.DeepL.com/Translator (free version)


Thanks for your support ❤️
Oh no! Who would have thought this simple tutorial will turn out like this? It looks so beautiful. Well-done
Thank you very much for your appreciation I value it very much 😊.
@yolimarag que originales aretes, unas sencillas pero hermosas Alas, gracias por compartir, Saludos 🤗
Gracias amiga @anamariag 🤗 me alegra mucho que te gusten, gracias por pasar 😊
Hola, están geniales los aretes, me gustó el paso a paso para darle forma a las alas.
Splinterlands sirve de mucha inspiración para realizar trabajos creativos. Esta genial el post. Saludos.
!PIZZA
Gracias por tu apreciación amigo @darwinjj si Splinterlans es de mucha inspiración la verdad, gracias por pasar 😉
$PIZZA slices delivered:
@darwinjj(1/5) tipped @yolimarag
Que belleza amiga @yolimarag, me encantaron, muy creativos, adaptados a la carta y te lucen hermosos. Mucha suerte en el concurso bella.
!DIY
You can query your personal balance by
!DIYSTATSThanks for sharing! - @alokkumar121

Such angel feather from splinterland you've got is nice 👍 with the iron you made it with.
Menuda pluma de ángel de splinterland te ha quedado bonita 👍 con el hierro con el que la has hecho.
Está idea me gustó mucho éxitos para ti 🤠