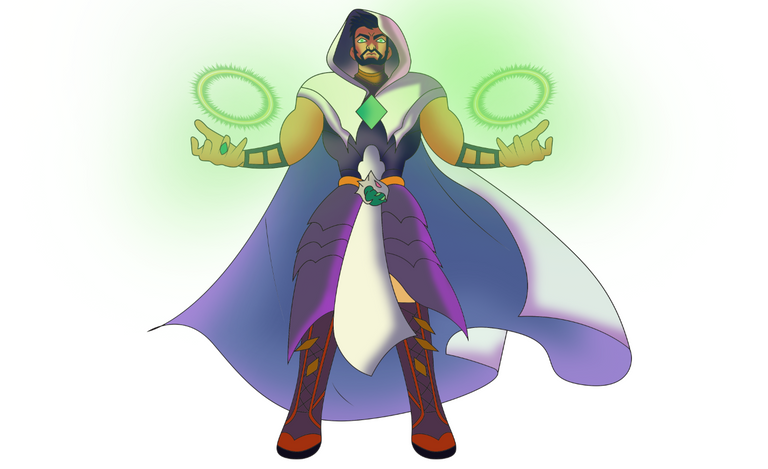
Grandmaster Rathe - Digital Art.
Hello Hive Community,
This is Rashed again.
Thanks to everyone who supported and encouraged me till now.
Another Splinterlands Art.
This time I'm going with Digital Drawing of Grandmaster Rathe.
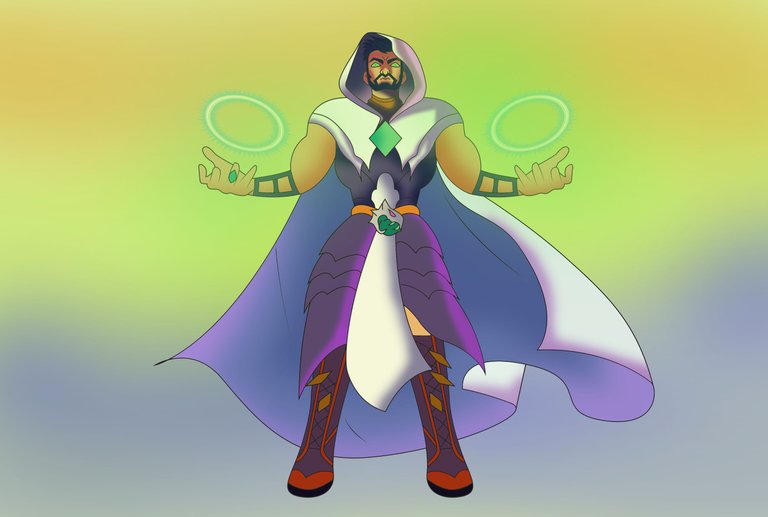
This is the finalized digital art that I did with Adobe Illustrator path tool and Adobe Photoshop.
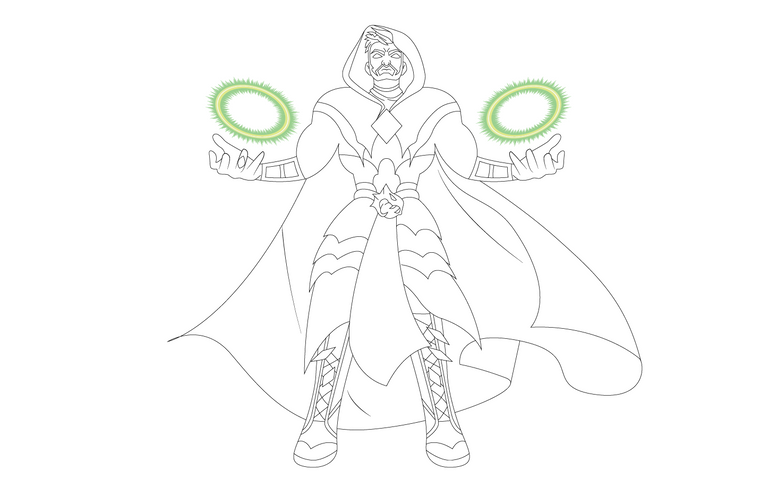
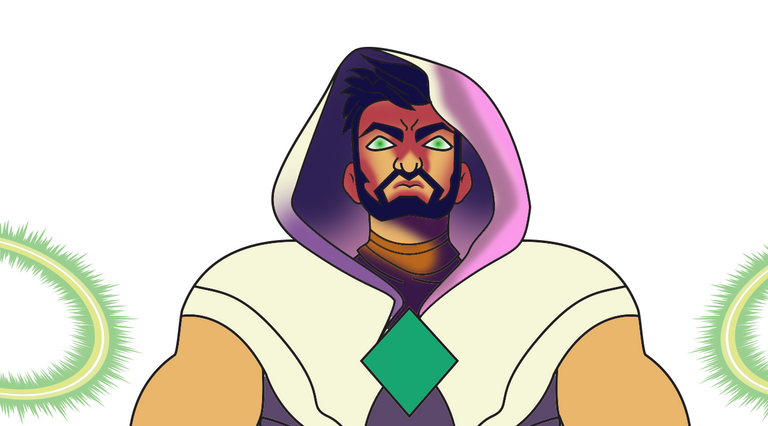
Here is the original picture that I tried to recreate.
This is going to be a tutorial kind of post that may not follow only a process format and I hope if someone tries following my articles below then he/she may create such things.
Tools
- Adobe Illustrator (Selection Tool, Pen Tool, Smooth Tool, etc.)
- Adobe Photoshop ()
How to
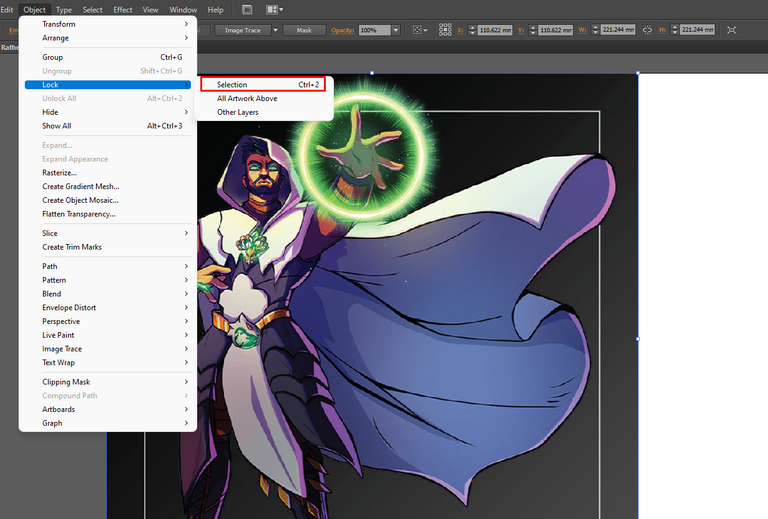
- I downloaded and used the original picture in Adobe Illustrator so get help in recreating the outline. Then after selecting the picture, I locked it from Object > Lock > Selection or by pressing ctrl+2 in shortcut. It needs to be locked cause I may need to click on it by the selection tool when I recreate it.

- Then first I recreated a hand and the legs using the pen tool and I used red color as stroke color.
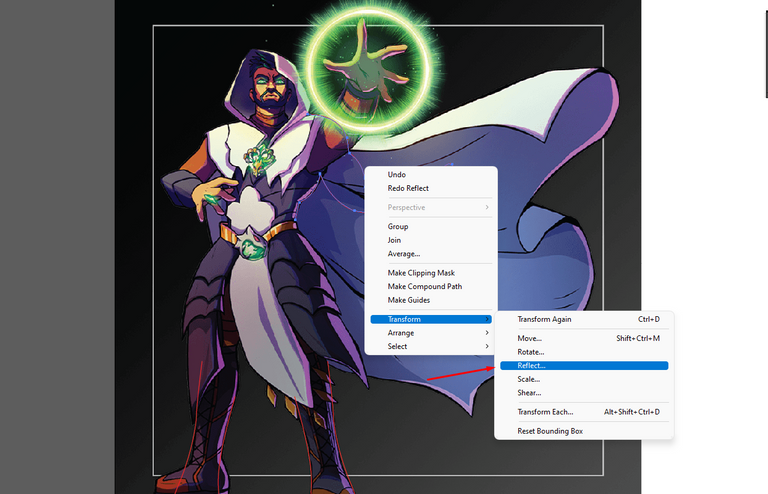
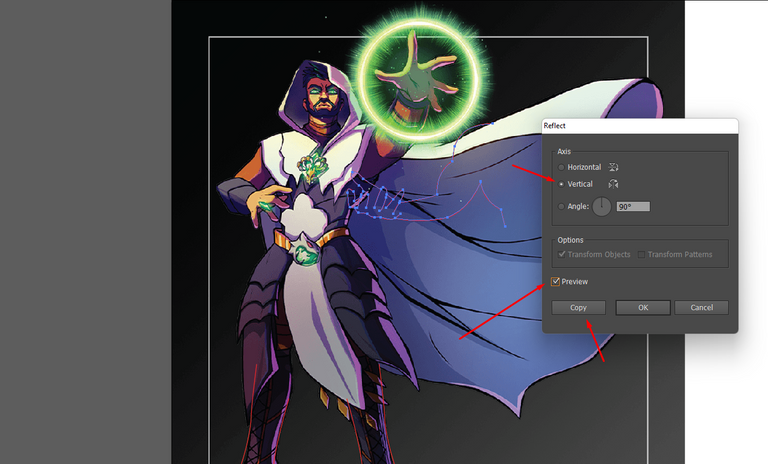
- Then I reflected a copied the arms part using the reflect option from transform and I had to use the vertical angle for that.
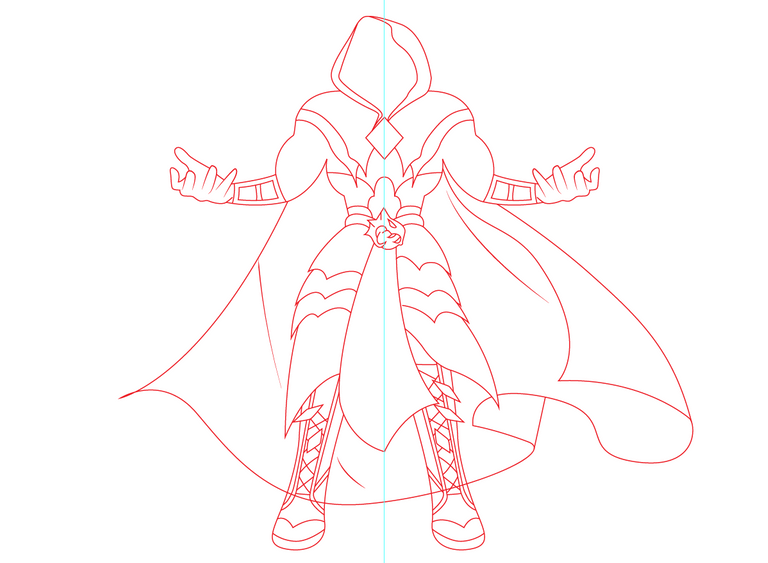
- Using a ruler guides at the center, I drew the whole outline includes the cape but I still didn't draw the face.
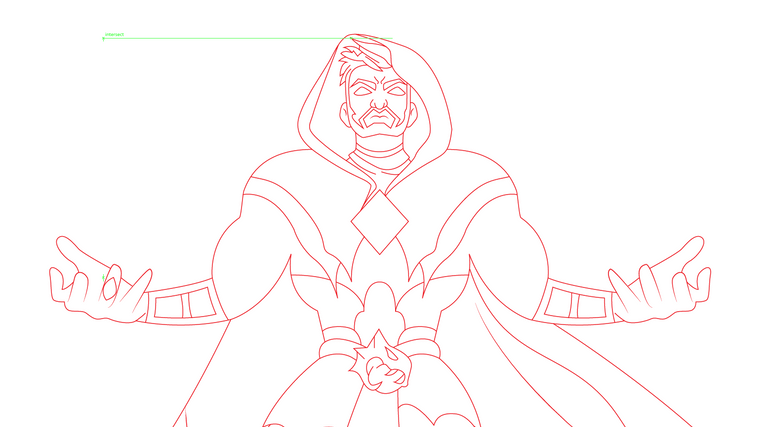
- Using the pen tool, I drew the face as well. Now I need to use the magical rays only that'll complete my work in Adobe Illustrator.
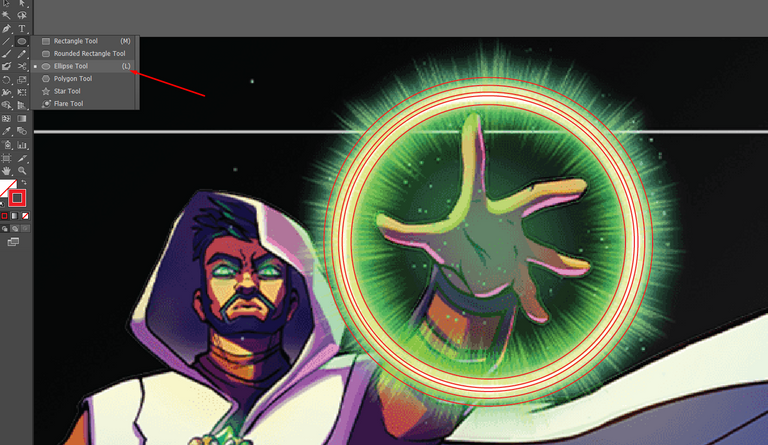
- To recreate the magical rays, at first I used the eclipse tool and I drew the biggest circle. Then I copied (ctrl+c) and pasted (ctrl+f) and kept reducing the size. I'll color the sun rays here in Adobe Illustrator as well as it may get difficult in Adobe Photoshop.
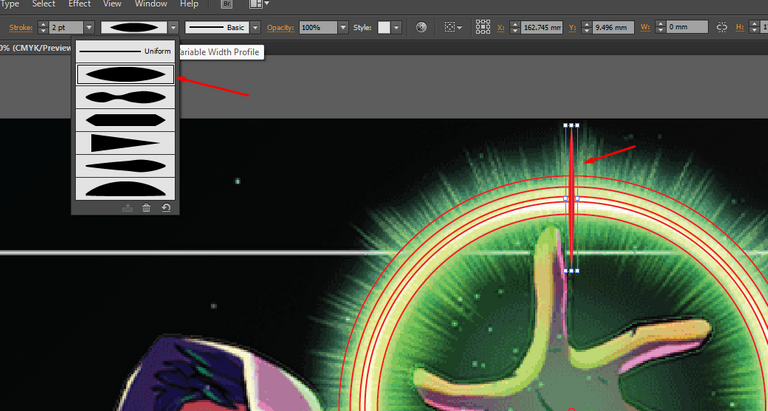
- I drew a line and from strokes variable width profile, I used width profile 1 that made the line fatter on the center and thinner on both sides.
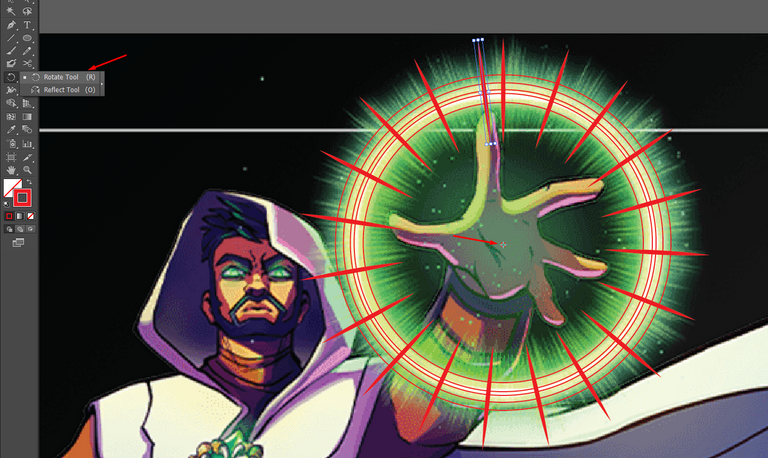
- Then I used the rotate tool first and I chose the center of the circles while selecting the line and then I just hold and pressed the mouse left button and the line started moving around the choosing center point and I released the mouse button using the alt button of the keyboard that made a copied version of the line. Then I kept pressing ctrl+d and the line kept getting copied.
- I repeated the same thing that gave me this wave lookalike design.
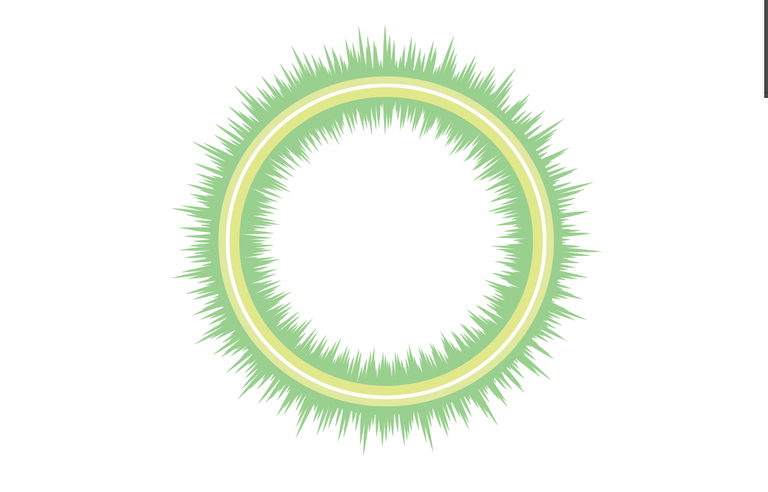
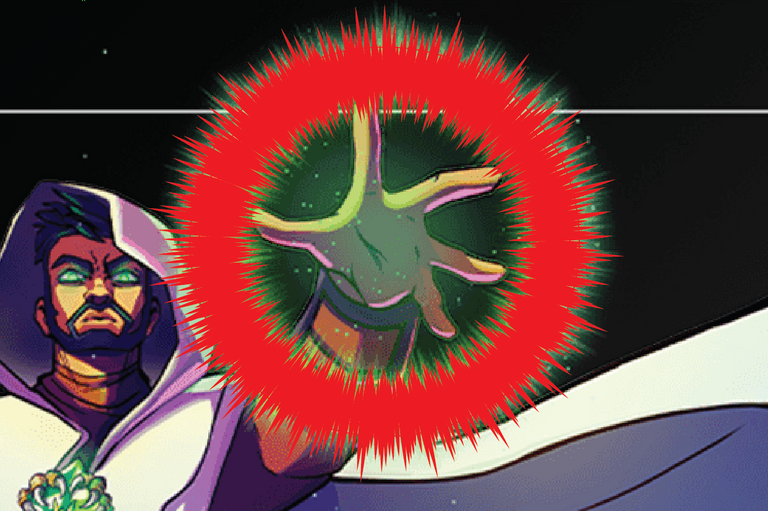
- And I made this that took me quite some times, I needed a lot more time for this than I needed to draw the face.
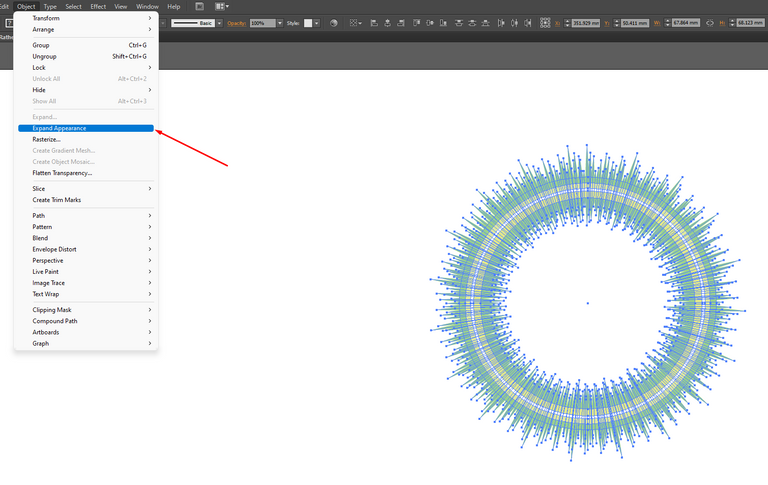
- I'll need to change the size ratio of this magical ray so I expanded the appearance of it first otherwise the stroke files may looks dumb later.
- And here I finished the outline work in Adobe Illustrator. Now I'll move to Adobe Photoshop to color the character.
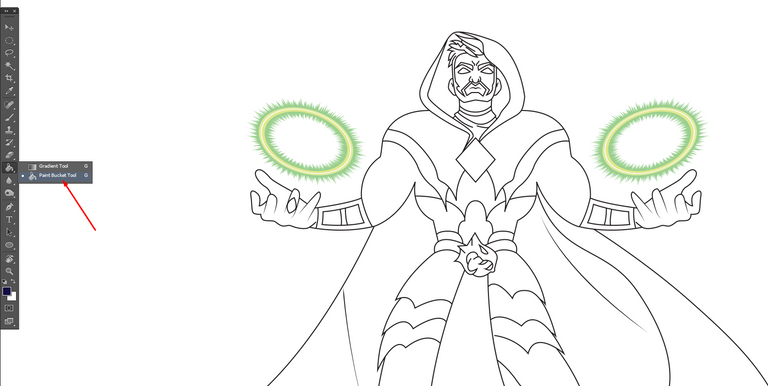
- Using the paint bucket tool, I did the solid colors on the whole character following the original character. Now its time to do some brushing.
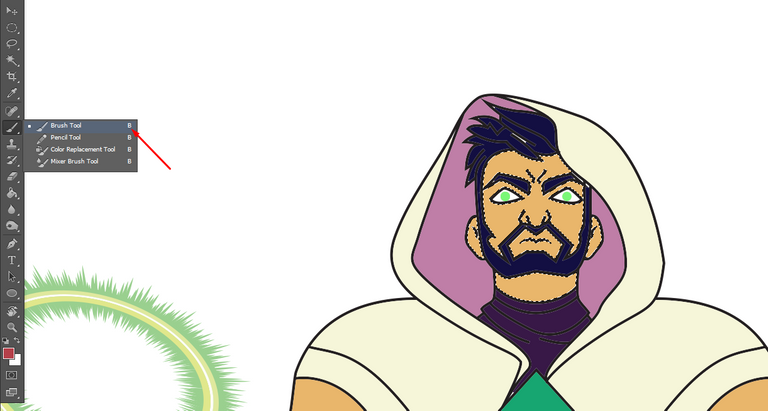
- Look how smooth and perfect the face and hood look now after doing some brushes. I used the brush tool and I selected different colors using the eyedropper tool (alt button from the keyboard in shortcut) and then I used the magic wand tool and I selected a certain part and I brushed them up.
- I kept brushing the whole character and I came to this after all the brushing.
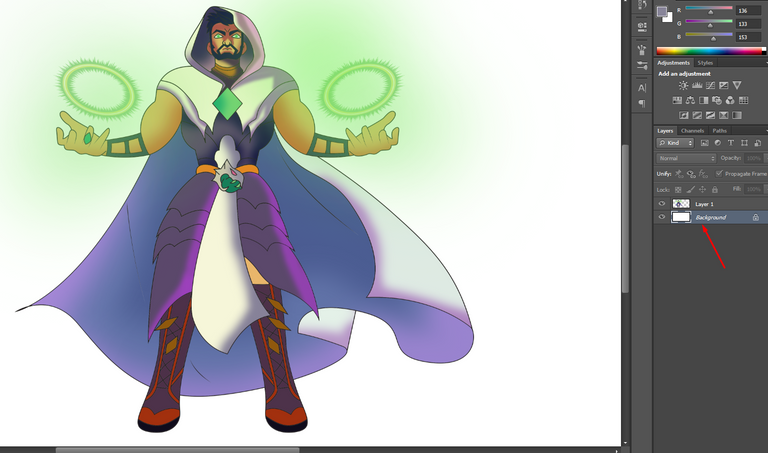
- Then I selected the background later from Layers cause I wanted to do some brushing on the background and if we do it in separate layers then the character picture that's in another layer won't get effected.
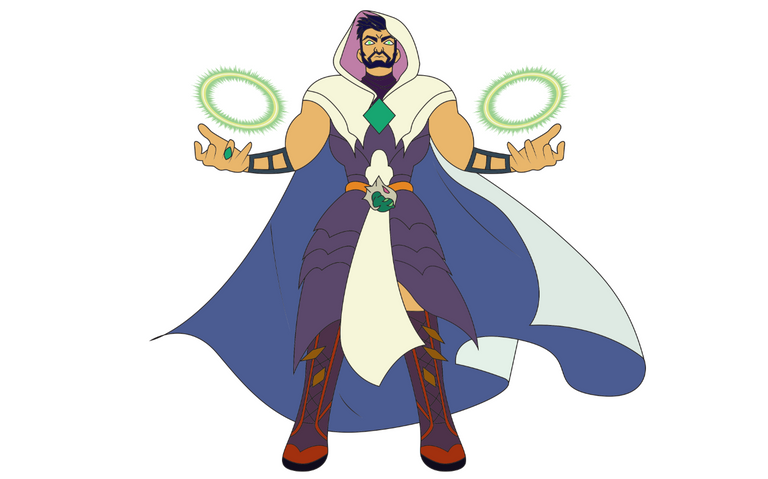
- And here I did some brushing on the background and I finished the digital drawing.
This is the one that I did today.
I hope splinterlands team will like it.
I will ask you to join with my referral link in splinterlands if you wish to.
And here's my referral link.
Wish me good luck, will you?
Be safe till we meet again.
Au revoir/Goodbye.
Thank you for sharing this post in the DIYHUB Community!
Your content got selected by our fellow curator sharminmim & you just received a little thank you upvote from us for your great work! Your post will be featured in one of our recurring compilations which are aiming to offer you a stage to widen your audience within the DIY scene of Hive. Stay creative & HIVE ON!
Please vote for our hive witness <3
Thanks for the selection @sharminmim and for the upvote @diyhub.
Yay! 🤗
Your content has been boosted with Ecency Points, by @rashed.ifte.
Use Ecency daily to boost your growth on platform!
Support Ecency
Vote for new Proposal
Delegate HP and earn more
You have done very good painting, everyone will like this painting, and you have explained about painting very well. nice work
Thanks for the compliment. I tried my best to make the post a detailed one. I may try to do better with the next post.
yes bro
Very nice work. @tipu curate 6
Upvoted 👌 (Mana: 0/55) Liquid rewards.
Thank you so much.
Beautiful 🥰
Thank you ☺️🤗
Welcome 😁
Is amazing!
Thanks a lot.
Thanks for sharing! - @yonilkar

Nice and increble art you made.
Thanks for the compliment and upvote @yonilkar
Congratulations @rashed.ifte! You have completed the following achievement on the Hive blockchain And have been rewarded with New badge(s)
Your next target is to reach 700 comments.
You can view your badges on your board and compare yourself to others in the Ranking
If you no longer want to receive notifications, reply to this comment with the word
STOPCheck out our last posts:
Support the HiveBuzz project. Vote for our proposal!