Battle Mage Secrets Weekly Challenge: Aimless
Hey guys,
it's been a while, but I'm back with a new Battle Challenge which is now called "Battle Mage Secrets" and will no longer be about a specific card but rather a ruleset. I personally liked the older challenge a bit more, but I understand that this one is way more beginner friendly so I'm all for it.

The Challenge's Rule

This weeks rule set is "Aimless" with gives every ranged and magic attacking monster the Scattershot ability.
For everyone who's not familiar: Scattershot completely randomizes where an attack is going. It could hit the first position, somewhere in the back, it can ignore Taunt and it will hit camouflaged monsters.
With that in mind Scattershot can be a great counter against line ups that use a big taunt monster with lots of support cards in the back, but at the same time it also goes against a fundamental gameplay strategy which is focussing your fire on one monster at a time to take it out as fast as possible.
The Ruleset

The rules for this battle besides Scattershot were Equalizer (every monster gains the health of the highest health monster on the field) and Close Range out (ranged monsters can attack from the first position), with 27 mana and every splinter except Dragon available.
The Line Up & Strategy
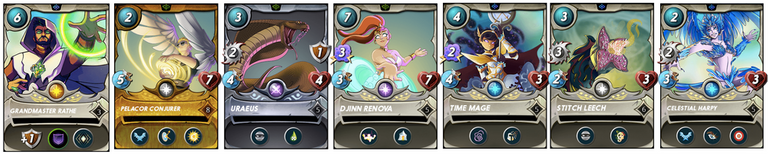
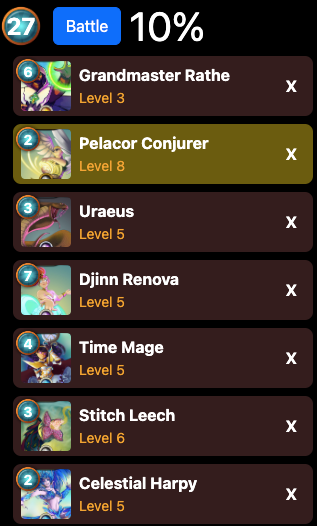
First I went with Grandmaster Rathe for my summoner, because I like the +1 Armor and Void Armor, especially when I don't know where my opponent will attack. I put Pelacor Conjurer as my tank because he's just so good for the 2 mana he costs.
For my damage I went with Uraeus, Stitch Leed (Life Leech is especially good in Equalizer) and Celestial Harpy, because they are all melee and would guarantee at least some attacks on the same target, because of the double Sneak.
Lastly I chose Djinn Renova to buff up my health, again to make sure every monster had some protection and for the Triage, which is a great counter against Scattershot and Time Mage to slow down my opponent and strip away any armor they might have.
Overall I was pretty happy with my team, considering there was only 27 mana to be used, but let's see how I did!
The Battle
Note: Usually I go over each round in detail, but because Scattershot battles tend to be quite chaotic and it would be hard to keep up with every single attack, I chose to only highlight the important parts in each round.
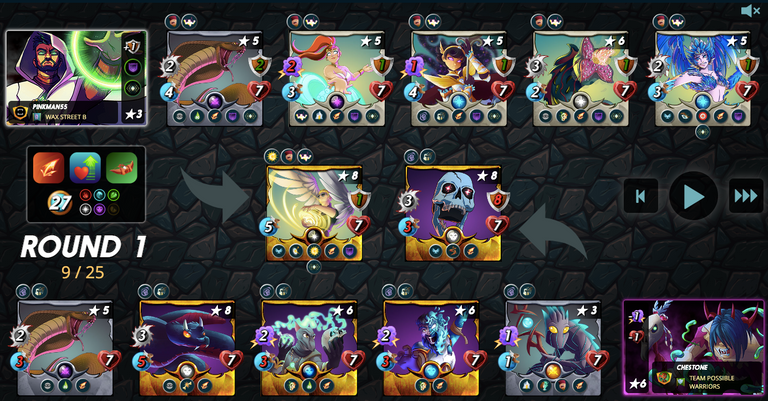
My opponent went or a Thaddius Brood team with two sneak attackers as well and the mighty Equalizer duo Venari Bonesmith and Life Sapper (both have Life Leech). They also brought a triage with Spirit Hoarder and their tank as Thorns. I have to admit this team looks pretty good.
Like I said there was a lot of back and forth and no monster died. However their Bonesmith managed to poison my Uraeus. Luckily my Djinn Renova healed it back up with Triage, so that it wouldn't die to the poison immediately.
Round 2
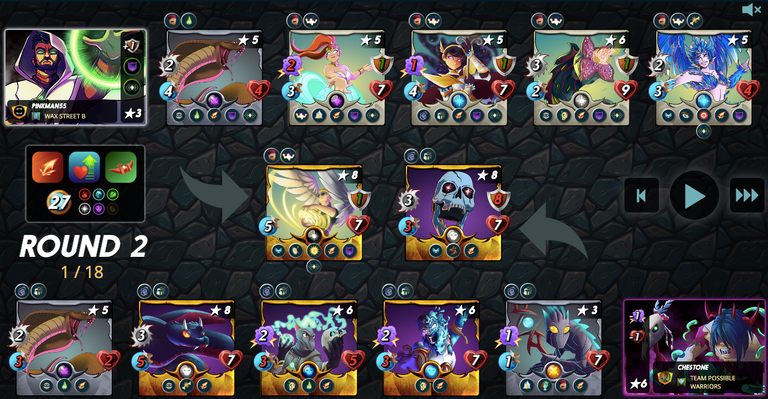
The battle commences and this round we have a little bit more action. My Harpy in the last spot manages to dodge the Silent Sha-vi's attack with her Flying ability and my Uraeus lands a nice poisonous hit on the opponents Uraeus which takes it out.
On my side everyone manages to stay alive. Especially Djinn Renova did a great job outhealing the poison on my Uraeus again.
Round 3
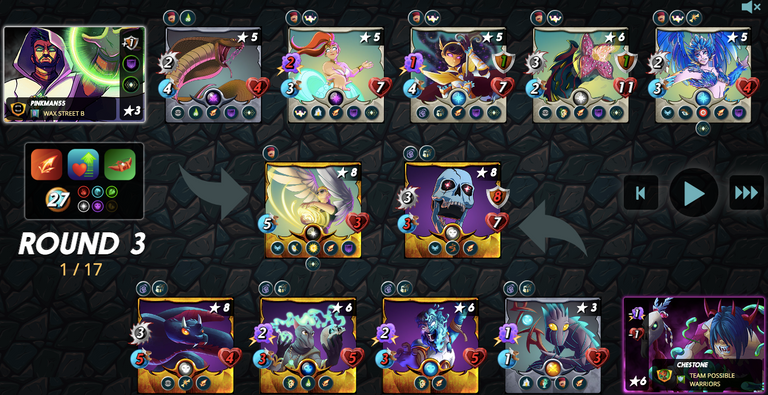
Uraeus lands another clutch poison hit on Silent Sha-Vi and is yet again healed by Renova to withstand the poison. I also manage to take out their Spirit Hoarder with the opportunity from the Harpy, which is amazing, because it now can't heal the poisoned Sha-Vi.
Unfortunately the Bonesmith also lands a poison on my Time Mage, which means its time is ticking (no pun intended 😂). Lastly the Ever Hungry Skull kills off my Pelacor Conjurer, pulling Uraeus into the first spot.
Round 4
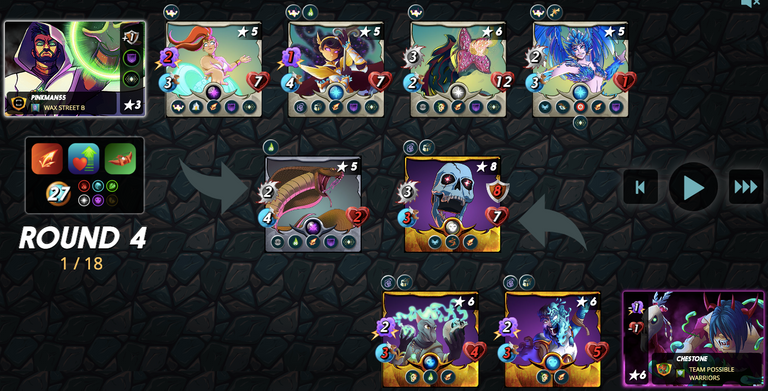
Uraeus lands yet another poison hit on the Skul and even though it dies to the Thorns damage, that was definitely worth it! Djinn Renova keeps going strong with the heals and gets the Harpy back to 3 HP, so she survives the Bonesmith's attack. Unfortunately she then attacks the Skull, because it's the lowest health enemy and dies to the thorns... this is how doctors must feel who patch someone up, just for them to go out and break something again.
Round 5
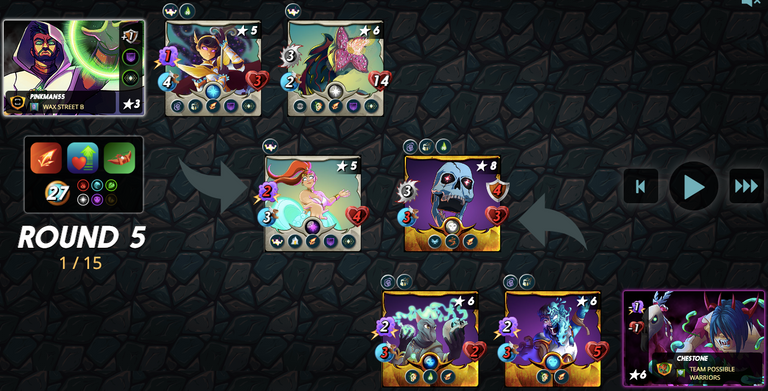
We're down to three monsters on each side, with two of them poisoned. Djinn Renova does her best to keep Time Mage alive with the Triage, but eventually dies to the Skull as well. In return my Stitch Leech which has 13 (!) HP by now takes out the Bonesmith and gains another 2HP for a total of 15!
Round 6-9
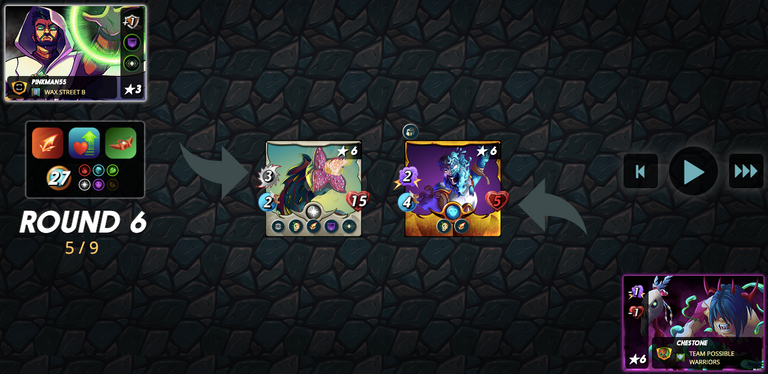
Time Mage and Every Hungry Skull both die to the poison damage, leaving Stitch Leech and Life Sapper for an epic stare down.
Stitch Leech misses its attack, while Life Sapper (which can't miss with magic attacks) leeches himself back up to 6 health. For a short moment my heart stopped, thinking "I can't lose here, can I?".
But round 7, 8 and 9 Stitch Leech hits all his attacks like a champ and Life Sapper's Life Leech isn't enough to withstand the 3 melee attack.
Conclusion
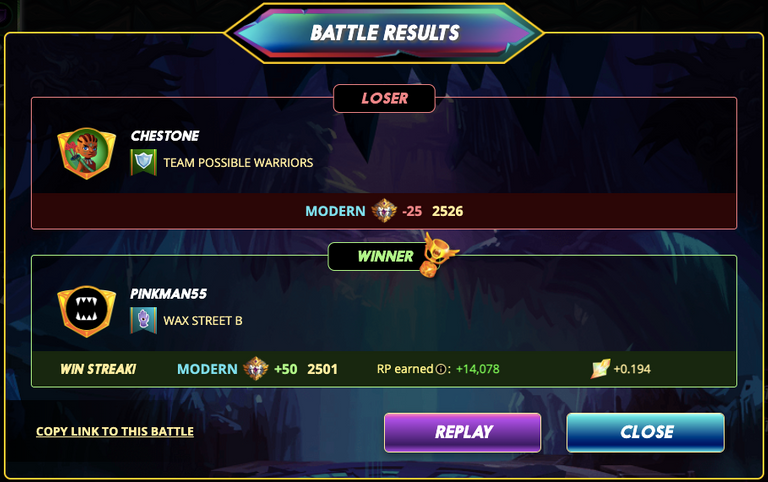
The battle is over and the stats are here: And I should've lost by a mile 😂
I liked my line up, but I knew that theirs was better when I saw it. I should've lost this, but I didn't and that's the randomness of Scattershot. Both my Uraeus and my Harpy where at 1-2 health for a majority of the game and could've been taken out by a magic attack at any time. But as luck has it the attacks landed else where and they survived long enough to tip the battle in my favor.
Like I said in the beginning, Scattershot can be very deadly and helpful to get by taunts and wipe out squishy targets, but it can also be super random and never hit what you want to hit.
This is why I used melee attacking monsters for my main source of damage to make sure, the attacks would land where they were supposed to and only used magic attacking monsters for support (Triage, Rust, Slow).
Disclaimer
None of this is financial advice. This content is for educational purposes only and might fall out of date as both Splinterlands and the Crypto Market in general are subject to constant change.

Start playing Splinterlands today!
Previous Posts
Check out my push into gold league: Part I, Part II

Check out my Bronze league strategy guides: Part I, Part II
Hope you enjoyed the read. Have a great day and until next time!
Pinkman45
Do you know you can win a Chaos Legion pack and many other things just by following some simple steps ?? Check out our Latest Daily Showcase and Participate our latest Giveaway. Thanks
Thanks for sharing! - Underlock#8573
