Battle Mage Secrets Weekly Challenge | Broken Arrows (2 Battles)

CHALLENGE RULES
RULESET: Broken Arrows
Description: Ranged attack Monsters may not be used in battles.
Tip: A high HP first monster with Void ability will deal with both melee and magic. Give your tank a back up with a tank heal support. Using Thorns or Magic Reflect is also very useful in this rule set. Defend against either Magic or Melee attacks by using the right summoner and then use monsters' abilities to deal with the other attack type.
Battle 1
Battle Rulesets:


Super Sneak: All Melee attack Monsters have the Sneak ability.
Tip: Choose a summoner that increases/reduces Melee attack or Mylor. Keep a monster with Shield, Retaliate or Thorns in the last position.
Healed Out: All healing abilities are removed from Monsters and Summoners.
Tip: You can skip monsters and summoners having Affliction. Life Leech is not impacted by this ruleset.
Broken Arrows: A high HP first monster with Void ability will deal with both melee and magic. Give your tank a back up with a tank heal support. Using Thorns or Magic Reflect is also very useful in this rule set. Defend against either Magic or Melee attacks by using the right summoner and then use monsters' abilities to deal with the other attack type.
Tip: A high HP first monster with Void ability will deal with both melee and magic. Give your tank a back up with a tank heal support. Using Thorns or Magic Reflect is also very useful in this rule set. Defend against either Magic or Melee attacks by using the right summoner and then use monsters' abilities to deal with the other attack type.
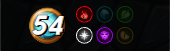
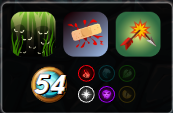
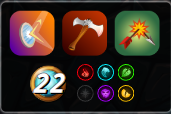
MANA CAP: 54
Active Splinters:
- Fire
- Life
- Death
TEAM AND STRATEGY
TEAM
Summoner:
- Ilthain
Monsters:
- Legionnaire Alvar
- Jared Scar
- Adelade Brightwing
- Disintegrator
- Arkemis the Bear
- Chaos Knight
Strategy
Since its Super Sneak, most of the players will likely to use Life Splinter if its available. I used Ilthain for the additional +1 Speed to all Monsters so I have a higher chance on attacking first.
There is also a possibility that my opponent will also use Life Splinter so I decided to use Legionnaire Alvar and Disintegrator** for the Demoralize ability.
I also put Chaos Knight at 6th position because it has Shield ability that can sustain Jared Scar's damage (if my opponent also used Life Splinter).
Adelade Brightwing for the Resurrect, Repair and Swiftness. She is really a good combination in this kind of lineup.
Arkemis the Bear as my second tank if my opponent has a Jared Scar. He is a really good counter against Jared Scar because of his Forcefield ability.
Jared Scar as my core damager because he has a True Strike and Bloodlust ability.
Positioning
Position 1:
Legionnaire Alvar - in case my opponent use magic monsters. He is a really good tank for magic because of his Void Armor ability. Also, to counter the opponent if he use Melee team, because he has Demoralize ability.
Position 2:
Jared Scar - my core damager and I put it at second position for its safety. I trust my Legionnaire Alvar and I have Adelade Brightwing for Repair.
Position 3:
Adelade Brightwing - She is my support and I want her in the safest position.
Position 4:
Disintegrator - I also want him in the middle position so that he can last in the battle because I really need his Demoralize ability.
Position 5:
Arkemis the Bear - as my second tank at the back and to sustain the backline if my opponent use Jared Scar.
Position 6:
Chaos Knight - my main tank at the back because of its Shield ability to at least protect the backline against melee monsters.
Battle
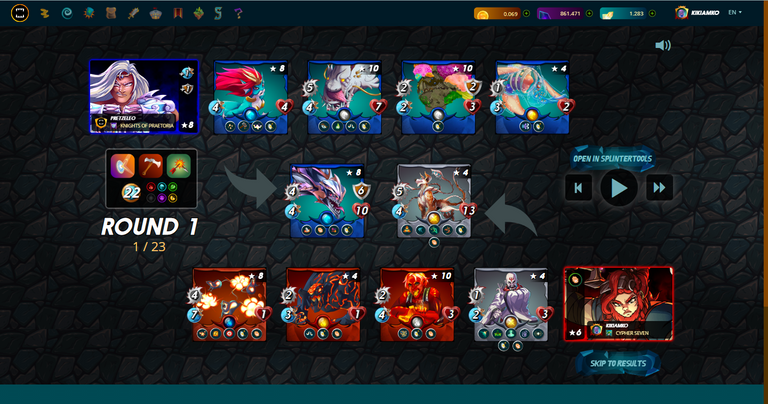
Round 1
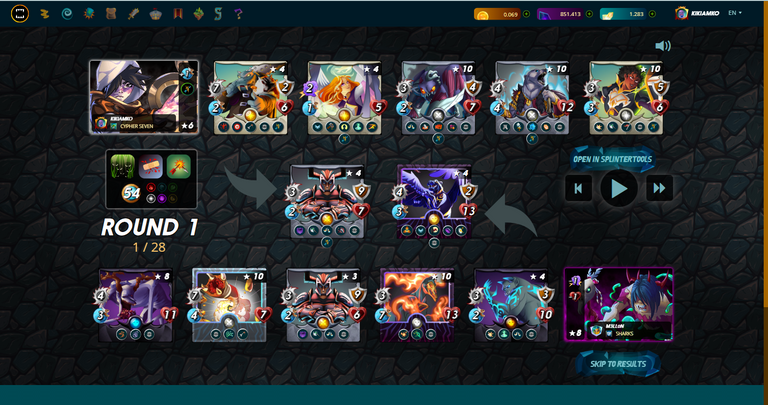
First of all, this is my girlfriend's account that I am playing.
I'm surprised because my opponent didn't used Life Splinter. There are also 2 misses on my team that's why his Dark Ha'on survived the Round 1.
Round 2
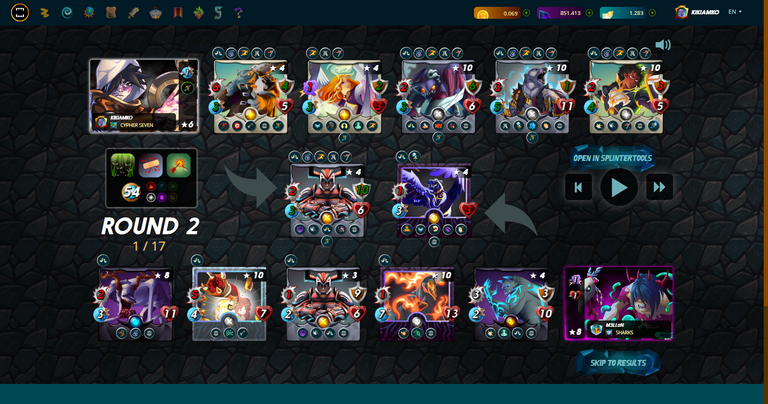
This time, Dark Ha'on died and I can attack his backline now. I'm expecting a Bloodlust on my Jared Scar but it didn't happen. Also, my Chaos Knight is still hanging in there because of her Shield and the Repair from Adelade Brightwing.
Round 3

Finally, I got a Bloodlust for my Jared Scar after he killed Sand Worm. Also, Round 3 ended with 6v3 battle.
Round 4
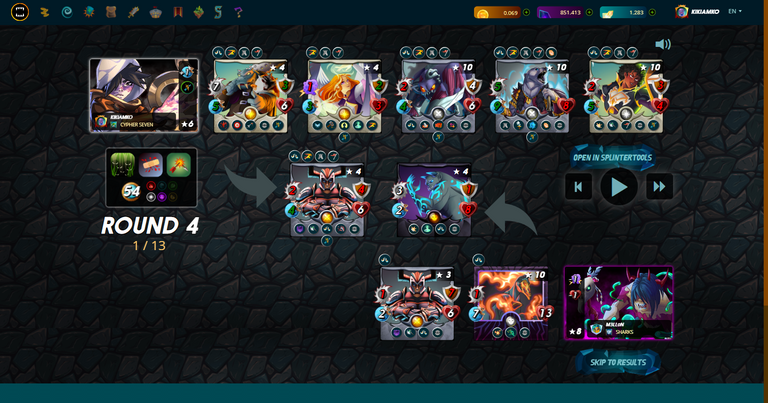
I thought I'm getting another Bloodlust again but there is one (1) Health left on his Legionnaire Alvar. The Round ended with 6v2 battle and I'm really dominating my opponent.
Last Round
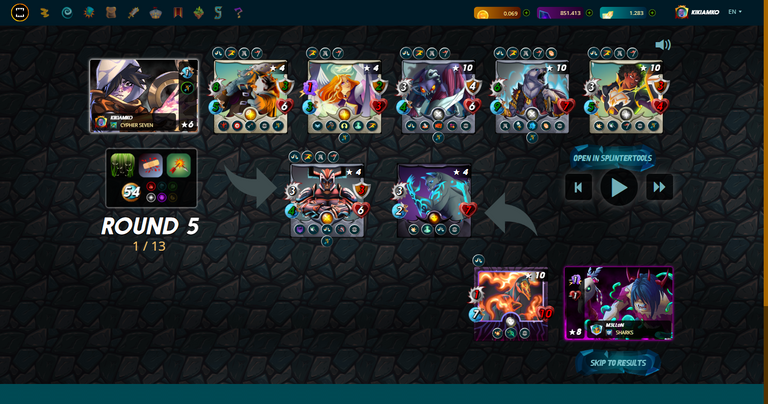
Last Round and my Jared Scar gets another Bloodlust after killing Nightmare and Disintegrator did the final blow to end the battle.
Battle Summary
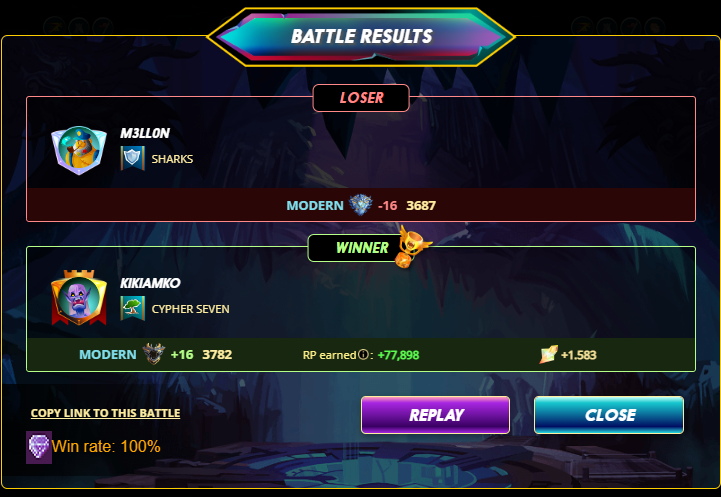
Overall, it was a flawless victory. My strategy works well and you can see the Win rate which is 100% (via Splintertools). Good thing he didn't also use "Life" Splinter which is a big surprise for me lol
Battle Results and Rewards
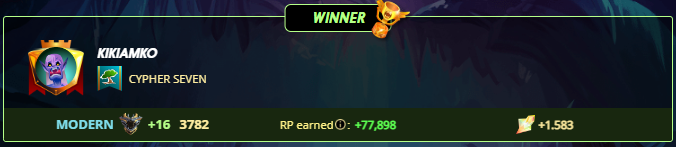
Rating: +16(3782)
RP earned: +77,898
SPS earned: +1.583

Battle 2
Battle Rulesets:

Counterspell: All monsters receive the Magic Reflect ability at the start of the battle. Enemy monsters that attack with magic receive damage back.
Tip:
Damage returned is equal to the damage of the attacker divided by 2, rounded up.
Magic monsters with the Reflection Shield ability do not take damage from reflected magic attacks.
The Amplify ability increases damage.

Melee Mayhem: Melee attack Monsters can attack from any position.
Tip: If you have melee monsters in the back-line with Sneak or Opportunity, those abilities take precedence. Select a summoner that increases melee attack or a summoner that reduces melee attack of enemies + a tank with Shield. Thorns, Inspire, Blast, Retaliate help in this ruleset.
Broken Arrows: A high HP first monster with Void ability will deal with both melee and magic. Give your tank a back up with a tank heal support. Using Thorns or Magic Reflect is also very useful in this rule set. Defend against either Magic or Melee attacks by using the right summoner and then use monsters' abilities to deal with the other attack type.
Tip: A high HP first monster with Void ability will deal with both melee and magic. Give your tank a back up with a tank heal support. Using Thorns or Magic Reflect is also very useful in this rule set. Defend against either Magic or Melee attacks by using the right summoner and then use monsters' abilities to deal with the other attack type.
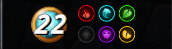
MANA CAP: 22
Active Splinters:
- Fire
- Water
- Earth
- Death
- Dragon
TEAM AND STRATEGY
TEAM
Summoner:
- Skargore
Monsters:
- Coeurl Lurker
- Venator Kinjo
- Radiated Scorcher
- Scorch Fiend
- Exploding Rats
Strategy
Since its Melee Mayhem and most likely my opponent will use Melee monsters because its impossible for him to use Magic monsters because of the Counterspell.
Skargore is really a good combination for Coeurl Lurker because it will Enrage and it will increase its Damage and Speed which is really great.
Venator Kinjo for Reflection Shield in case my opponent use a monster with Thorns and a monster with blast to protect my backline. Also, for the Amplify if my opponent hits my Coeurl Lurker so it will increase the damage to enemies when they got Thorned.
Radiated Scorcher for Shatter.
Scorch Fiend for Demoralize.
Exploding Rats because of its insane Speed and Damage. Also, it has Redemption which is really good.
Positioning
Position 1:
Coeurl Scorcher - my main tank and it has Thorns and Dodge which is really great for this kind of ruleset.
Position 2:
Venator Kinjo - perfect for second position because of its Refflection Shield in case my opponent used a monster with Blast ability and he will not die if the opponent has a Thorn ability. Also, Amplify is really best for the Thorn ability of my Coeurl Lurker.
Position 3:
Radiated Scorcher - it has more Health than Scorch Fiend and Exploding Rats and for the Shatter.
Position 4:
Scorch Fiend - its really great because of the Demoralize ability.
Position 5:
Exploding Rats - my second core damager because of its insane Damage.
Battle
Round 1
I added this battle because its really interesting ^_^
As I predicted, my opponent used Melee team and with a tank that has a lot of Armor. Luckily, there is no Retaliate on his Diemonshark for this Round. I'm also happy that my Venator Kinjo missed his attack because it might Retaliate and kills it and Trample and will also kill my Radiated Scorcher which is crucial because I really need both of them because of their abilities.
Round 2

His Diemonshark Retaliate to my Coeurl Lurker and there is 1 Health left for my Coeurl Lurker and his Diemonshark died because of the Thorns. Sadly, my Coeurl Lurker died by "Torrent Fiend** and the Round ended with 4v4 battle.
Round 3
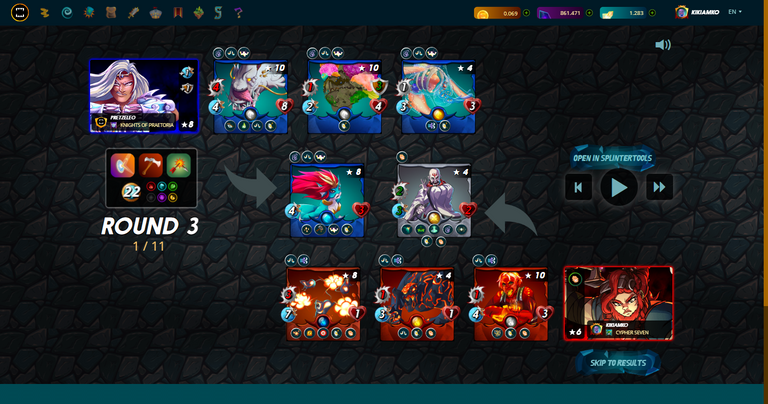
When you look at the image above, it looks like that he's really in advantage. But before the end of the Round, Radiated Scorcher triggered its Enraged which is really great because he will attack first before Deeplurker ono the next Round.
Round 4
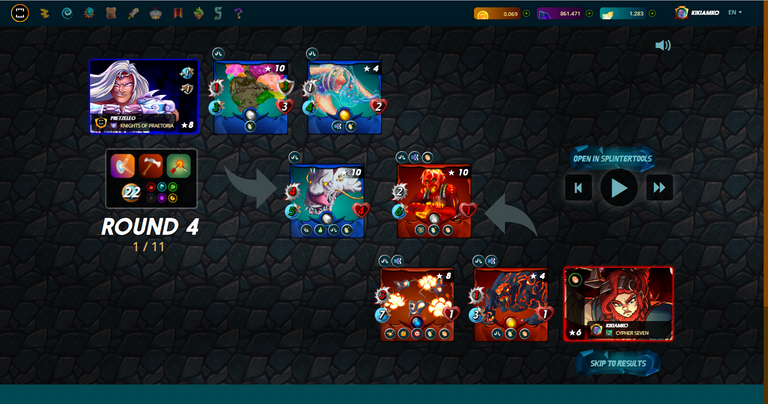
Enrage really helps a lot in this Round because my Radiated Scorcher attacked first before his Deeplurker which is clutch and the Round ended with 2v1 battle.
Last Round
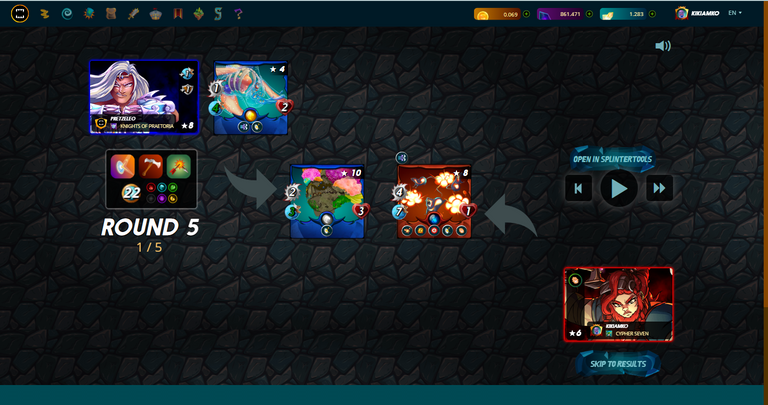
We can clearly see that I'm going to win this battle because my Exploding Rats will attack first and he killed the two (2) monsters with that insane attack!
Battle Summary
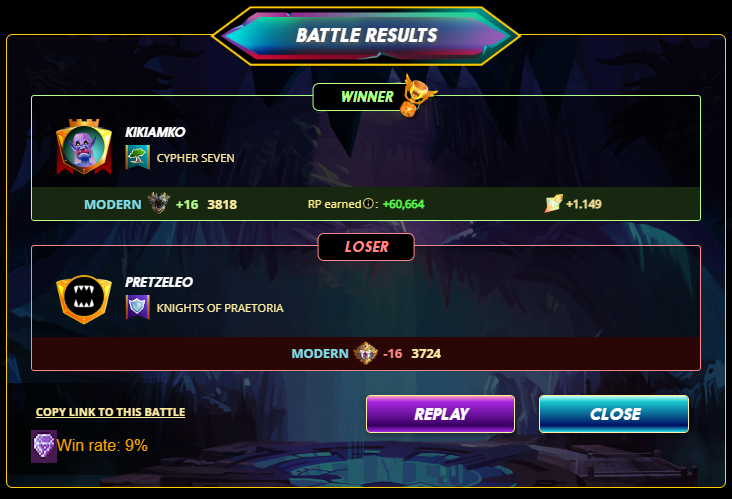
Overall, the MVP of this battle is Skargore because of its Enrage buff. Also, I didn't expect that my Win rate is only 9% (via Splintertools). RNG is really on my side in this battle :P
Battle Results and Rewards
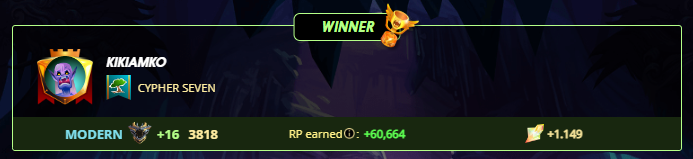
Rating: +16(3818)
RP earned: +60,664
SPS earned: +1.149

Watch the full battle:
Follow me on:
Thank you for reading my blog! Much love ❤️ Good luck everyone on your Splinterlands grind and keep safe!


Follow me on:
Thank you for reading my blog! Much love ❤️ Good luck everyone on your Splinterlands grind and keep safe!
Great post, Kira! 👍
Do you know you can win a Chaos Legion pack and many other things just by following some simple steps ?? Check out our Latest Daily Showcase and Participate our latest Giveaway. Thanks
Thanks for sharing! - @rehan12
