Splinterlands Art Contest Week 183! - Cornealus
Hello, I am Brainlagx. I just recently arrived in this Hive space, and love seeing all the art community since I am an aspiring artist myself. I am currently practicing with 3D-modelling as part of my free time hobbies, and would love to share.
For this week I will share my process in making Cornealus. I learned a lot from this art. Can't wait to see what my 3 years of future art will look like. Hopefully, I can be a great artist-designer, that's my biggest dream so far. This is my journey and hopes u guys stay with me, Brainlagx till my last breath, I will try my best to upload consistently, weekly I guess XD. Have fun !!!!
Cornealus 3D Fanart
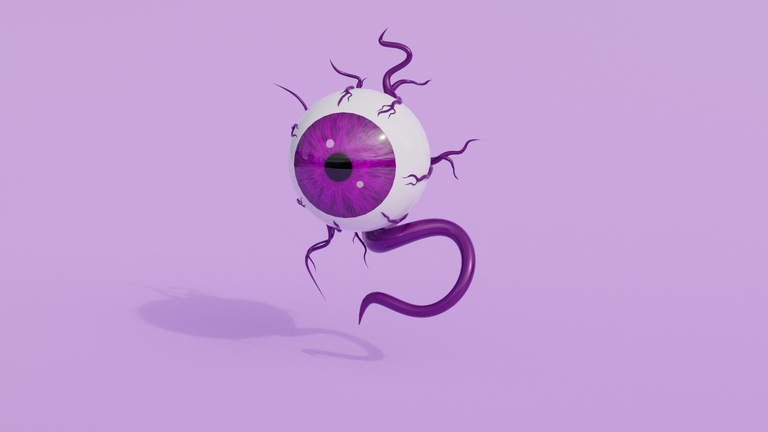
Cornealus Character I have selected.

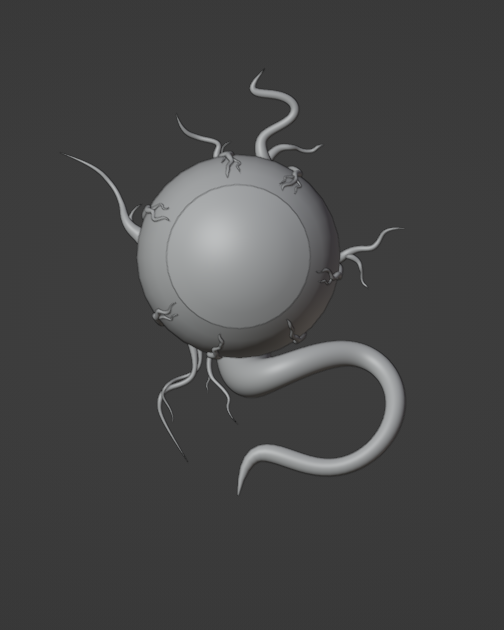
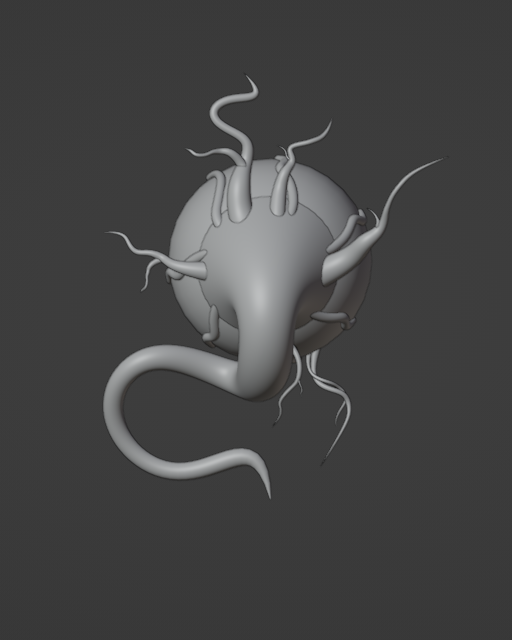
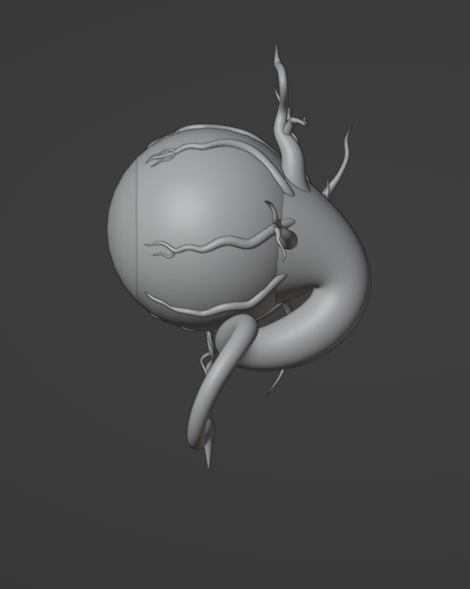
Nothing much to see from this perspective, but I thought I might as well include it. The optic nerve looks quite chunky from here XD
Congratulations @brainlagx! You have completed the following achievement on the Hive blockchain and have been rewarded with new badge(s):
Your next target is to reach 50 upvotes.
You can view your badges on your board and compare yourself to others in the Ranking
If you no longer want to receive notifications, reply to this comment with the word
STOPCheck out the last post from @hivebuzz:
Support the HiveBuzz project. Vote for our proposal!
Great work!
I tried making this but the optic nerve just don't look nice.
What object did you use to make it? I tried path curve but can't make those branches. :)
!PIZZA
Hi, Thanks a lot buddy XD, here's the method I put the Youtube video down below, u can use alt+s to change size and E to extrude the object. This method is super useful when u want to create hair and lots of stuff. If u have any other question,ask me again ok!!!! XD, I will try my best to explain what I know. Have fun!!!!
I use path curve to create this, i duplicate it to make those branch, can also use low poly first to design the nerve + brance and then remesh it to high poly or subdivision .... If u have any other method pls share with me too .
@brainlagx! The Hive.Pizza team manually curated this post.
PIZZA Holders sent $PIZZA tips in this post's comments:
thecuriousfool tipped brainlagx (x1)
Learn more at https://hive.pizza.
Thanks for sharing! - castleberry#6859
