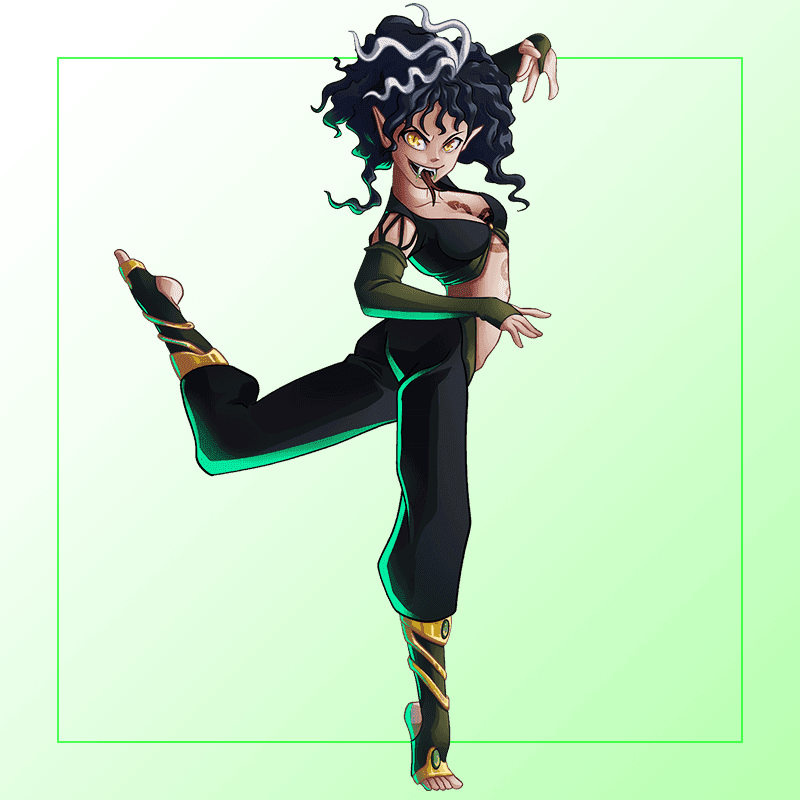
IZA THE FANGED🍃 Splinterlands Art Contest SPT W-256
Hola gran comunidad 🌷🌹quiero darles una bienvenida más para esta semana!❤️🌷😊
Hello great community 🌷🌹 I want to welcome you one more time for this week!❤️🌷😊


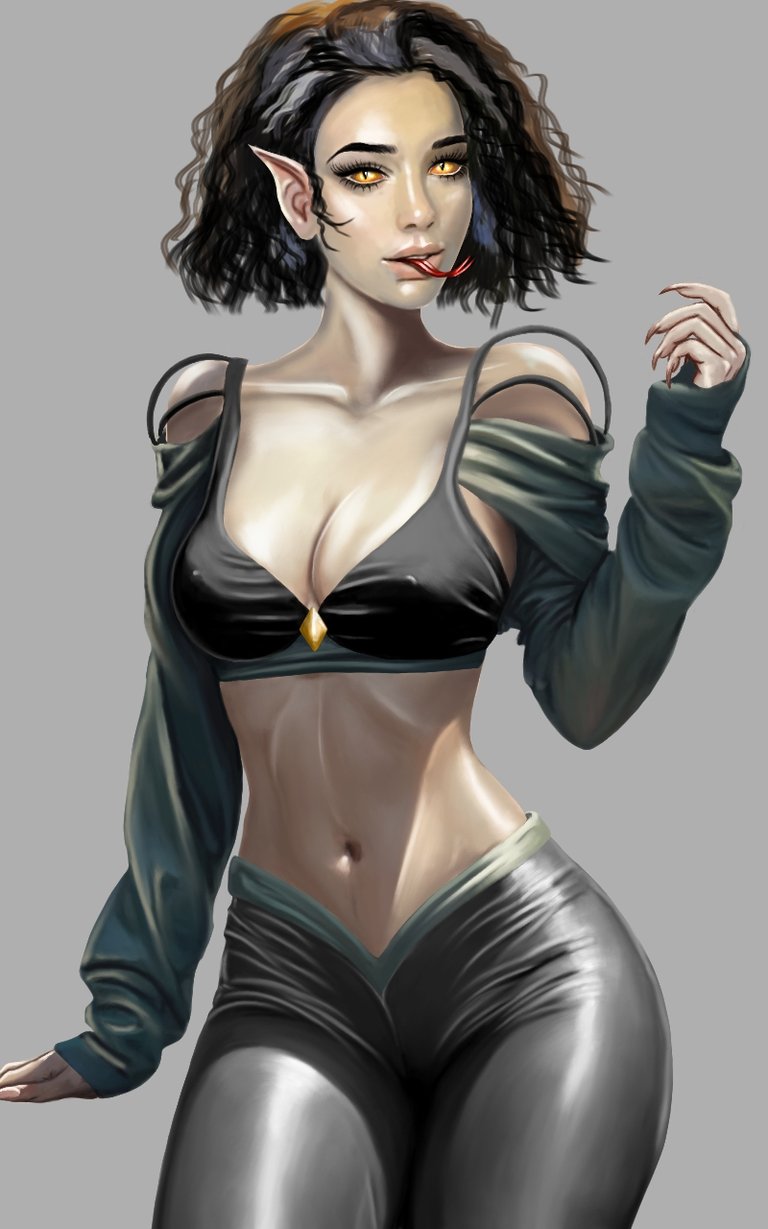
Un feliz fin de semana les deseo a todos, espero se encuentren muy bien. Hoy, ya finalizando esta semana les comparto una vez más mi entrada al concurso de arte de esta semana de Splinterlands. Y estoy participando con la carta de IZA THE FANGED, ya que es otro personaje con ojos de serpiente el cual me llamó la atención para representarlo, enfocándome en realizarle una esbelta silueta por su carácter también de danzarina. Creo es uno de los personajes con más detalles al que me he dedicado y durante toda esta semana fui aplicando cada detalle, estuve trabajando por mucho tiempo los pliegues de la ropa y aparte iluminarlos un poco más para así definir. Se me dificultó hacer el cabello tan ondulado como este, así que debo ver otro método de realizarlo, pero realmente me gusto el resultado que logré con esta representación. Con dedicación y esmero espero les guste mucho y siempre muy atenta a sus comentarios.
I wish you all a happy weekend, I hope you are very well. Today, at the end of this week, I share once again my entry to this week's Splinterlands art contest. And I am participating with the letter of IZA THE FANGED, since she is another character with snake eyes which caught my attention to represent it, focusing on making her a slender silhouette due to her character as a dancer. I think he is one of the characters with the most details that I have dedicated myself to and throughout this week I was applying each detail, I was working for a long time on the folds of the clothes and apart from illuminating them a little more in order to define them. I had a hard time making my hair as wavy as this one, so I need to see another method of doing it, but I really liked the result I achieved with this representation. With dedication and care I hope you like it very much and always very attentive to your comments.
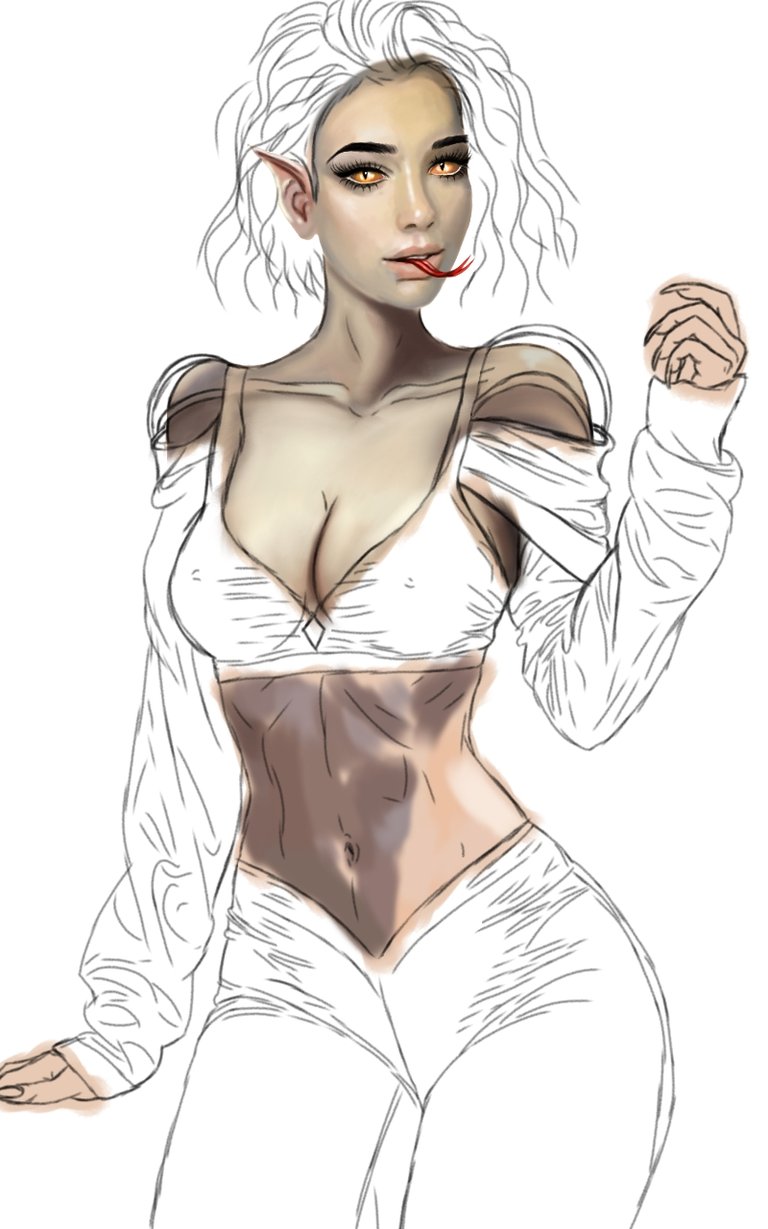
Link de la Imagen de Referencia/Reference Image Link
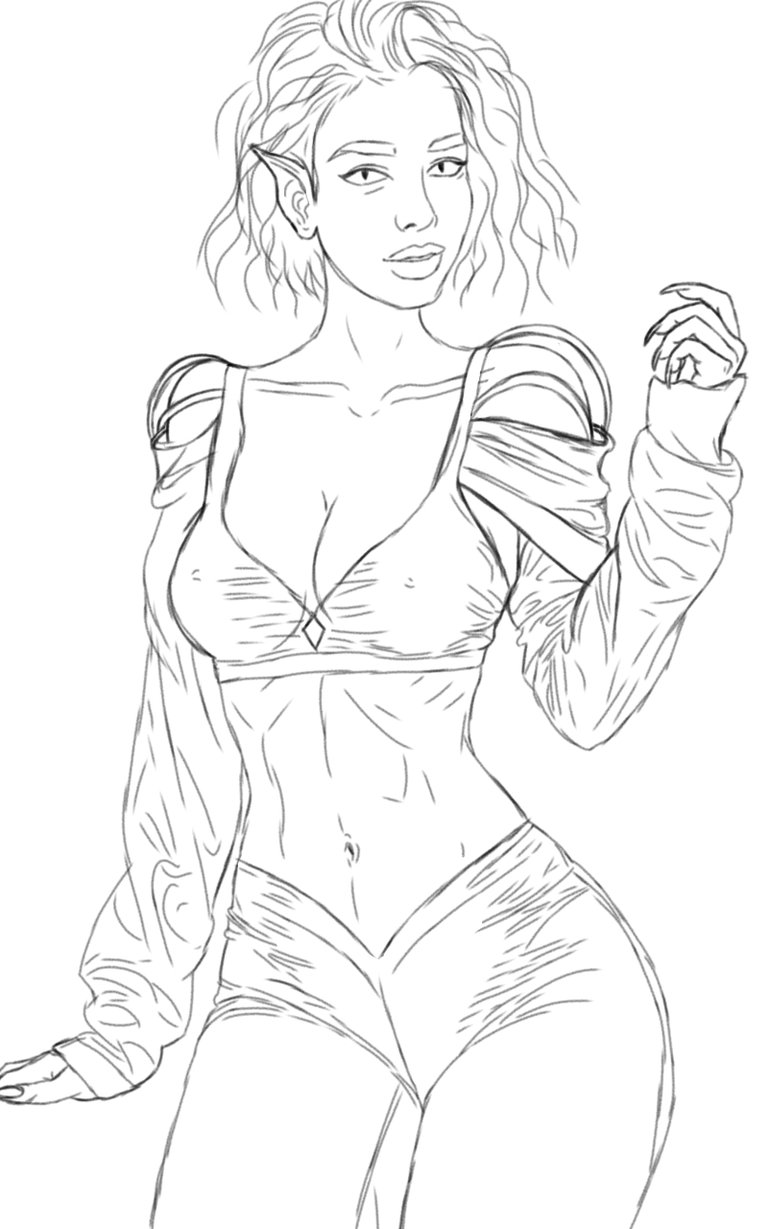
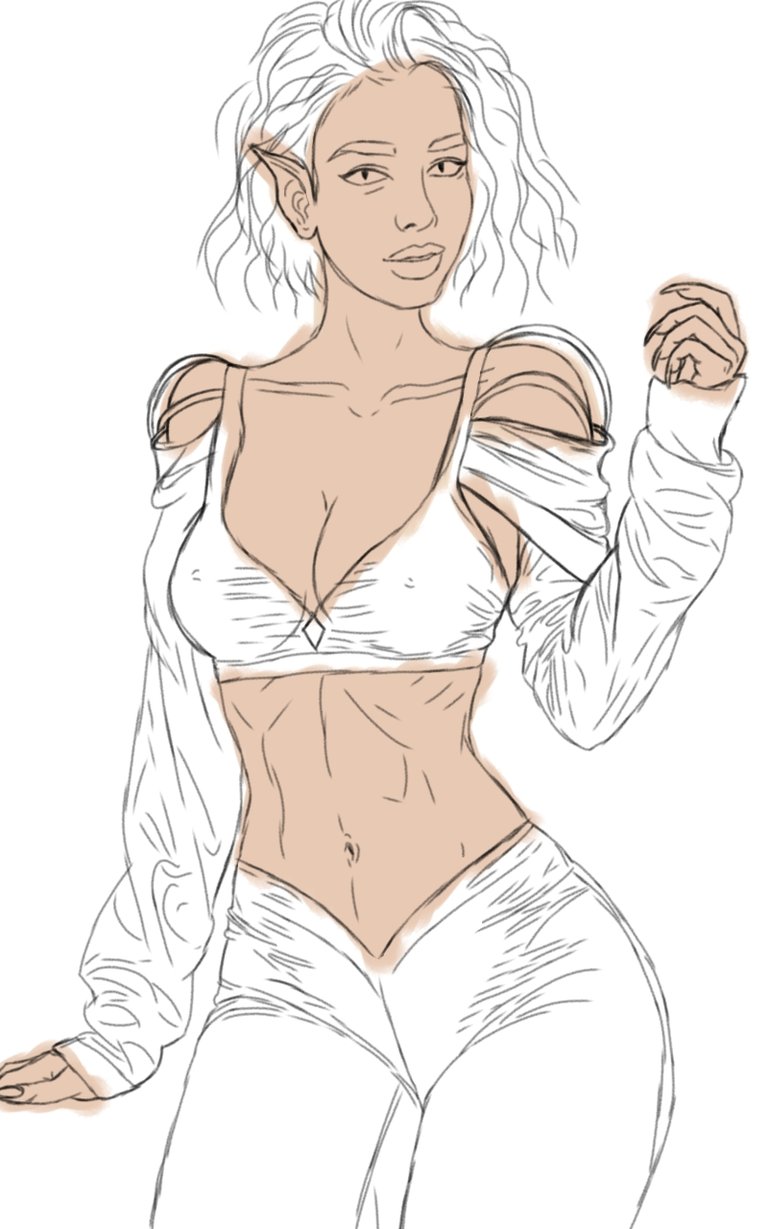
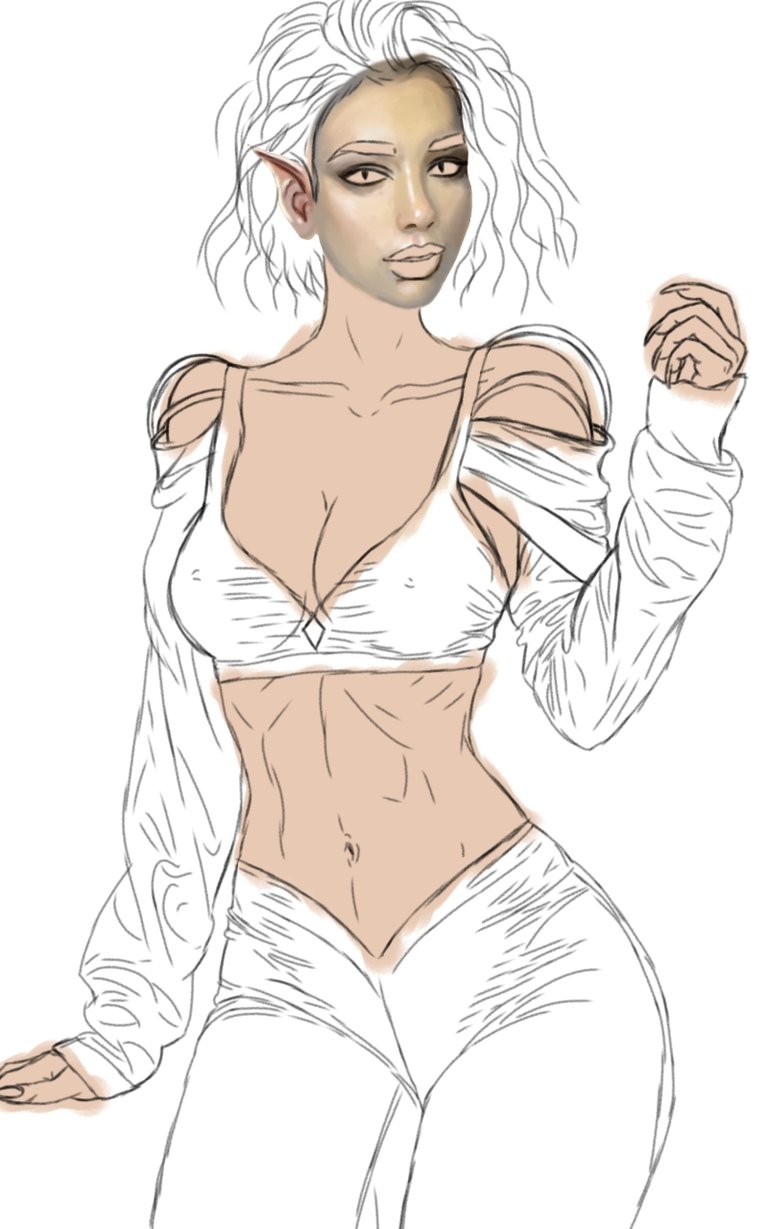
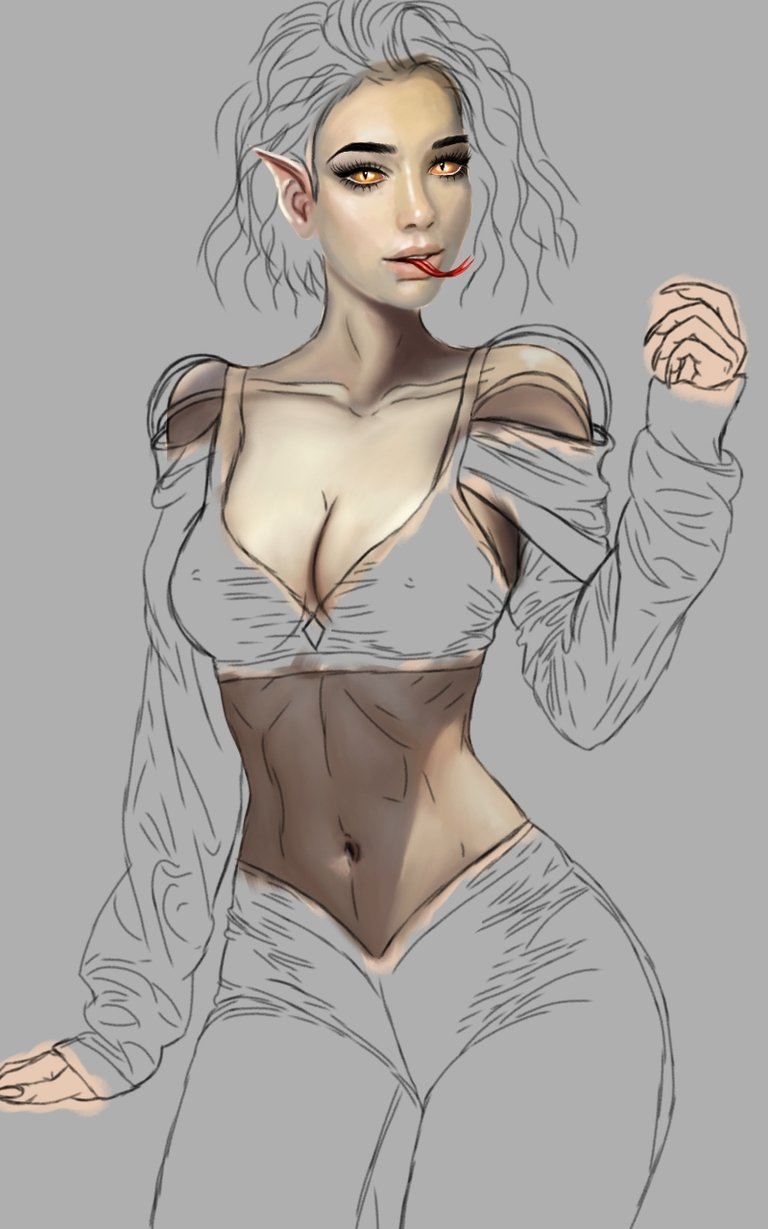
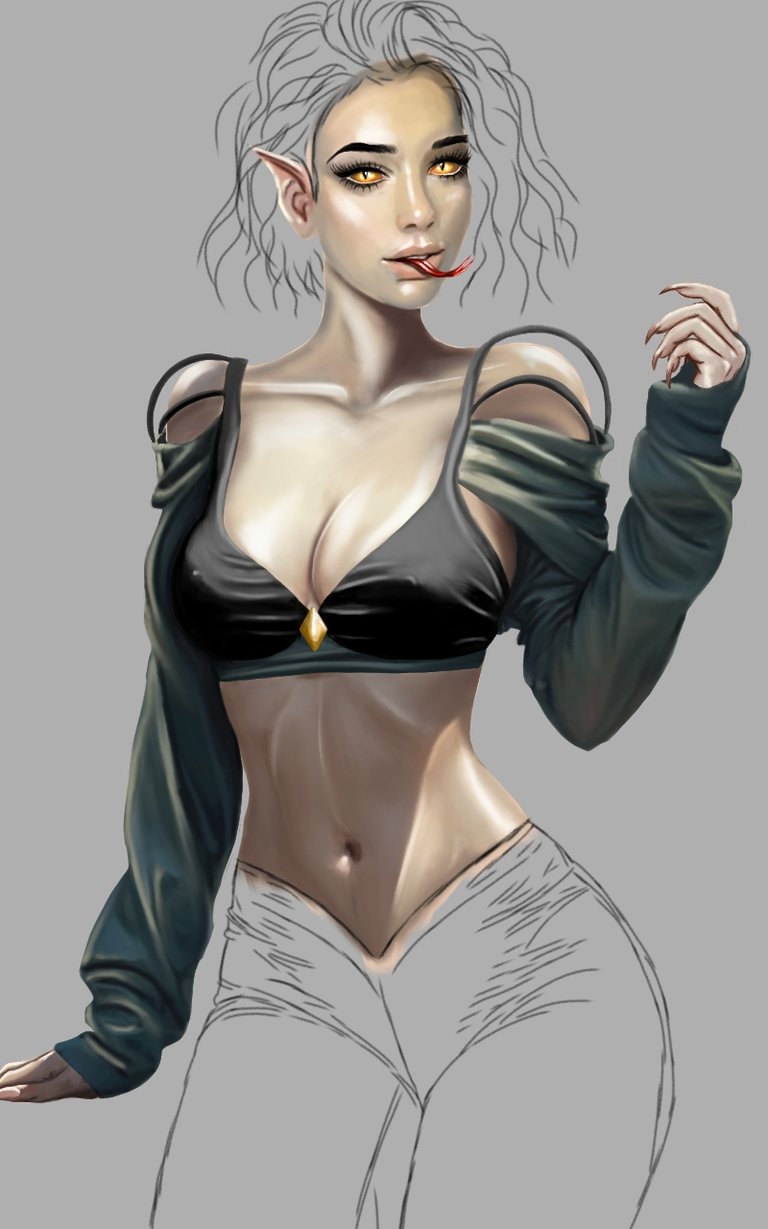
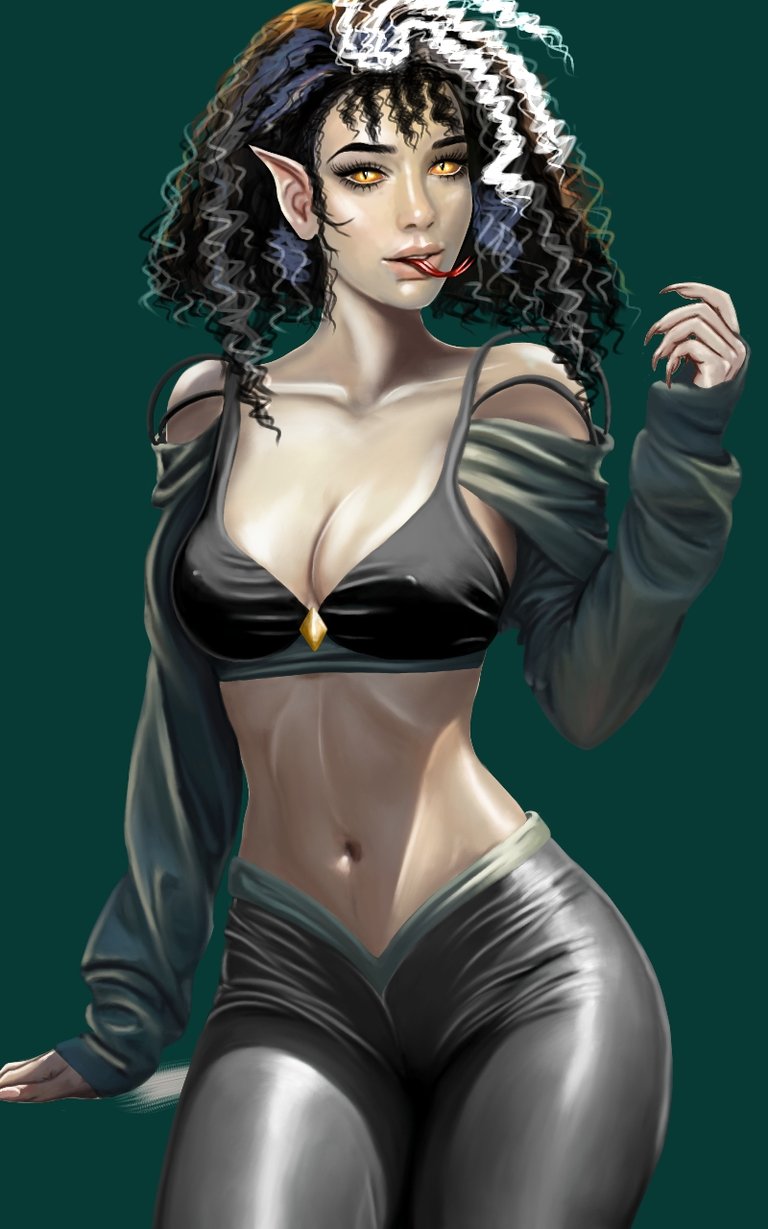
Etapas del Dibujo/Drawing Stages
Use para el boceto un pincel tipo lápiz, y fui aplicando en una nueva capa lo que es el color base. Fui por etapas para tener mayor control de lo que estaba haciendo, así que empecé a ilustrar el rostro y estuve pincelando con sombras y de una vez fui aplicando en una nueva capa lo que es la iluminación usando un método de mezcla normal, pincelando con la brocha tipo plano real. Seguí con los ojos en una nueva capa y me llevo algo de tiempo con el difuminado ya que con el dispositivo en el que trabajo se ve mucho los pixeles al acercar, así que se me complicó un poco el difuminado porque corría mucho a pesar de estar en una opacidad media baja, es complicado con los detalles. Después de usar la brocha tipo pincel redondo abanico para hacer la lengua de serpiente, fui pincelando el resto del cuerpo usando iluminación para definir con una capa normal de mezcla, y después de definir fui borrando las partes ya terminadas en la capa de delineado dando más detalles de iluminación a la piel. De la misma forma en una nueva capa fui recreando la ropa con un método normal de mezcla.
I used a pencil-type brush for the sketch, and I applied the base color to a new layer. I went in stages to have more control of what I was doing, so I started illustrating the face and I was brushing with shadows and at once I was applying the lighting in a new layer using a normal blending method, brushing with the real flat type brush. I continued with my eyes on a new layer and it took me some time with the blurring since with the device I work on the pixels are very visible when zooming in, so the blurring was a bit complicated because it ran a lot despite being at a low medium opacity, it's tricky with details. After using the round fan brush to make the snake tongue, I brushed in the rest of the body using highlighting to define with a normal blend layer, and after defining I erased the finished parts on the liner layer giving more lighting details to the skin. In the same way, in a new layer I recreated the clothes with a normal mixing method.
 |  |
 |  |
 | 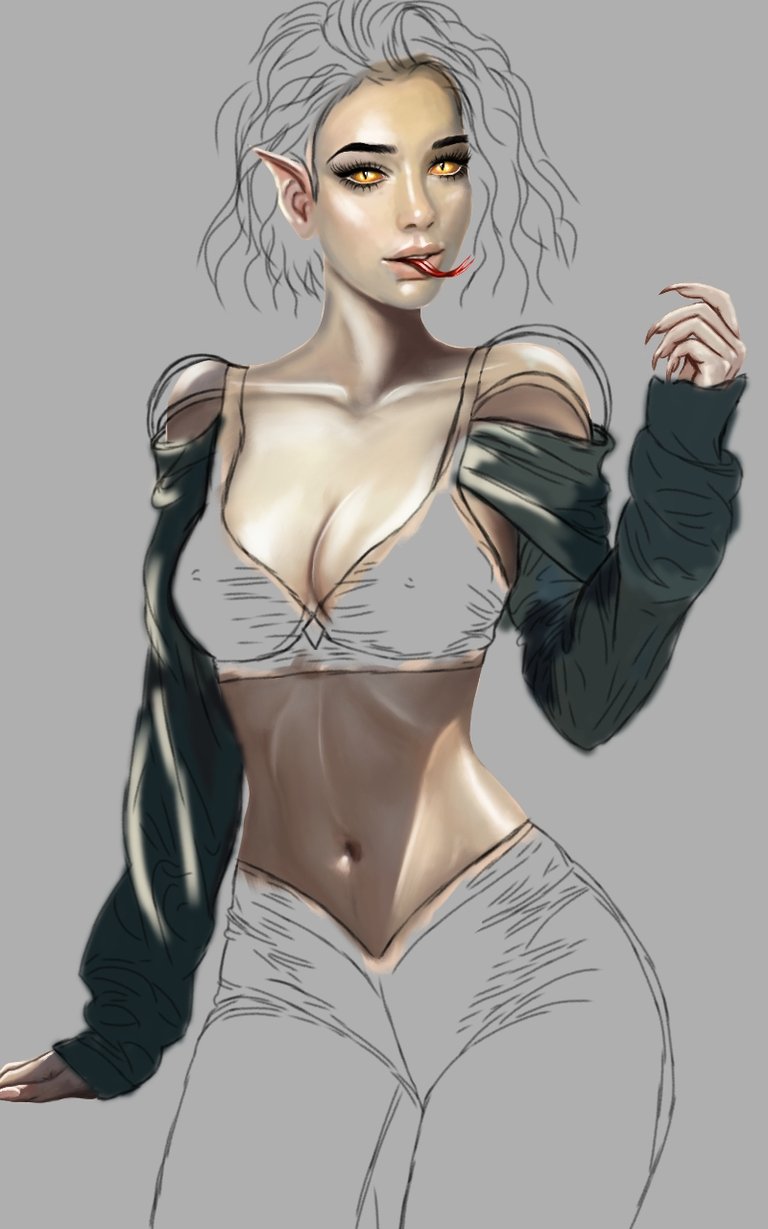 |
Fui difuminando y aplicando iluminación y sombra a los pliegues, en esta etapa dure bastante tiempo, cambiando los tonos de verde y en cuando a darle iluminación y profundidad. Use la misma brocha tipo plano real y seguí así mismo con el top. Luego, fui borrando el delineado y corrigiendo algunas imperfecciones de los bordes con difumino y endureciendo algunas sombras y zonas de iluminación. Después seguí en una nueva capa pincelando el pantalón usando el difumino y mezclando, use un método normal de mezcla y con el mismo pincel plano real. Reforcé la iluminación de los pliegues del mismo en una nueva capa y seguí con el cabello usando en este caso el pincel redondo abanico y en una nueva capa con método normal de mezcla, seguí dándole volumen y agregando otros tonos para no tener un solo tono negro. Ya teniendo el personaje completo empecé a trabajar en el fondo, no tenía muy claro, pero fui agrandó varios tonos para hacer un fondo rocoso y húmedo con un arroyo y cascadas, use la brocha tipo pincel redondo abanico y difumine un poco.
I was blurring and applying lighting and shadow to the folds, at this stage it lasted a long time, changing the shades of green and from time to time to give it lighting and depth. I used the same real flat brush and continued likewise with the top. Then, I was erasing the outline and correcting some imperfections on the edges with blurring and hardening some shadows and lighting areas. Then I continued on a new layer brushing on the pants using the smudge and blending, I used a normal blending method and with the same real flat brush. I reinforced the lighting of the folds of it in a new layer and I continued with the hair using in this case the round fan brush and in a new layer with the normal blending method, I continued giving it volume and adding other tones so as not to have a single black tone . Having already completed the character, I began to work on the background, I was not very sure, but I enlarged several tones to make a rocky and humid background with a stream and waterfalls, use the round fan brush and blend a little.
 |  |
 |  |
 |  |
Use varias capas donde fui agregando más detalles en el fondo endureciendo algunas zonas con el pincel tipo redondo abanico y seguí con el pincel tipo carboncillo, también agregué algunos pinceles tipo hierba y dicha de hojas usando una opacidad media baja y variando algunos tonos de verdes. Para el agua use el pincel tipo carboncillo y luego para darle cristalinidad agregué un blanco con la brocha tipo pincel redondo abanico y algo más de brillo con la brocha tipo purpurina. Después agregué una capa en superposición para darle más vida a los colores, aplicando más que todo en las zonas verdes, usando el pincel tipo carboncillo y también el pincel redondo abanico con opacidad media baja. Use también para el personaje una capa de superposición para darle mas sombras y resaltar los colores usando el pincel tipo plano real con opacidad baja también use el pincel redondo abanico. El tatuaje de la serpiente me llevo un tiempo haciéndola en otro lienzo y guadandole como PNG transparente, que luego aplicaría en una nueva capa sobre la piel de IZA, le aplique un poco de perspectiva y agregué algunas iluminaciones acorde a la iluminación de la piel, usando un método de mezcla normal. Termine aplicándole algunos brillos con la brocha tipo purpurina y la punto de brillo. Fue un reto largo este personaje y termine con una satisfacción muy grande. Espero lo hayan disfrutado tanto como yo!😊🌹🙂 Gracias queridos amigos por valorar mi trabajo y estar siempre allí!❤️🌷
I used several layers where I was adding more details in the background by hardening some areas with the round fan brush and followed with the charcoal brush, I also added some grass and leaf brushes using a low medium opacity and varying some shades of green. For the water I used the charcoal brush and then to give it crystallineness I added a white with the round fan brush and some more shine with the glitter brush. I then added an Overlay layer to liven up the colors, applying mostly to the green areas, using the Charcoal Brush and also the Round Fan Brush with Low Medium Opacity. Also use for the character an overlay layer to give it more shadows and bring out the colors using the real flat type brush with low opacity also use the round fan brush. The snake tattoo took me a while to do it on another canvas and save it as a transparent PNG, which I would then apply in a new layer on IZA's skin, I applied a bit of perspective and added some lighting according to the lighting of the skin, using a normal mixing method. Finish by applying some glitter to it with the glitter brush and the glitter point. This character was a long challenge and I ended with great satisfaction. I hope you enjoyed it as much as I did!😊🌹🙂 Thank you dear friends for appreciating my work and always being there!❤️🌷
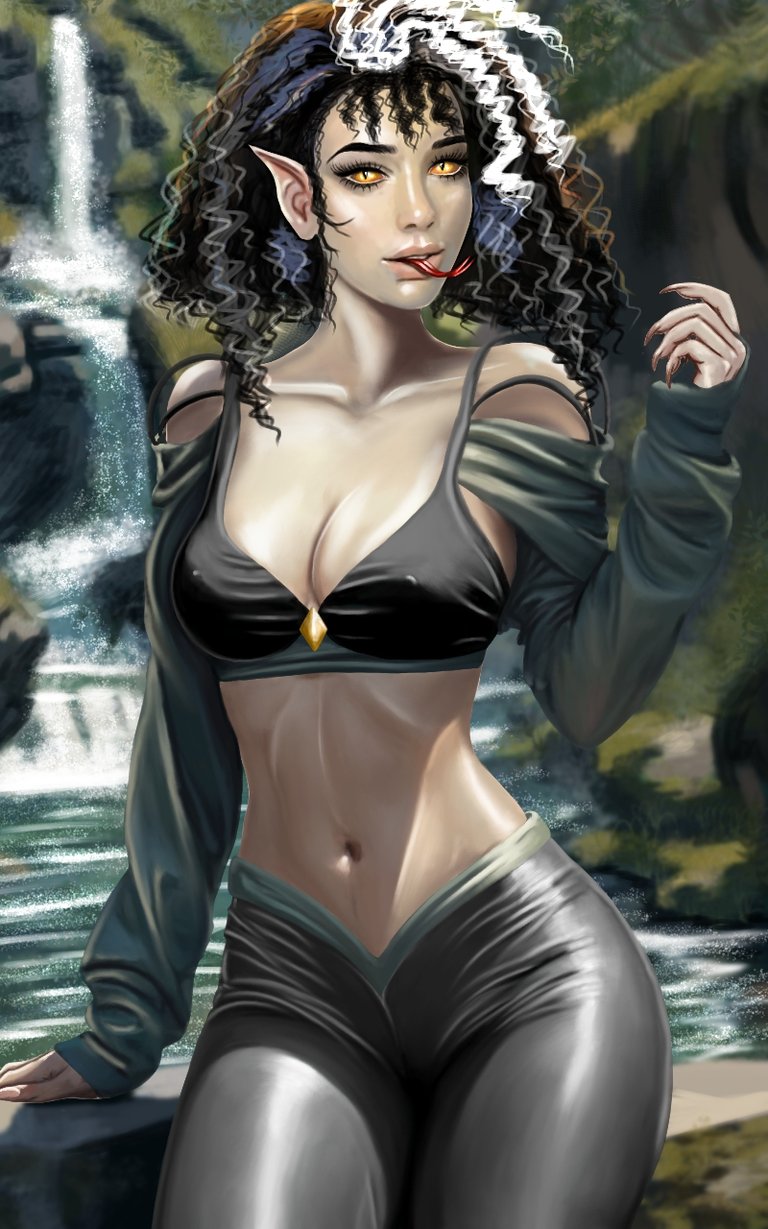 | 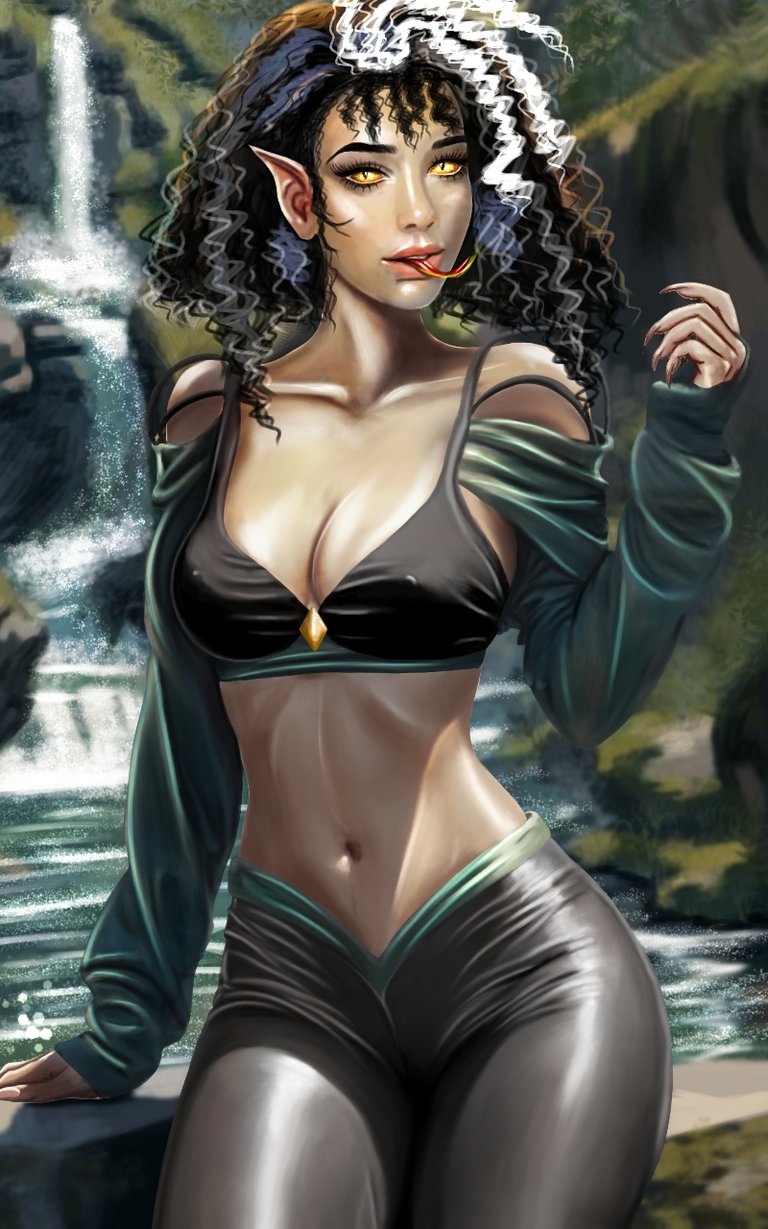 |
ILUSTRACIÓN FINAL/ End Illustration
Redes Sociales/ Social Networks
Sigueme en/ Follow me in:
👉Instagram: @catrynart
👉 Twitter: @catrynart
Herramientas Usadas/Used Tools
- Tablet Android/ Android Tablet
- Programa Ibis Paint X/ Ibis Paint X Program
- Traductor Deepl/ Deelp Translator
- Servidor de Imagenes Imgbb/ Imgbb Image Server
- Dactilopintura Digital/ Digital Fingerprint Painting
🌺¡HASTA EL PRÓXIMO POST!🌺

Detenerse es Retroceder
To Stop is to go Backwards
This post has been manually curated by @bhattg from Indiaunited community. Join us on our Discord Server.
Do you know that you can earn a passive income by delegating to @indiaunited. We share more than 100 % of the curation rewards with the delegators in the form of IUC tokens. HP delegators and IUC token holders also get upto 20% additional vote weight.
Here are some handy links for delegations: 100HP, 250HP, 500HP, 1000HP.
100% of the rewards from this comment goes to the curator for their manual curation efforts. Please encourage the curator @bhattg by upvoting this comment and support the community by voting the posts made by @indiaunited.
muy detallada, excelente trabajo ^^
!LOLZ
lolztoken.com
It’s all fun and games until someone loses an I.
Credit: reddit
@catrynart, I sent you an $LOLZ on behalf of nicosistemas5
(1/1)
ENTER @WIN.HIVE'S DAILY DRAW AND WIN HIVE!
Muchas gracias 🥰
Thanks for sharing! - castleberry#6859

Thanks so My @castleberry❤️🥰
Es Hermosa
Thanks 🌷