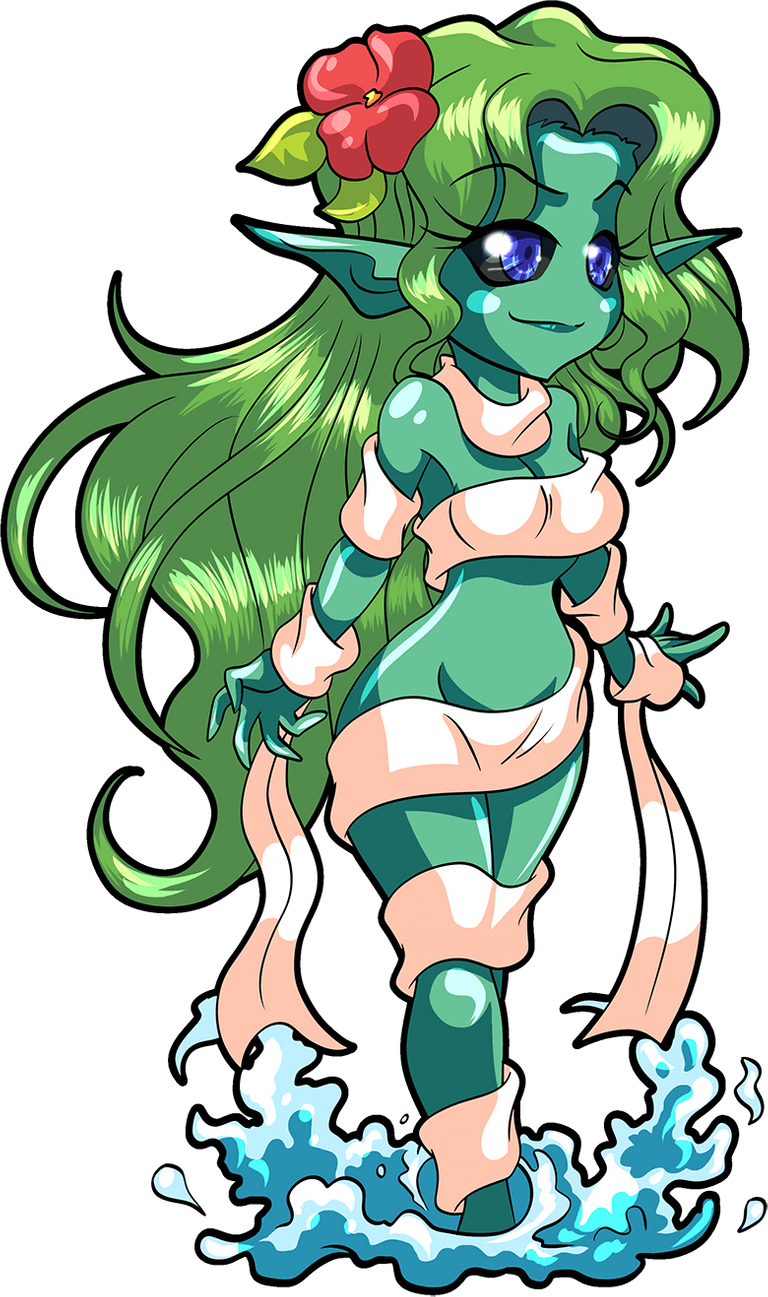
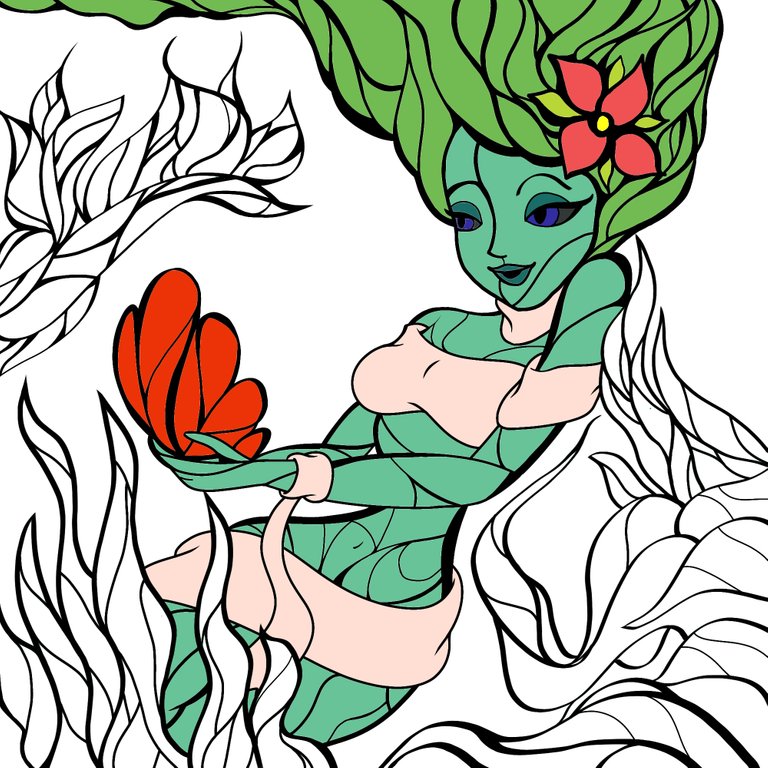
Wood Nymph Social Media SPT
Mis saludos a todos ustedes estimados integrantes de esta hermosa comunidad. Me da gusto informarles de mi primera participación en Splinterlands Social Media, para la cual he tomado una carta de WOOD NYMPH, una especie de hada del bosque, que quise dibujarla a un estilo vitral utilizando los mismos tonos verdes de la carta característico de esta criatura. Ya que su naturaleza es de un ser del bosque, quise representarla en una noche tranquila en las alturas de los grandes árboles, disfrutando de la luz de las estrellas resplandecientes. Al comienzo, como son bastantes delineados que realizaba para darle ese estilo vitral seccionado, pensaba en no hacerlo, pero este estilo le dio un tono de cierta madurez y rasgos físicos un poco más finos al hada ninfa, el cual me gustó y espero que les guste igualmente a todos ustedes.
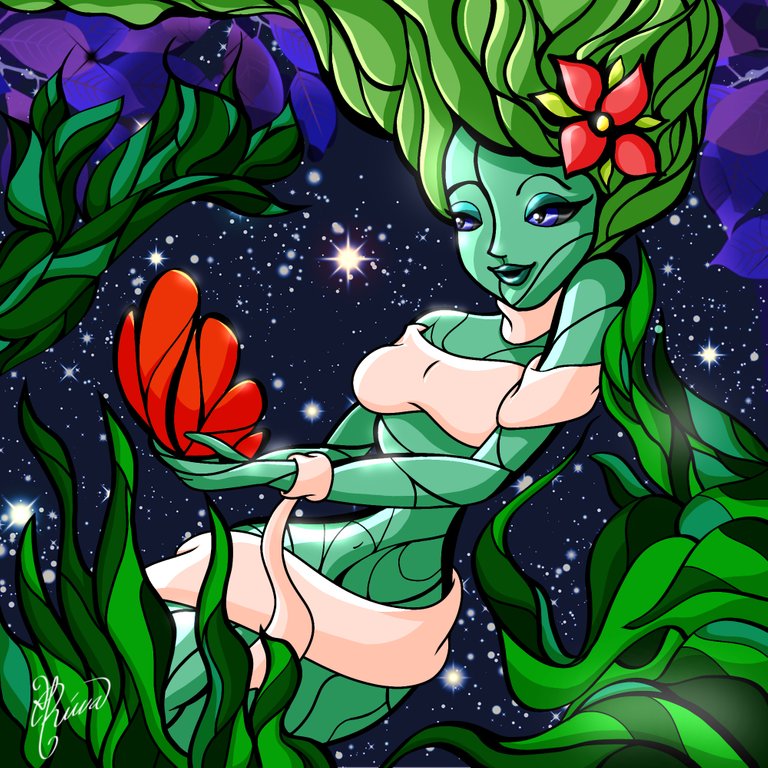
My greetings to all of you dear members of this beautiful community. I am happy to inform you of my first participation in Splinterlands Social Media, for which I took a card from WOOD NYMPH, a kind of forest fairy, which I wanted to draw in a stained glass style using the same green tones as the characteristic card of this creature. Since her nature is of a forest being, I wanted to represent her in a calm night in the heights of the big trees, enjoying the light of the shining stars. At the beginning, since there are quite a few outlines that he made to give it that sectioned stained glass style, I hoped not to, but this style gave a tone of certain maturity and slightly finer physical features to the nymph fairy, which I liked and I hope you like. like all of you equally.

Etapas del dibujo/Drawing stages
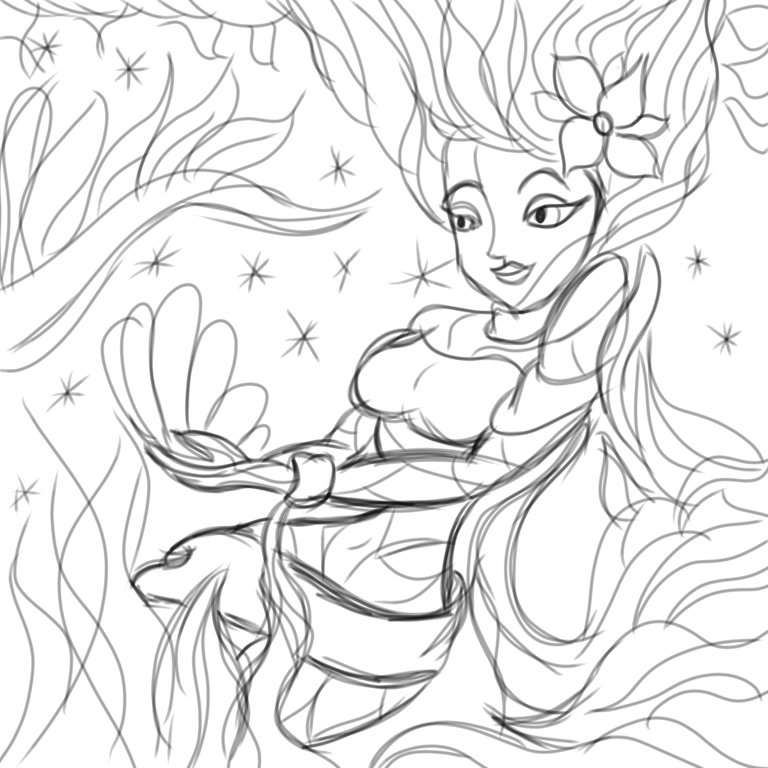
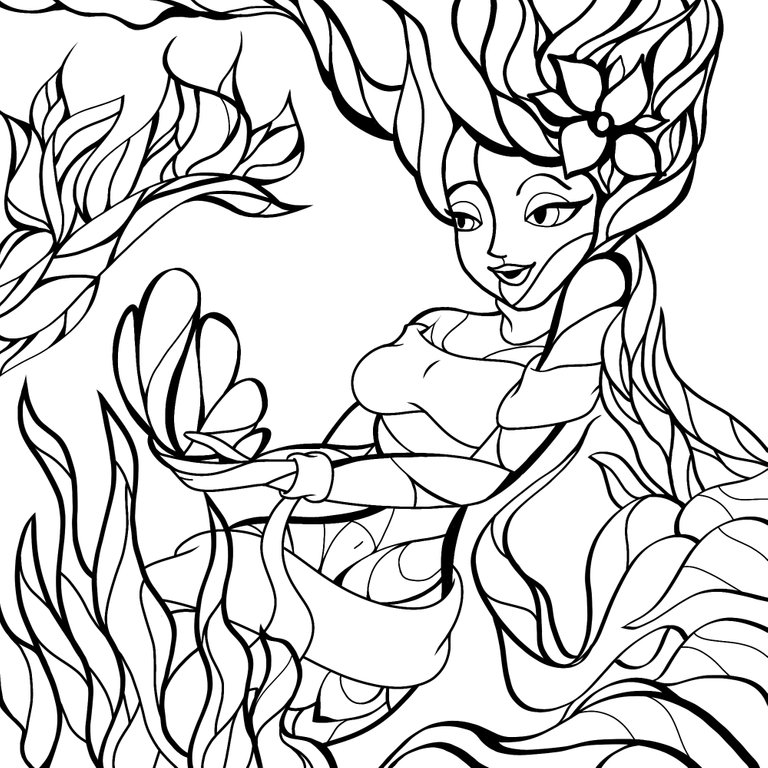
Comence con un boceto base para plasmar la representación de la carta de la Wood Nymph, luego aplicando un Pincel Rotulador fuerte realice los trazos para que fueran más notorios y definidos, resaltando los detalles que quería para el dibujo. Realice varias capas de delineado para las plantas y la criatura, después las uni. De esta manera, finalice el delineado en limpio para pasar a aplicar las capas de colores.
I started with a base sketch to capture the representation of the Wood Nymph card, then using a strong Marker Brush I made the strokes to make them more noticeable and defined, highlighting the details I wanted for the drawing. I did several layers of outline for the plants and the creature, then blended them together. In this way, finish the outline cleanly to go on to apply the layers of colors.
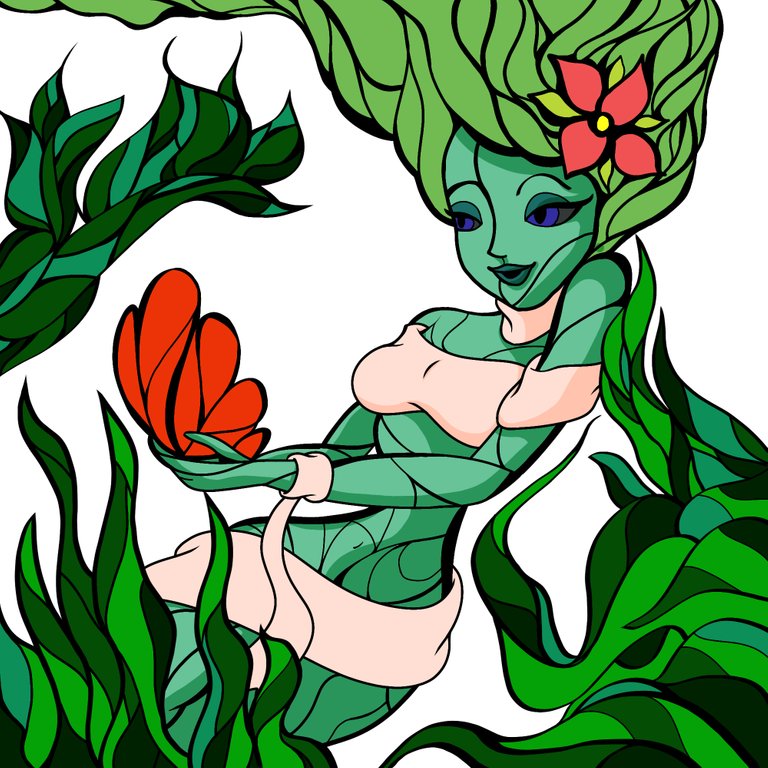
Luego aplique la capa de color tomando los colores de la carta, no queriendo hacer varios tonos de verde en la piel de la ninfa ya que se perdería con el cabello y las ramas de los árboles y no habría una diferenciación de los matices entre la criatura y lo vegetal. Ya al terminar de rellenar las secciones con los colores empecé el sombreado de la piel en una capa multiplicando el color dándole el sombreado y la profundidad deseada.
Then apply the color layer taking the colors from the card, not wanting to make several shades of green on the skin of the nymph as it would be lost with the hair and the branches of the trees and there would not be a differentiation of the shades between the creature and the vegetable When I finished filling the sections with the colors I started the shading of the skin in a layer multiplying the color giving it the shading and the desired depth.
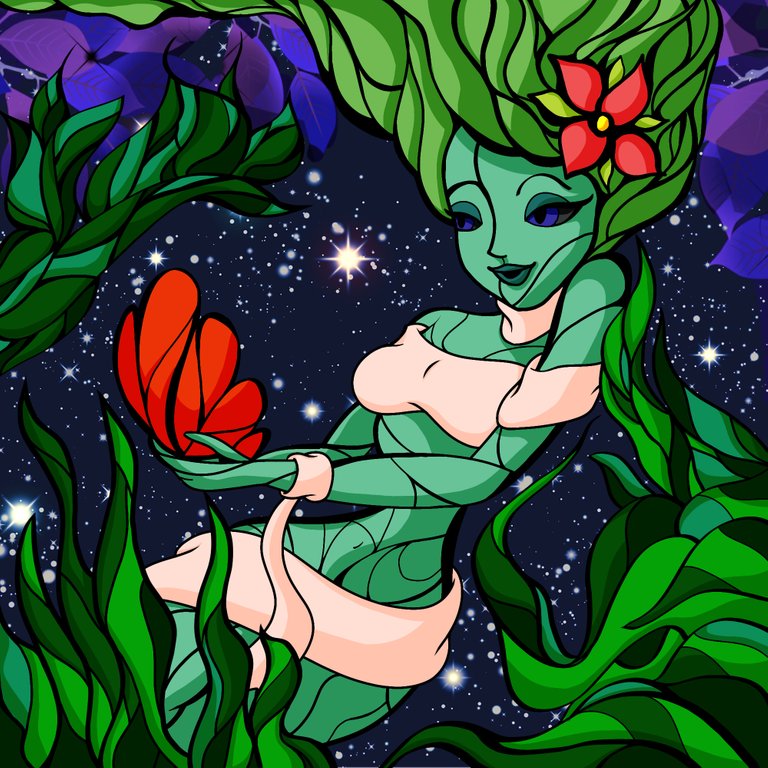
Finalmente en esta fase aplique la totalidad del sombreado utilizando la opción de varita mágica que me permitió sombrear con más control cada área seccionada evitando utilizar tanto el borrador. Y ya para pasar a la capa de iluminación primero aplique un fondo azul oscuro que sobresaltada a la criatura y su mundo mágico, con una variedad de grandes y pequeñas estrellas que me permitiera ver los puntos de iluminación en las diferentes partes del dibujo, añadiendo así un toque radiante y de vida al hada.
Finally, in this phase, I applied all the shading using the magic wand option that allowed me to shade each sectioned area with more control, avoiding using the eraser so much. And to go to the lighting layer, I first applied a dark blue background that startled the creature and its magical world, with a variety of large and small stars that allowed me to see the lighting points in the different parts of the drawing, thus adding a radiant touch of life to the fairy.
Herramientas usadas/Used tools
- Tablet Android
- Ibis Paint X
- Traductor Deepl
- Servidor de imagenes Imgbb
- Dactilopintura digital
HASTA EL PRÓXIMO POST

Detenerse es retroceder
To stop is to go backwards
Congratulations @catrynart! You have completed the following achievement on the Hive blockchain And have been rewarded with New badge(s)
Your next target is to reach 100 upvotes.
You can view your badges on your board and compare yourself to others in the Ranking
If you no longer want to receive notifications, reply to this comment with the word
STOPTo support your work, I also upvoted your post!
Check out the last post from @hivebuzz:
Support the HiveBuzz project. Vote for our proposal!
Thanks for sharing! - @rehan12

Pretty impressive!
Gracias gracias, complacida con su voto!!😊