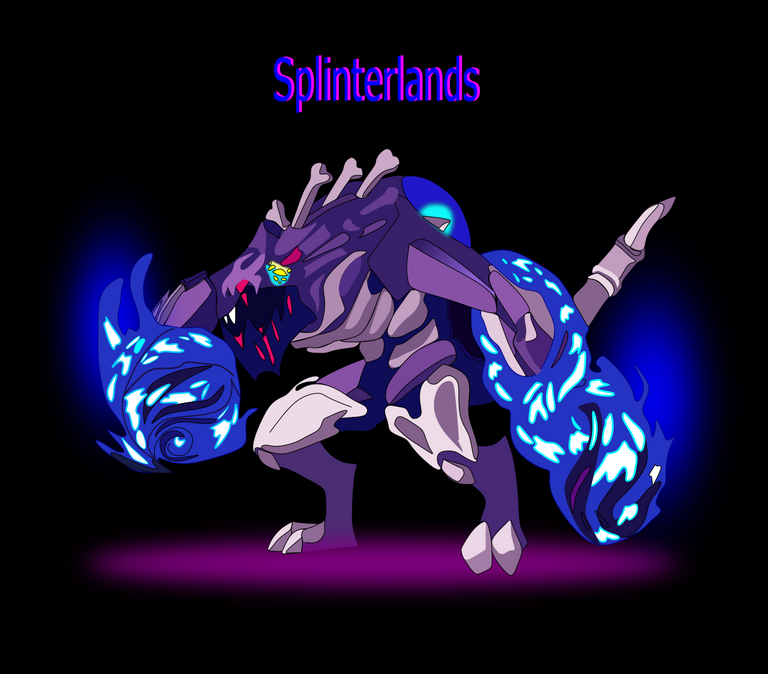
Corpse- Frend Social Media Challenge Splinterlands SPT
Greetings friends from Hive, I had not drawn for a few months, today I am going to participate again in the splinterlands art contest, where I will present my design of the character Corpose Fiend, made in the Inkscape vector tool.
Pensé que esta ilustración no iba llevar mucho trabajo hacerlo, pero resulta que si porque tiene muchos detalles de sombras y luces, sin embargo logre terminar mi diseño.
I thought that this illustration was not going to take a lot of work to do it, but it turns out that it did because it has a lot of shadow and light details, however I managed to finish my design.
A continuación les muestro el proceso:
Here I show you the process:
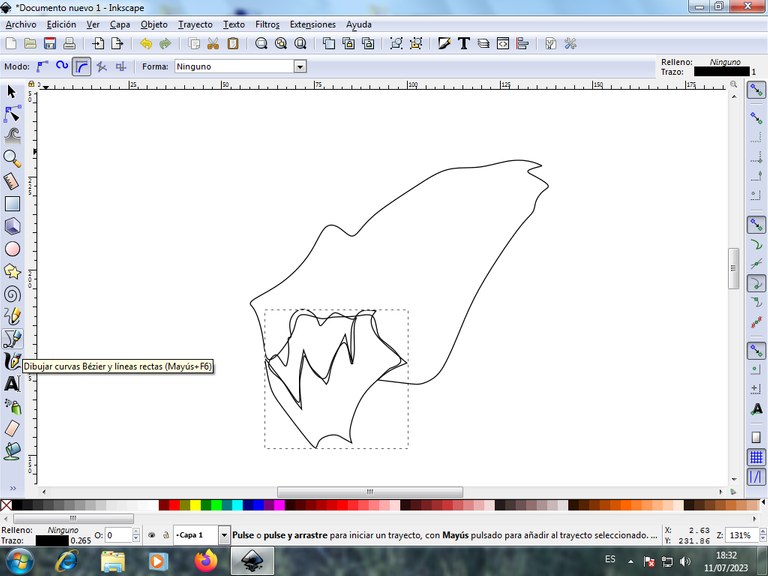
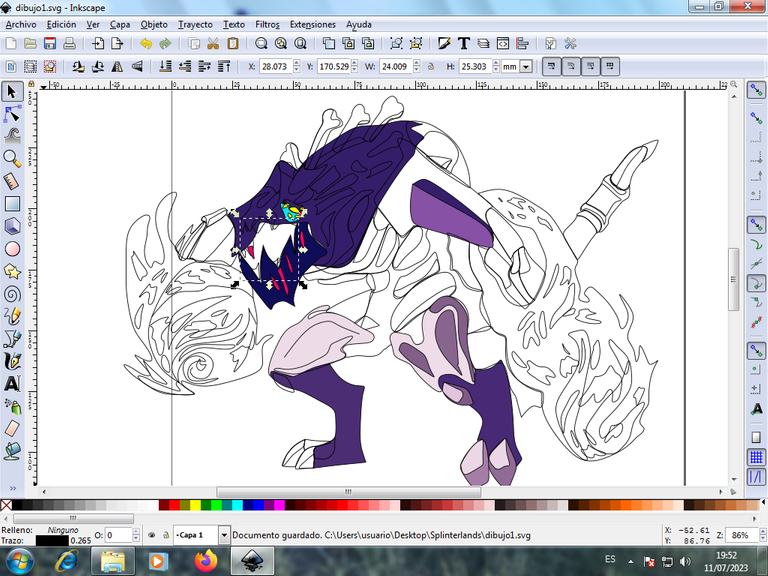
Paso 1 /Step 1:
Abrimos el programa Inkscape y comenzamos a realizar el boceto, dando clic en la barra de herramientas de curvas Bezier, en la parte de crear trayecto Bspline. De esta forma vamos haciendo los diferentes trazos de esta ilustración, comenzando por la parte de la boca y los dientes de esta criatura.
We open the Inkscape program and begin to make the sketch, clicking on the Bezier curves toolbar, in the part to create a Bspline path. In this way we are making the different strokes of this illustration, starting with the part of the mouth and the teeth of this creature.
Paso 2 /Step 2:
Seguidamente continuamos trabajando con la misma herramienta, trazando partes de la cabeza.
Next we continue working with the same tool, tracing parts of the head.
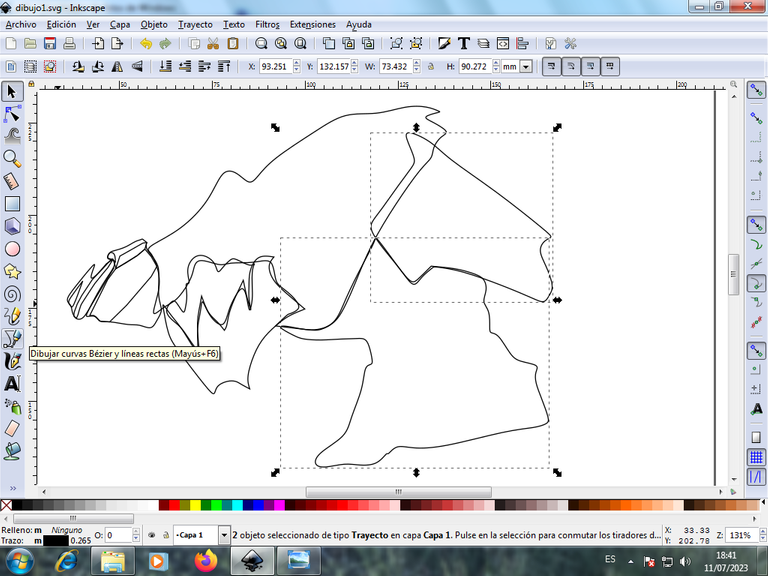
Paso 3 / Step 3:
Luego continuamos dibujando las patas y uñas de esta criatura, con la herramienta de curvas Bezier.
Then we continue drawing the legs and nails of this creature, with the Bezier curves tool.
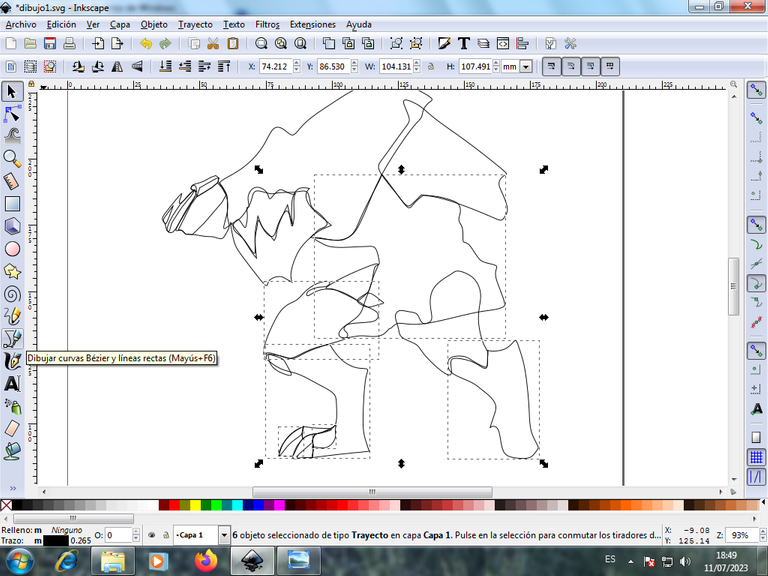
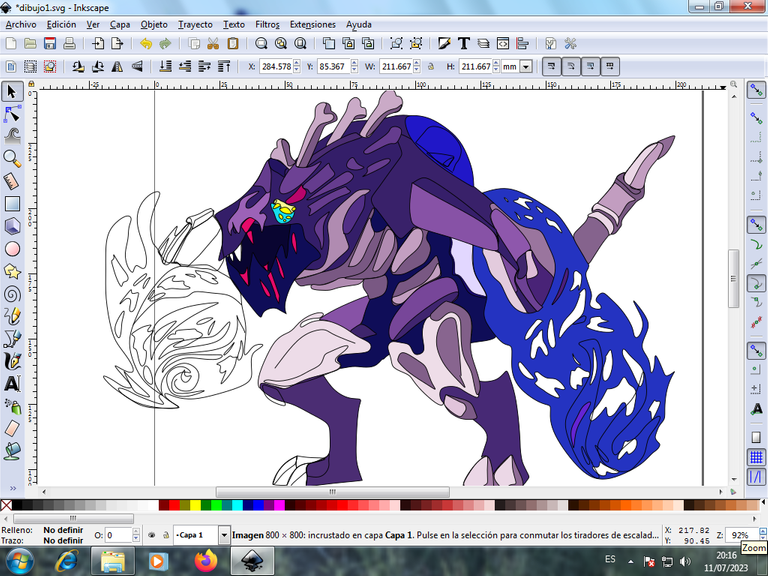
Paso 4 / Step 4:
Así mismo vamos dibujando los brazos que son como una especie de armazón y trazamos como una bola de color azul.
Likewise we are drawing the arms that are like a kind of frame and we draw as a blue ball.

Paso 5 / Step 5:
Continuamos dibujando del lado izquierdo, otras figuras y vamos trazando dentro del cuerpo la forma de los huesos que destacan en la criatura, con la misma herramienta mencionada anteriormente.
We continue drawing on the left side, other figures and we are tracing inside the body the shape of the bones that stand out in the creature, with the same tool mentioned above.
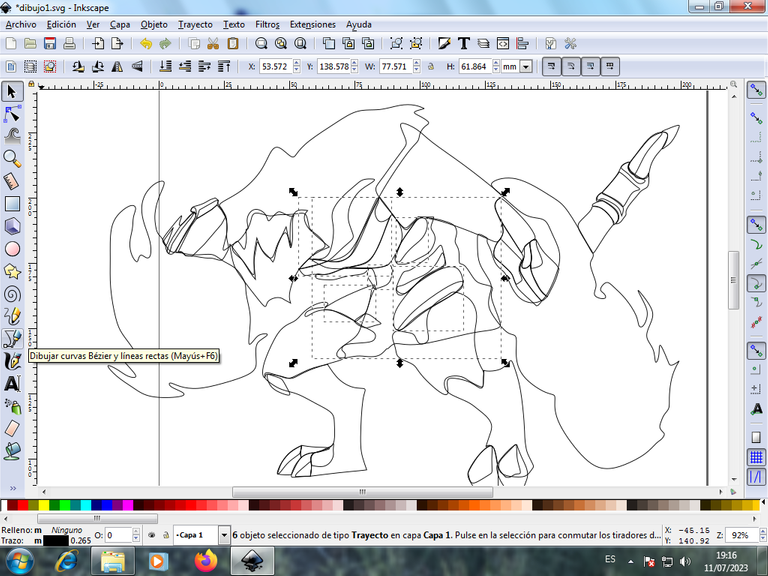
Paso 6 / Step 6:
En la parte superior, dibujamos varios huesos que va como incrustados en el cuerpo, se trazan también los dientes de color rojo, los ojos, de la criatura.
In the upper part, we draw several bones that are embedded in the body, we also draw the red teeth, the eyes, of the creature.
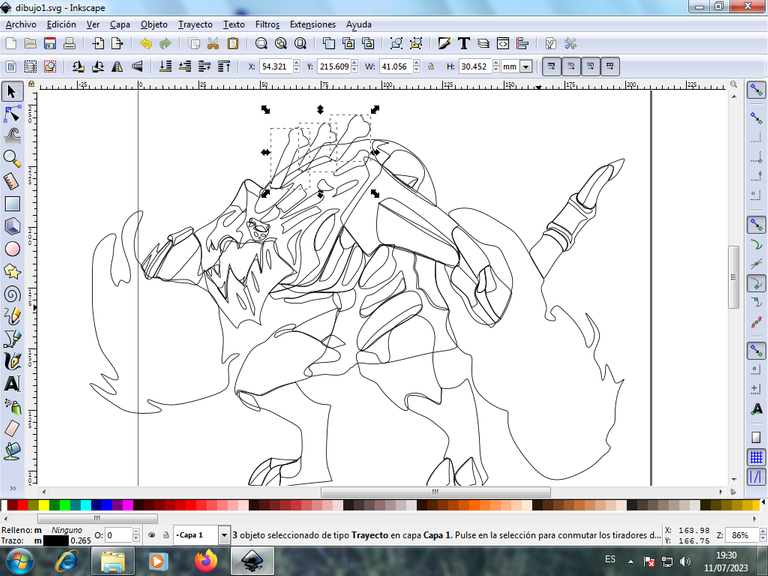
Paso 7 / Step 7:
Por otro lado vamos a trazar figuras que van dentro de la bola para darle un mayor acabado a la ilustración y de esta forma vamos trazando las partes que falta en todo el cuerpo de la criatura.
On the other hand, we are going to draw figures that go inside the ball to give a better finish to the illustration and in this way we are drawing the missing parts in the entire body of the creature.
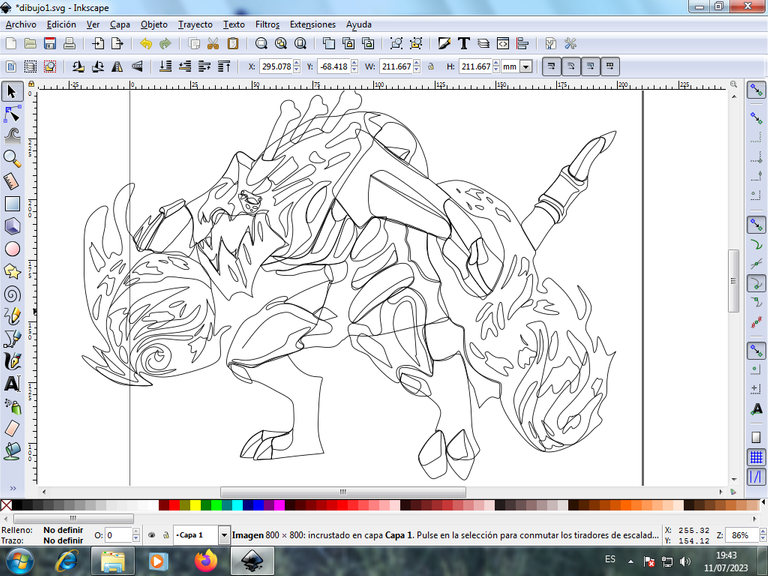
Paso 8 / Step 8:
Una vez terminado todo el boceto, procedemos a darle el color, para esto seleccionamos la figura, comenzando por los ojos de color amarillo y la patas de color morado claro, desde la paleta de colores que está en la parte inferior de la aplicación.
Once the entire sketch is finished, we proceed to give it the color, for this we select the figure, starting with the yellow eyes and the light purple legs, from the color palette that is at the bottom of the application.
Paso 9 / Step 9:
Vamos aplicando los colores en el resto del cuerpo, y de esta forma vamos dando el acabado a la ilustración.
We are applying the colors to the rest of the body, and in this way we are finishing the illustration.
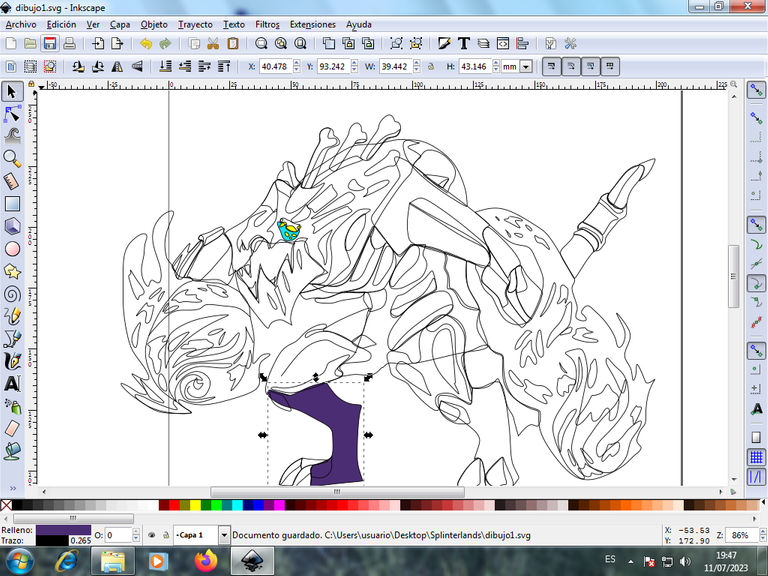
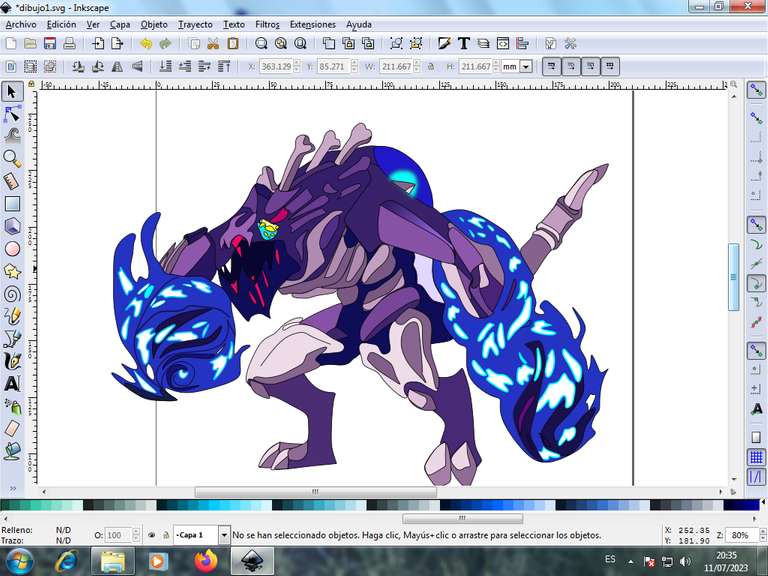
Paso 10 / Step 10:
Podemos ver que la figura que está dentro de la bola de color azul, tiene un color blanco y tenemos que darle un color azul claro a los bordes, esta opción está en la barra de menú Objeto, rellenos y bordes, desde allí vamos cambiando el color de los bordes de la ilustración.
We can see that the figure that is inside the blue ball has a white color and we have to give the edges a light blue color, this option is in the Object, fills and borders menu bar, from there we are changing the color of the borders of the illustration.
Paso 11 / Step 11:
Comenzamos a quitar los bordes de algunas figuras que están dentro del cuerpo de la criatura, para darle un mejor efecto y acabado.
We begin to remove the edges of some figures that are inside the body of the creature, to give it a better effect and finish.

Paso 12 / Step 12:
Insertamos un ovalo en la parte inferior, de color morado, se aplica un desenfoque de 8 porciento, y dos círculos aplicando el mismo porcentaje, luego se coloca en el fondo de color negro para que se visualice mejor la criatura con estos efecto en la ilustración.
We insert an oval in the lower part, purple, a blur of 8 percent is applied, and two circles applying the same percentage, then it is placed on the black background so that the creature with these effects can be better visualized in the illustration .
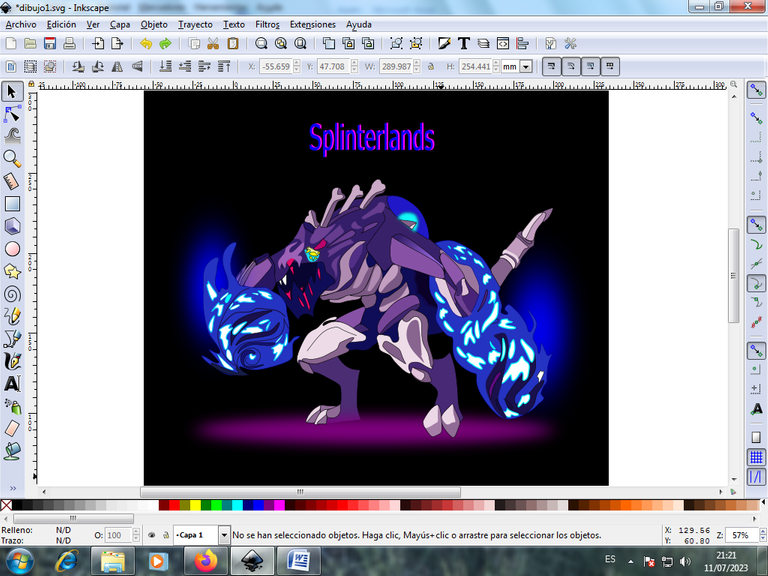
De esta forma termino mi ilustración, espero que les haya gustado, nos vemos en una próxima publicación.
This is how I finish my illustration, I hope you liked it, see you in a next publication.
Programa: Inkscape 0.96
Imagen de Referencia Fuente
Traductor utilizado: https://www.deepl.com
Program: Inkscape 0.96
Reference Image Source
Translator used: https://www.deepl.com

Vote la-colmena for witness By @ylich

https://leofinance.io/threads/cetb2008/re-leothreads-mhkvdf5r
The rewards earned on this comment will go directly to the people ( cetb2008 ) sharing the post on LeoThreads,LikeTu,dBuzz.