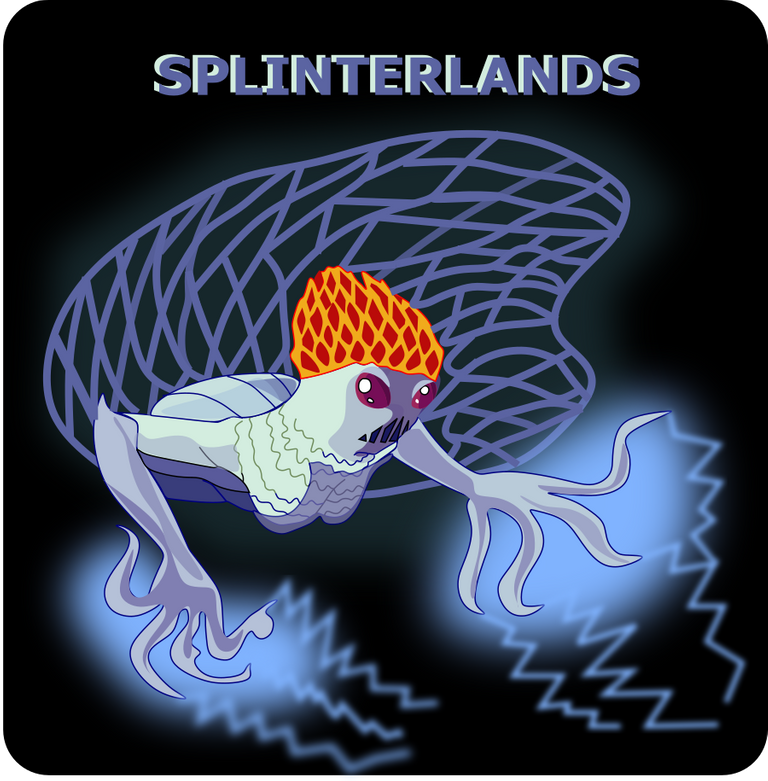
My Dibujo de Splinterlands Art Concurso 174/ Mycelic Slipspawn [ESP/ENG]
Saludos amigos de Hive esta es mi participación en el concurso de dibujo de Splinterlands número 174, promocionado por @splinterlands. El dibujo fue realizado en el programa vectorial Inkscape. Este dibujo se llama Mycelic Slipspawn.
My Dibujo de Splinterlands Art Concurso 174/ Mycelic Slipspawn
Este es el Proceso:
Paso 1:
Se abre el programa Inkscape y se realizan estos trazos que son la cabeza y los ojos de la figura, con la herramienta de curvas Bézier.

Paso 2:
Ahora trazamos el cuerpo y una de las patas, con la misma herramienta.

Paso 3:
Se continúan trazando las patas y algunas formas con la misma herramienta.

Paso 4:
Continuamos trazando una especie de red con la misma herramienta.

Paso 5:
Terminamos de hacer varios trazos en dentro del cuerpo de la figura para darle mayor efecto.

Paso 6:
Comenzamos a darle color a la figura, seleccionándola y luego le damos clic en la paleta de colores en el color.

Paso 7:
Ahora continuamos aplicando color en al cuerpo.

Paso 8:
Terminamos de aplicar el color a las partes de la figura. Se inserta un fondo color negro, se aplica sombras y efectos al diseño
Imagen de Referencia fuente
Si deseas participar estas son las bases del concurso
English
Greetings Hive friends, this is my entry in the 174th Splinterlands drawing contest, sponsored by @splinterlands. The drawing was made in the vector program Inkscape. This drawing is called Mycelic Slipspawn.
My Splinterlands Drawing Art Contest 174/ Mycelic Slipspawn
#This is the Process:
Step 1:
The Inkscape program is opened and these strokes are made, which are the head and the eyes of the figure, with the Bézier curves tool.
Step 2:
Now we trace the body and one of the legs, with the same tool.
Step 3:
It is configured by tracing the legs and some shapes with the same tool.
Step 4:
We continue drawing a kind of network with the same tool.
Step 5:
We finish making several strokes inside the body of the figure to give it a greater effect.
Step 6:
We begin to give color to the figure, selecting it and then we click on the color palette in the color.
Step 7:
Now we continue applying color to the body.
#Step 8:
We finish applying the color to the parts of the figure. A black background is inserted, shadows and effects are applied to the design
Reference Image source
If you want to participate, these are the rules of the contest

https://twitter.com/cbit_roxana_mdh/status/1488571248787562496
The rewards earned on this comment will go directly to the person sharing the post on Twitter as long as they are registered with @poshtoken. Sign up at https://hiveposh.com.
Interesante diseño
Hola gracias por visitar mi blog.
Thanks for sharing! - castleberry#6859
