Hello friends...
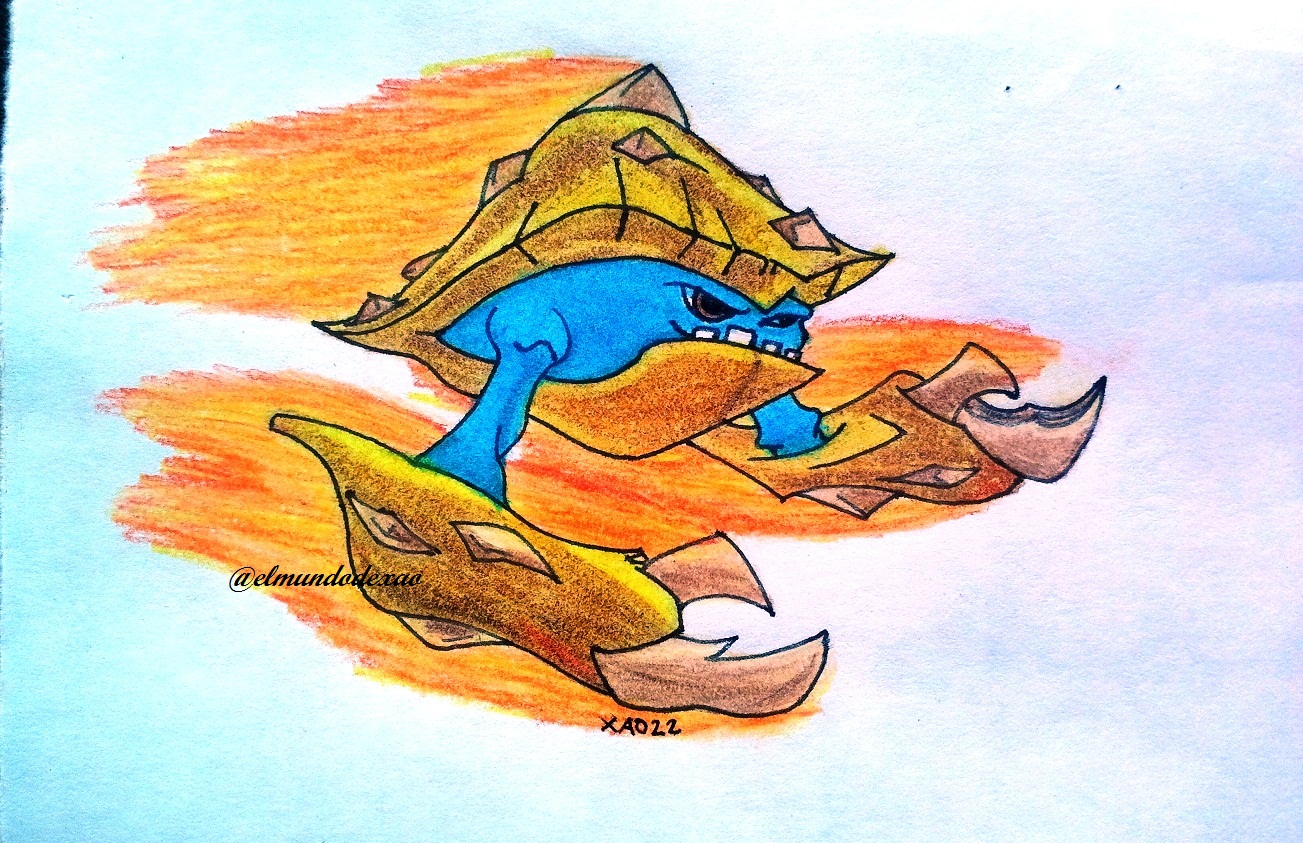
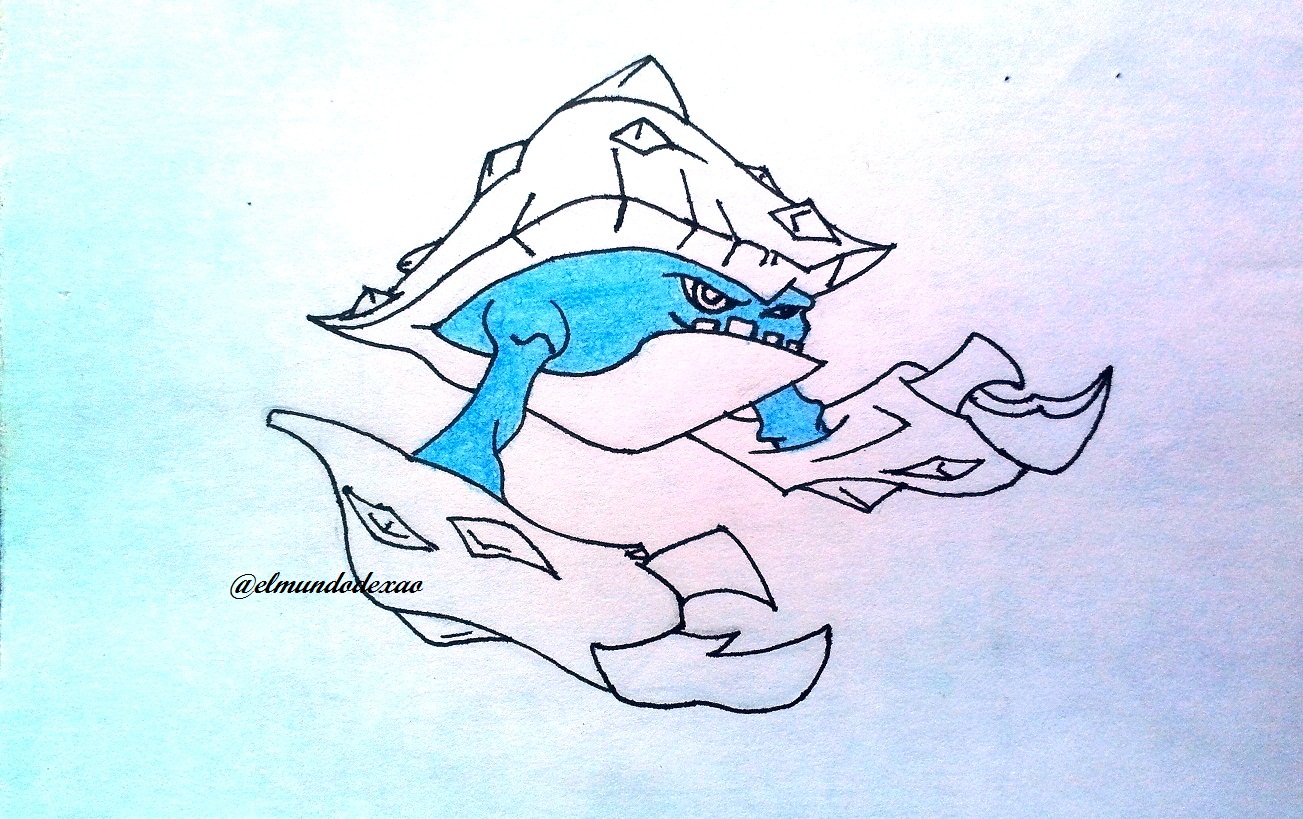
Welcome to my blog I hope you are having a great day Thursday; today to continue making art in Hive I want to share a new drawing of the slugs that I have been drawing for a while; this is Torpedo that belongs to the metal element; I remind you that these characters can be in normal state or transformed and in this case is transformed which represents a more detailed work and with a better finish as it has better strokes and a more elaborate combination of colors.
Next I mention the materials used: white bond paper, pencil # 2, 0.5 marker, eraser and colors (Variety of brands).
Before continuing I remind you that at the end I will leave you the link that I used on this occasion.
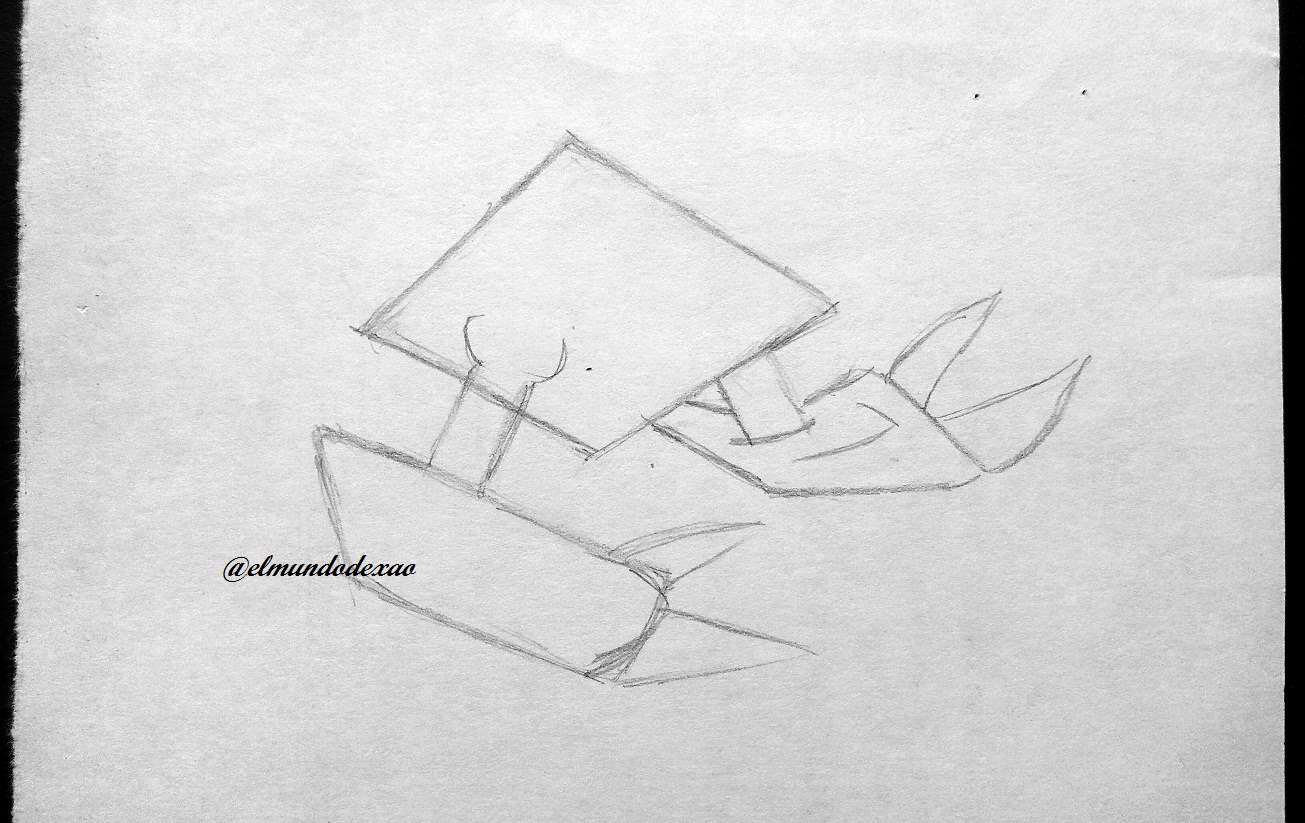
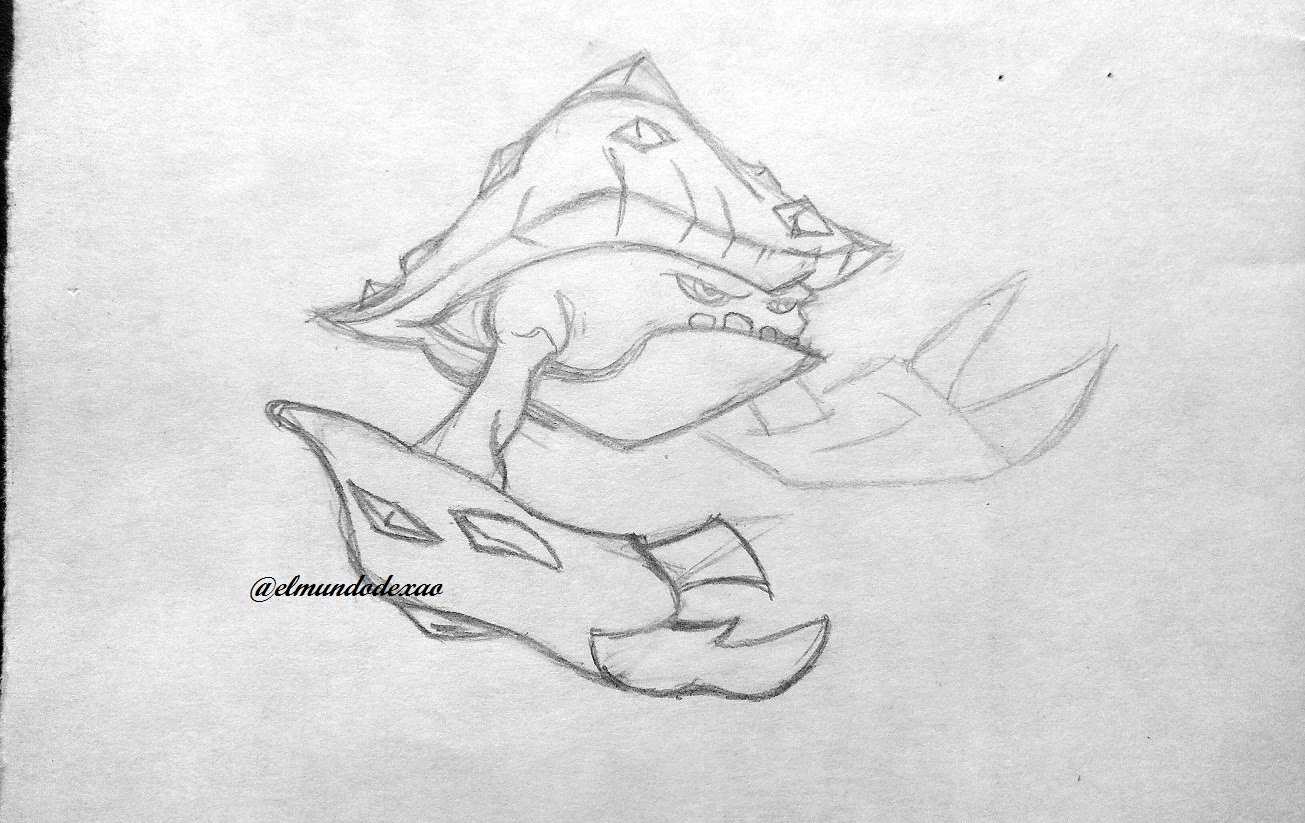
 As soon as I started the sketch I realized that this was going to be one of those drawings that require patience and attention so I decided to make an initial sketch without stopping to take pictures as I have done on other occasions in order to find a technique that would facilitate my work. Once I finished the first sketch I leave it as a guide; as you can see below the best way I got to square the size and the peculiar characteristics of this character was through geometric figures.
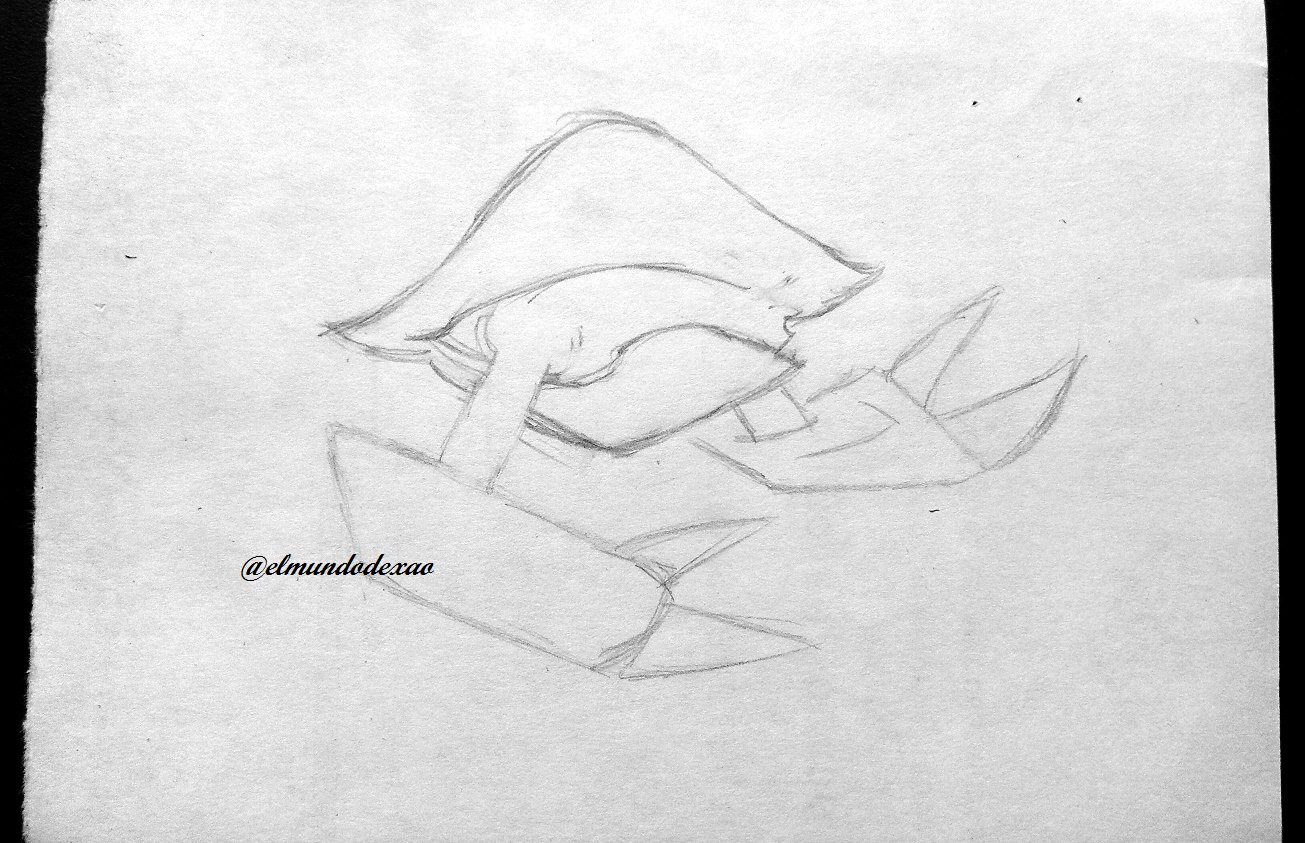
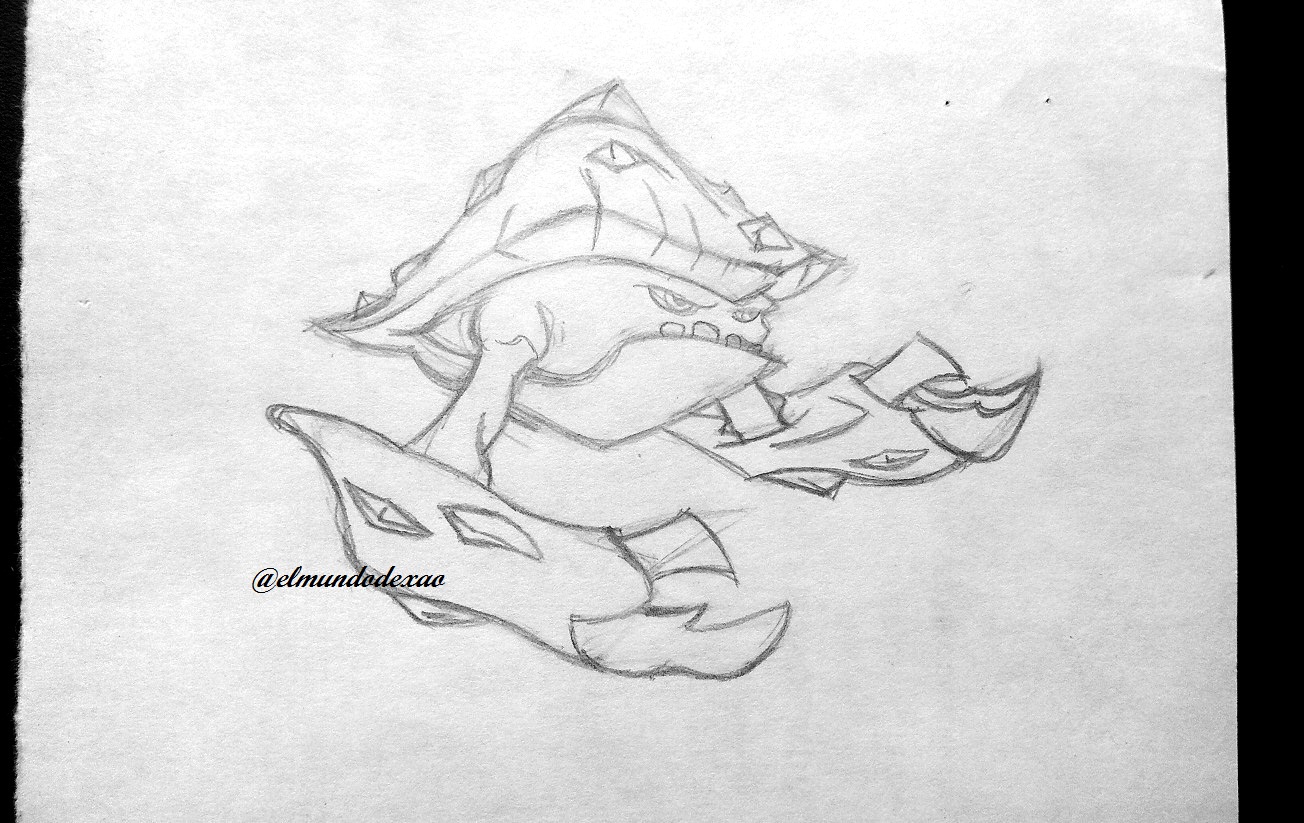
 You can see several changes that I made in the second sketch but the most notable is the separation between the tweezers; in the first one they were very close to each other so it would be difficult to draw the trail that is leaving.
 After defining the body with a rhombus I proceeded to detail it by making the shell, working first the top part; it is very similar to a crab. Then I added the spikes or protuberances that it shows; I also defined the thickness of the shell, I also drew the eyes and lower teeth.
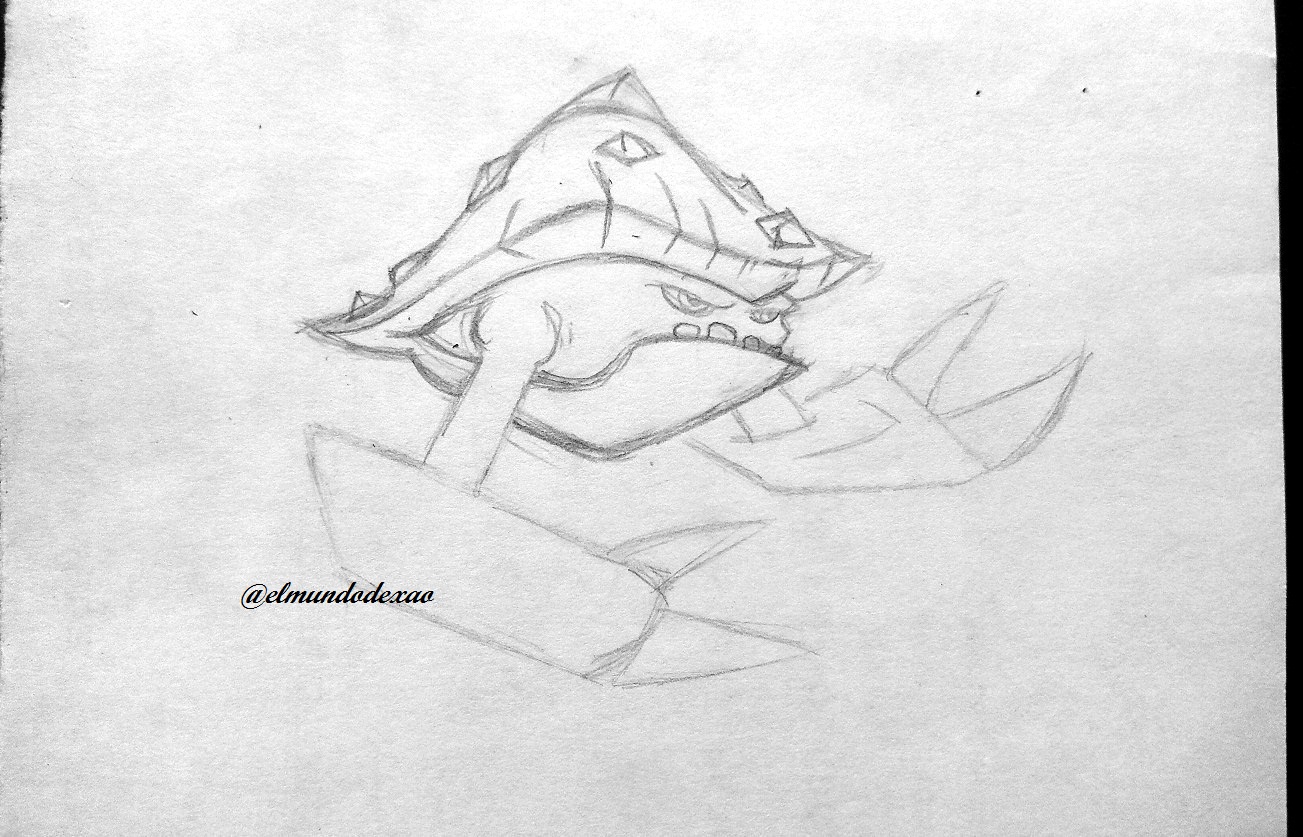 The next step will be to define the pincers, so I decided to make the right one, that is to say the most visible; these pincers have the same details as those of the breastplate, only a little more elongated. One of the qualities of these large pincers is to be able to snatch some of the slugs that the opponent has in his arsenal.
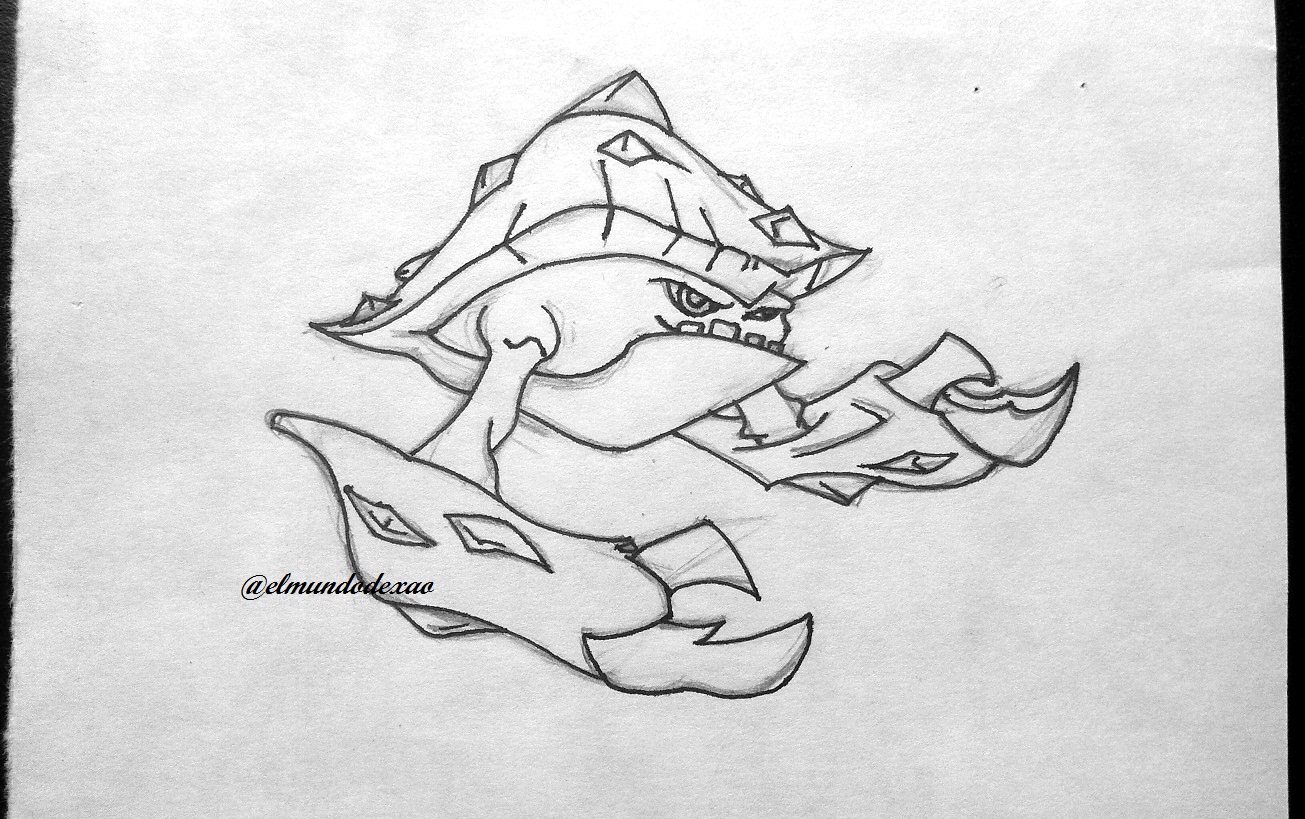
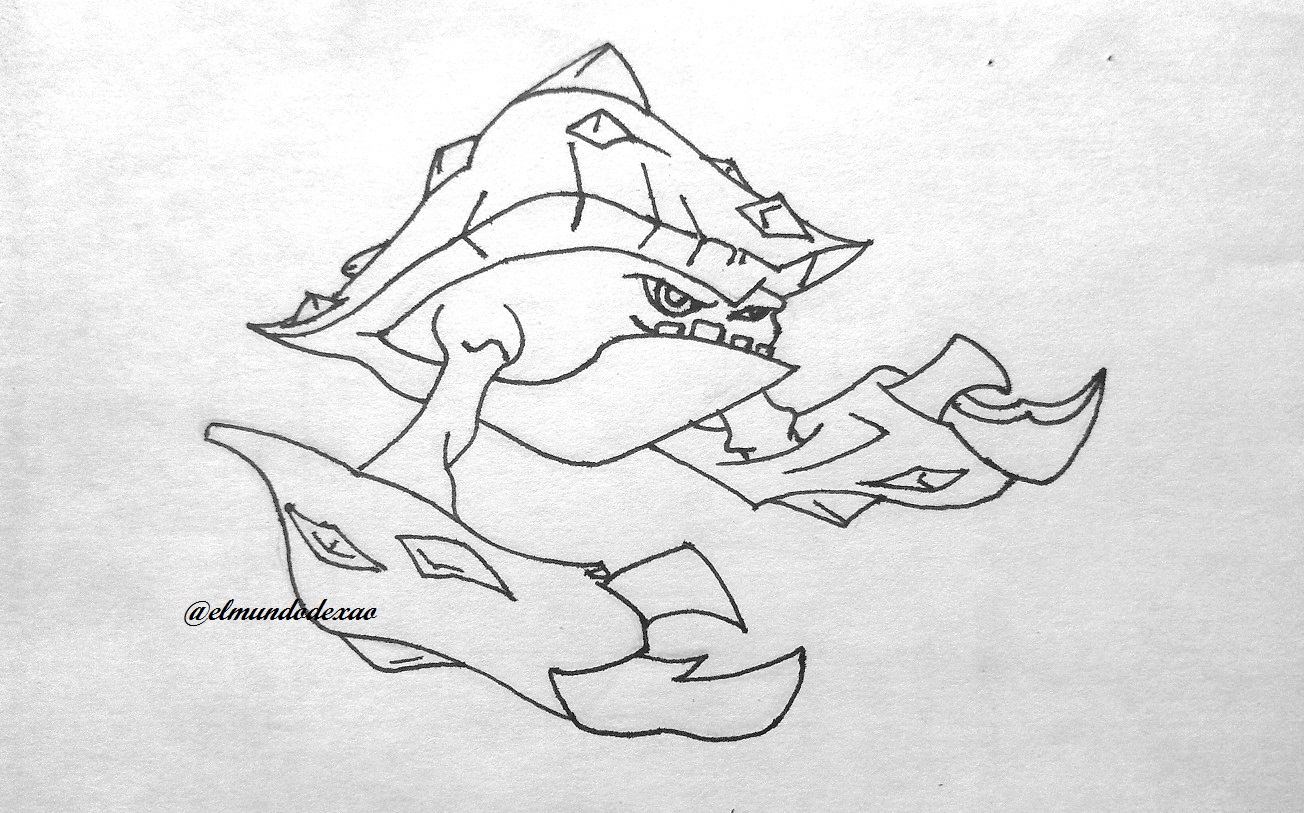
 Once the sketch is finished, I ink it as I usually do; I like to do this step immediately because my sketches are of clear lines since I don't like to sharpen the pencil too much and that sometimes makes it difficult for me to remember which is exactly the line I have to highlight.
 I start coloring the body with a light blue color including the arms and a yellow color for the breastplate and the pincers; this yellow color will be like a background to place other shades on top.
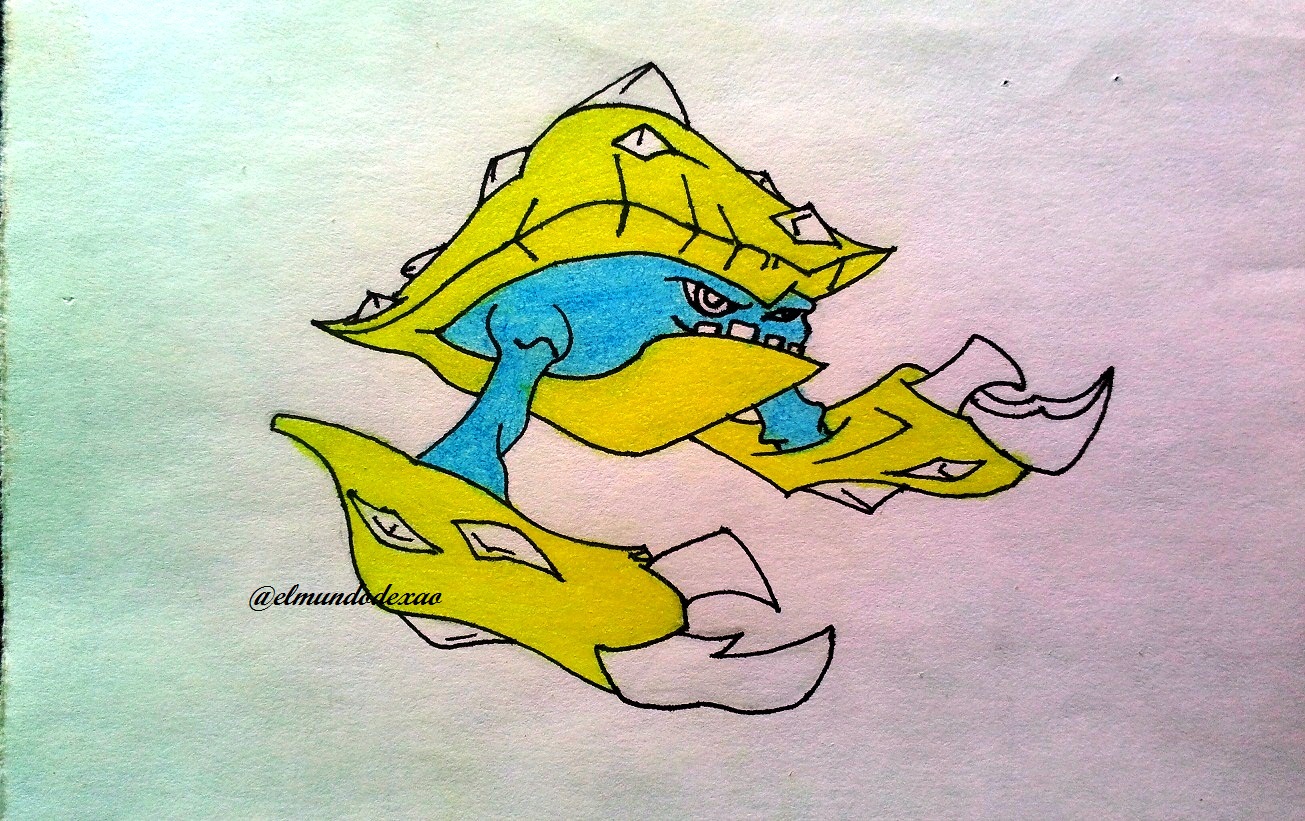 For the barbs or bumps I add a cream background color and then brown; then a little yellow to lighten some parts.
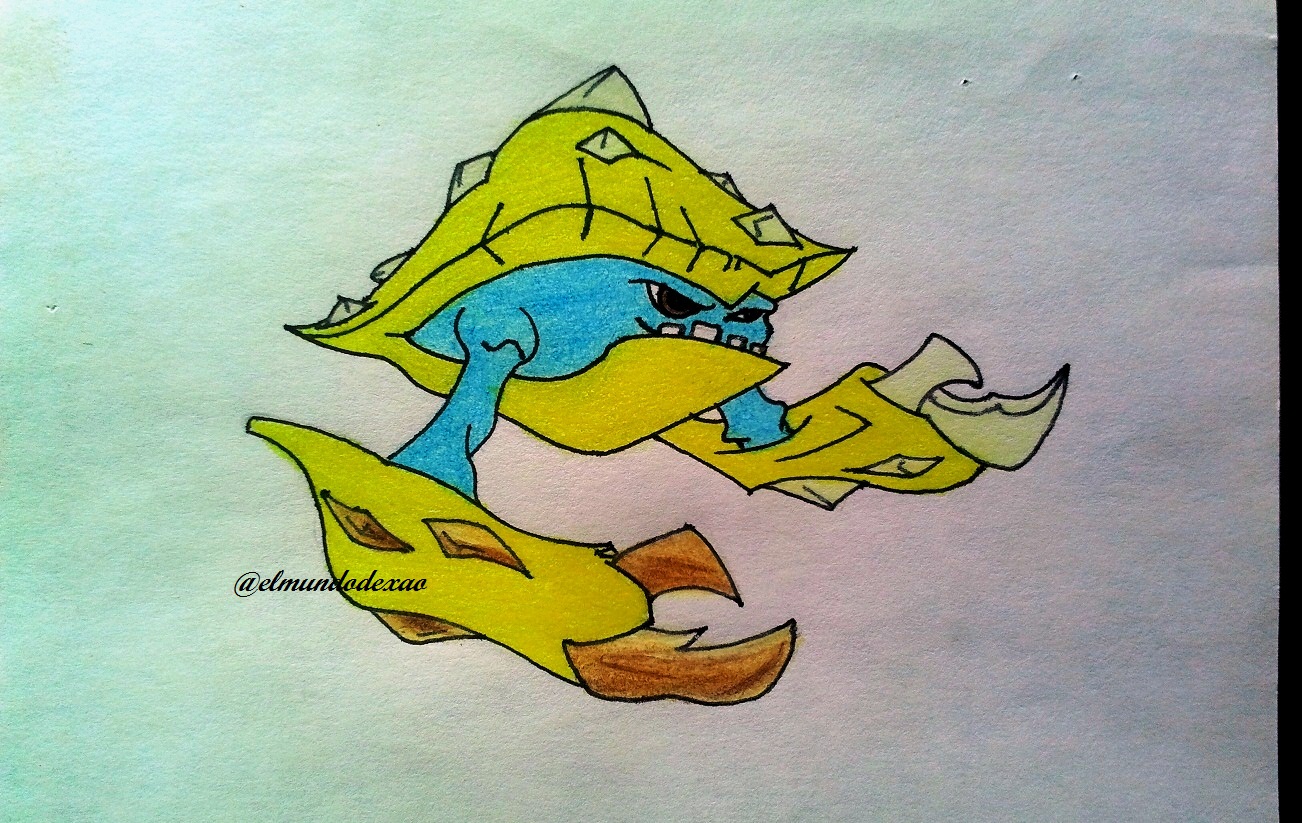
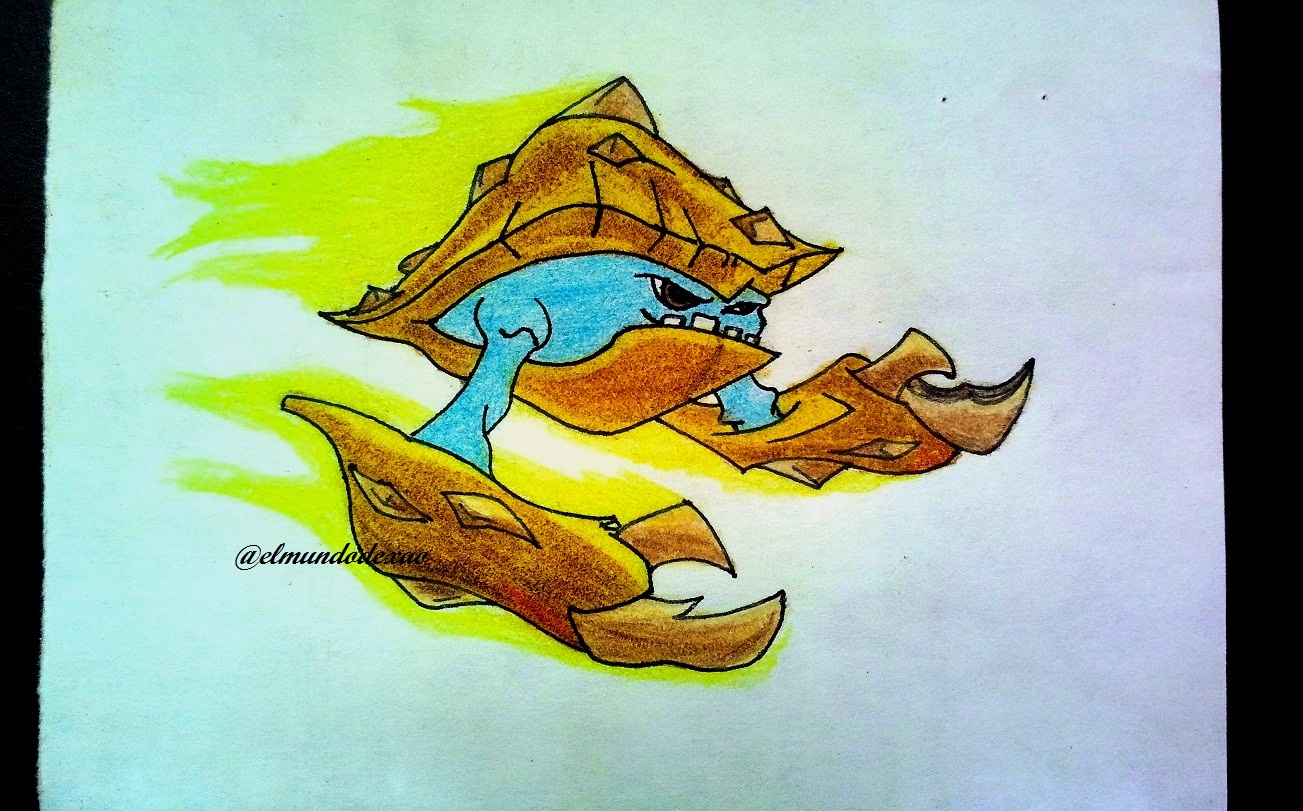
 Now I place light brown on the armor on top of the yellow leaving some lighter parts, that is to say that the yellow that is remaining underneath is noticeable; to then begin to define the stele with the same yellow tone that I used previously.
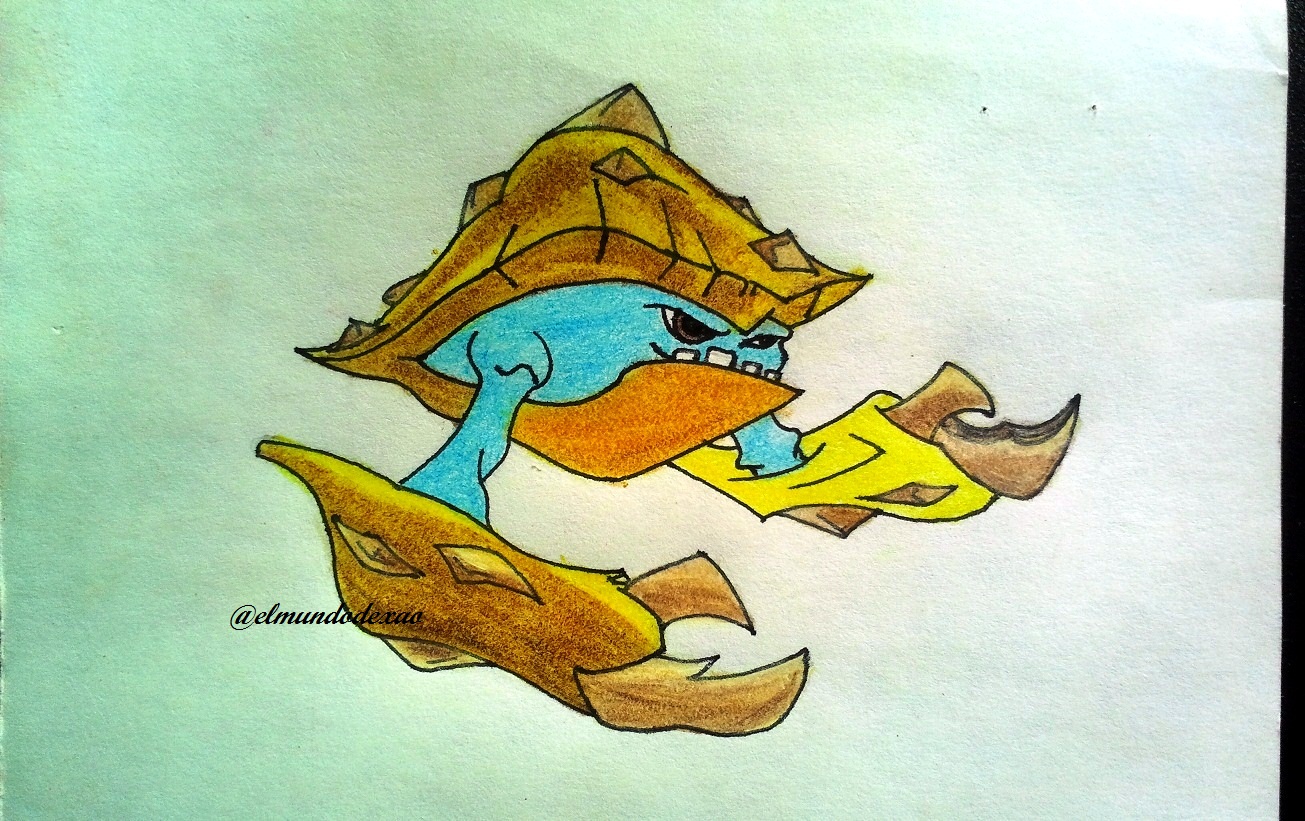
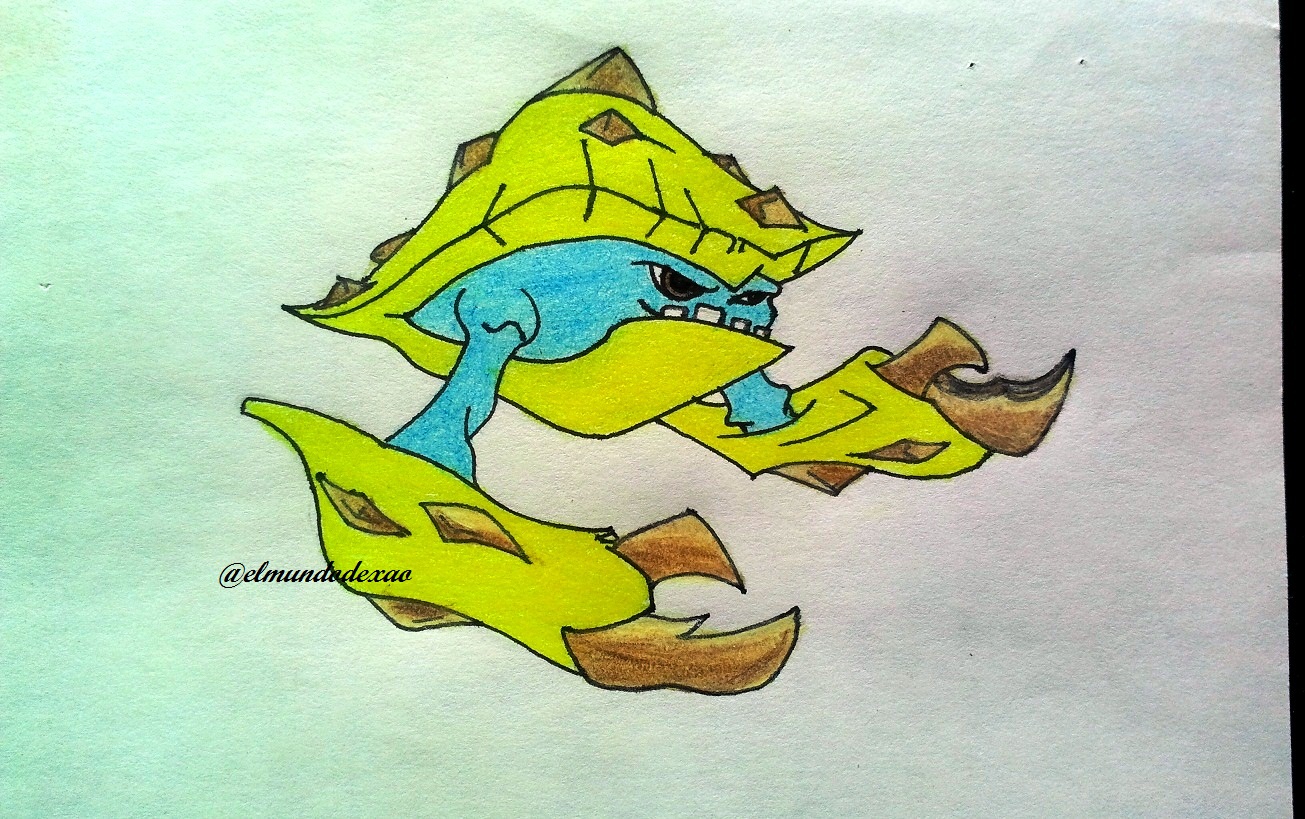
 To finish I add an orange tone on the yellow trail so it will look like it is lit with fire. I have to tell you that I really liked how this slug turned out and now I say goodbye wishing you a happy sunrise, sunset or a happy night depending on where you are.
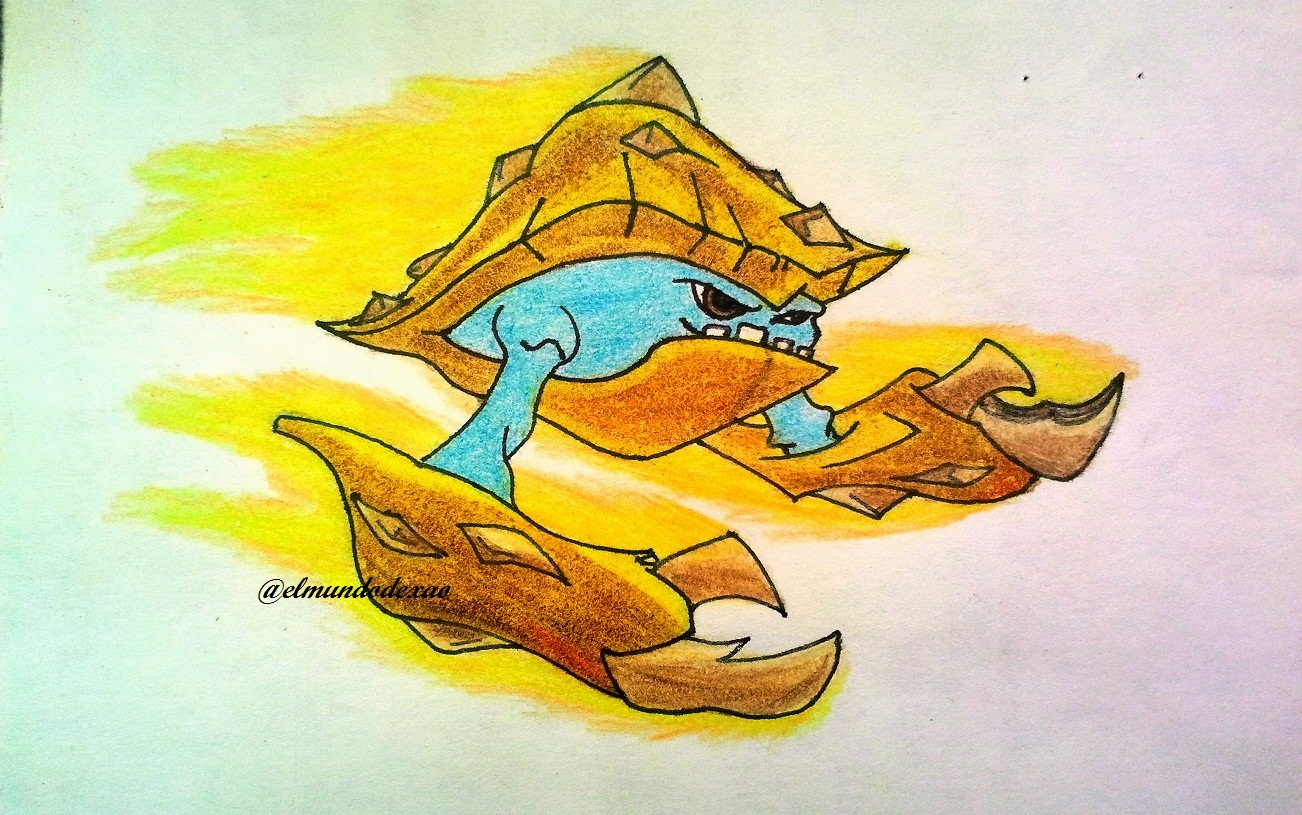
Photo Source: Own photos captured with a Síragon camera.
Modified size: With the Paint Program.
Thanks for visiting my Blog… AH! Don't forget to vote, reblogear, and comment.
Translated with:

www.DeepL.com/Translator (free version)

Art Dibujando a la Babosa Torpedo.
Bienvenidos a mi blog espero la estén pasando un gran día jueves; hoy para continuar haciendo arte en Hive les quiero compartir un nuevo dibujo de las babosas que vengo dibujando hace un tiempo; esta es Torpedo que pertenece al elemento metal; les recuerdo que estos personajes pueden estar en estado normal o transformadas y en este caso está transformada lo cual representa un trabajo más detallado y con un mejor acabado ya que tiene mejores trazos y una combinación de colores más elaborada.
A continuación menciono los materiales utilizados: Papel bond blanco, lápiz # 2, rotulador de 0.5, borrador y colores (Variedad de marcas).
Antes de continuar les recuerdo que al final les dejare el enlace que use en esta ocasión.
Apenas comencé el boceto pude darme cuenta que este iba a ser uno de esos dibujos que requieren paciencia y atención por lo que decidí hacer un boceto inicial sin detenerme a tomar fotos como ya lo he hecho en otras ocasiones para poder buscar una técnica que me facilite el trabajo. Una vez terminado el primer boceto lo dejo como guía; como pueden ver a continuación la mejor forma que conseguí para cuadrar el tamaño y las características tan peculiares de este personaje fue a través de figuras geométricas.
Se pueden observar varios cambios que hice en el segundo boceto pero el más notable es la separación entre las pinzas; en el primero quedaron muy cerca una de la otra por lo que dificultaría dibujar la estela que viene dejando.
Después de definir el cuerpo con un rombo procedí a detallarlo haciendo la coraza o caparazón trabajando en primer lugar la parte de arriba; es muy similar a un cangrejo. Luego agregue las púas o protuberancias que luce; además definí el grosor del caparazón, también dibuje los ojos y dientes inferiores.
El paso siguiente será definir las tenazas por lo que me dispuse hacer la derecha es decir la más visible; estas pinzas poseen detalles iguales a los de la coraza solo que un poco más alargados. Una de las cualidades de estas grandes tenazas es poder arrebatarle alguna babosa de las que posea en su arsenal el contrincante.
Una vez terminado el boceto me dedico a entintarlo como habitualmente lo hago; este paso me gusta hacerlo de inmediato porque mis bocetos son de trazados claros ya que no me gusta afincar mucho el lápiz y eso en ocasiones me dificulta recordar cual es exactamente el trazo que debo remarcar.
Comienzo a colorear el cuerpo con un color celeste incluyendo los brazos y un color amarillo para la coraza y las pinzas; este amarillo será como un fondo para colocar encima otras tonalidades.
Para las púas o protuberancias agrego un color crema de fondo y después marrón; luego un poco de amarillo para aclarar algunas partes.
Ahora coloco marrón claro en la coraza encima del amarillo dejando algunas partes más claras es decir que se note el amarillo que está quedando debajo; para luego comenzar a definir la estela con el mismo tono amarillo que use anteriormente.
Para terminar agrego un tono naranja sobre la estela amarilla de esta forma tendrá un aspecto de encendida con fuego. Tengo que decirles que me gustó mucho como quedo esta babosa y ahora me despido deseándoles un feliz amanecer, atardecer o una feliz noche según donde te encuentres.
Fuente de Fotos: Propias capturadas con una cámara Síragon.
Modificado el tamaño: Con el Programa Paint.
Gracias por visitar mi Blog… ¡AH! No se olvide de votar, rebloguear y comentar.