Hello Hive Diy friends...
☺☺☺
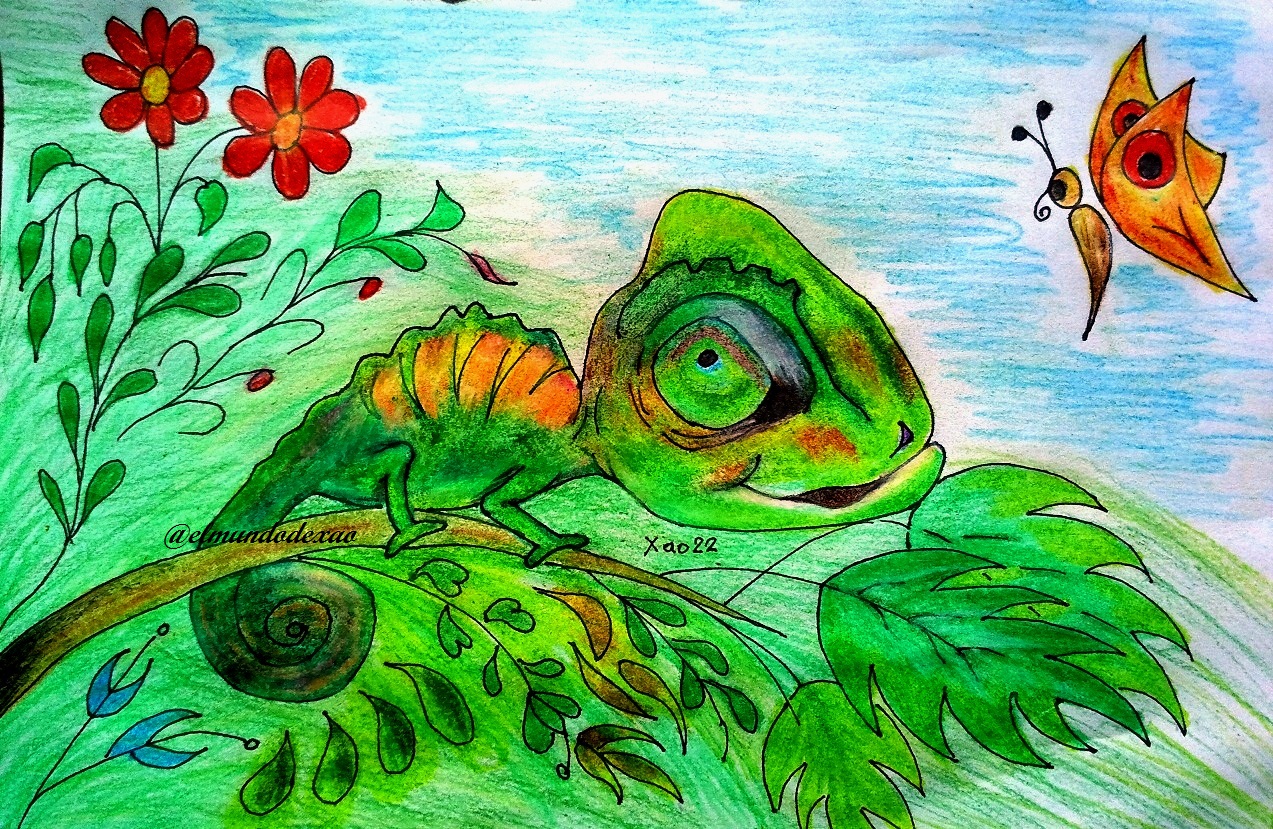
Welcome to my blog once again, I hope you have a great day. Today I will share with you my latest kawaii work; the chameleon and the butterfly. While I was doing the drawing I came up with a short story.
The chameleon used to enjoy himself every day, changing colors
because he is an artist even though he lacked other emotions,
He knows a lot about colors and combinations, but what he most enjoyed
but what he enjoyed the most was the diversity of flavors of all the insects
that were in the surroundings.
One day, changing colors as he passed by some beautiful flowers, he saw a radiant butterfly,
he saw a radiant butterfly, it approached him and greeted him.
he remained silent, he knew that if he tried to speak he would devour it,
the butterfly talked and fluttered and he simply watched it.
Days went by and the chameleon learned to control his instincts
and to enjoy the beauty and company of his friend the butterfly.
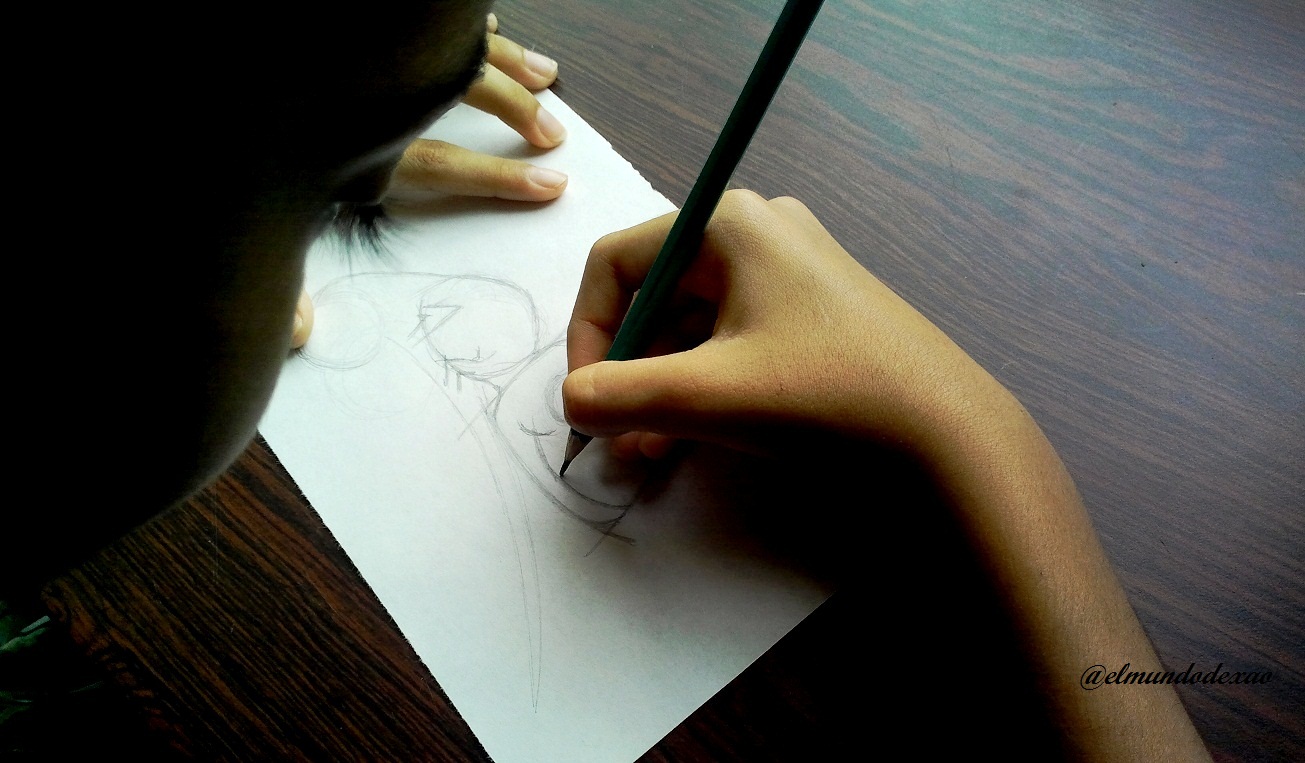
Here are the materials used: 52 g white bond paper, 0.5 mechanical pencil, 0.5 marker, eraser and colors (variety of brands).
Before I continue I want to tell you that many of my learning I develop through videos that we search on YouTube, so at the end I will leave you the link I used on this occasion.
 Let's start with the step by step drawing:
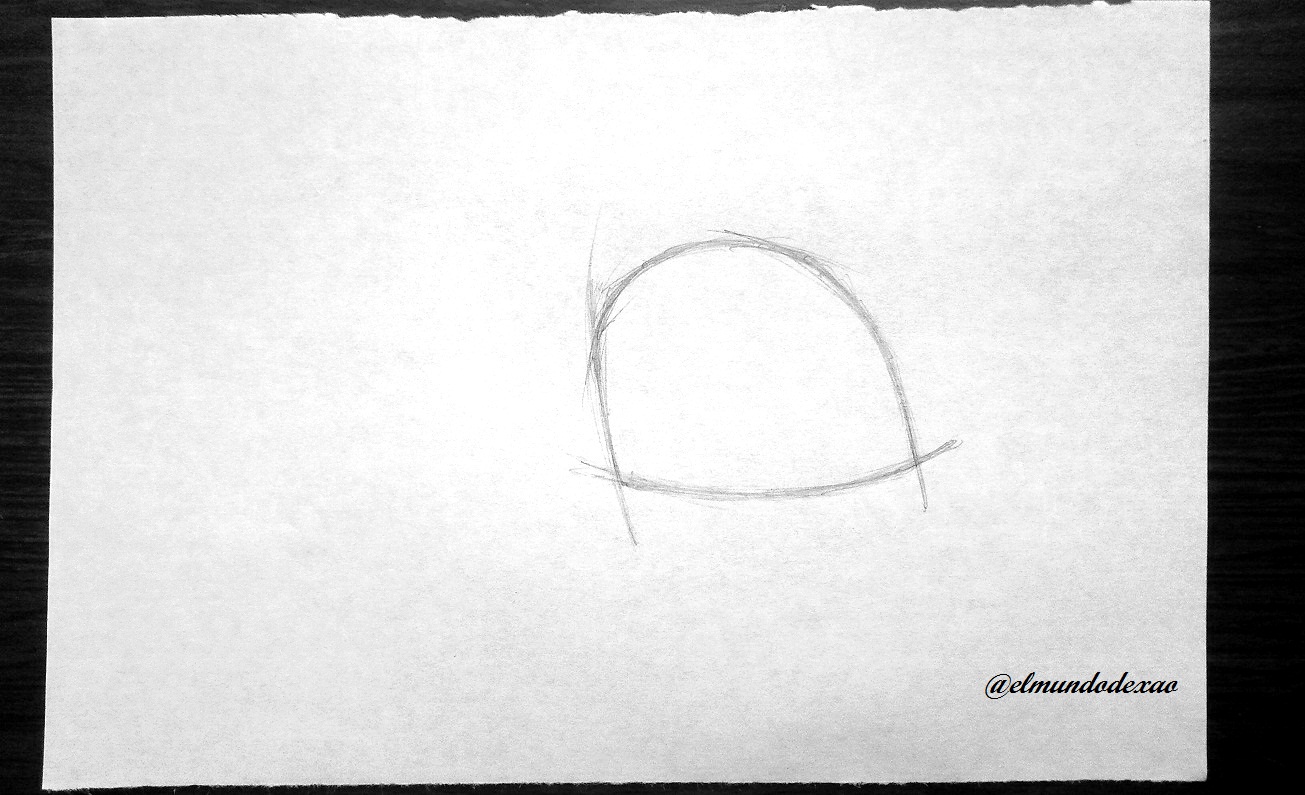
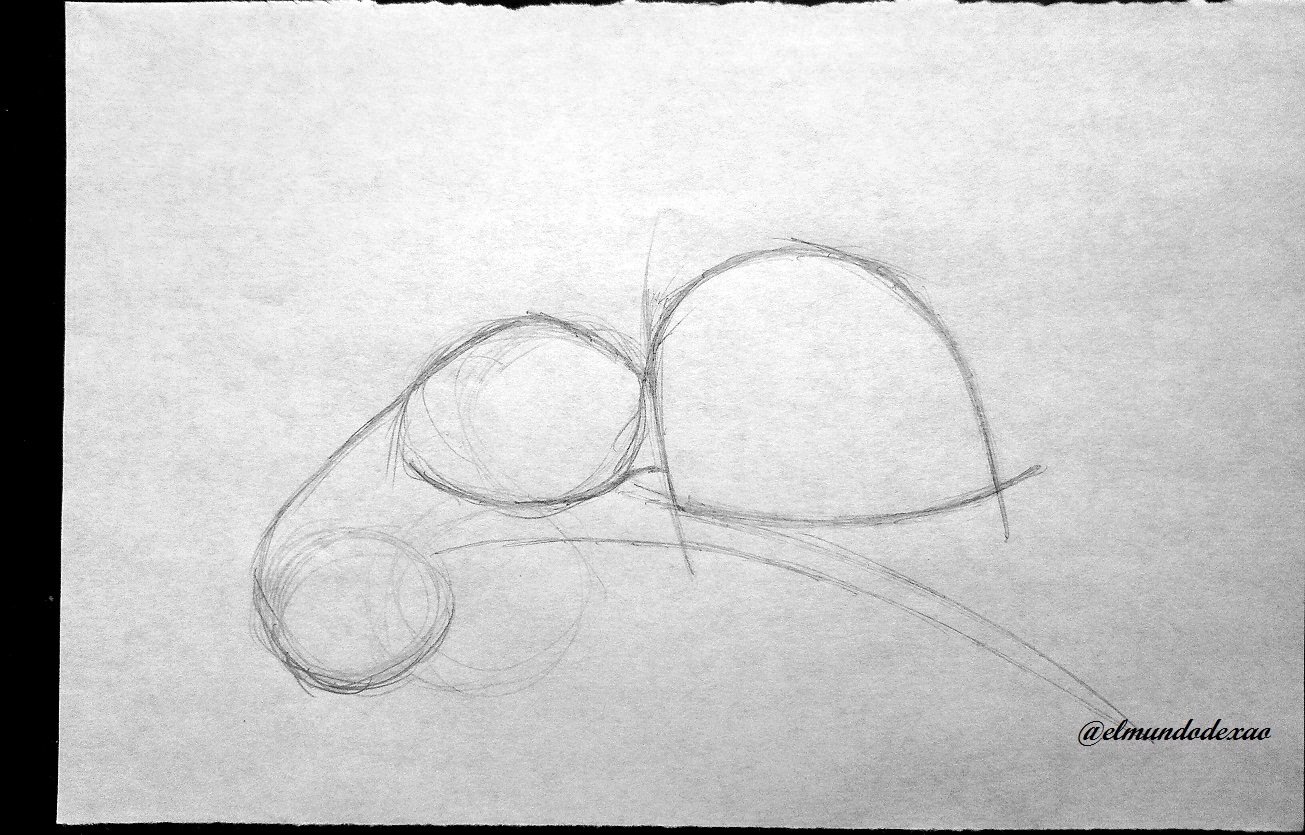
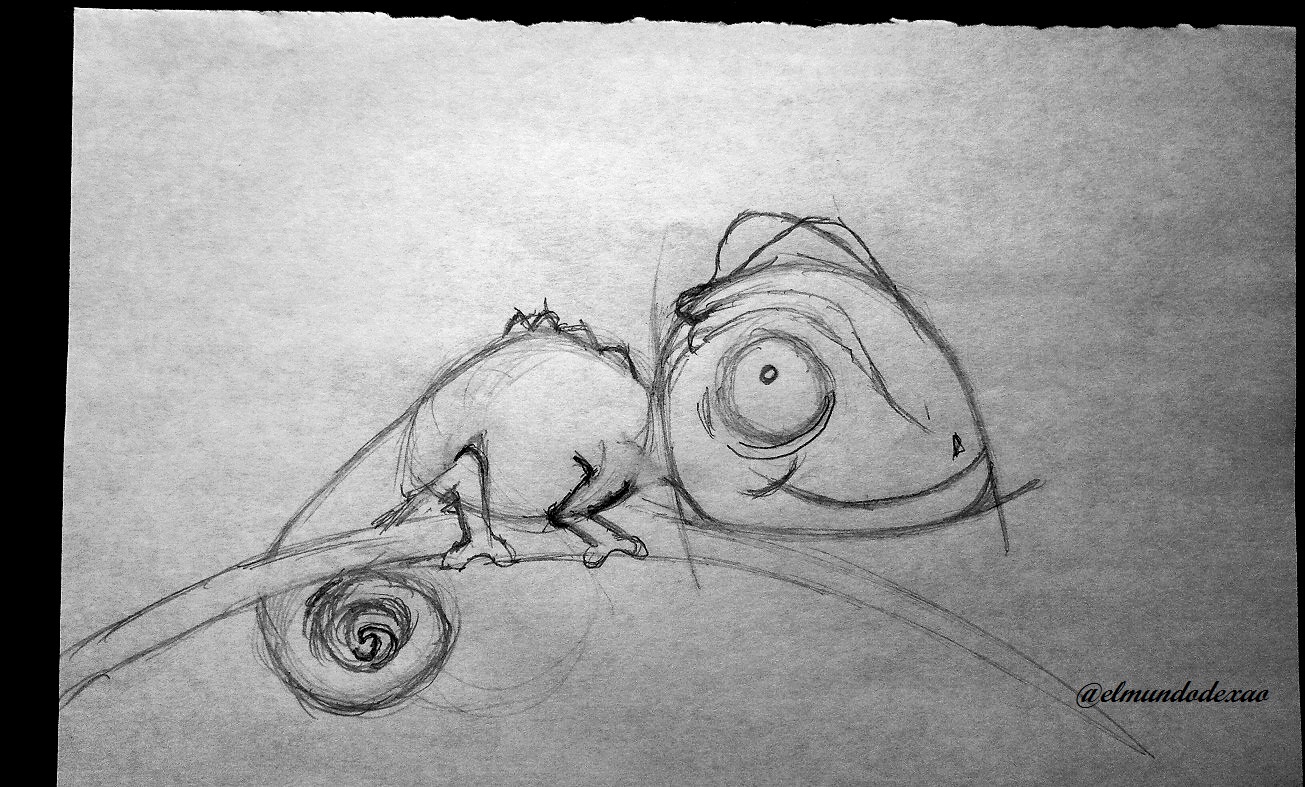
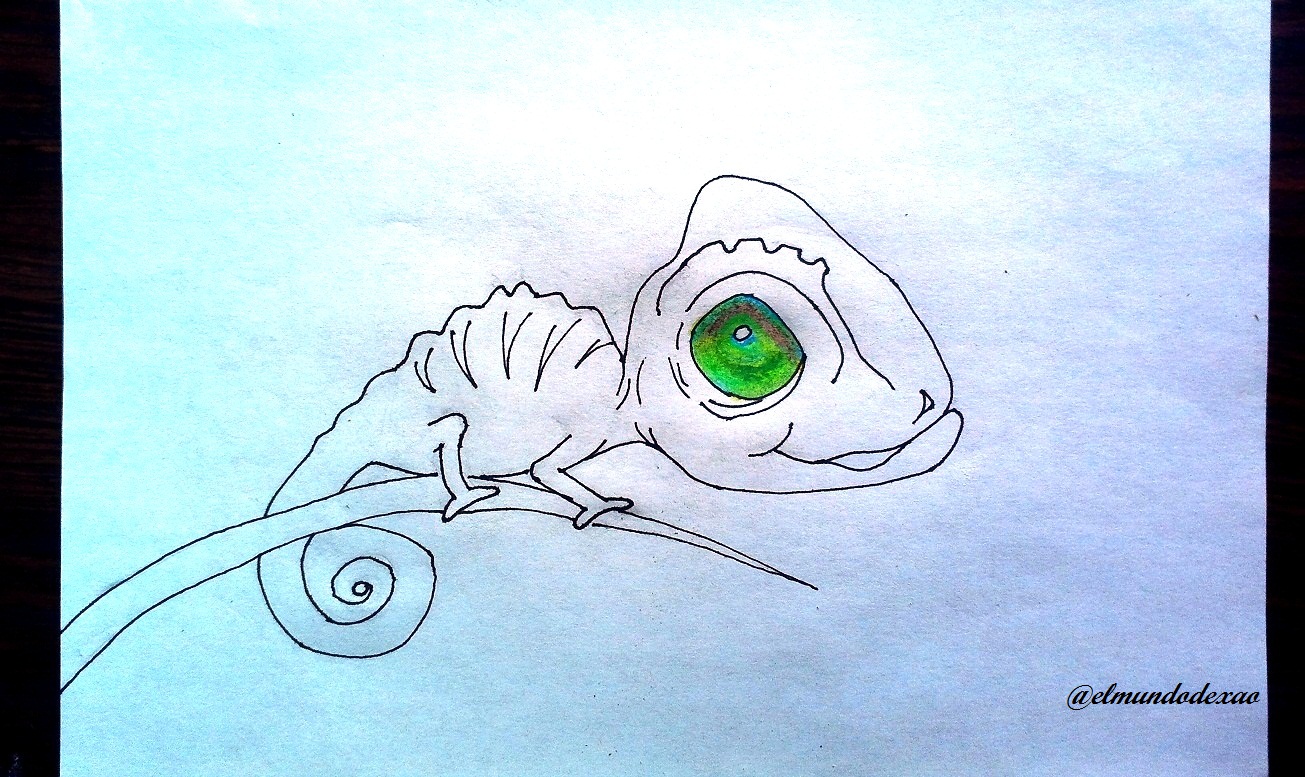
Step # 01: I start by making something like half of an oval and close the open side with a semi curved line, this image would be the head. Then on the left side I make a small oval for the body and below it on the left, I draw a circle for the tail.
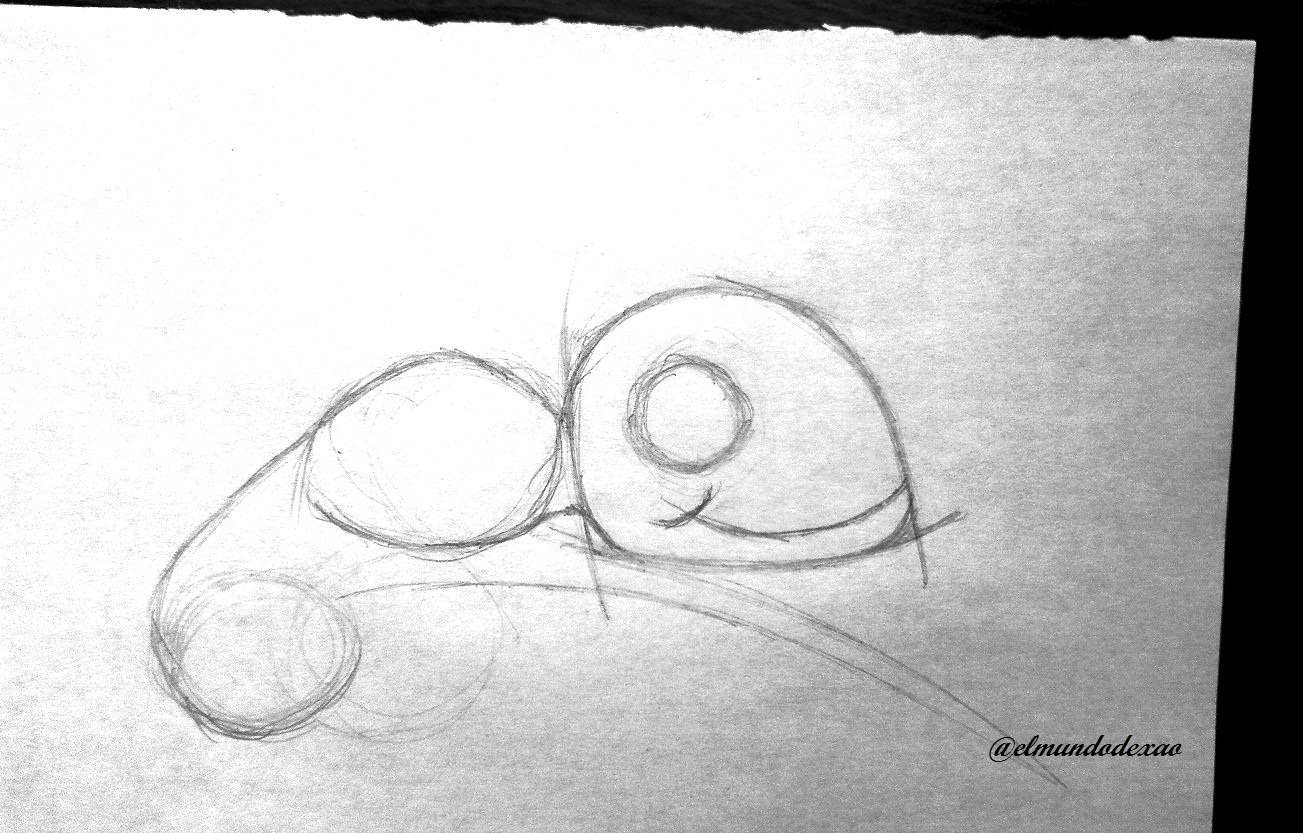
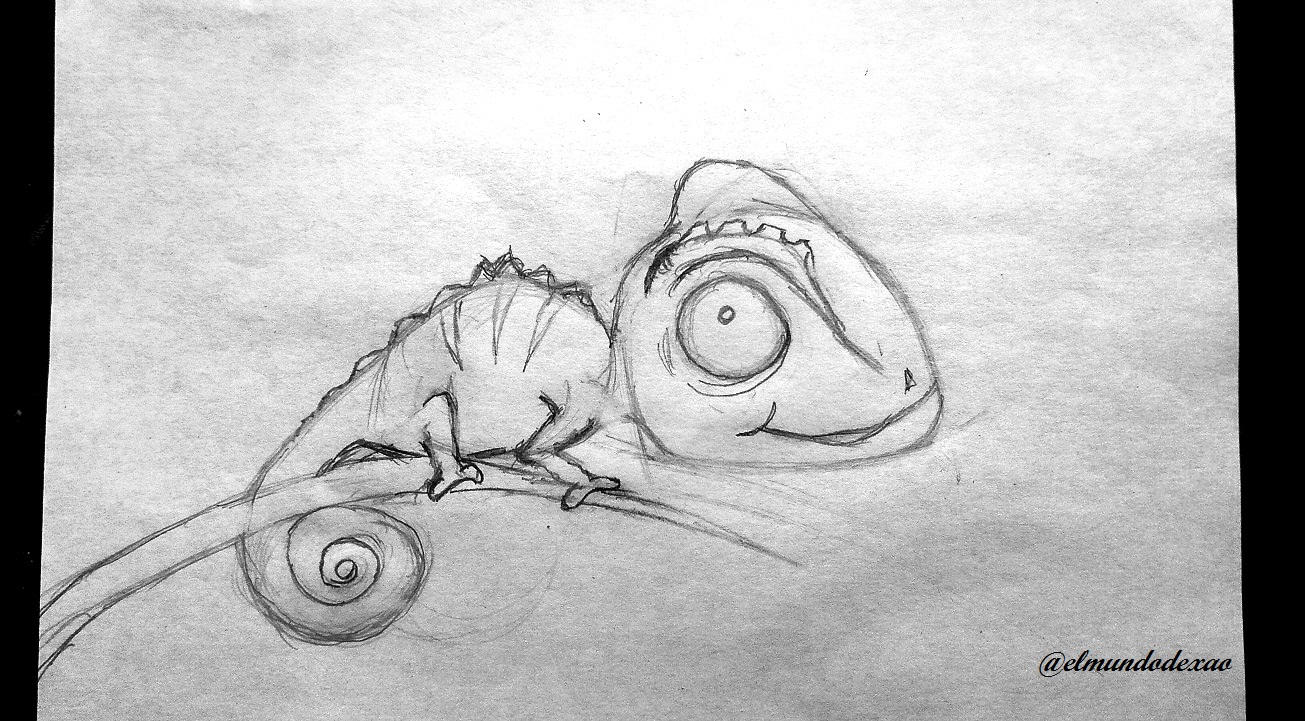
 Step # 02: I start defining the head by making a small circle for the eye and a curved line for the mouth.
 Step # 03: I add details such as paws, crest and eyebrows, I look for the best location for these details because according to how we place them, it can show joy, sadness or even malice.
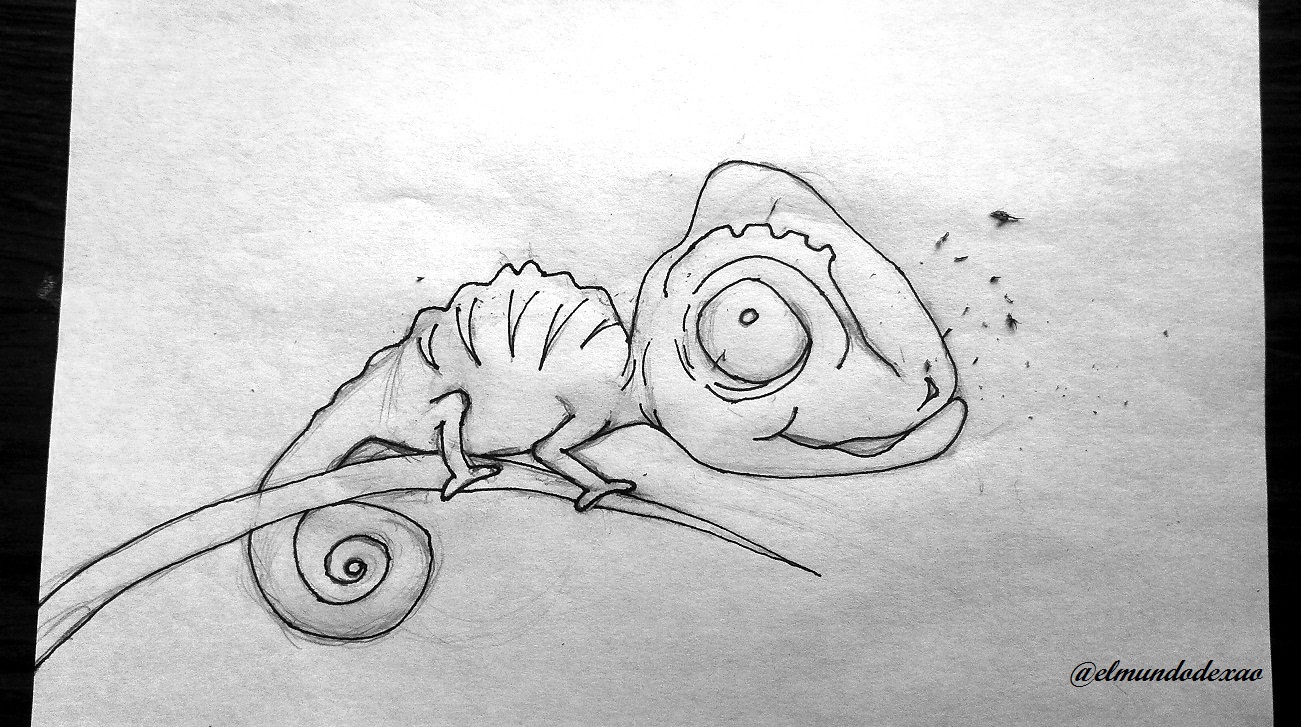
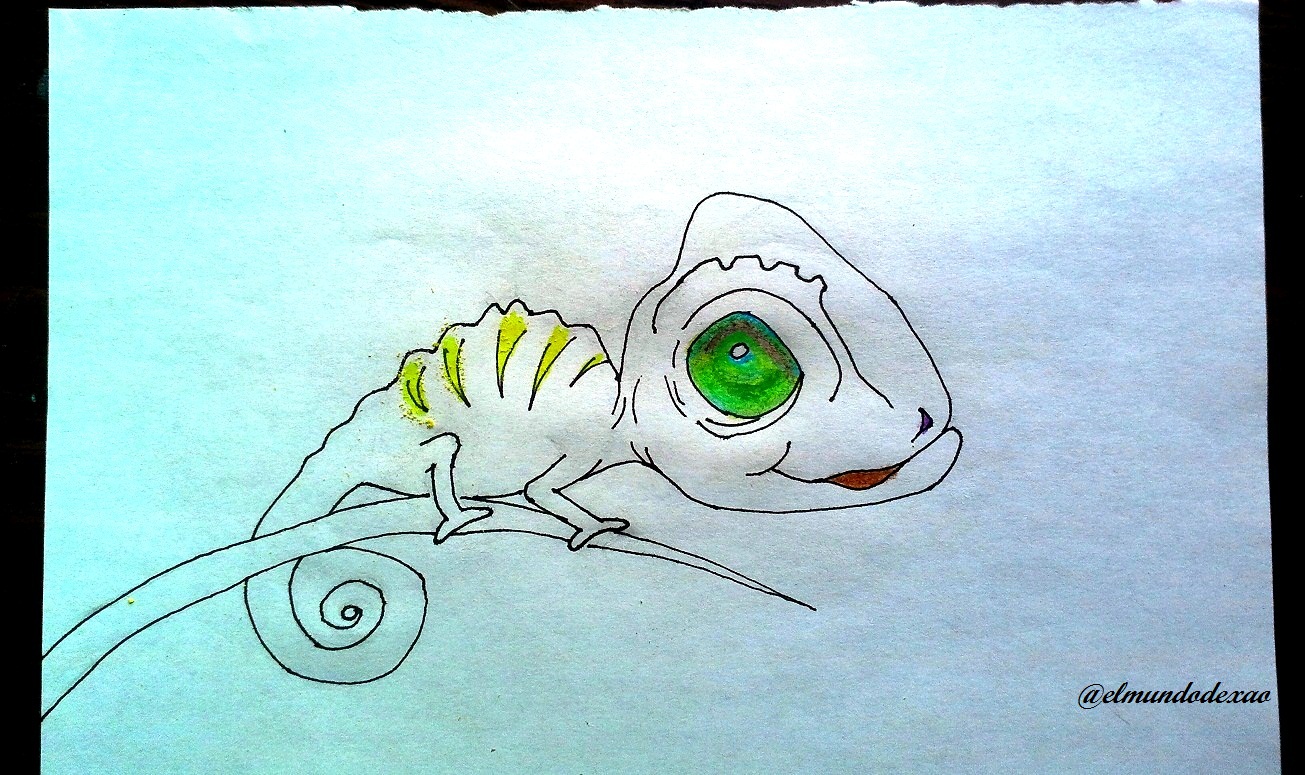
 Step # 04: Once the drawing is finished I proceed to ink it and erase the graphite.
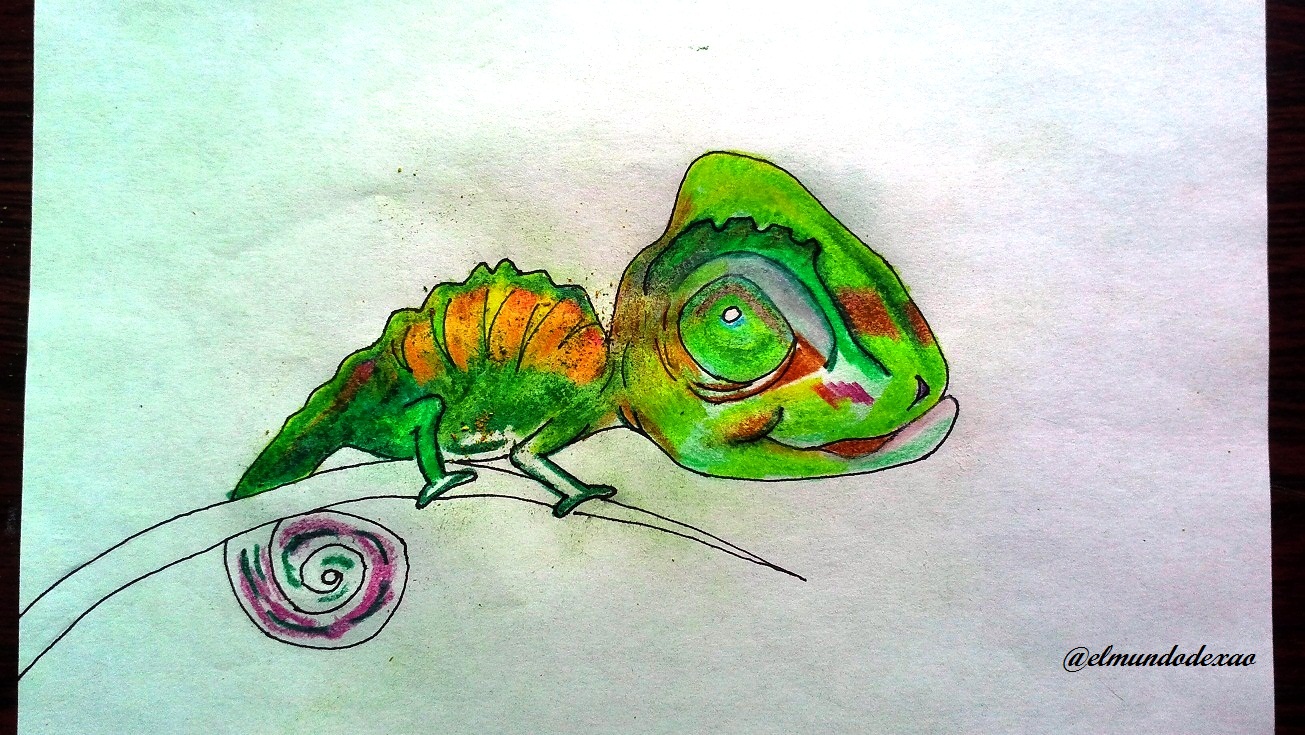
 Step # 05: I color the eye and then begin to place colors on the body and as it is difficult to imagine how it will look like I must go little by little making combinations on other paper, yellow and dark green will be the base.
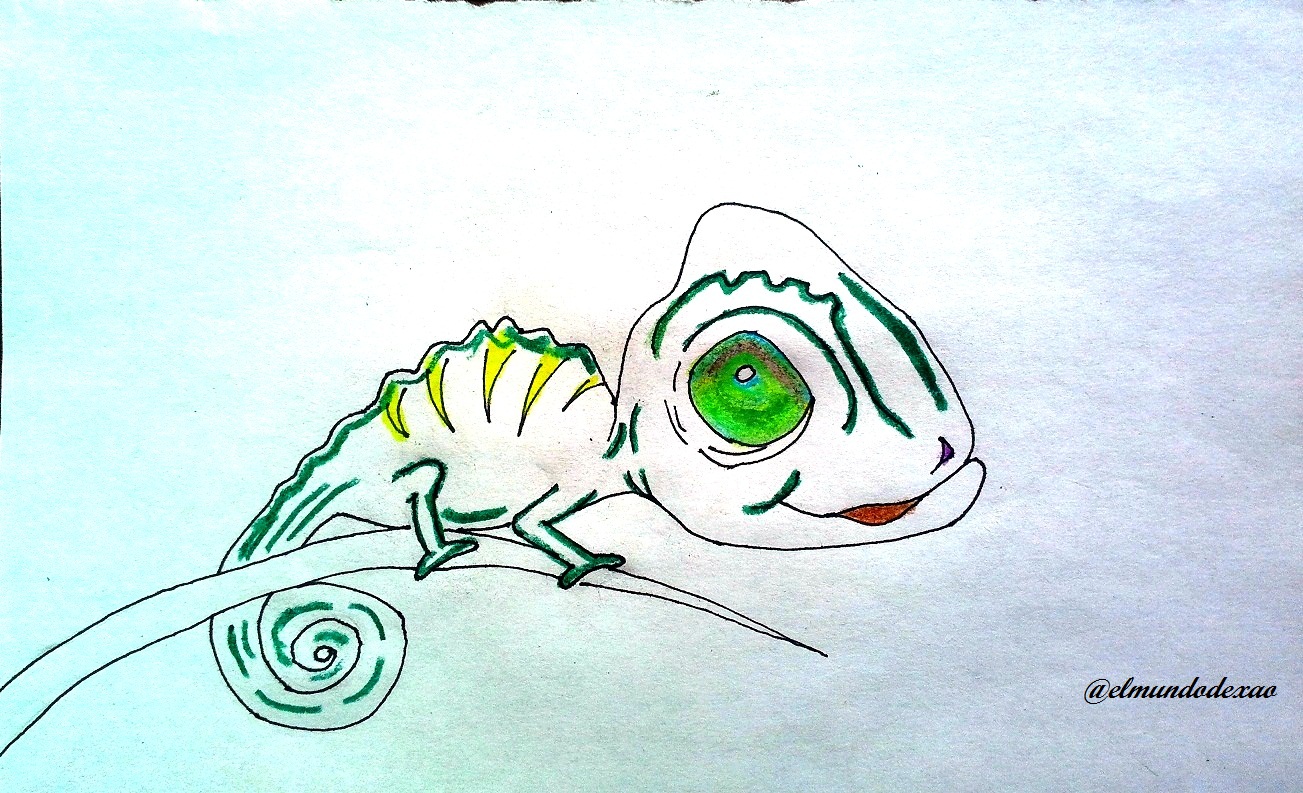 Step # 06: I place a light green background on the head and orange and blue on the body and with a fuchsia I darken some parts of the face.

 Step # 07: I use a dark green for the body and tail, I also add a little fuchsia.
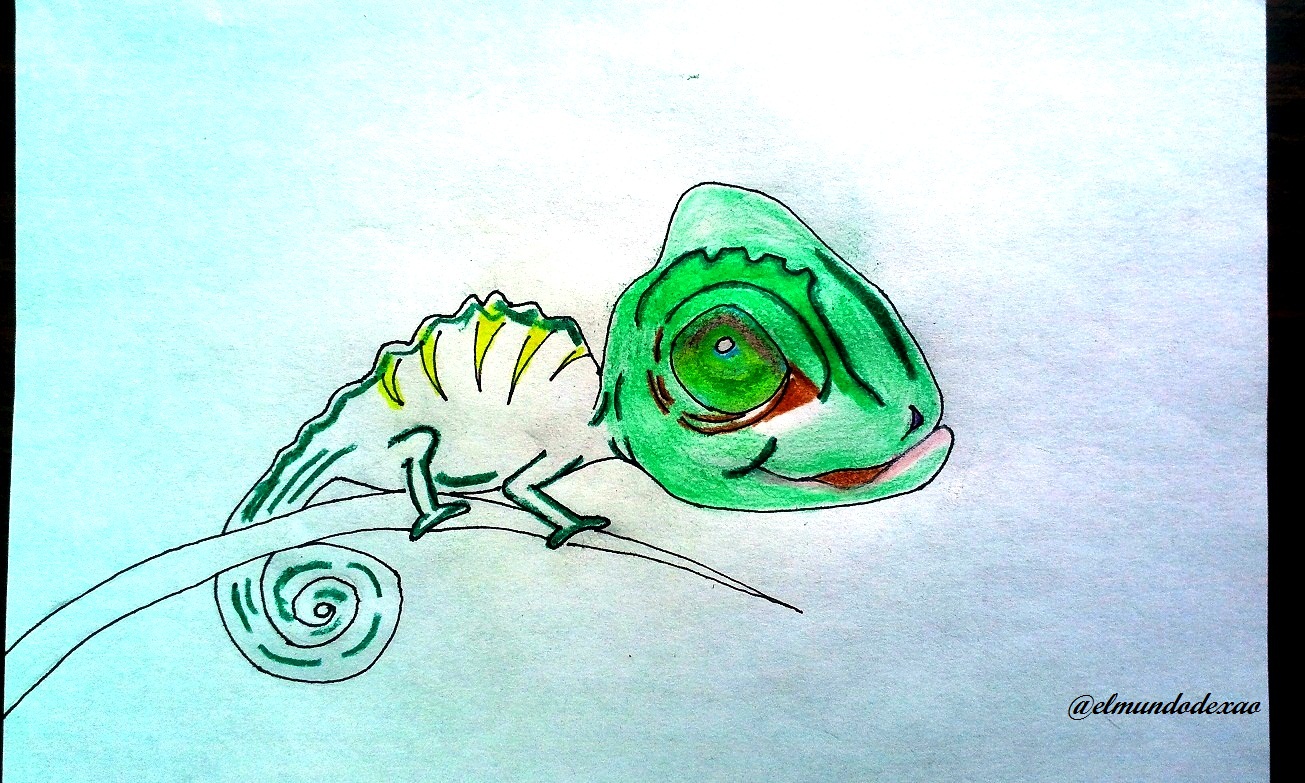
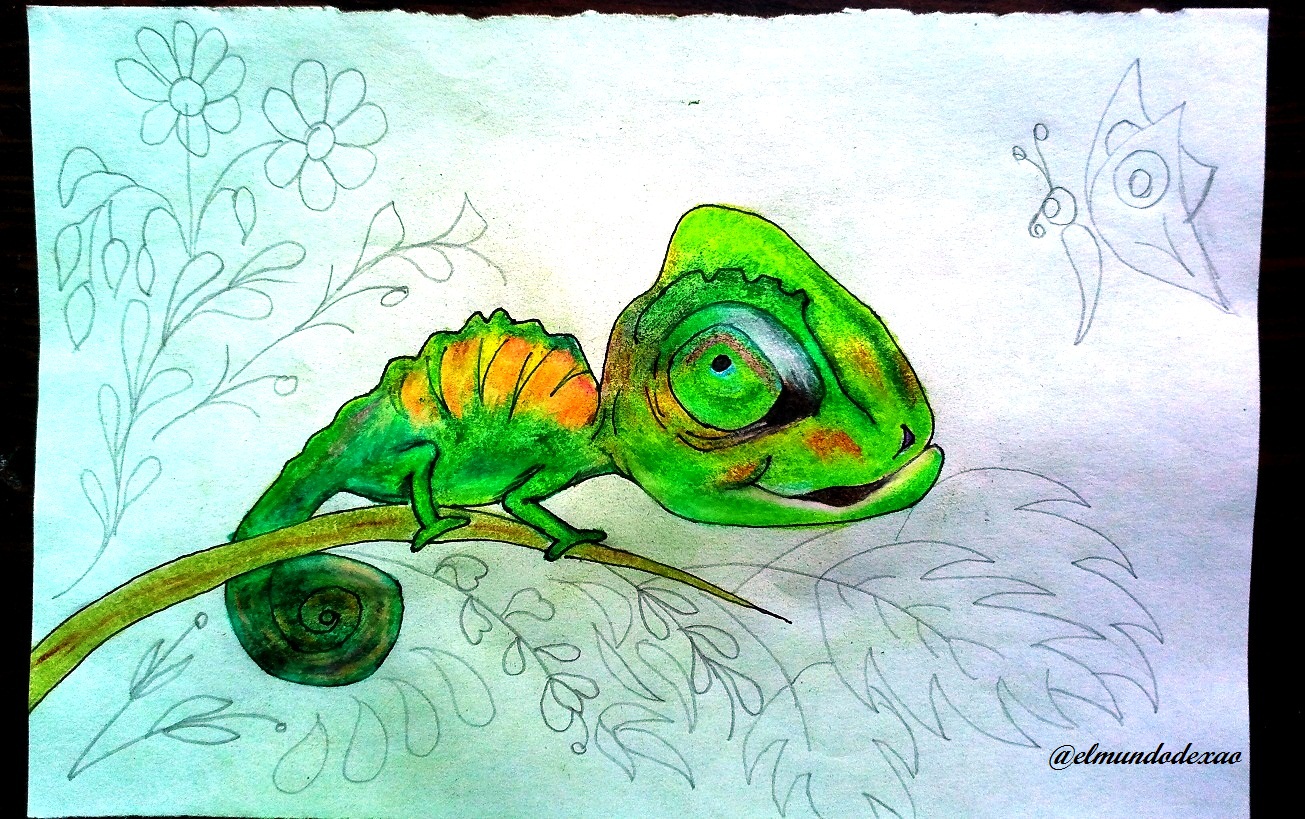
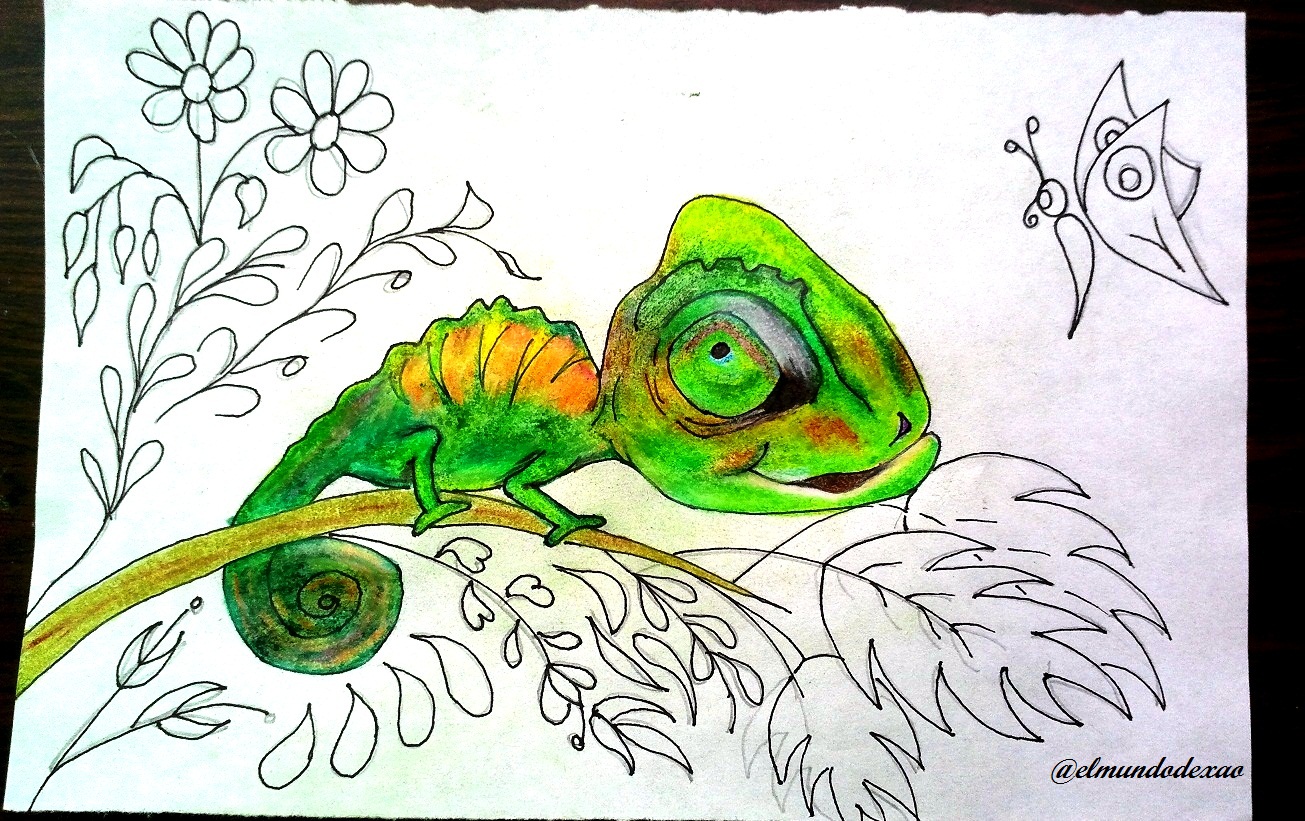
 Step # 08: I draw the environment and then ink the branches, flowers and the butterfly.
 Step # 09: Finally I color the whole environment and the butterfly.
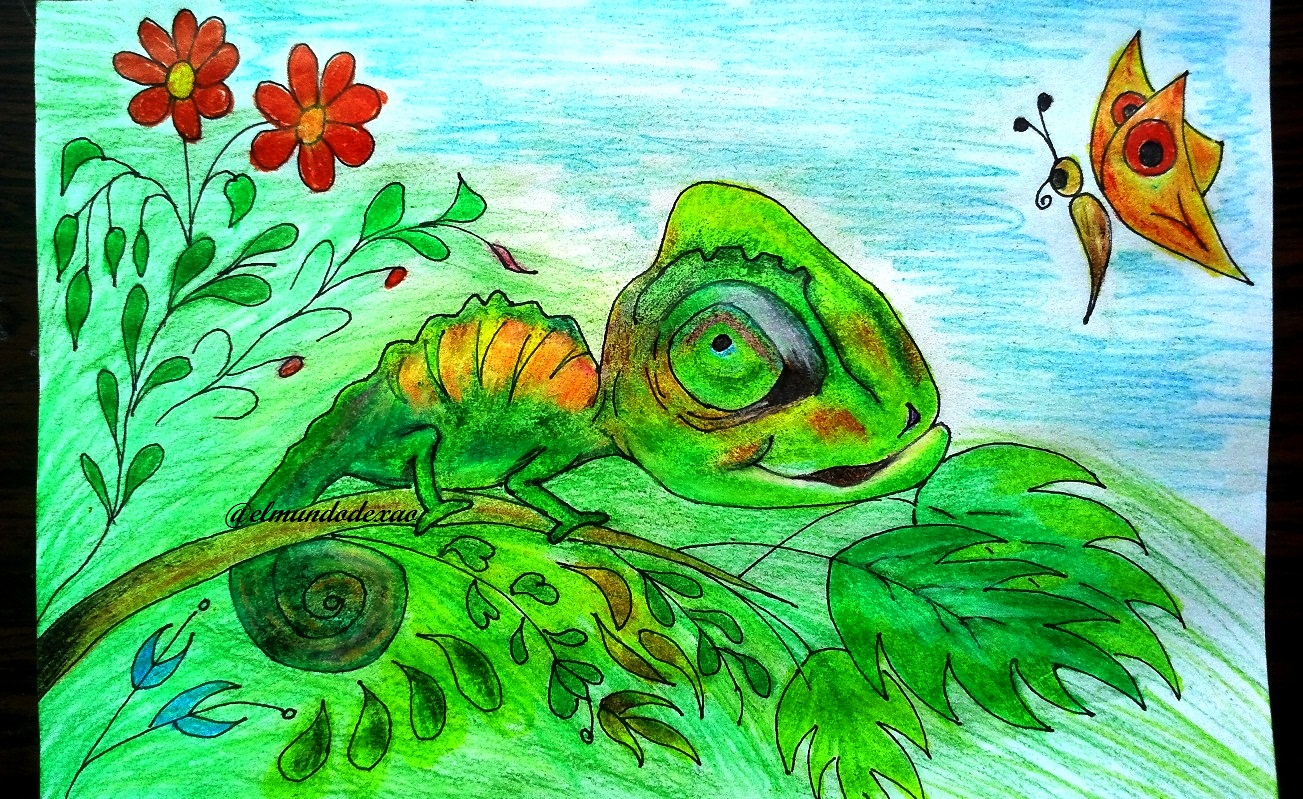
Photo Source: Own photos captured with a Síragon camera.
Modified size: With the Paint Program.
Thanks for visiting my Blog… AH! Don't forget to vote, reblogear, and comment.
Translated with:

www.DeepL.com/Translator (free version)

Hola amigos de Hive Diy…
☺☺☺
Bienvenidos a mi blog una vez más, Espero tengan un gran día. Hoy les compartiré mi más reciente trabajo kawaii, El camaleón y la mariposa. Mientras hacia el dibujo se me ocurrió una breve historia.
El camaleón solía disfrutar cada día, cambiando de colores
ya que es todo un artista aunque carecía de otras emociones,
sabe mucho de colores y de combinaciones pero lo que más
disfrutaba era la diversidad de sabores de todos los insectos
que andaban en los alrededores.
Un día cambiando de colores al pasar entre unas hermosas flores,
vio una radiante mariposa, esta se acercó y lo saludo
él se quedó en silencio, sabía que si intentaba hablar la devoraría,
la mariposa hablaba y revolotea y el simplemente la observaba.
Pasaron los días y el camaleón aprendió a controlar sus instintos
y a disfrutar de la belleza y compañía de su amiga la mariposa.
A continuación menciono los materiales utilizados: Papel bond blanco de 52 g, portaminas 0.5, rotulador de 0.5, borrador y colores (Variedad de marcas).
Antes de continuar les quiero comentar que muchos de mis aprendizajes los desarrollo mediante videos que buscamos en YouTube por lo que al final les dejare el enlace que use en esta ocasión.
Comencemos con el paso a paso del dibujo:
Paso # 01: Comienzo haciendo algo como la mitad de un ovalo y cierro el lado abierto con una línea semi curvada, esta imagen sería la cabeza. Luego del lado izquierdo hago un pequeño ovalo para el cuerpo y debajo de este a la izquierda, dibujo un circulo para la cola.
Paso # 02: Empiezo a definir la cabeza haciendo un pequeño círculo para el ojo y una línea curvada para la boca.
Paso # 03: Agrego detalles como las patas, cresta y cejas, busco la mejor ubicación para estos detalles ya que de acuerdo a como los coloquemos puede notarse alegría, tristeza o hasta malicia.
Paso # 04: Una vez terminado el dibujo procedo a entintarlo y borrar el grafito.
Paso # 05: Coloreo el ojo para luego comenzar a colocar colores en el cuerpo y como es difícil imaginar cómo quedara debo ir poco a poco haciendo combinaciones en otro papel, el amarillo y verde oscuro serán la base.
Paso # 06: Coloco un fondo verde claro en la cabeza y en el cuerpo naranja y azul y con un fucsia oscurezco algunas partes de la cara.
Paso # 07: Utilizo un verde oscuro para el cuerpo y la cola, también agrego un poco de fucsia.
Paso # 08: Dibujo el entorno y luego entinto las ramas, flores y la mariposa.
Paso # 09: Por ultimo coloreo todo el entorno y la mariposa.
Fuente de Fotos: Propias capturadas con una cámara Síragon.
Modificado el tamaño: Con el Programa Paint.
Gracias por visitar mi Blog… ¡AH! No se olvide de votar, rebloguear y comentar.
Muy lindo el dibujo. ¿Sabes qué habría quedado genial? Pintarle el fondo con acuarela. El camaleón y la mariposa con colores pero el fondo con acuarela, el acabado habría sido genial.
Las fotos del paso a paso quedaron muy bien, pero pudiste extenderte un poco más en la descripción de cada paso, para que se entienda un poco mejor todo lo que hiciste en la fotografía.
Por otra parte, tienes que tener cuidado con esas etiquetas. Debes colocar etiquetas relacionadas con tu publicación; splinterlands no tiene nada que ver, las etiquetas de fotografía mucho menos; las etiquetas de ballenas (ocdb) incluso te pueden traer problemas. ¿Qué etiquetas te recomiendo usar? Pues las de manualidades: diy, handmade, crafts, drawing, painting, tutorial, dibujo... Así ganarás un poco más de visualización de parte de los usuarios que buscan contenido a través de estas etiquetas.
Hola @gaboamc2393, gracias por los consejos los tomare en cuenta.

Buenísimo amiga
Hola @jorgelissanchez, gracias por visitar mi publicación, me alegra te guste.