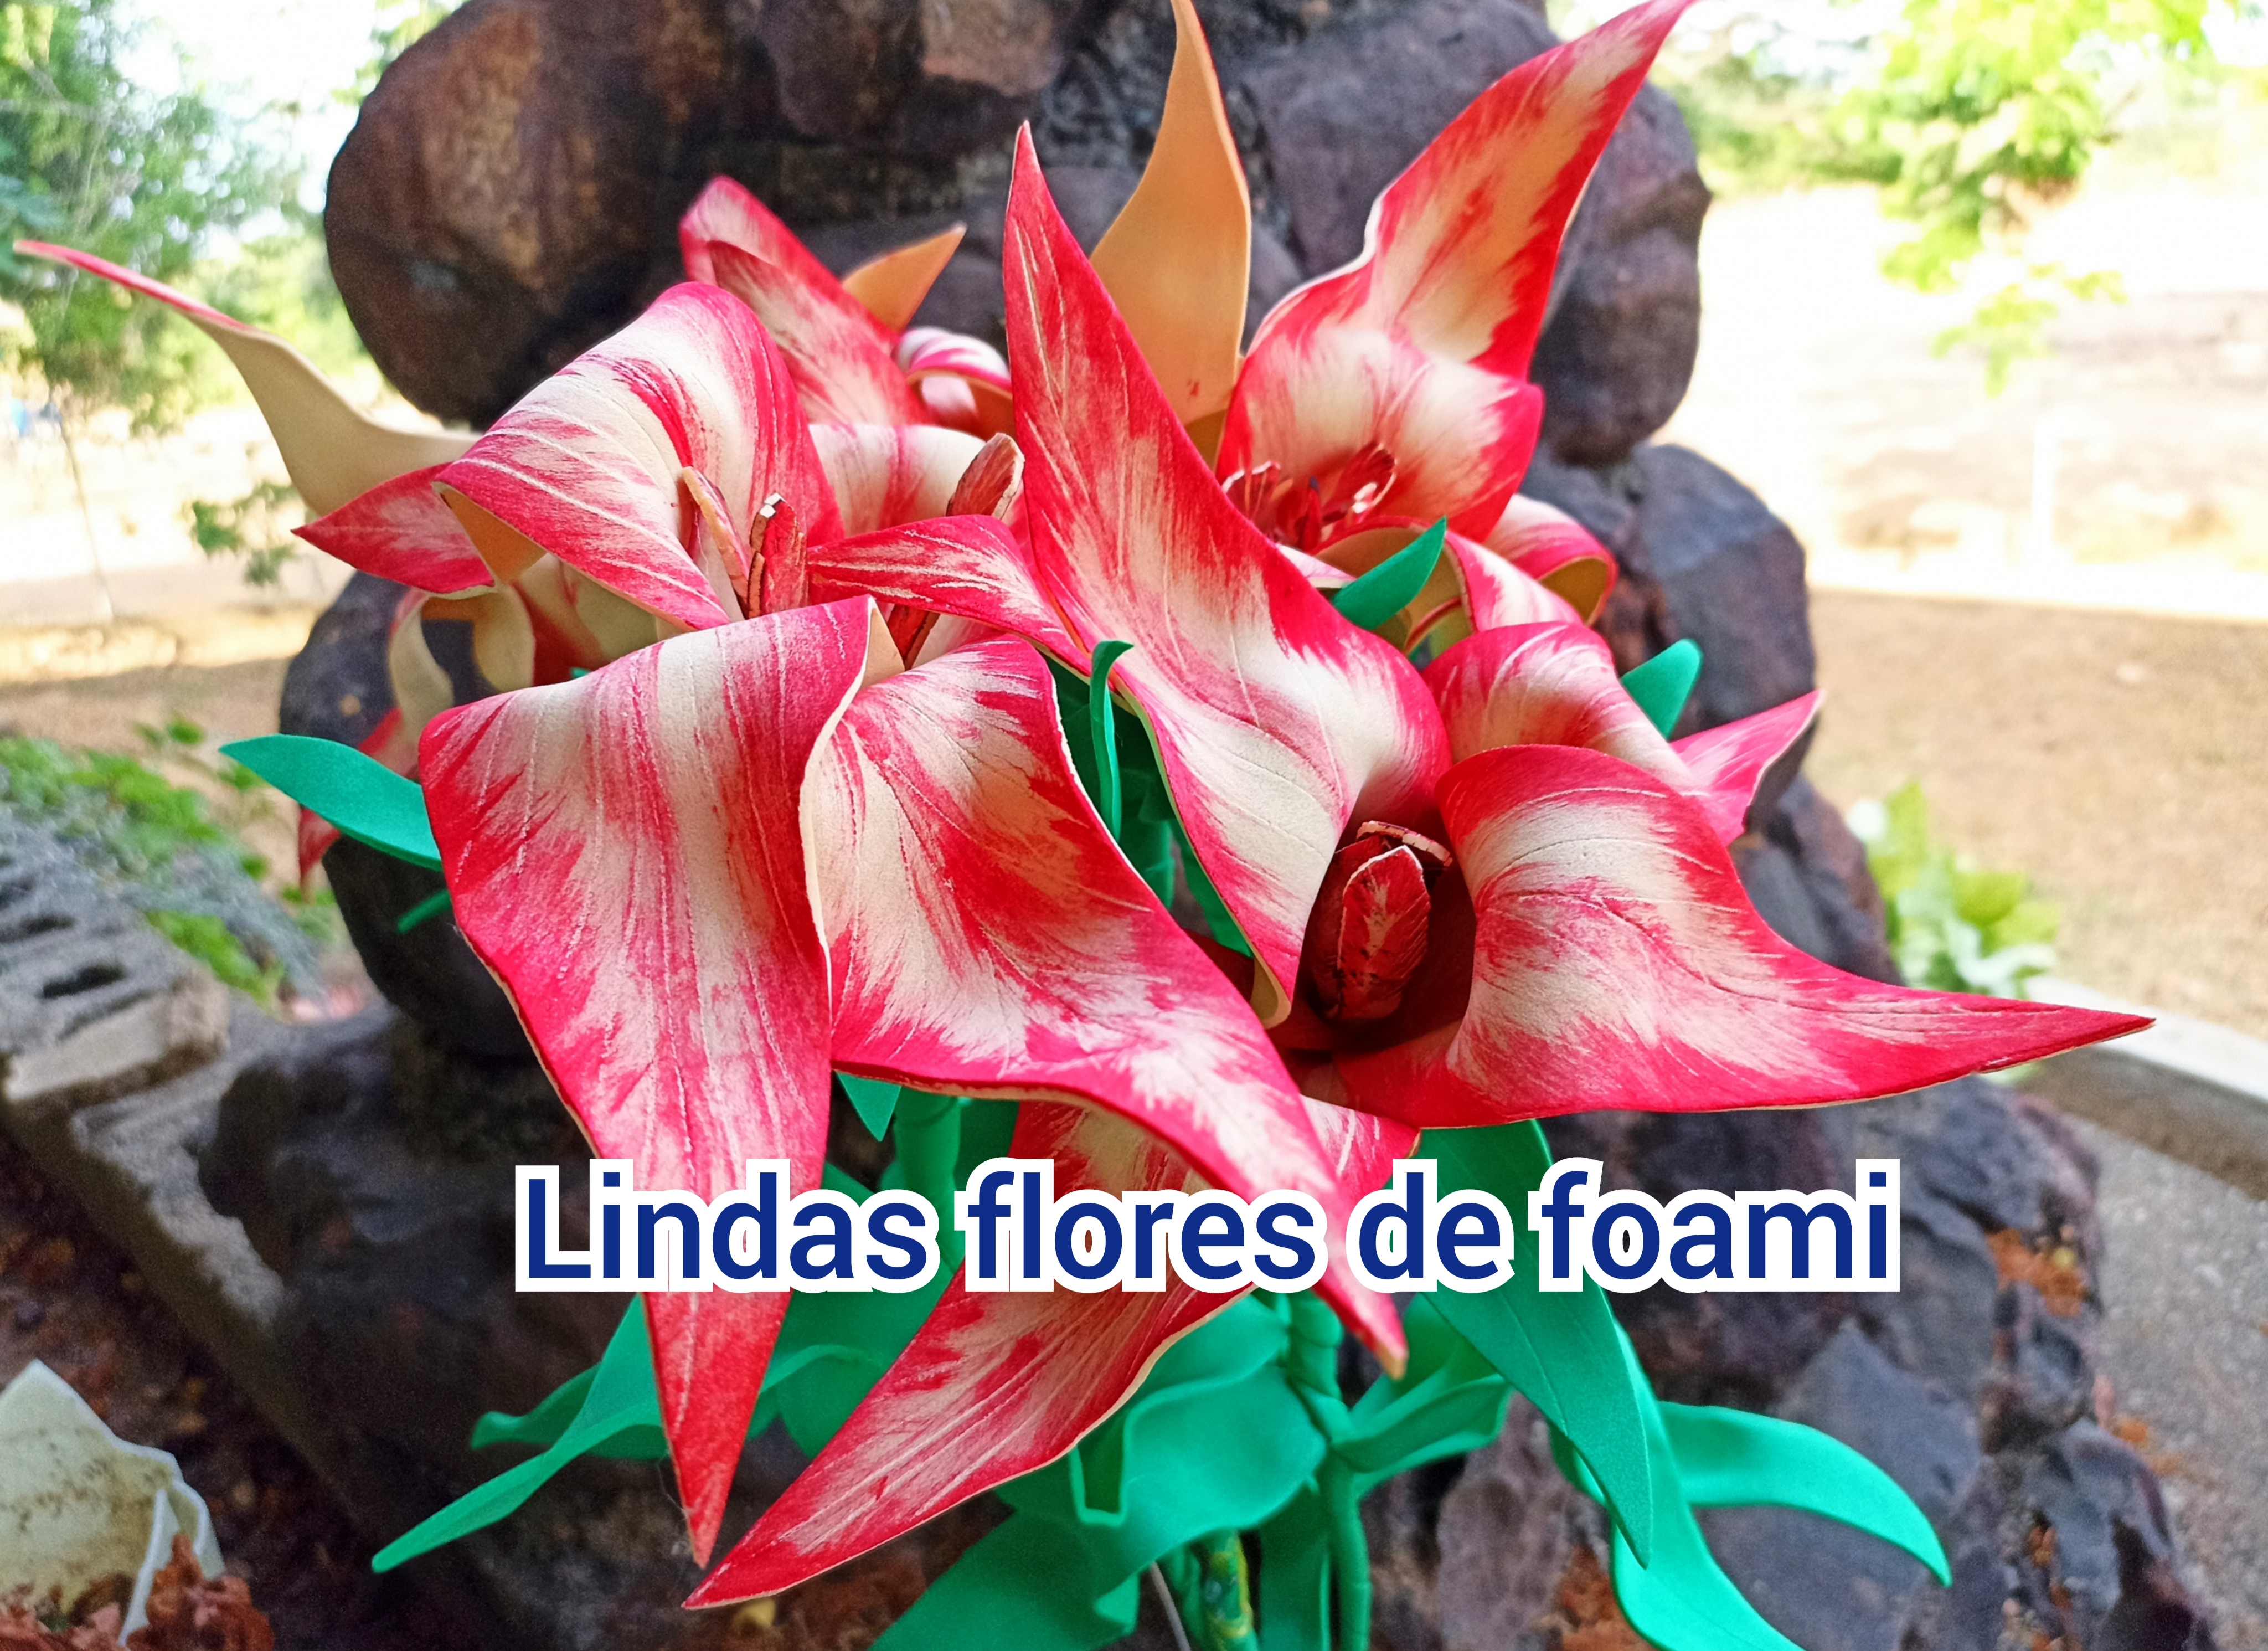
Tutorial cómo realizar lindas flores de foami// Tutorial how to make cute foami flowers.
Bienvenidos a mí blog apreciados amigos de la blockchain de Hive, espero que se encuentren bien disfrutando de buena salud, alegrías, amor y paz, que tengan una feliz tarde.
Welcome to my blog dear friends of the Hive blockchain, I hope you are well enjoying good health, happiness, love and peace, have a happy afternoon.
Nuevamente con ustedes en ésta hermosa comunidad de Hive Diy compartiendo un lindo ramos de flores realizadas en foami.
Again with you in this beautiful community of Hive Diy sharing a beautiful bouquet of flowers made in foami.

Ésta es una actividad que me fascina, elaborar diferentes de flores para adornar rincones de mi hogar o realizar algún regalito.
Pasar el tiempo realizado está actividad es muy gratificante, es un momento que me distraigo y me llena de emoción de ver la belleza y naturalidad de las flores culminadas. Me imagino las flores que deseo elaborar en foami y dibujo los patrones en una hoja blanca, luego sacos las piezas en foami y después empiezo con el procedimiento para hacer las flores. Está es una manera fácil y económica de elaborar flores, que me gustan porque son muy decorativas, resistentes y bellas, donde las coloquen adornan mucho.
This is an activity that fascinates me, making different types of flowers to decorate corners of my home or make a little gift. Spending time doing this activity is very rewarding, it is a moment that distracts me and fills me with emotion to see the beauty and naturalness of the culminated flowers.
I imagine the flowers that I want to make in foami and I draw the patterns on a white sheet, then I take out the pieces in foami and then I start with the procedure to make the flowers. This is an easy and economical way to make flowers, which I like because they are very decorative, resistant and beautiful, where you place them they adorn a lot.
Materiales.
✓ 2 láminas de foami grandes; una de color verde y otra amarillo crema.
✓ Silicón frío, o en barra.
✓ Pintura roja al frío.
✓ Un pincel.
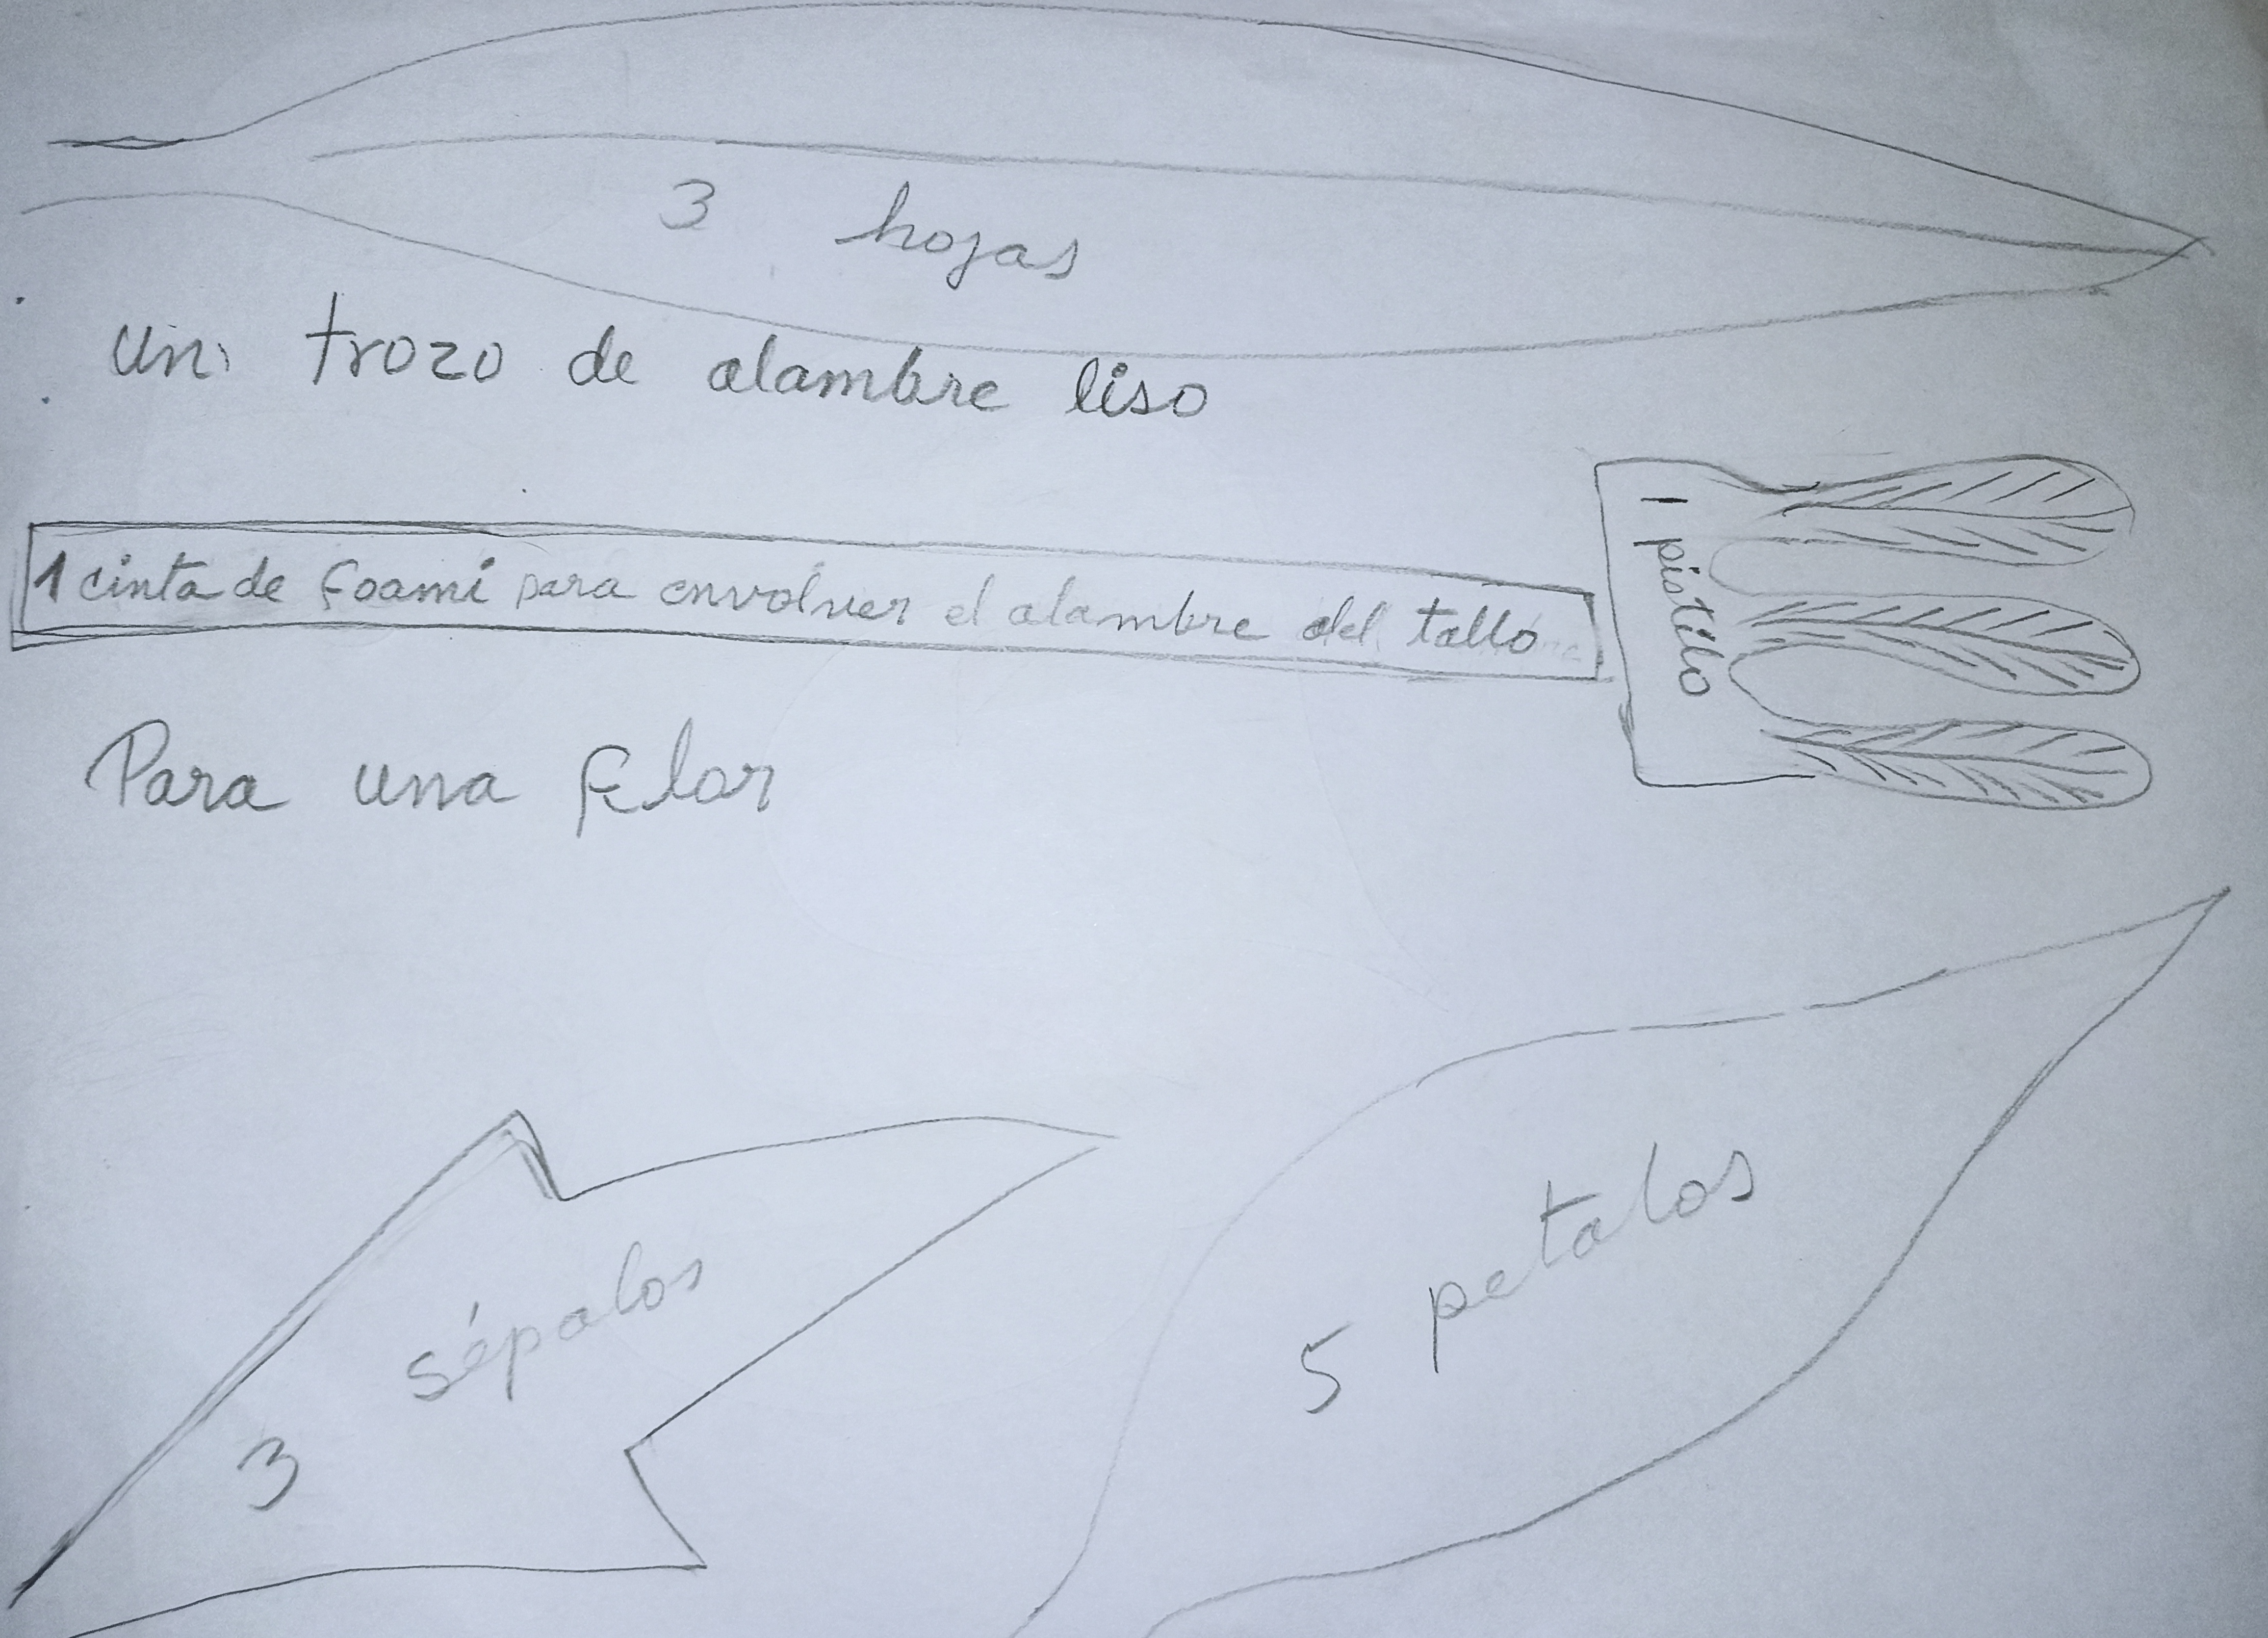
✓ 5 trozos de alambre liso de 60 y 70 cm de largo y del agrado de cada quien.
✓ hoja blanca y lápiz para dibujar los patrones.
✓ Hilo para sujetar.
Materials.
✓ 2 large sheets of foami; one green and one cream yellow.
✓ Cold silicone, or bar.
✓ Red cold paint.
✓ A brush.
✓ 5 pieces of smooth wire 60 and 70 cm long and to everyone's liking.
✓ white sheet and pencil to draw the patterns.
✓ Thread to hold.
Ahora con el paso a pasos.
Now with the step by steps.
Elaboré los patrones en una hoja blanca, luego los recorté para dibujarlas en el foami y sacar las piezas.
I made the patterns on a white sheet, then I cut them out to draw them on the foami and take out the pieces.
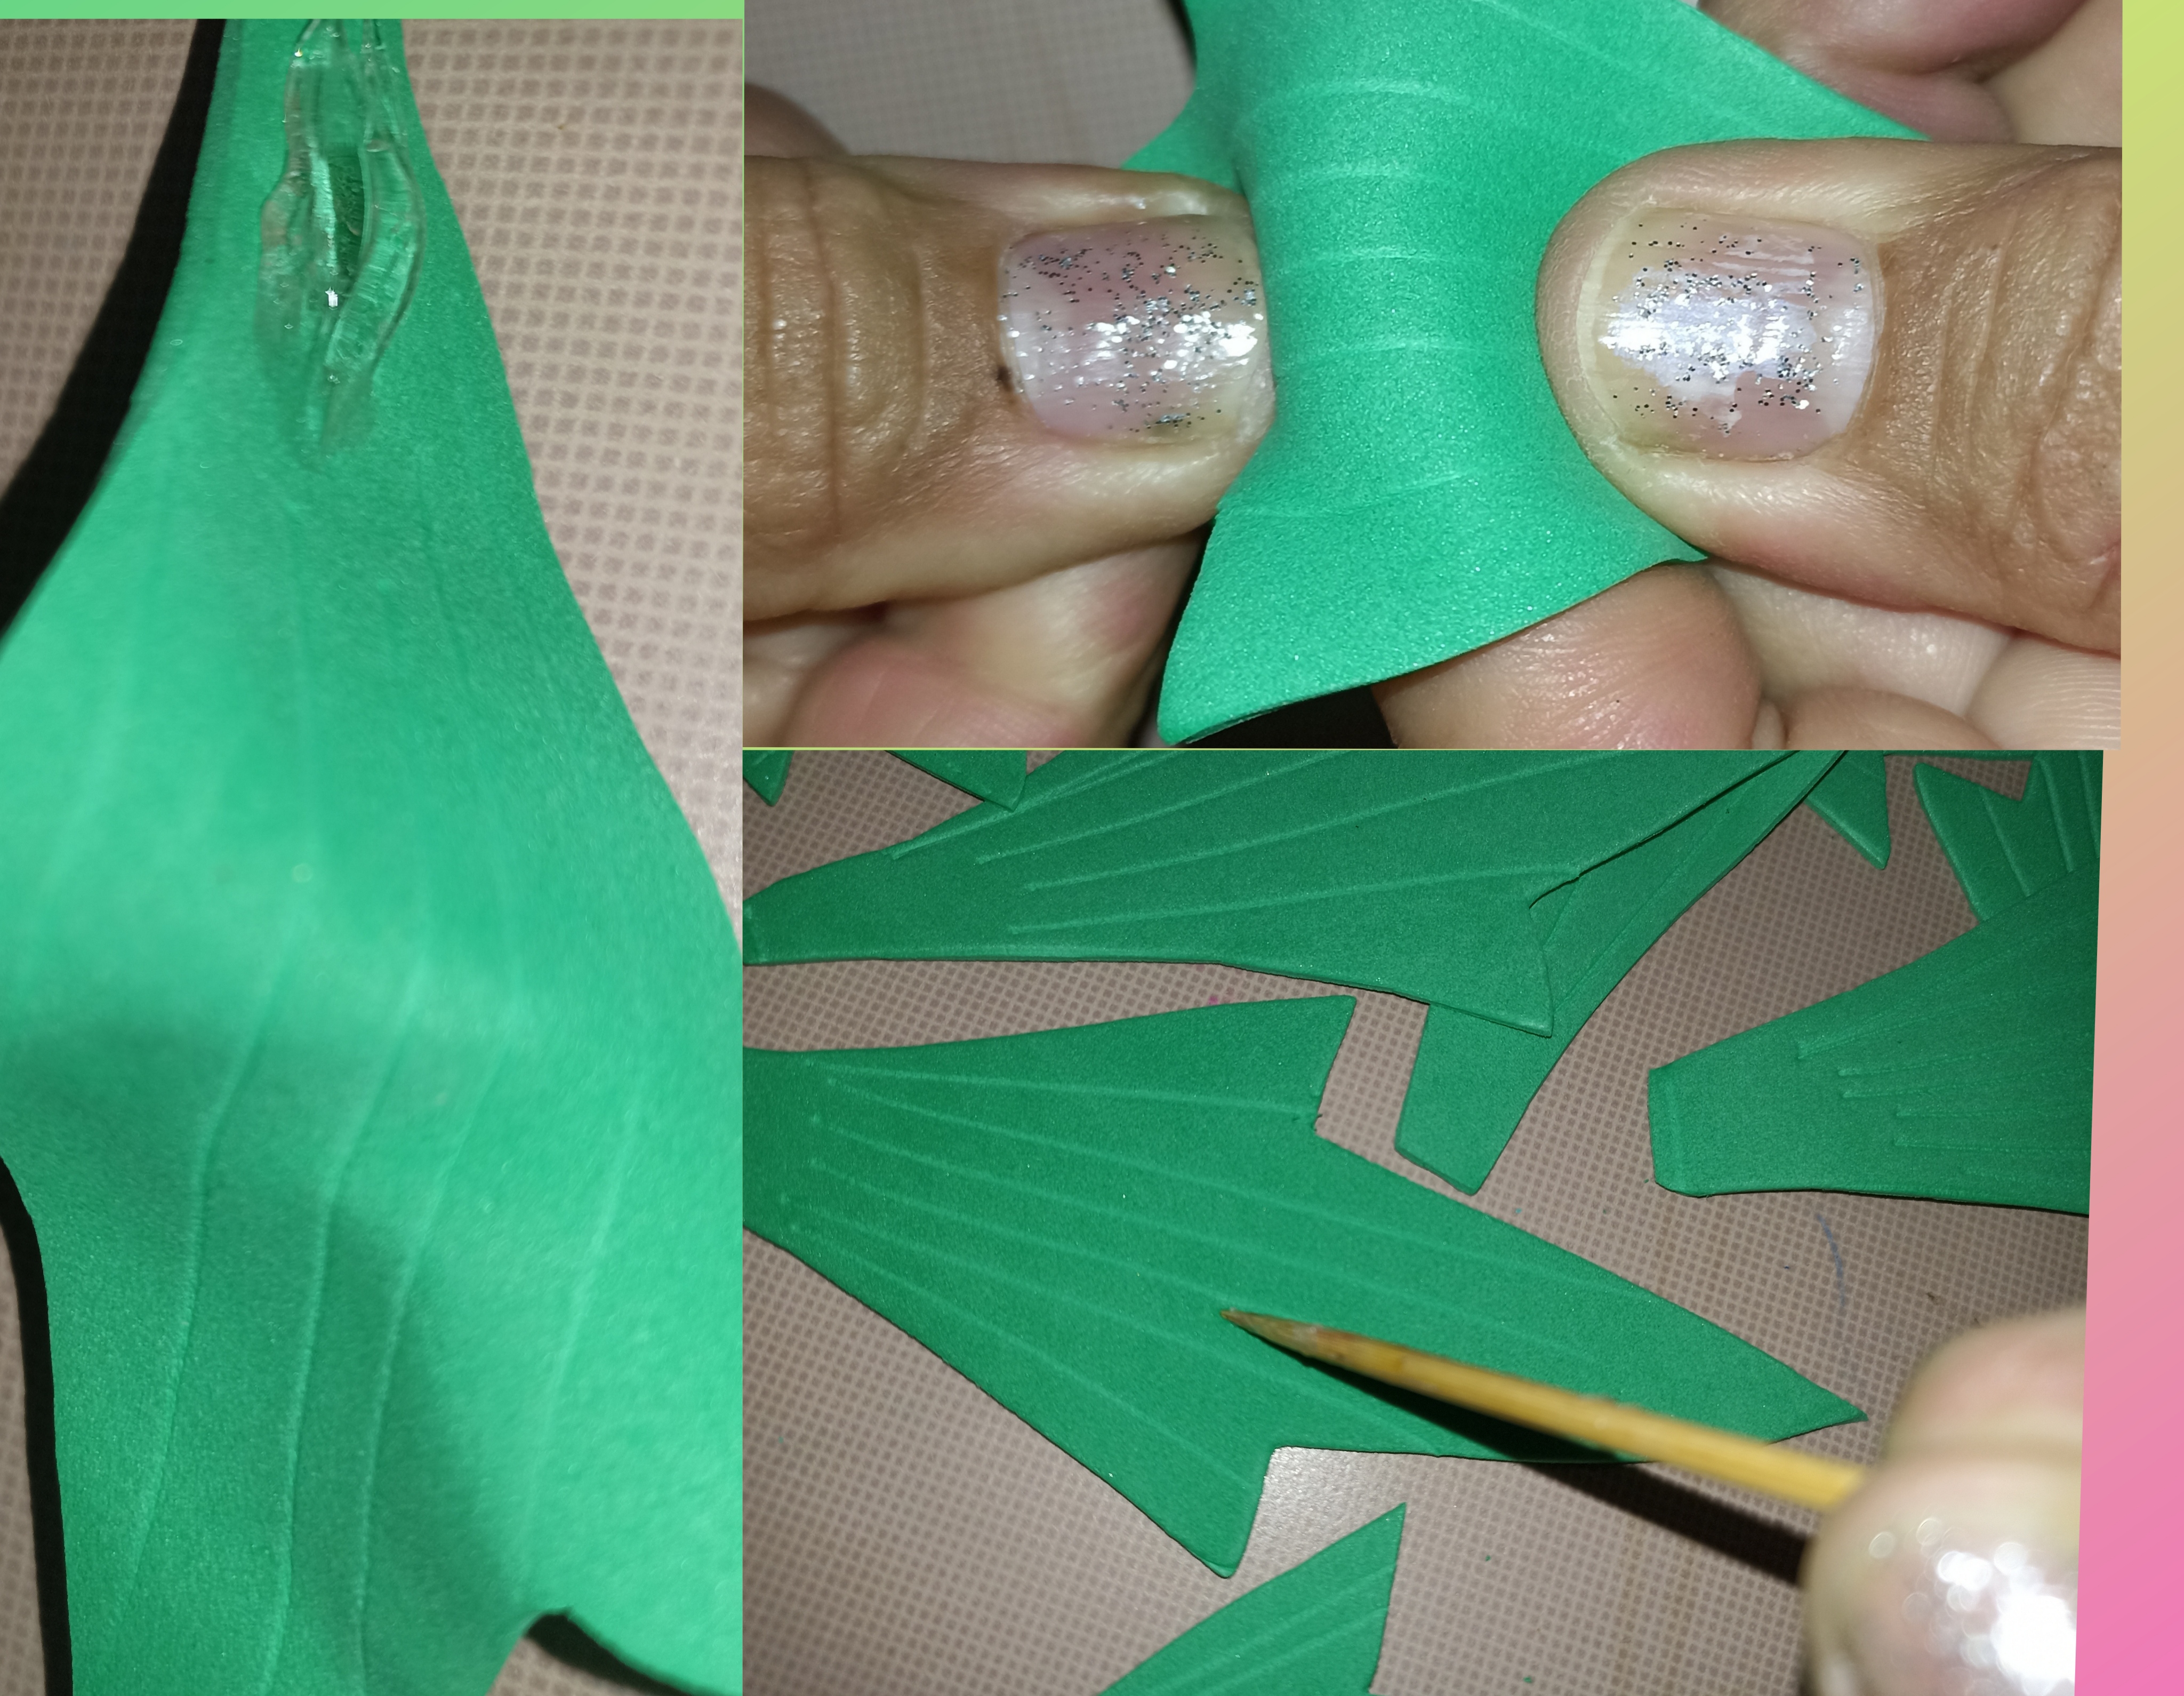
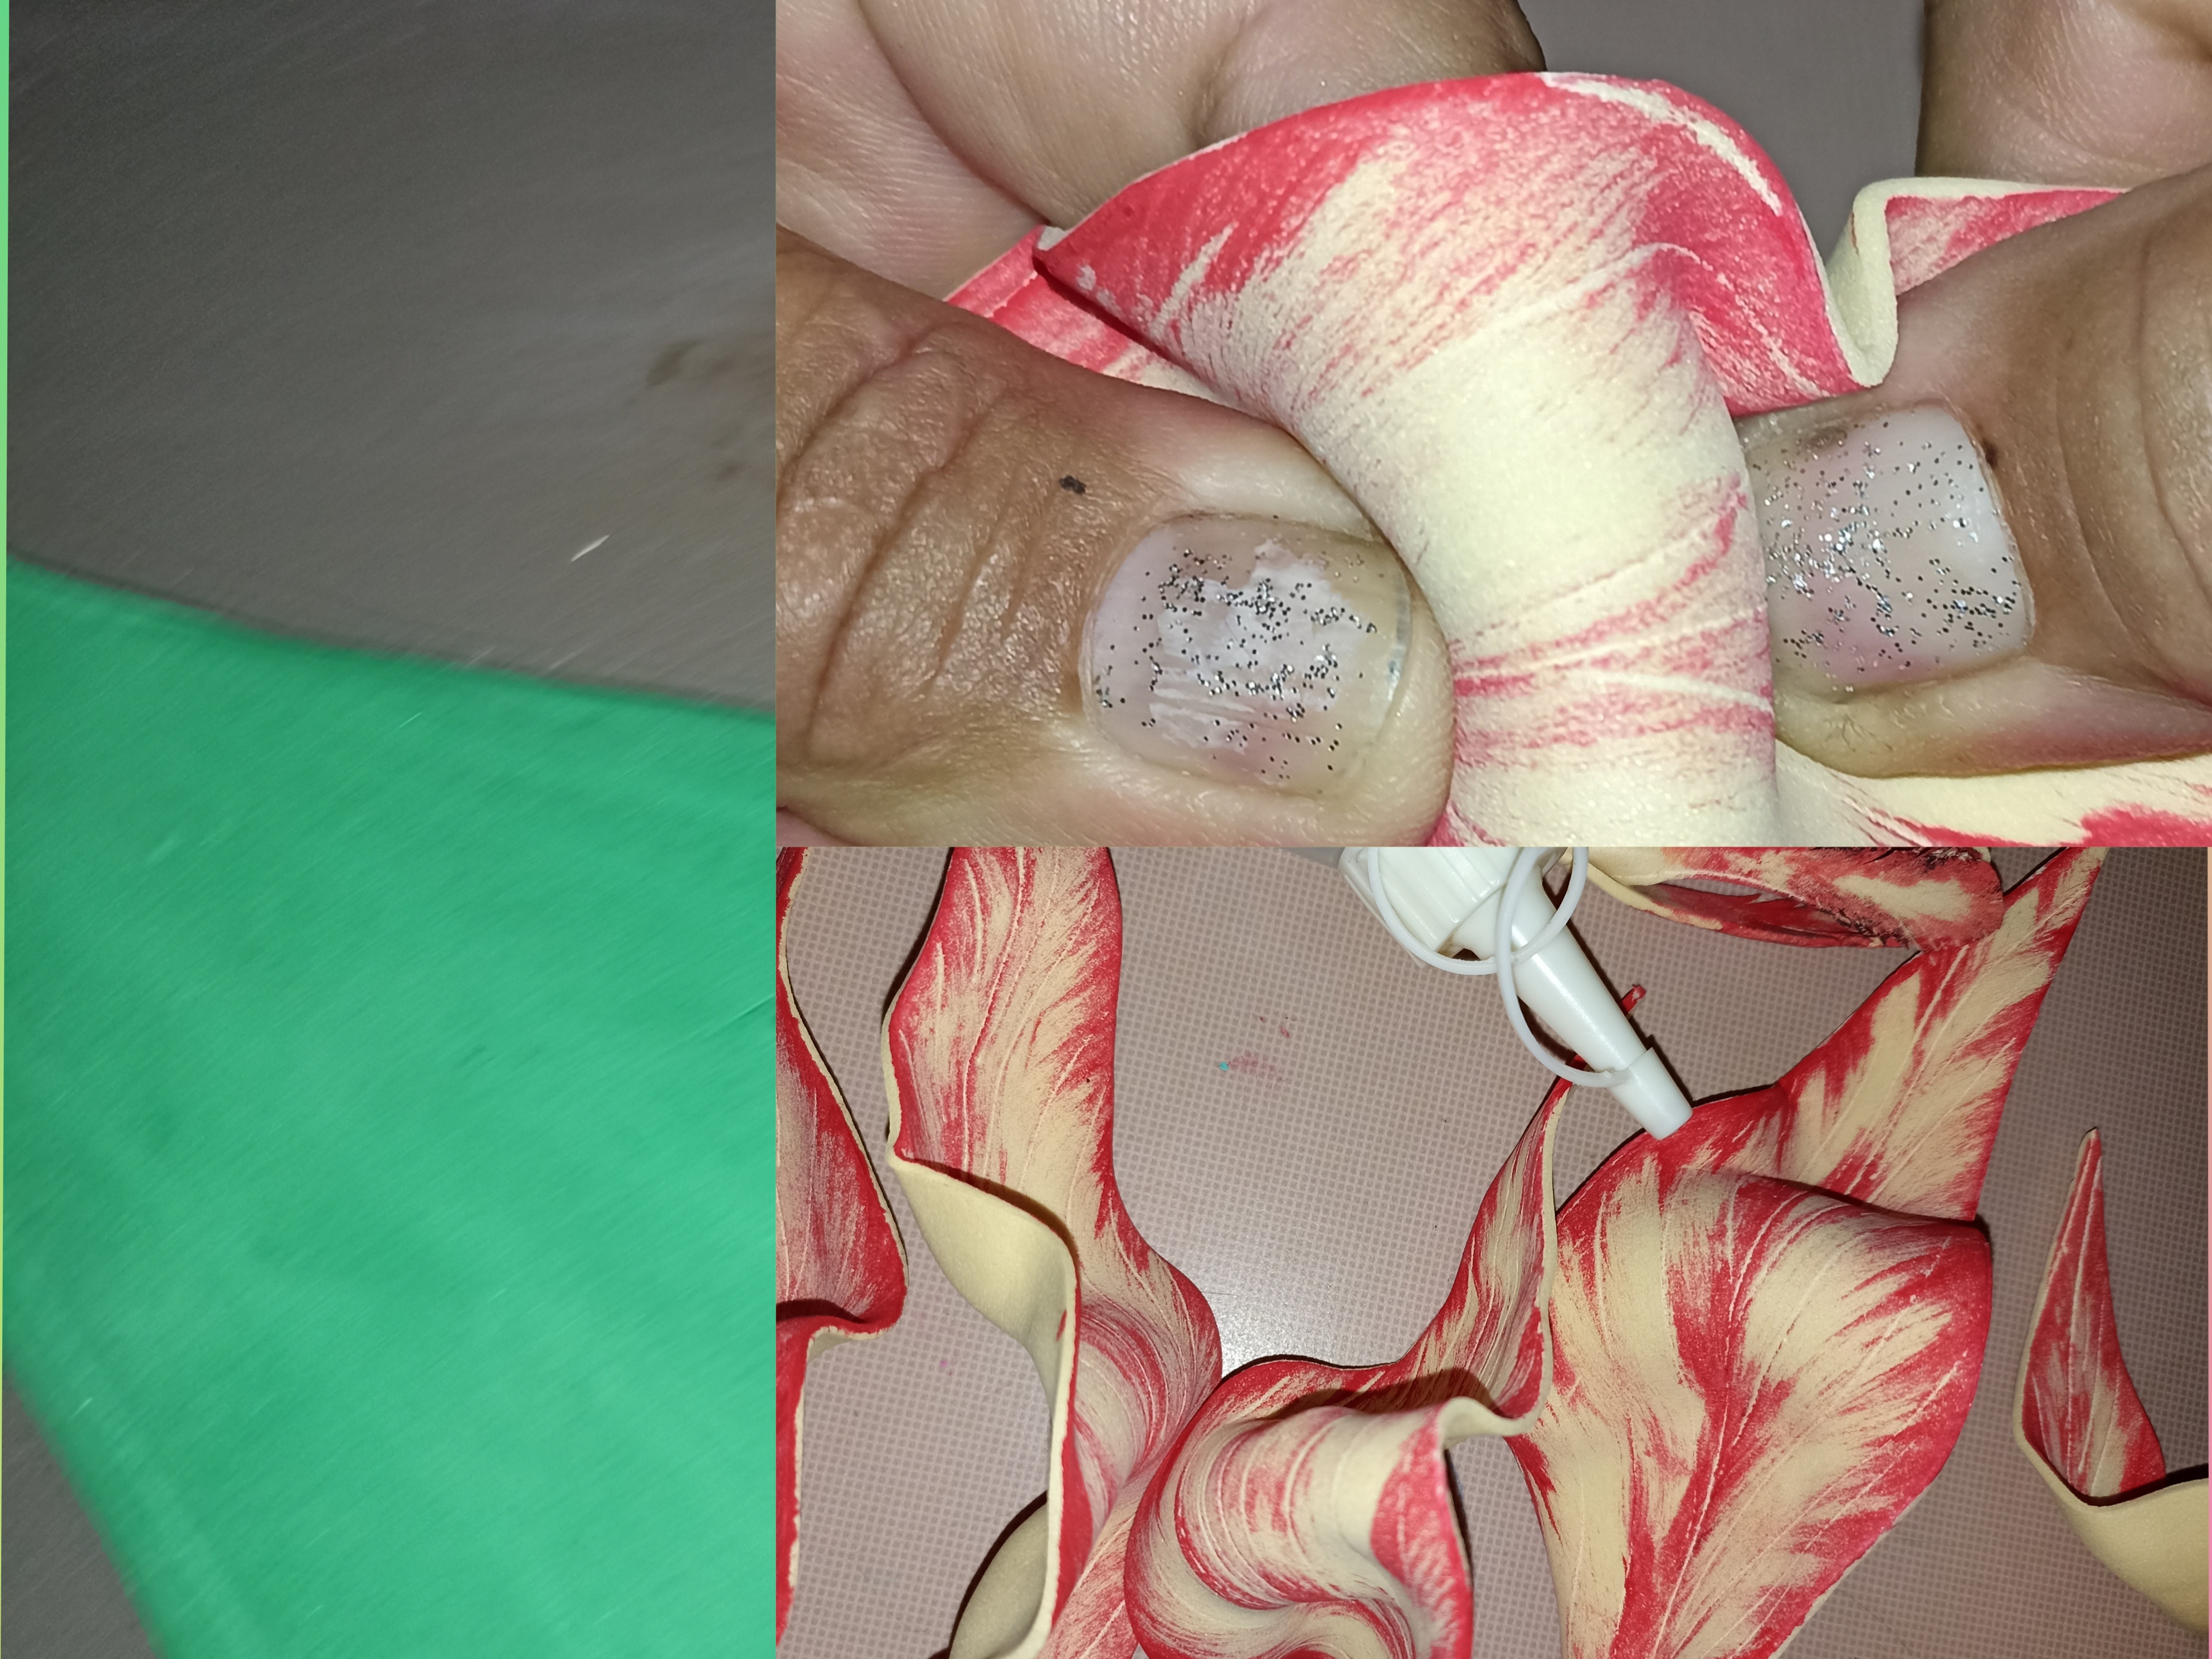
Después de recortar las piezas en foami, se le dibujan rallas con un n palito de pinchos a los pétalos como las que tienen las flores naturales y también a las hojas.
After cutting the pieces in foami, scratches are drawn with a stick of spikes on the petals like those of natural flowers and also on the leaves.
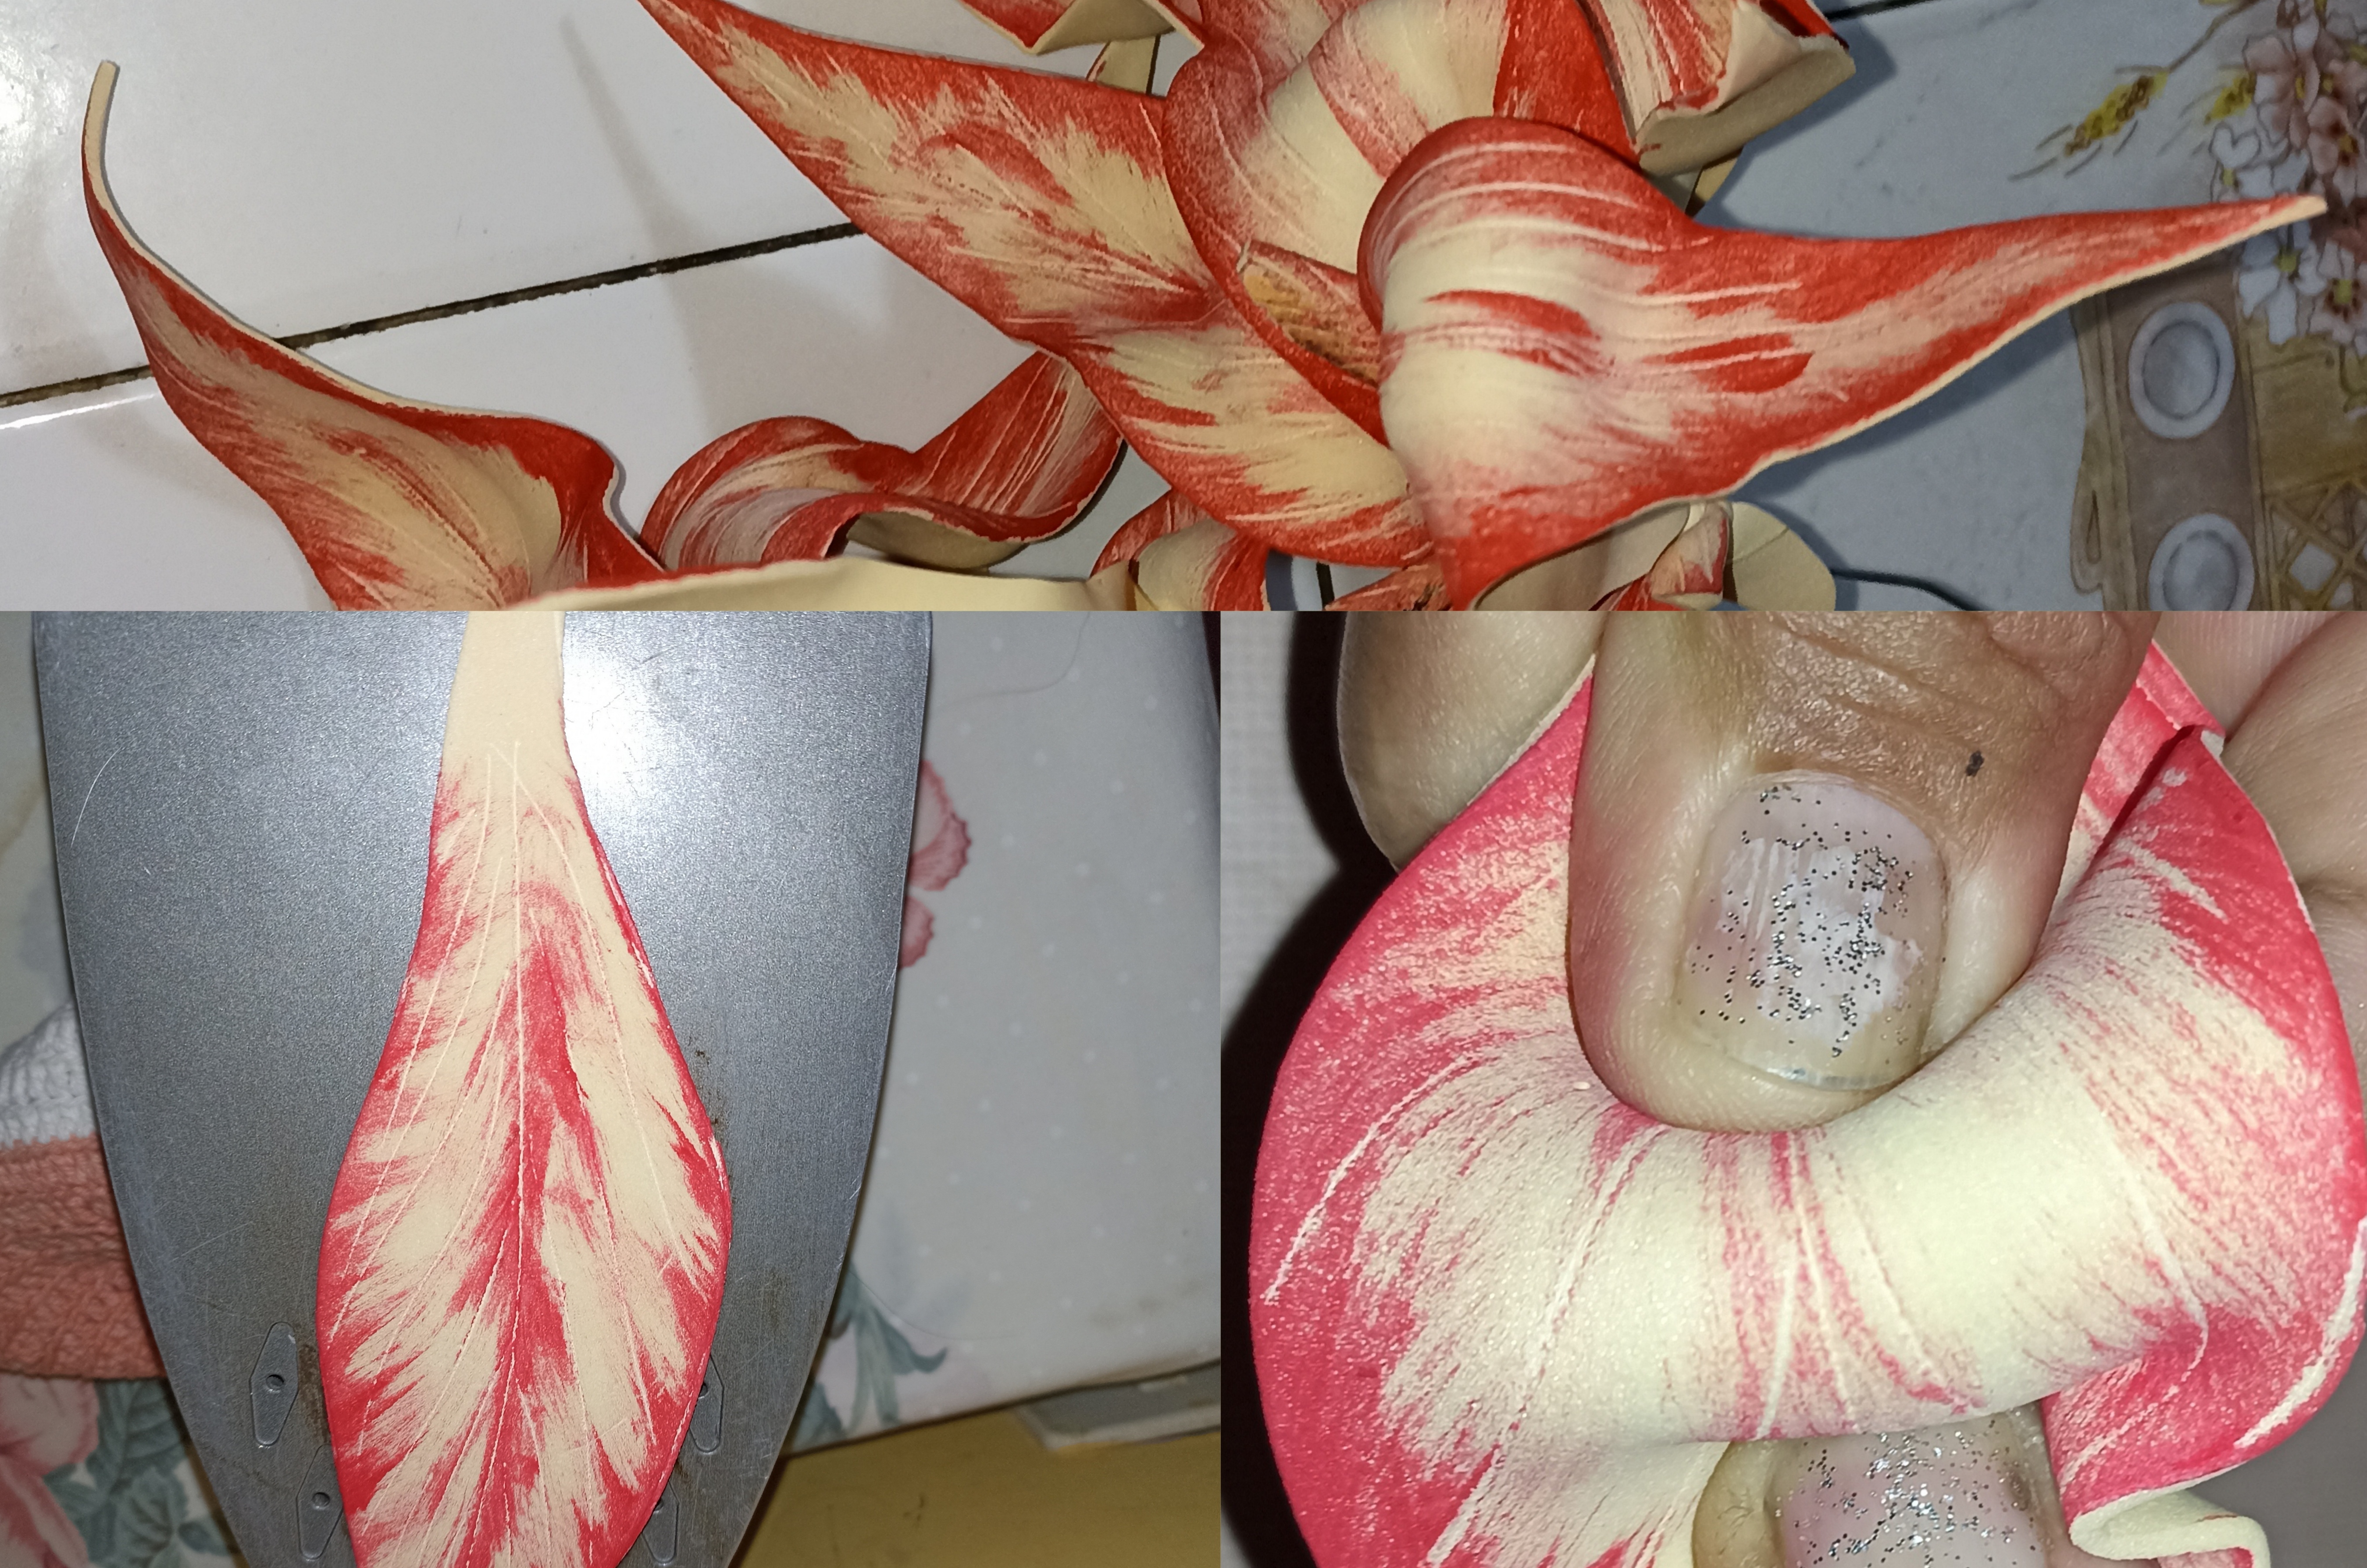
Los pétalos después se matizan con pintura al frío del color de su agrado,con pincel casi seco por los contornos.
The petals are then tinted with cold paint of the color of your choice, with an almost dry brush along the contours.

Después se colocan las piezas una por una sobre la plancha tibia ( la plancha de alisar las ropas) y se agarra la pieza recién sacada de la plancha y se le da forma con los dedos y las manos quedan con una forma natural, muy bonitas.
Then the pieces are placed one by one on the warm iron (the iron to straighten the clothes) and the piece just removed from the iron is grabbed and shaped with the fingers and the hands are left with a natural shape, very beautiful.
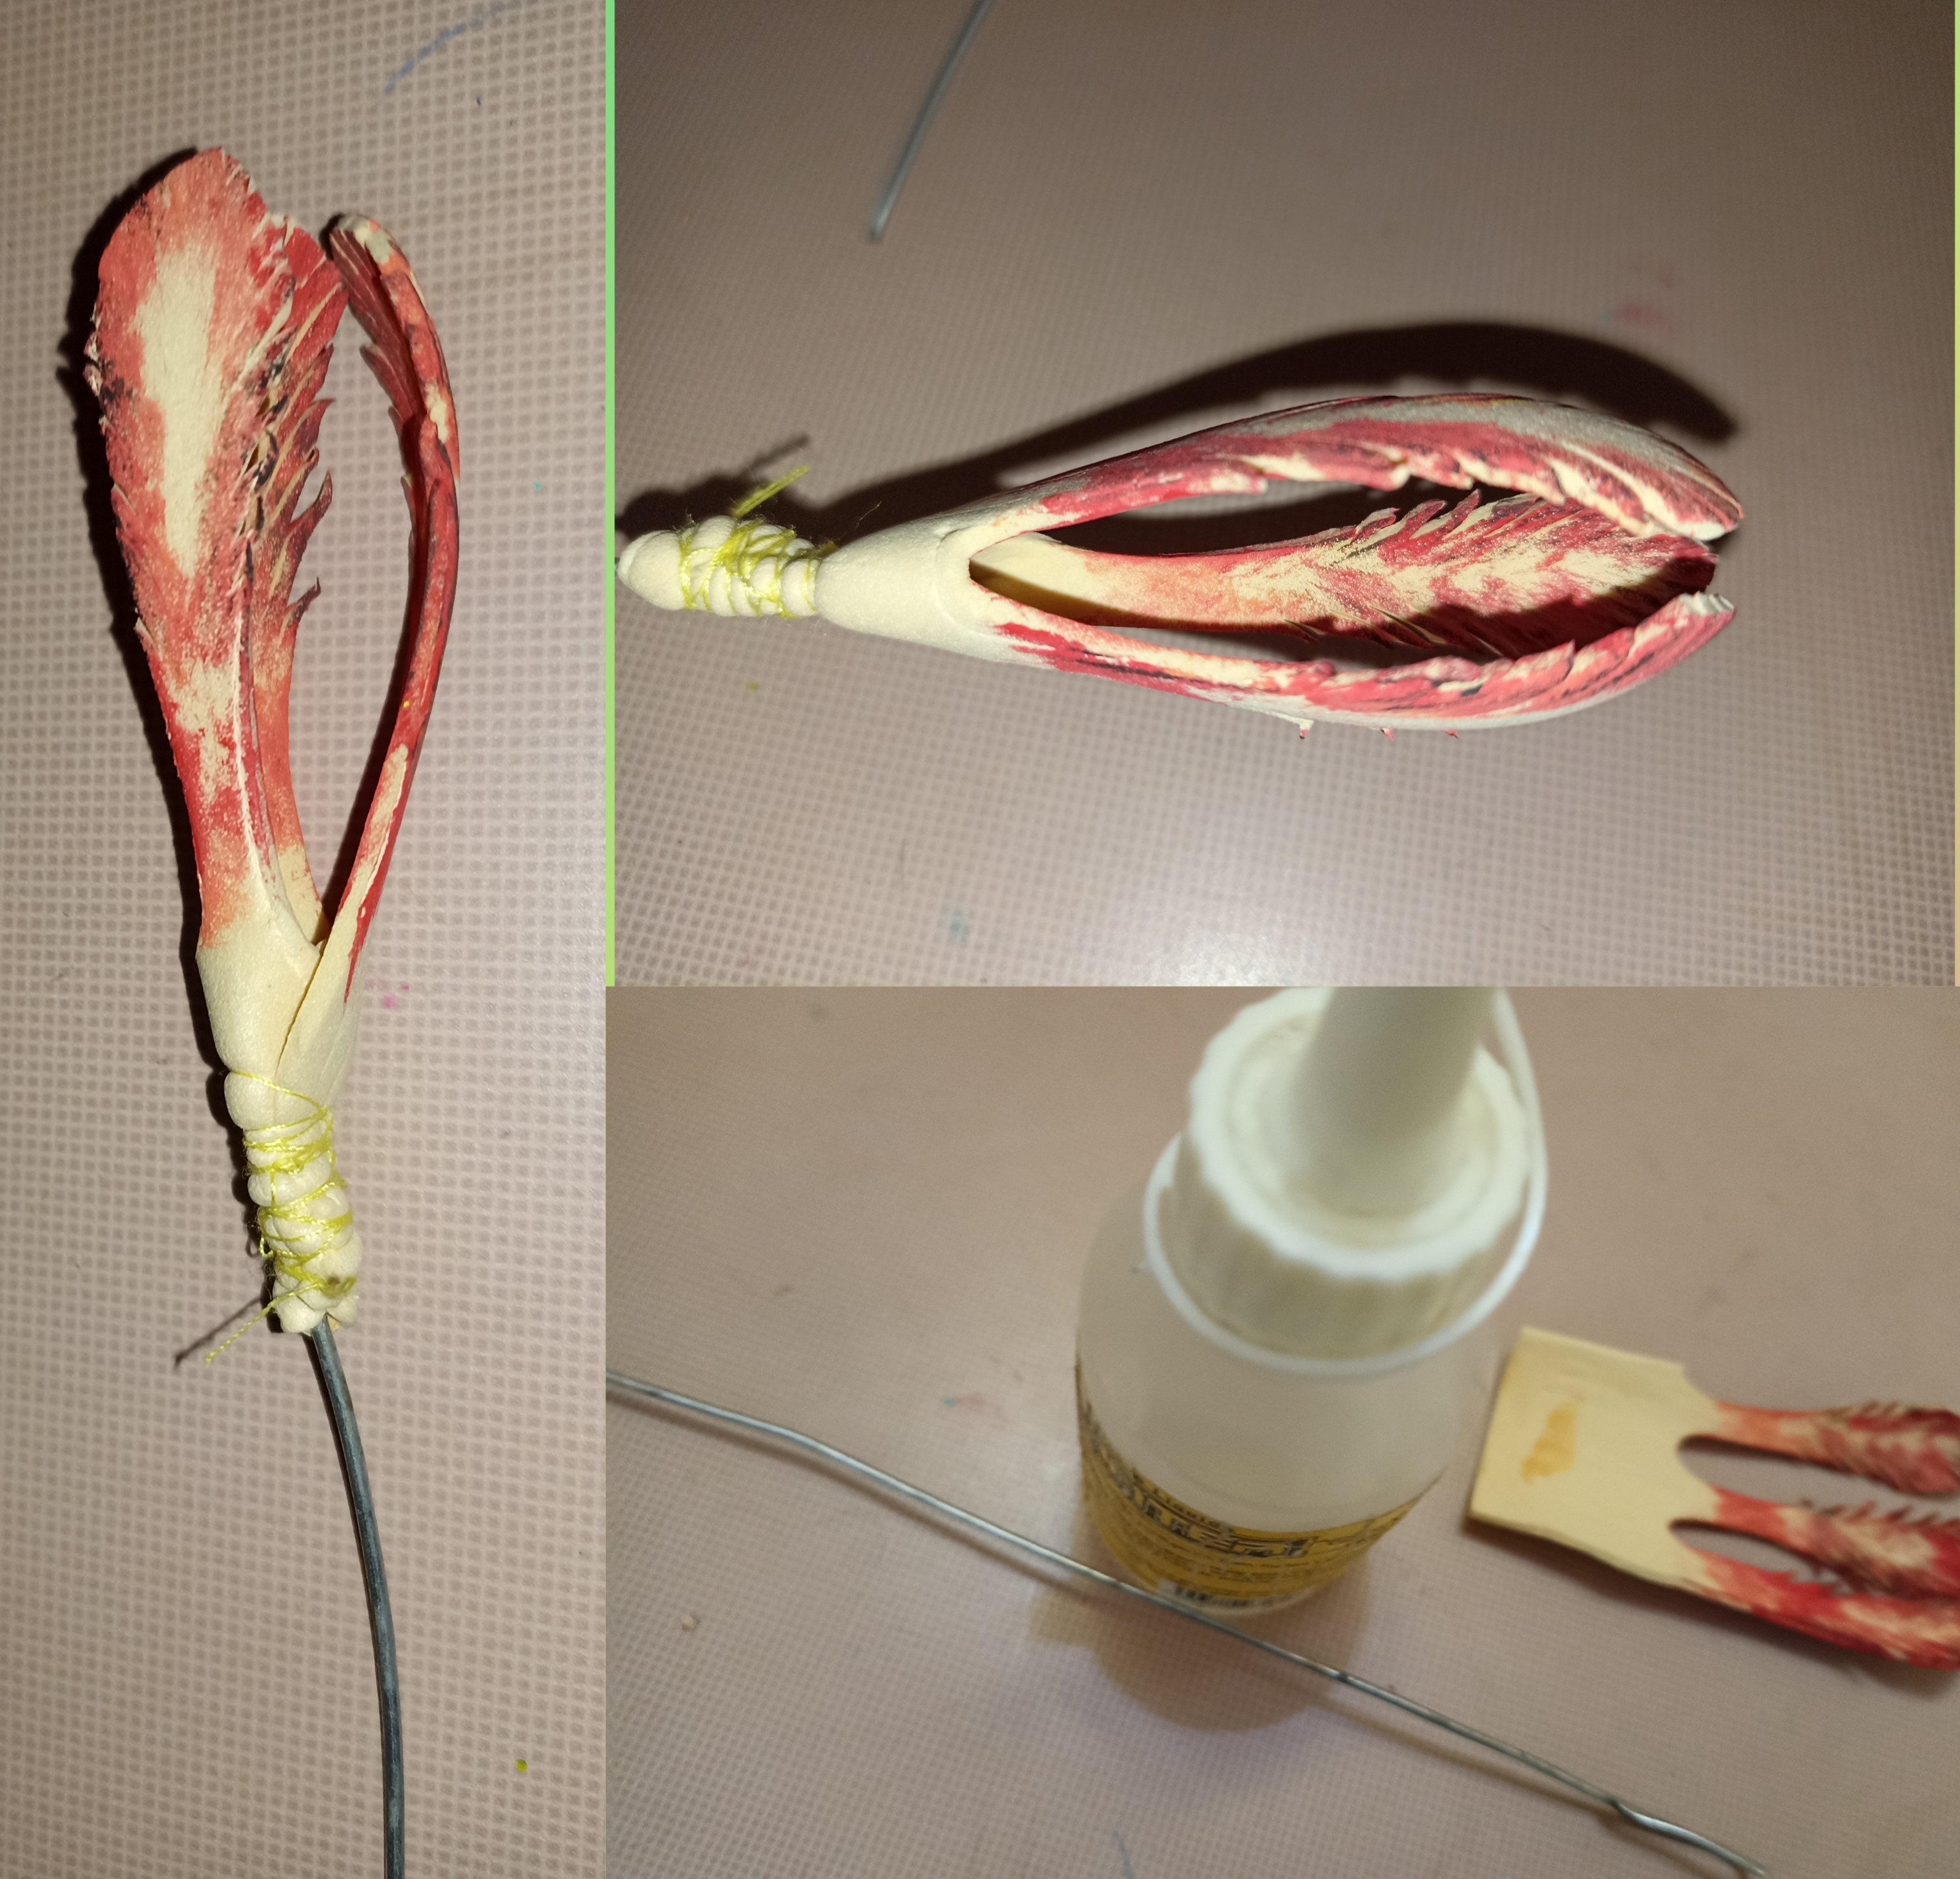
Luego se agarra el alambre y se le dobla la punta realizando una "u" serrada dónde se aplica silicón líquido, debería ser silicón con la pistola de barra, pero no lo conseguí en la tienda, solamente silicón frío, para unir bien las piezas; coloqué el silicón frío y lo sujeté bien con un hilo doble hasta que seque bien, realicé éste procedimiento con todo los demás piezas.
Then the wire is grabbed and the tip is bent making a serrated "u" where liquid silicone is applied, it should be silicone with t he bar gun, but I couldn't find it in the store, only cold silicone, to join the pieces well; I placed the cold silicone and fastened it well with a double thread until it dries well, I did this procedure with all the other pieces.
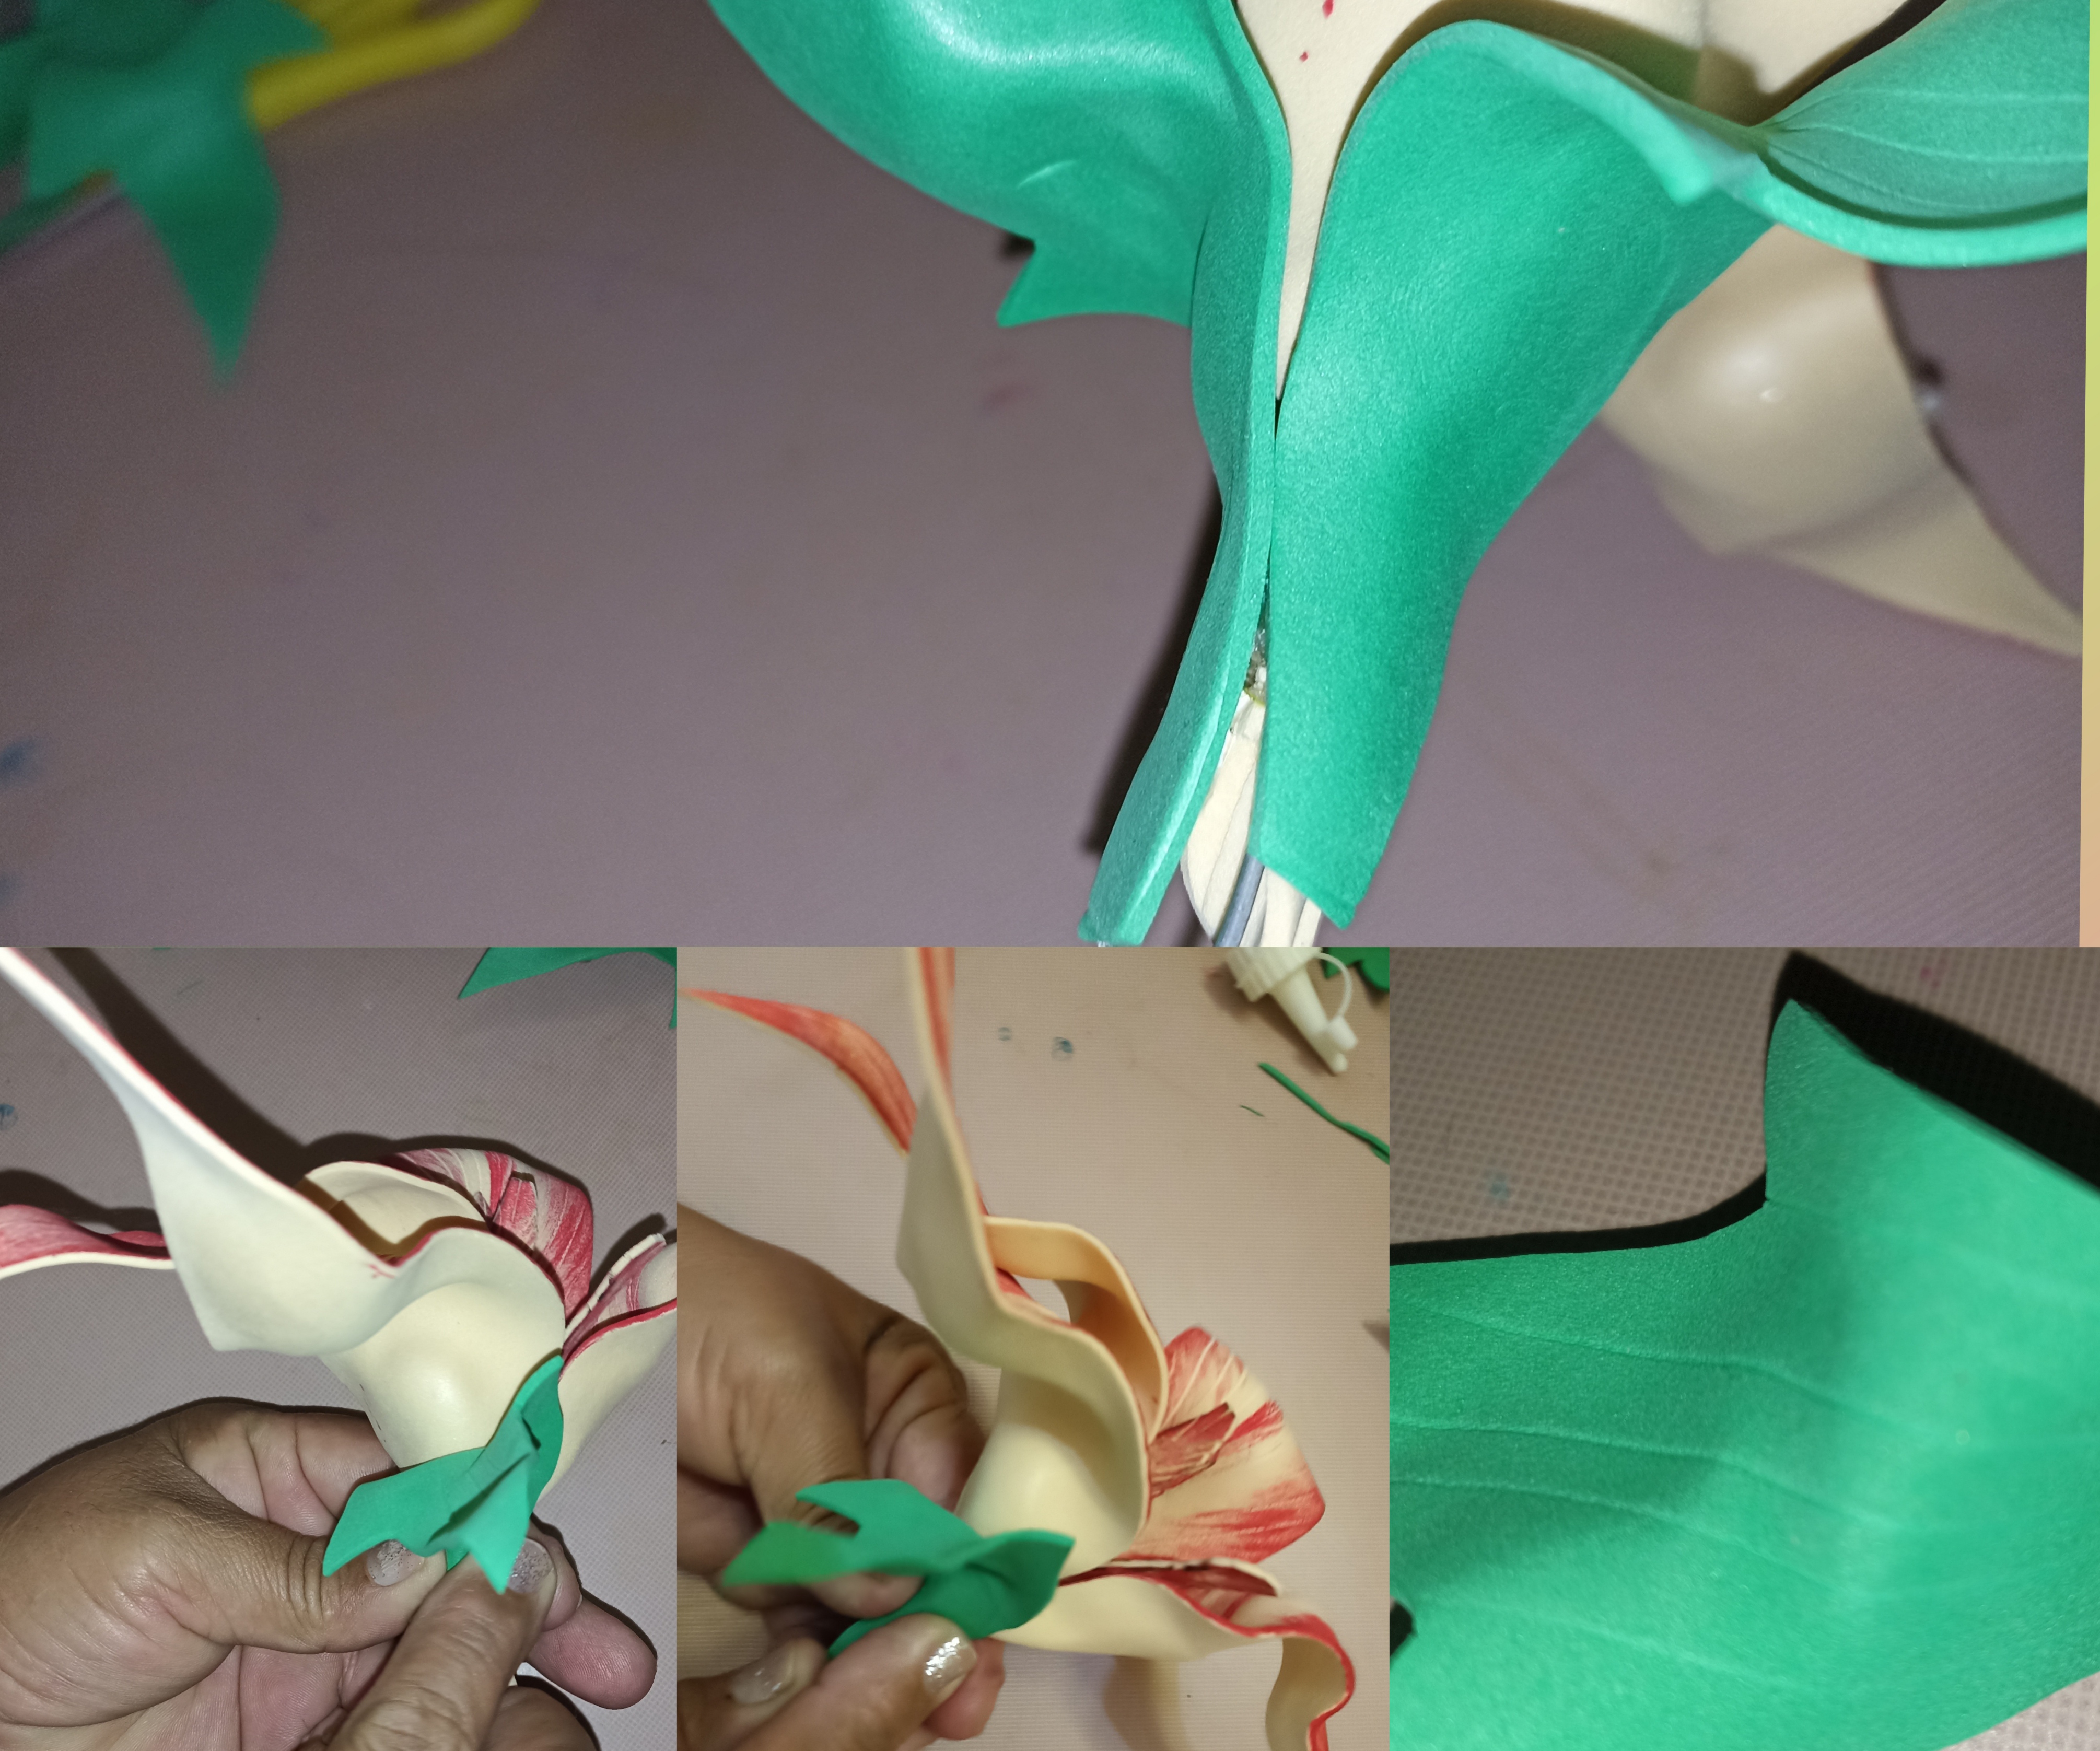
Después inicié unir los pétalos en el alambre liso ya colocado el pistilo unido con silicón frío y después sujetado bien con el hilo hasta que seque bien y se continúa colocando los sépalos, las hojas y se envuelve el alambre, lo que es el tallo de la flor, con la cinta de foami verde.
Then I started joining the petals on the smooth wire, already placed, the pistil joined with cold silicone and then fastened well with the thread until let it dry well and continue placing the sepals, the leaves and wrap the wire, which is the stem of the flower, with the green foami tape.

Así quedaron las bellas flores de foami..
This is how the beautiful foami flowers were..
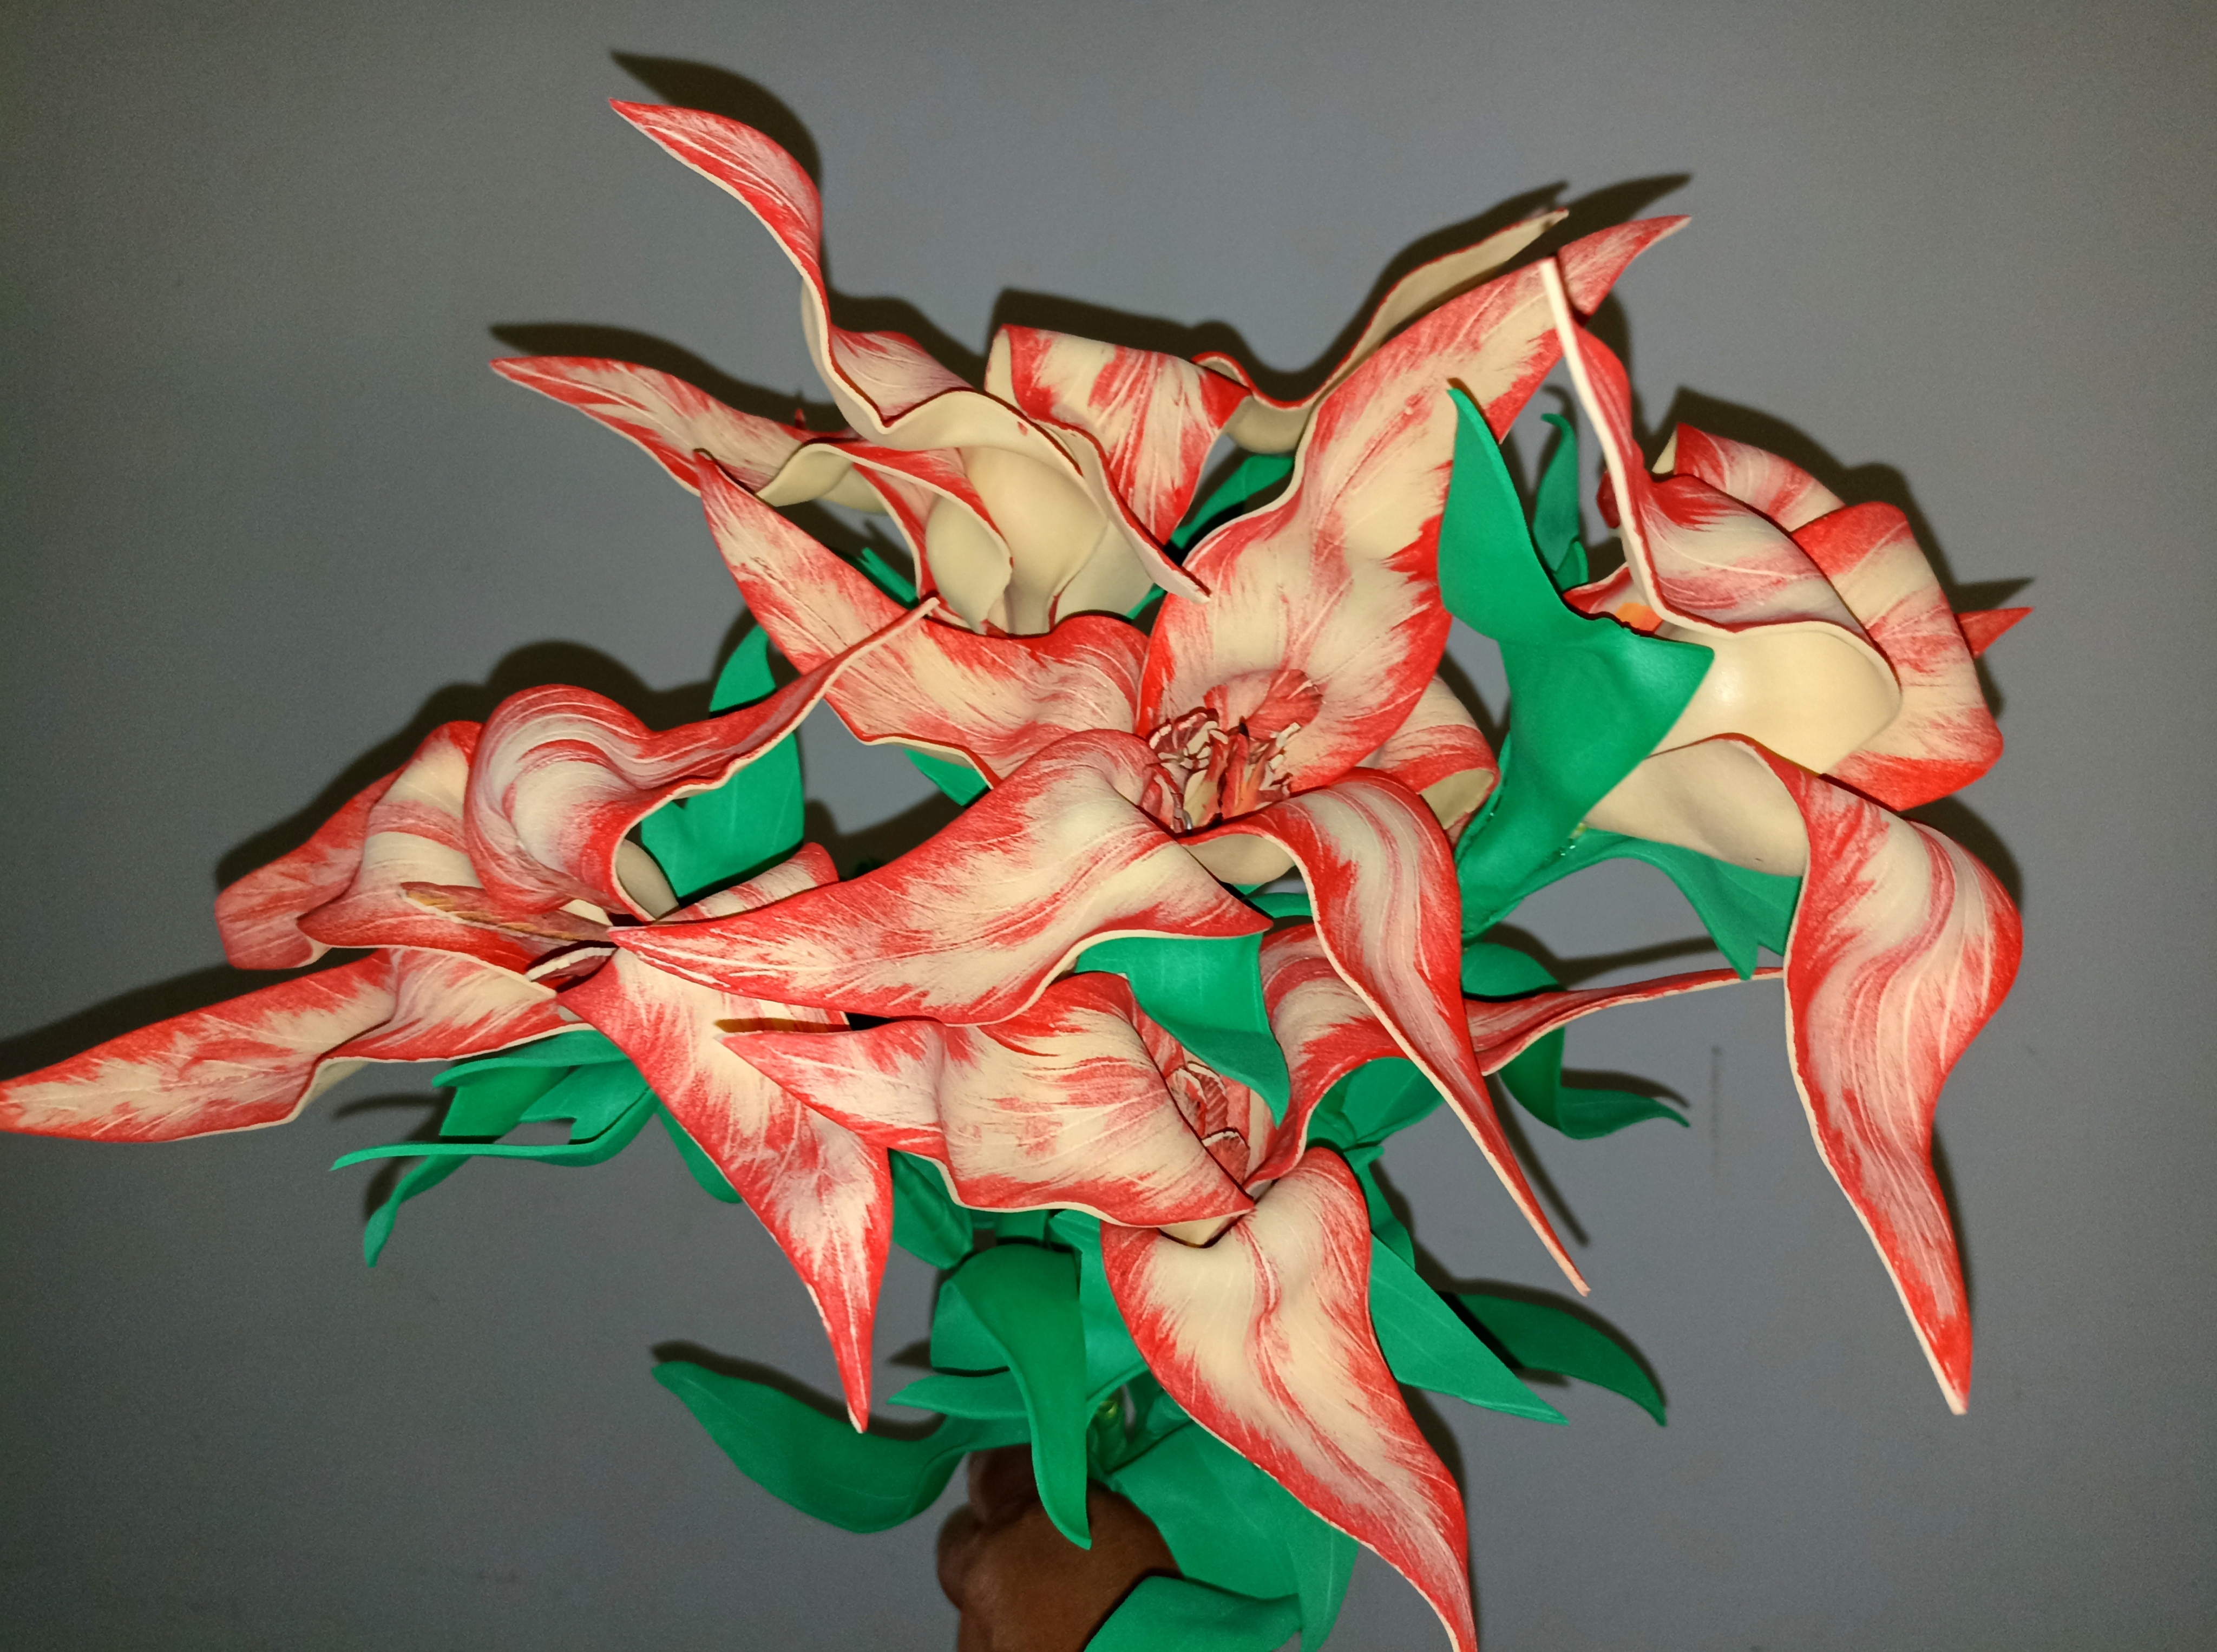
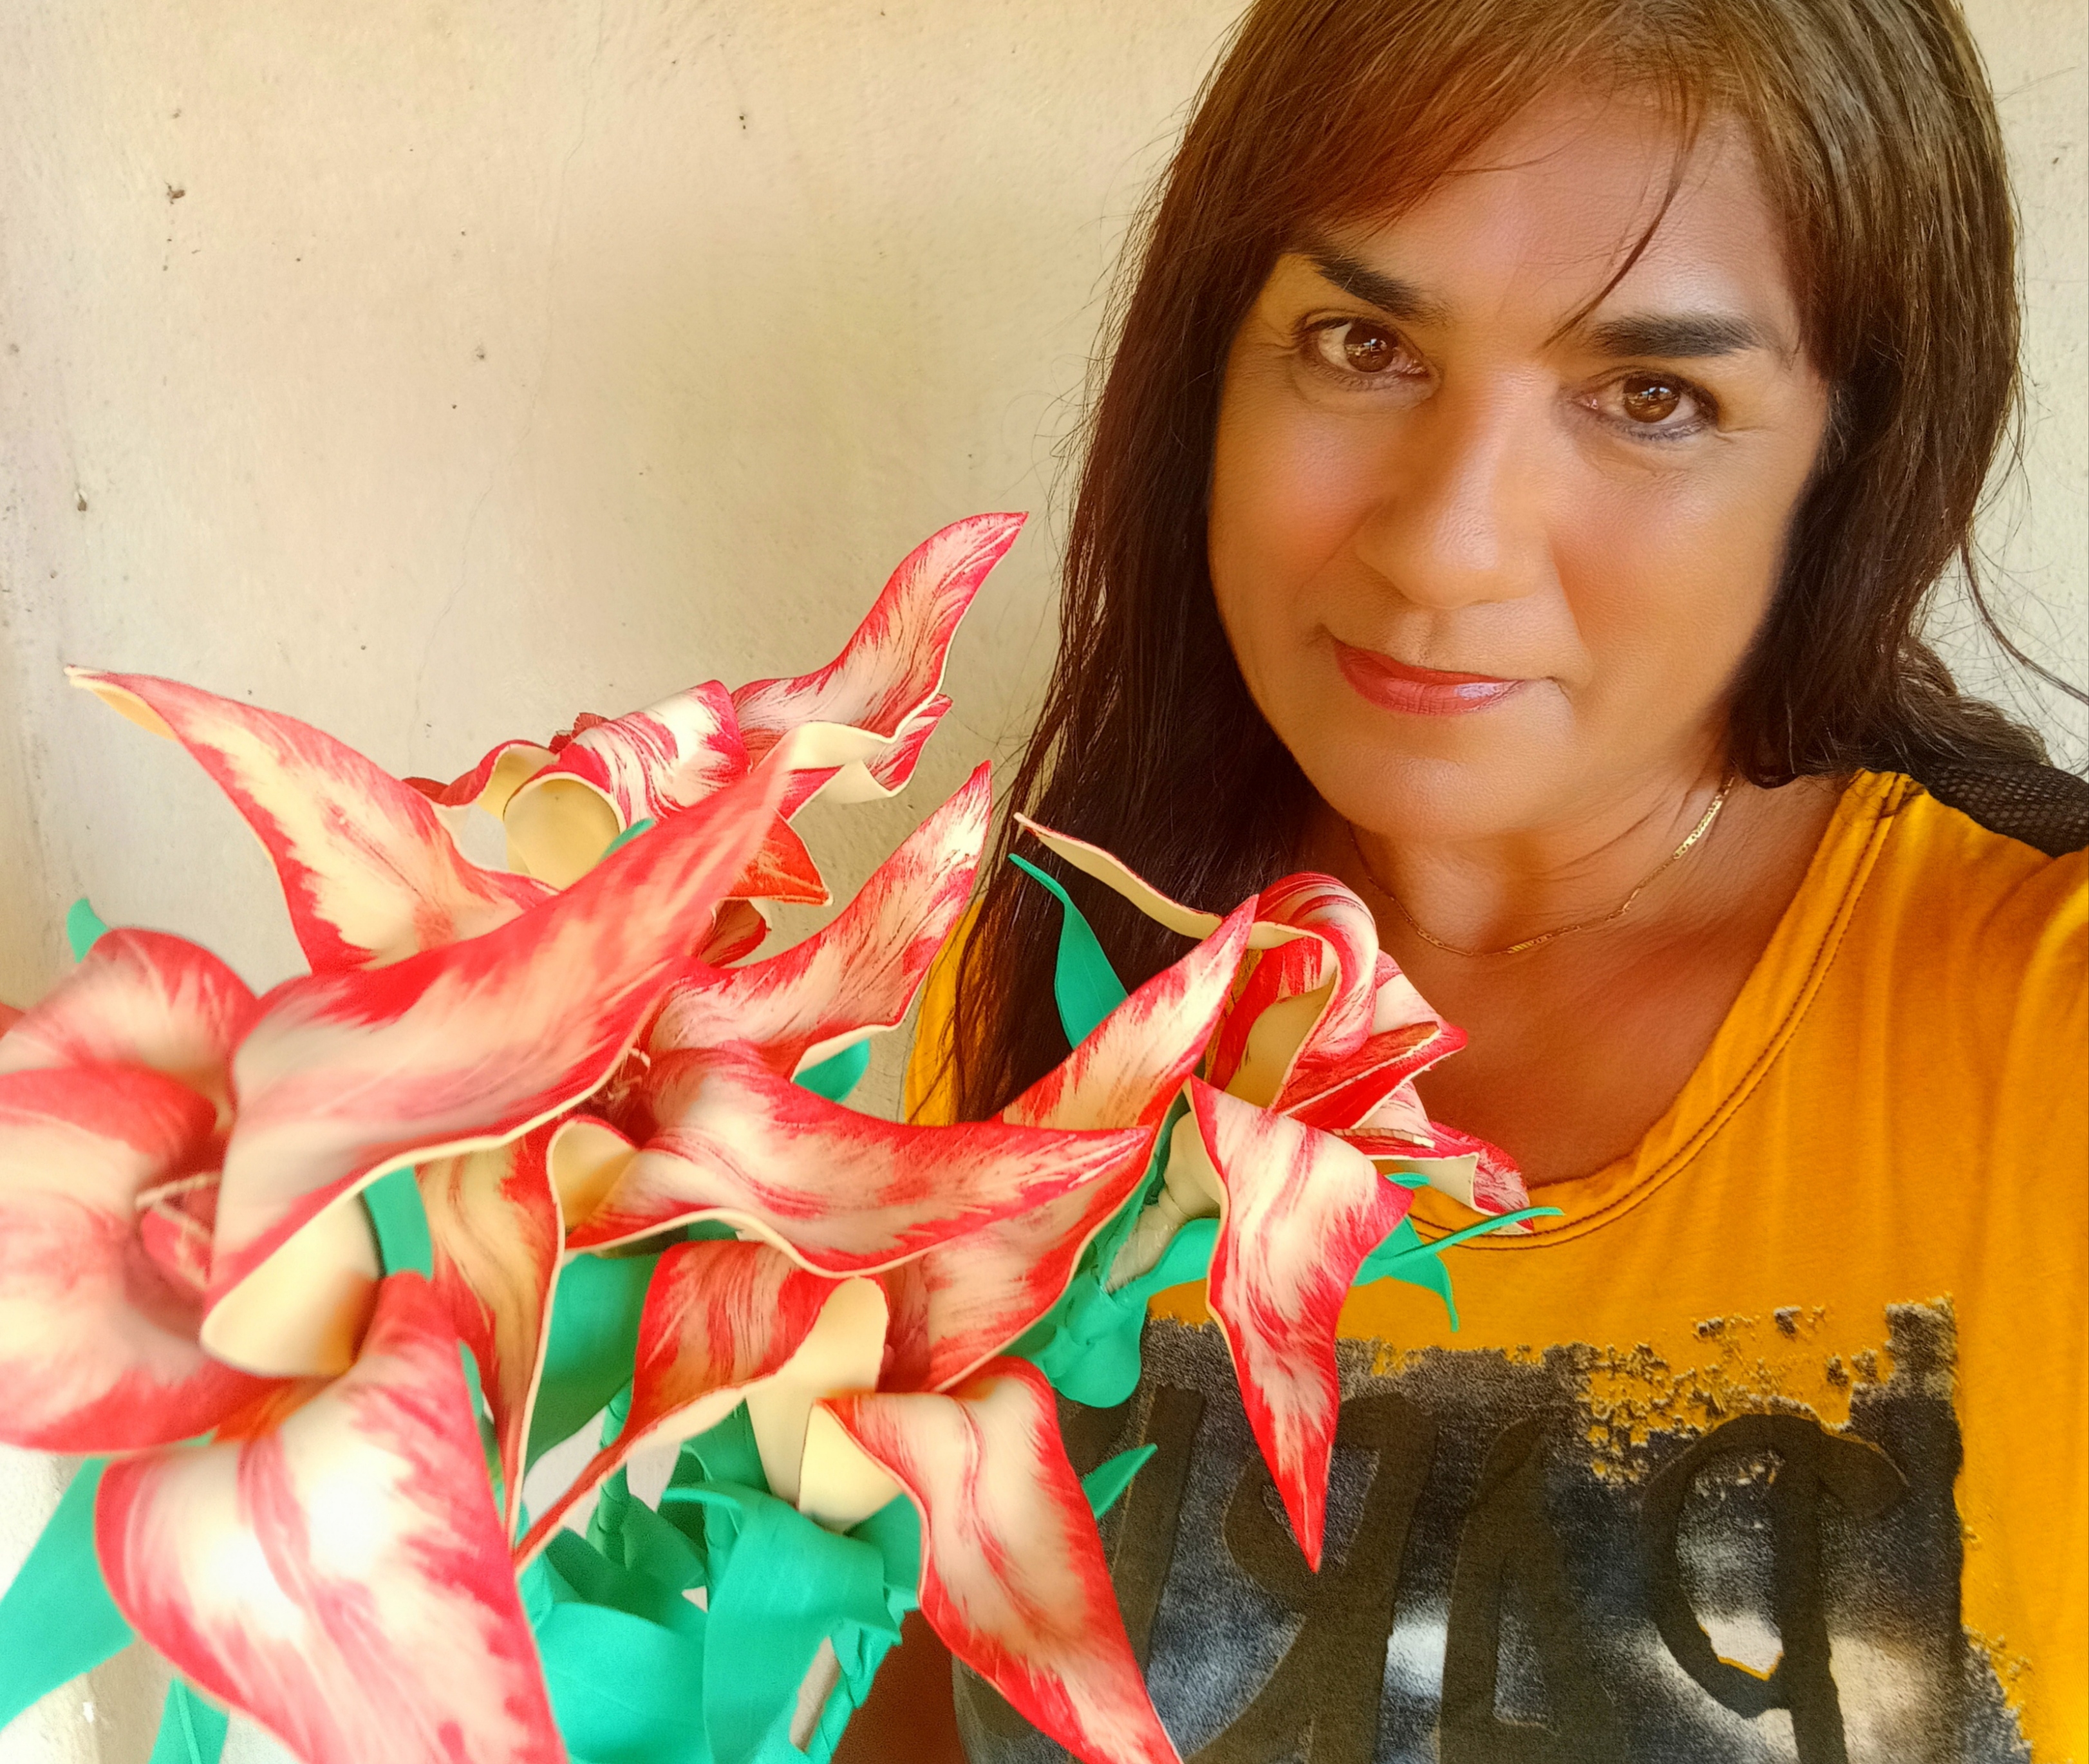
Espero que les guste mi lindas flores de foami.
Gracias a todos los que me leen mí blog.
I hope you like my cute foami flowers. Thanks to everyone who reads my blog.
@enmaoro
Seguiré creando con mucho cariño.
I will continue creating with g
Será hasta el próximo post.
will be until the next post.
Las fotos son de mi autoría, tomadas con mi teléfono Redmi 10.
The photos are my own, taken with my Redmi 10 phone.