Splinterlands Art Contest 271 - VAMPIRE BAT FAN ART SCULPTURE [ENG-ESP]
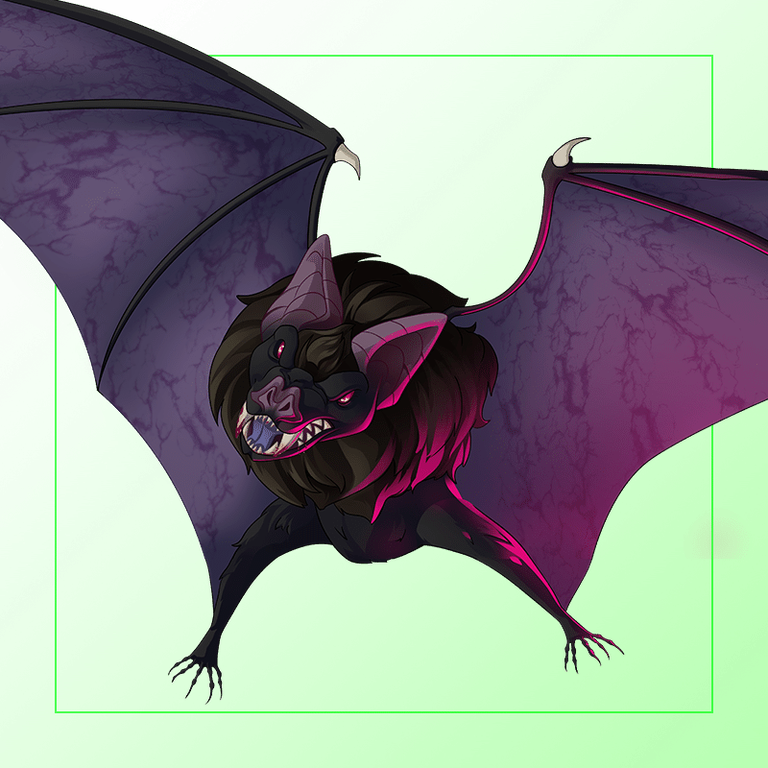
Hello dear friends, I hope you have had a happy day, and have been doing what you like most, for my part I made a sculpture with aluminum material taken from soda cans, one of my favorite hobbies for the 271st Splinterlands contest . I have made a sculpture of the Vampire Bat card, I had previously chosen this card for a drawing, so it occurred to me to take it again but this time for a sculpture, since I like to make figures that have wings. For this work I used 5 soda cans and the sculpture was approximately 20 centimeters in size with the wings extended and 10 centimeters between the body and the head. I hope you enjoy it.
Hola queridos amigos, espero hayan tenido un feliz día, y hayan estado haciendo lo que más les gusta, por mi parte yo hice una escultura con material de aluminio sacado de latas de soda, una de mis aficiones preferidas para el concurso número 271 de Splinterlands. He realizado una escultura de la carta Vampire Bat, anteriormente había escogido esta carta para un dibujo, así que se me ocurrió volver a tomarla pero esta vez para una escultura, ya que me gusta hacer figuras que tengan alas. Para este trabajo utilicé 5 latas de soda y la escultura quedó de un tamaño aproximado de 20 centímetros con las alas extendidas y de 10 centímetros entre el cuerpo y la cabeza, espero que lo disfruten.

 |  | |
|---|---|---|
 |  |
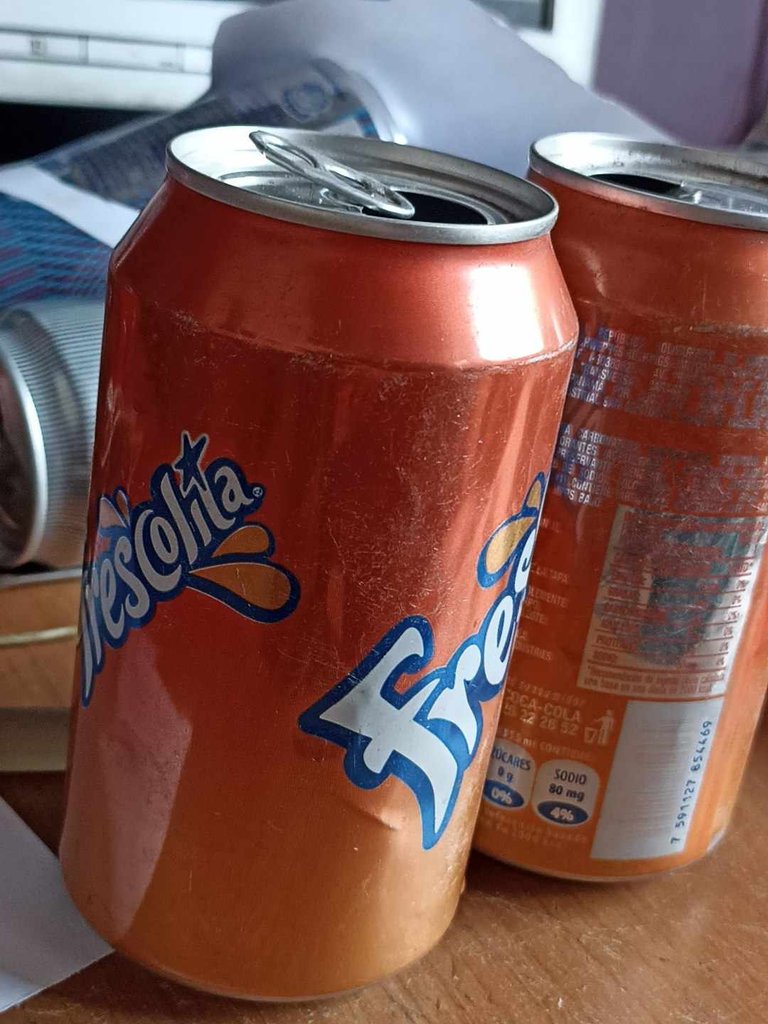
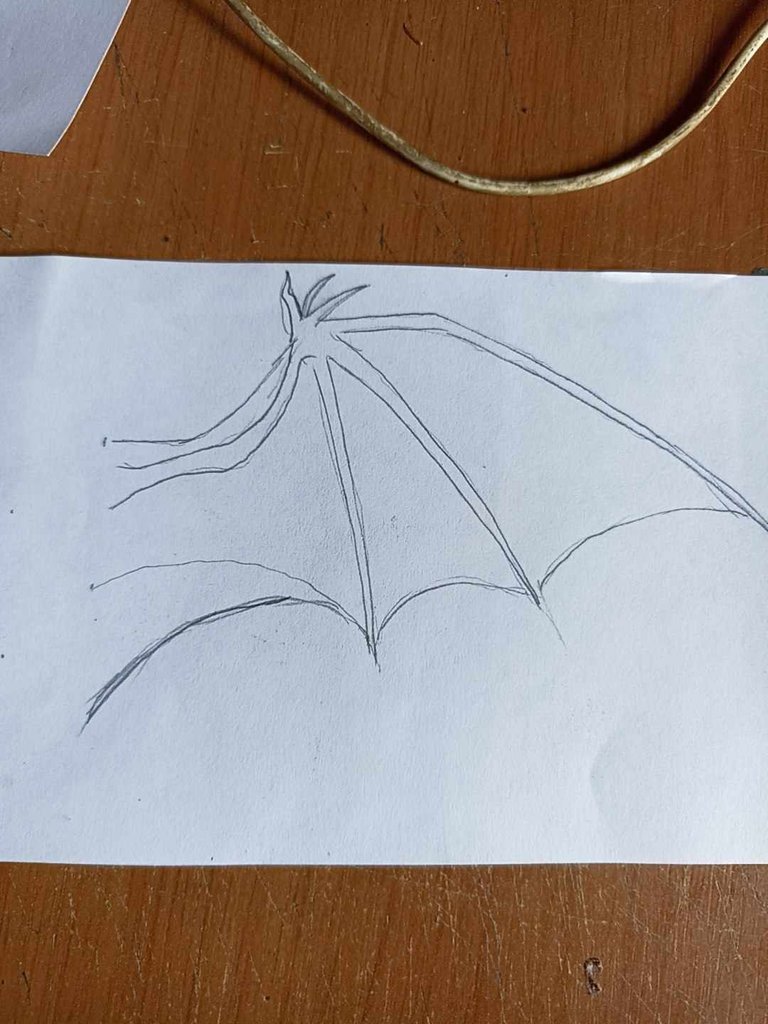
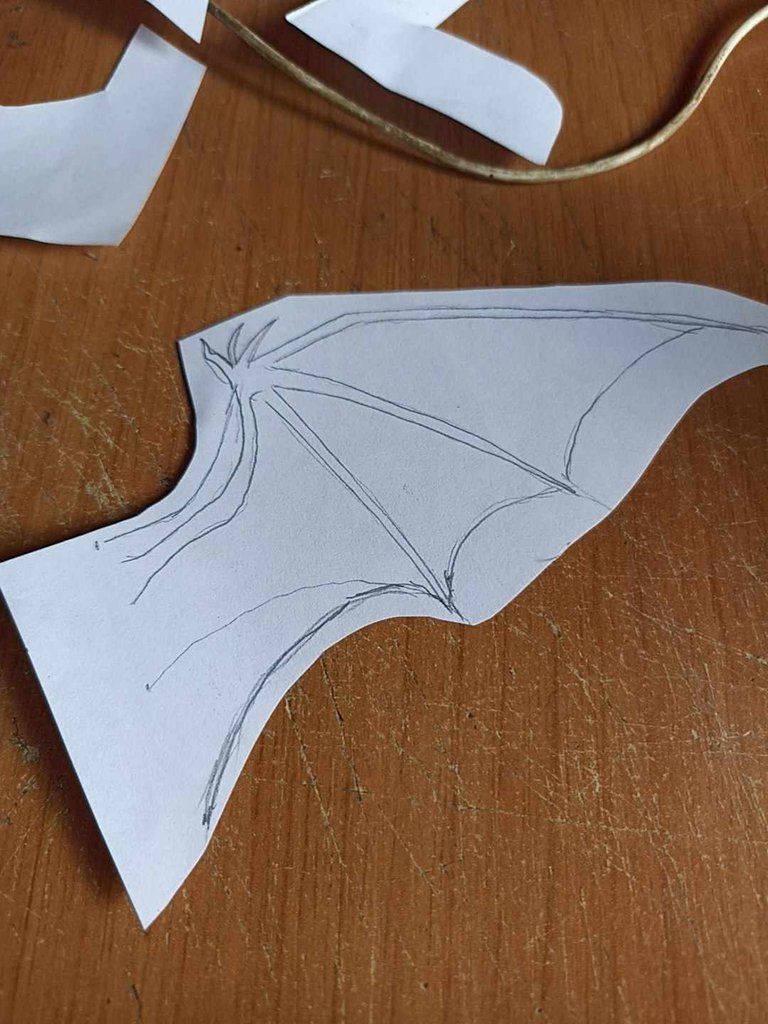
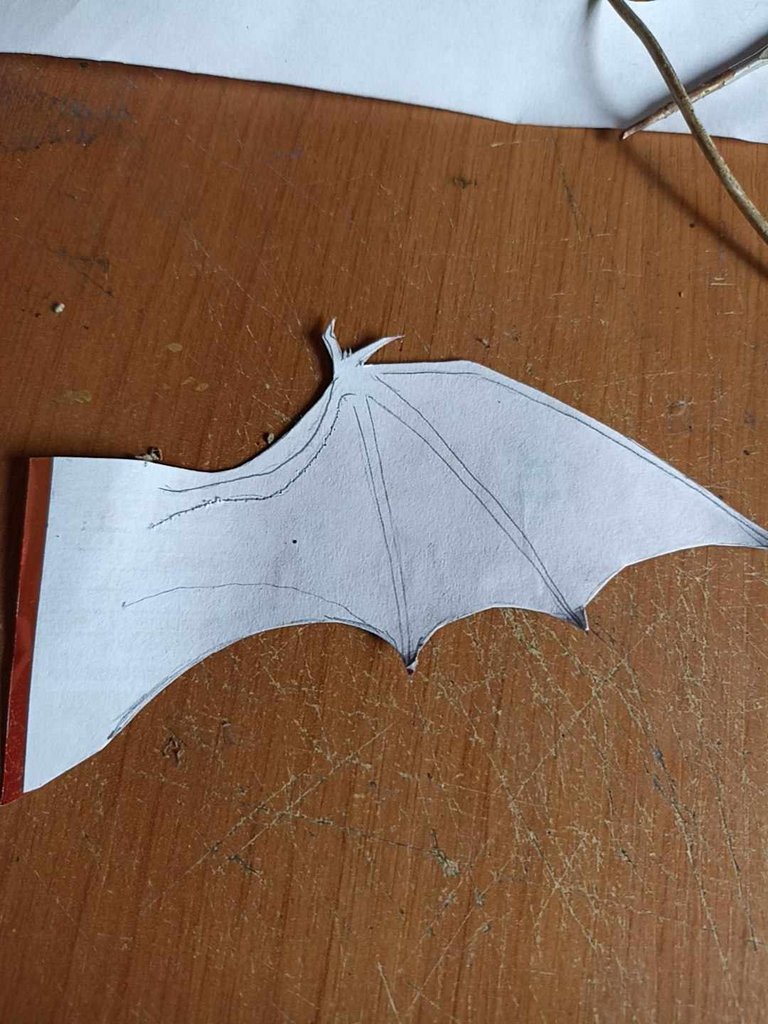
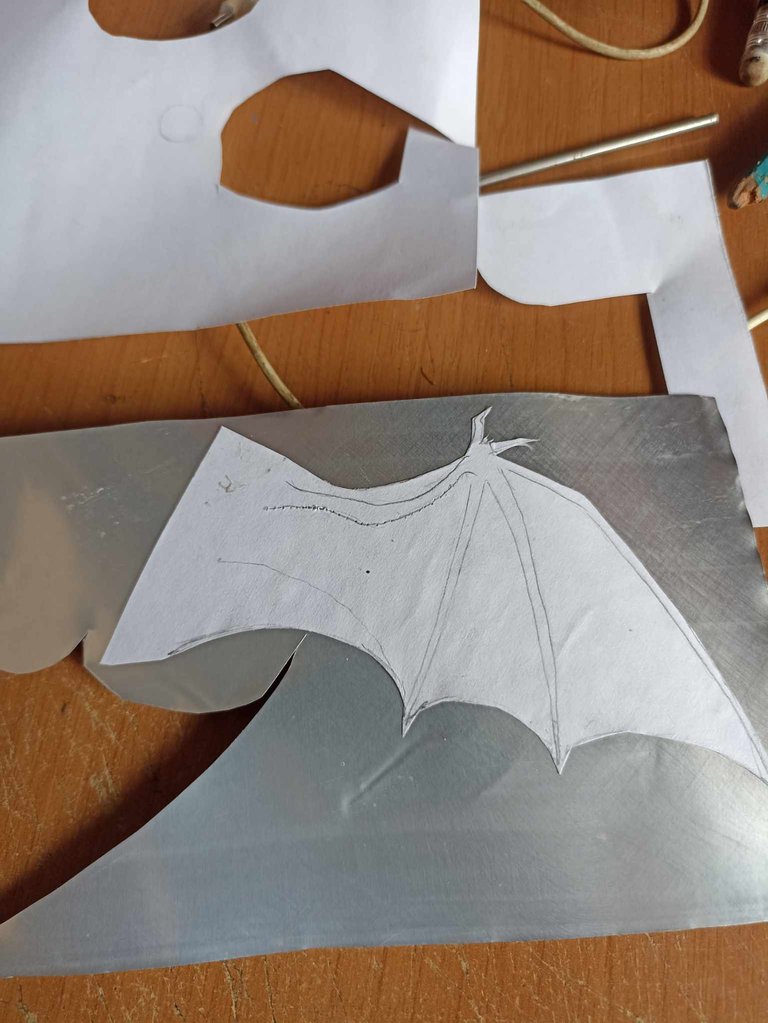
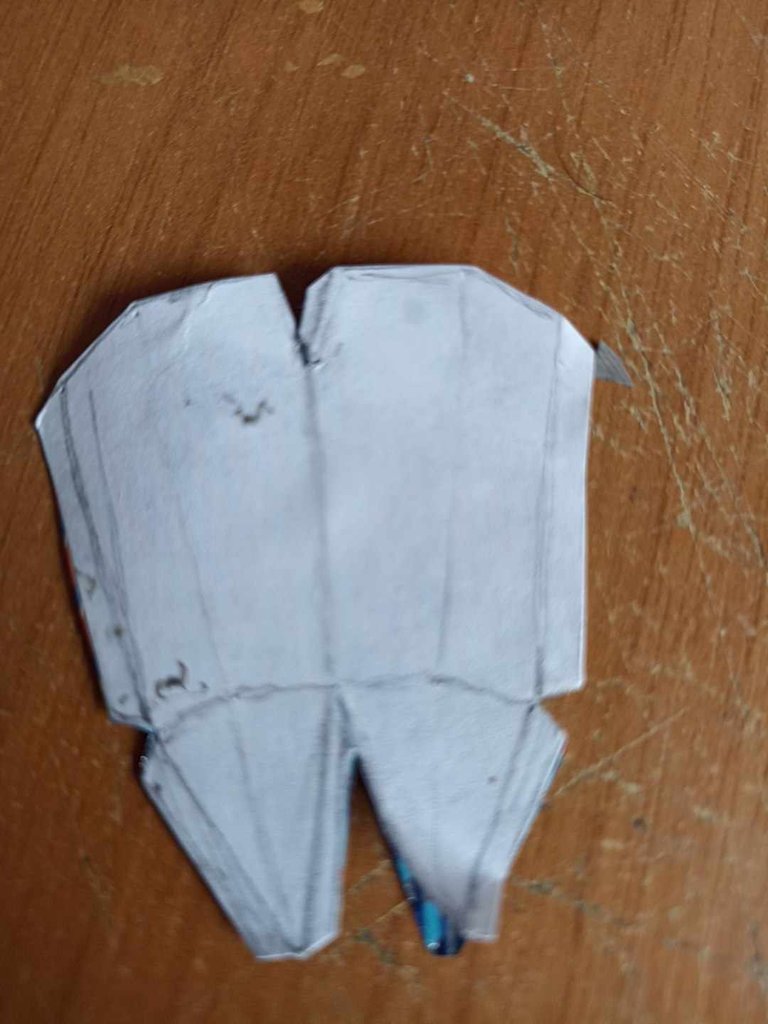
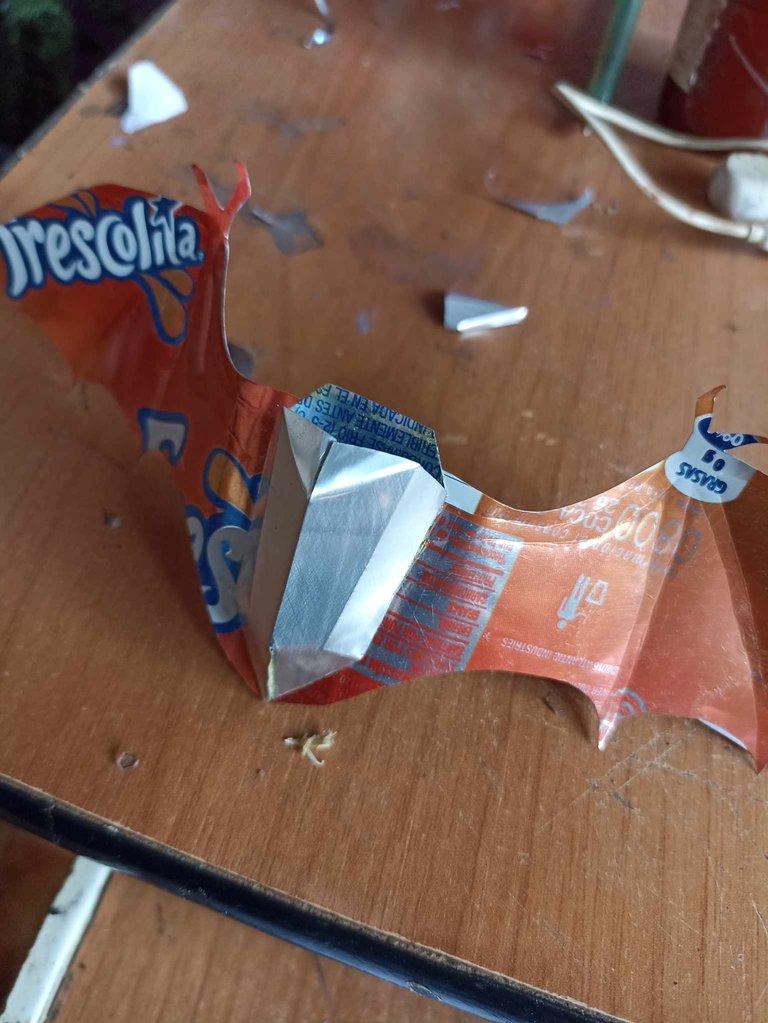
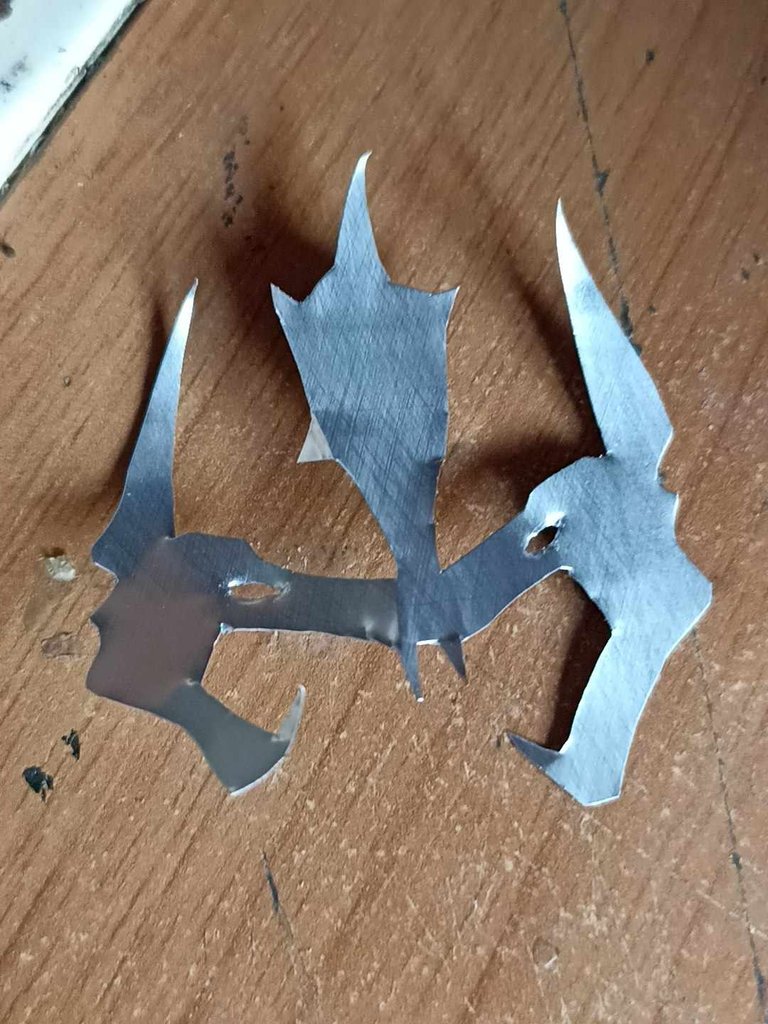
I cut all the cans and turned them into sheets to work better. I made some wing designs, first I had made wings for a dragon but then I thought they were too big, then I made them smaller and more similar to those of a real bat. I made a piece for the body and another for the head, with these three templates I began to make the figure.
Corté todas las latas y las convertí en láminas para trabajar mejor. Hice unos diseños de alas, en primer lugar había hechos alas para un dragón pero pensé luego que eran demasiado grandes, después las hice más pequeñas y más semejantes a las de un murciélago verdadero. Hice una pieza para el cuerpo y otra para la cabeza, con estas tres plantillas comencé a hacer la figura.
 |  |  |
|---|---|---|
 | 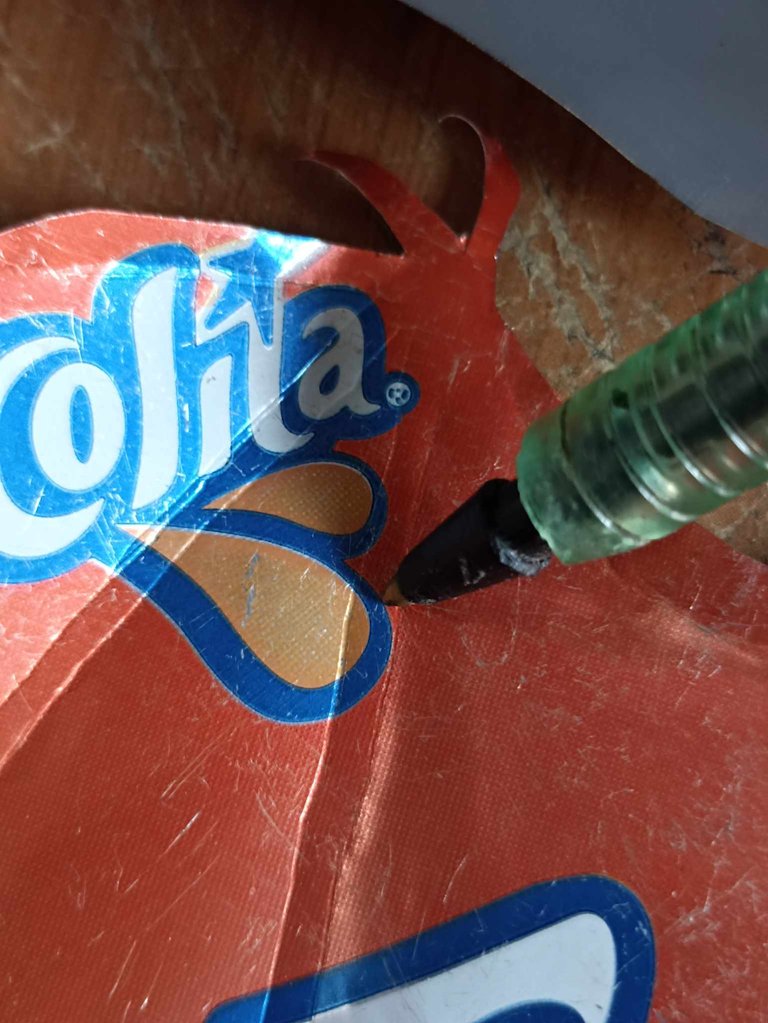 | 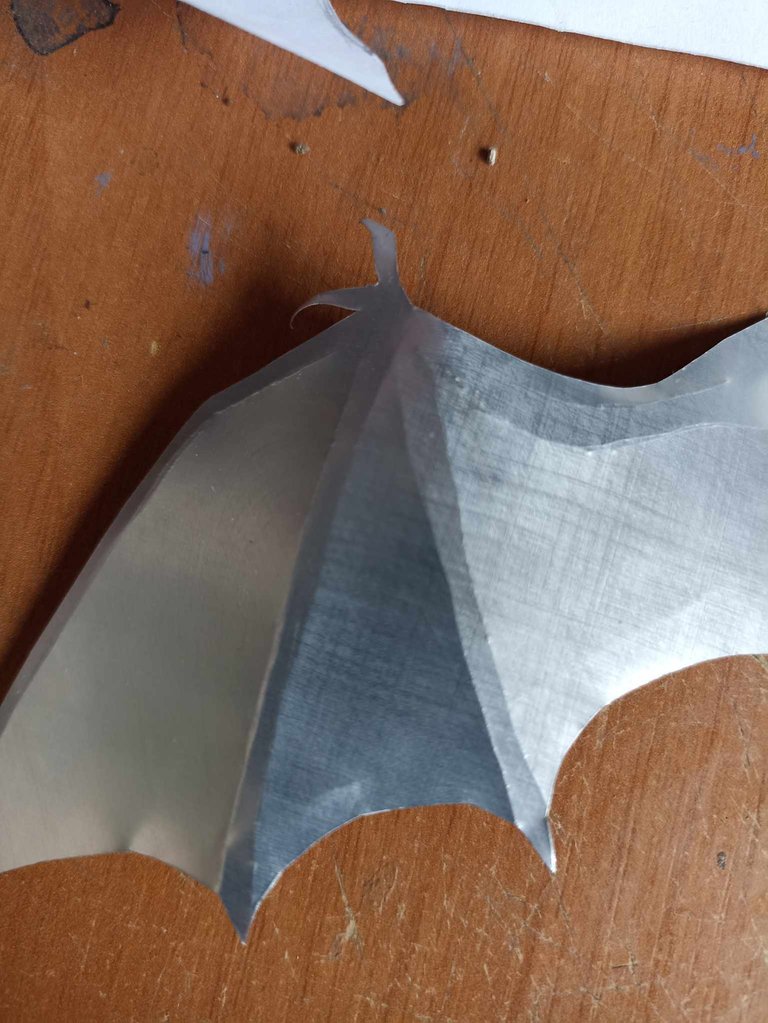 |
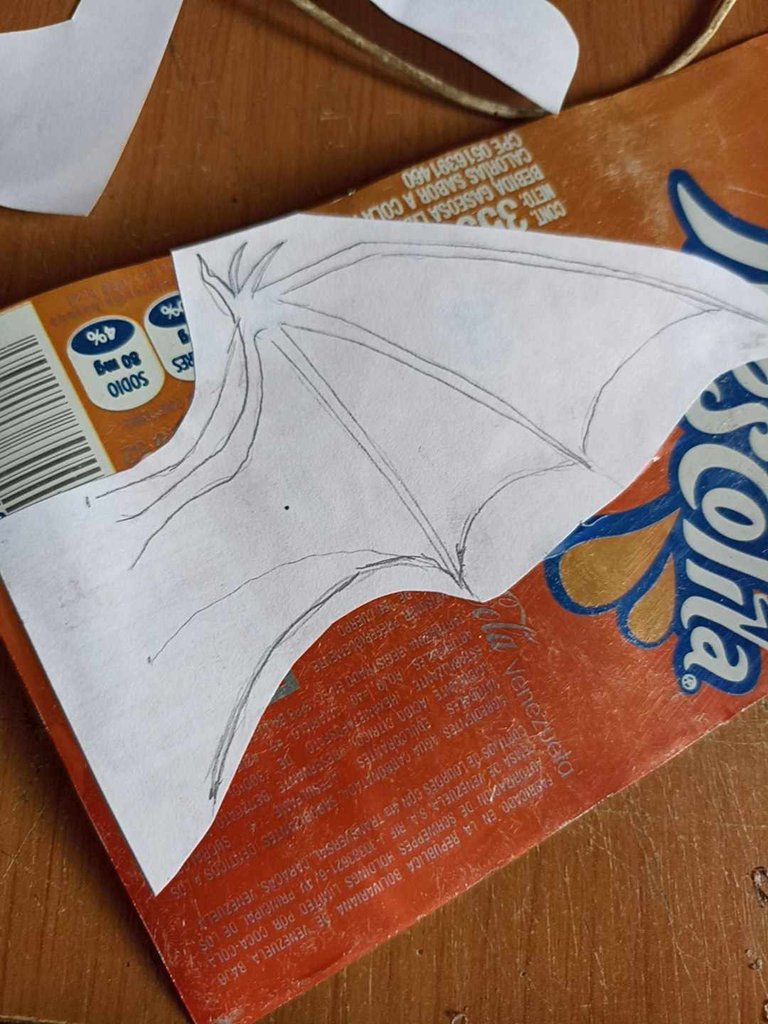
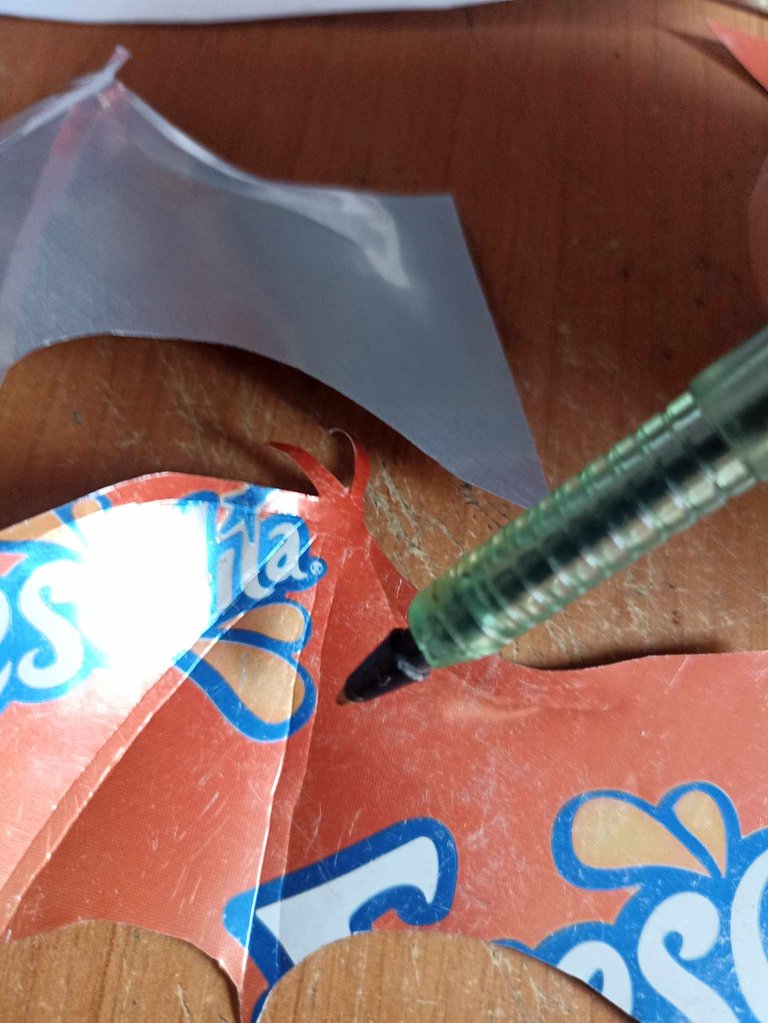
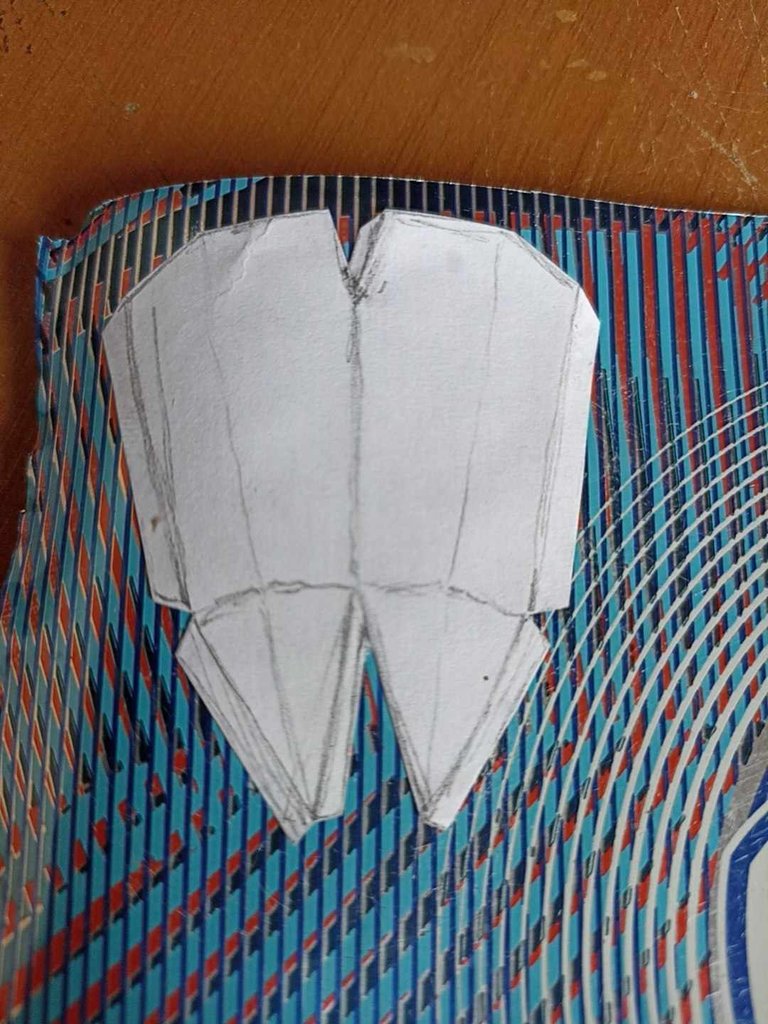
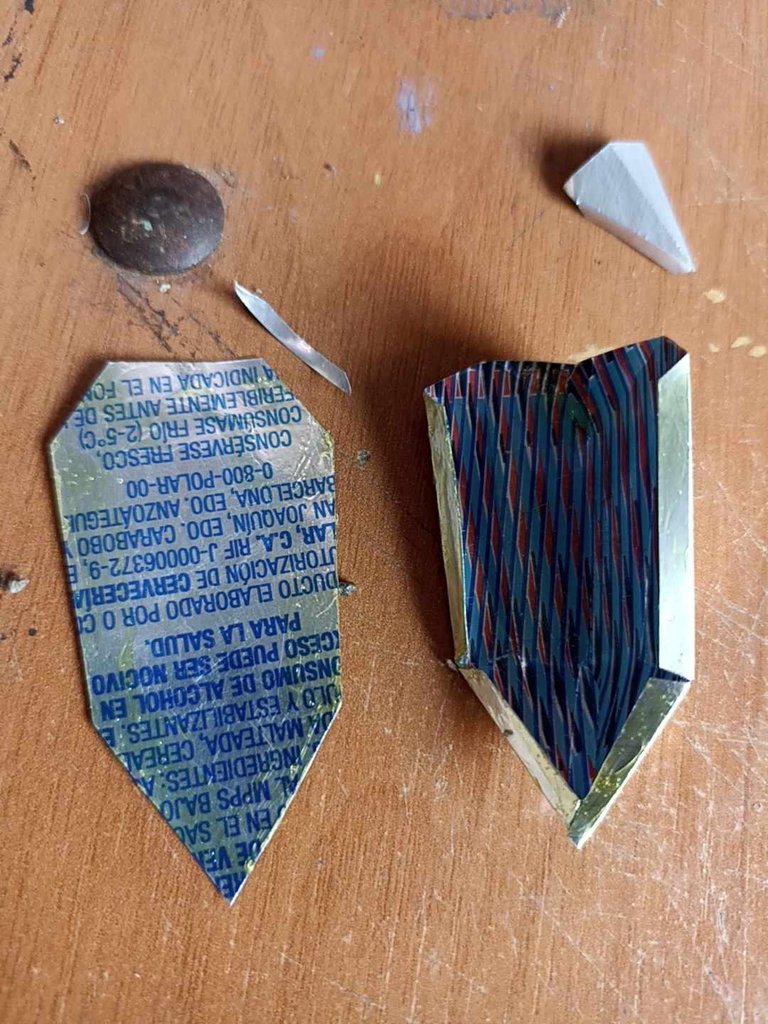
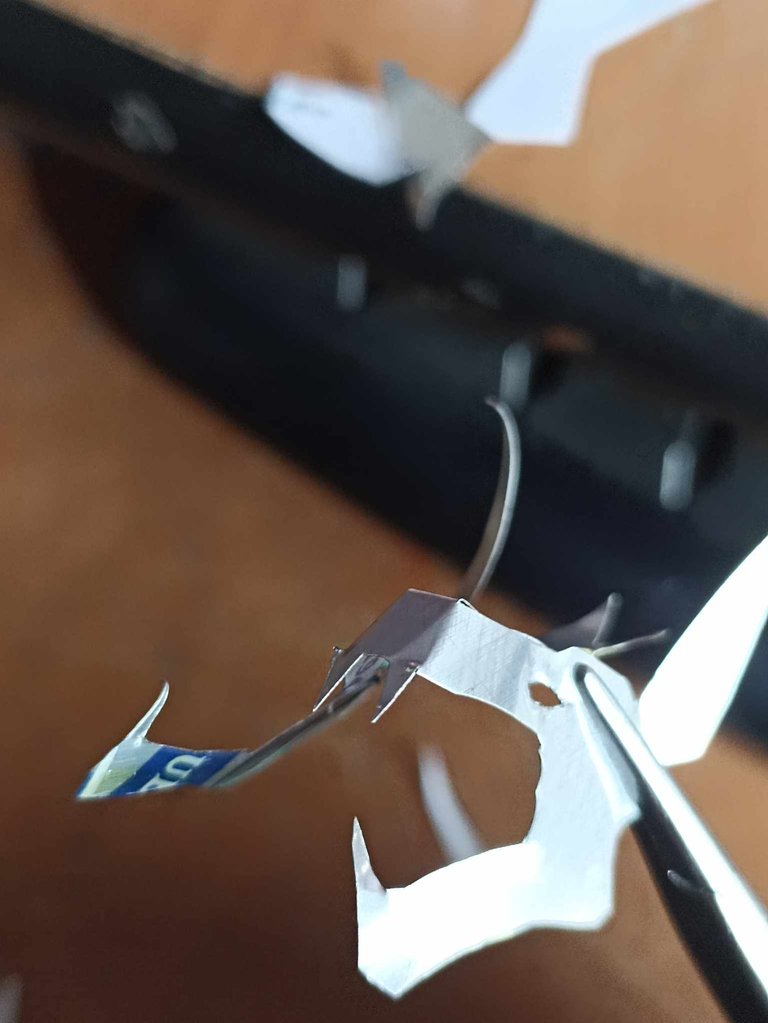
I used the first template to make one of the wings, with school glue I glued it on the aluminum can and then cut it out with scissors, and then I made the most exact cut to get the complete figure. The next step was to remove the paper, with a pen without ink I began to make some strokes on the can to give it the best shape that bat wings have, as aluminum is malleable, it sinks with the tip of the pen and is easily carved.
Utilicé la primera plantilla para hacer una de las alas, con pegamento escolar la pegué sobre la lata de aluminio y después con una tijera la recorte, ya luego hice el recorte más exacto para sacar la figura completa. El siguiente paso fue retirar el papel, con un bolígrafo sin tinta comencé a hacerle unos trazos a la lata para darle la mejor forma que tienen las alas de murciélagos, como el aluminio es maleable, se hunde con la punta del bolígrafo y fácilmente queda tallado.
 |  | |
|---|---|---|
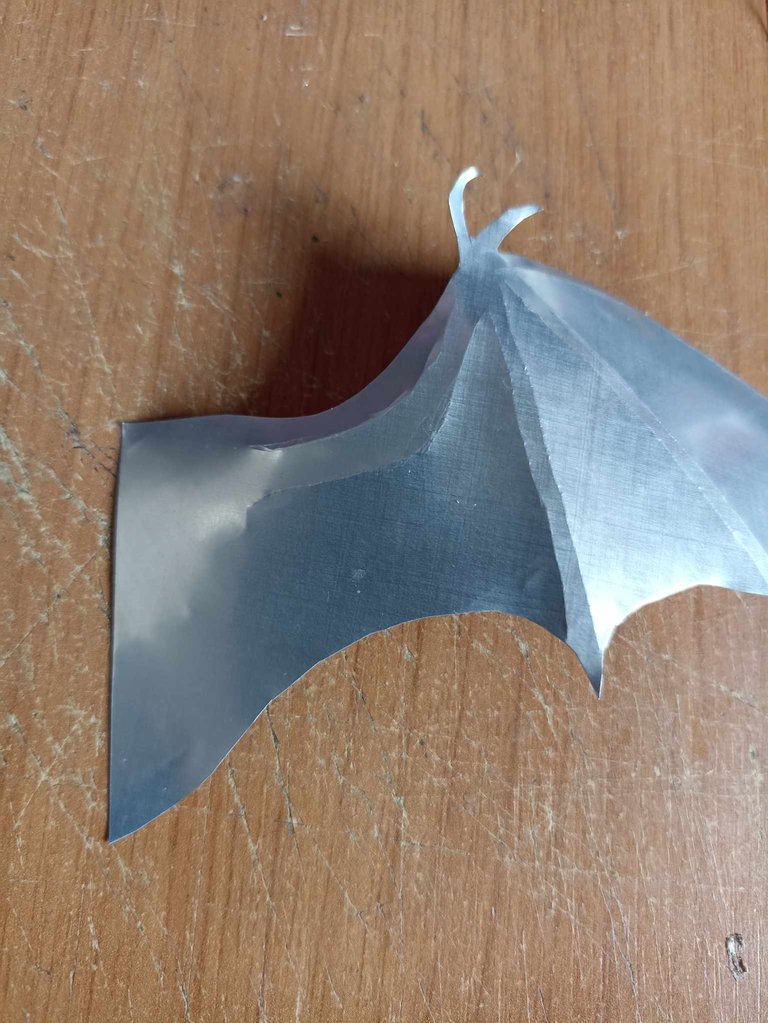 |  |
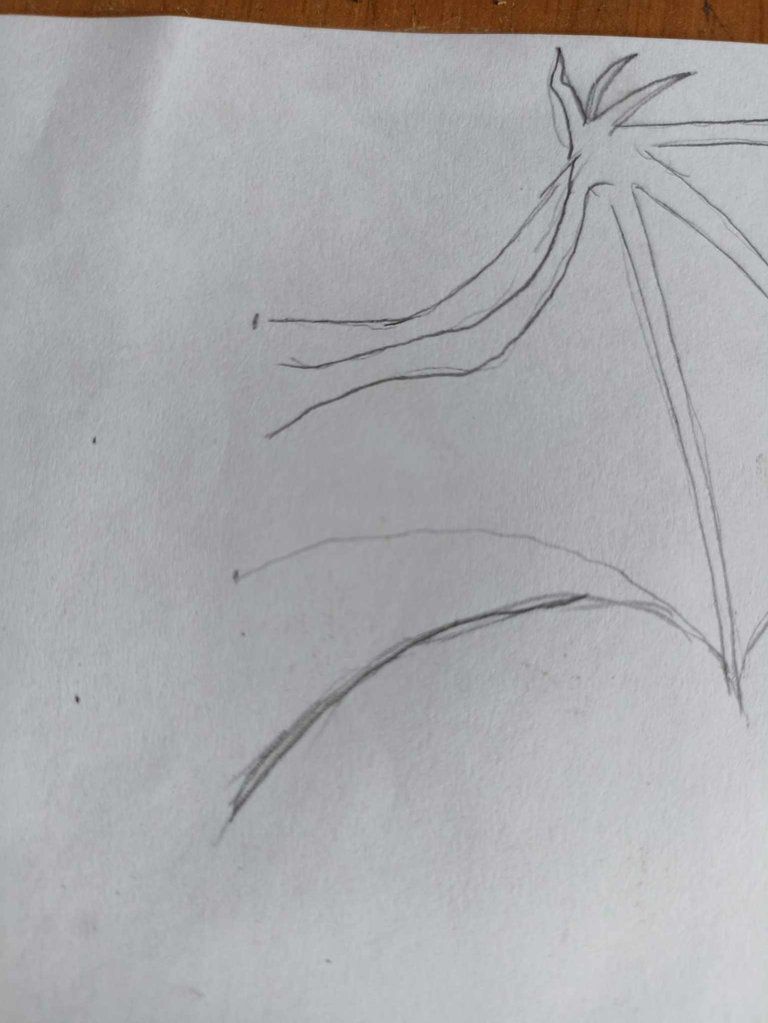
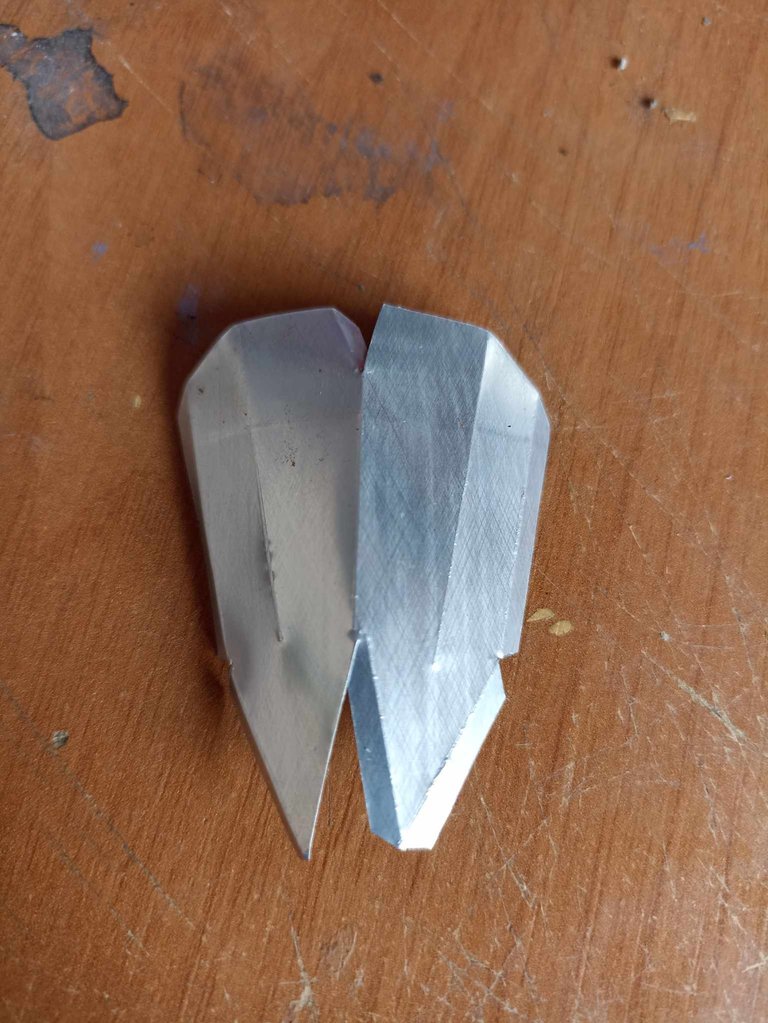
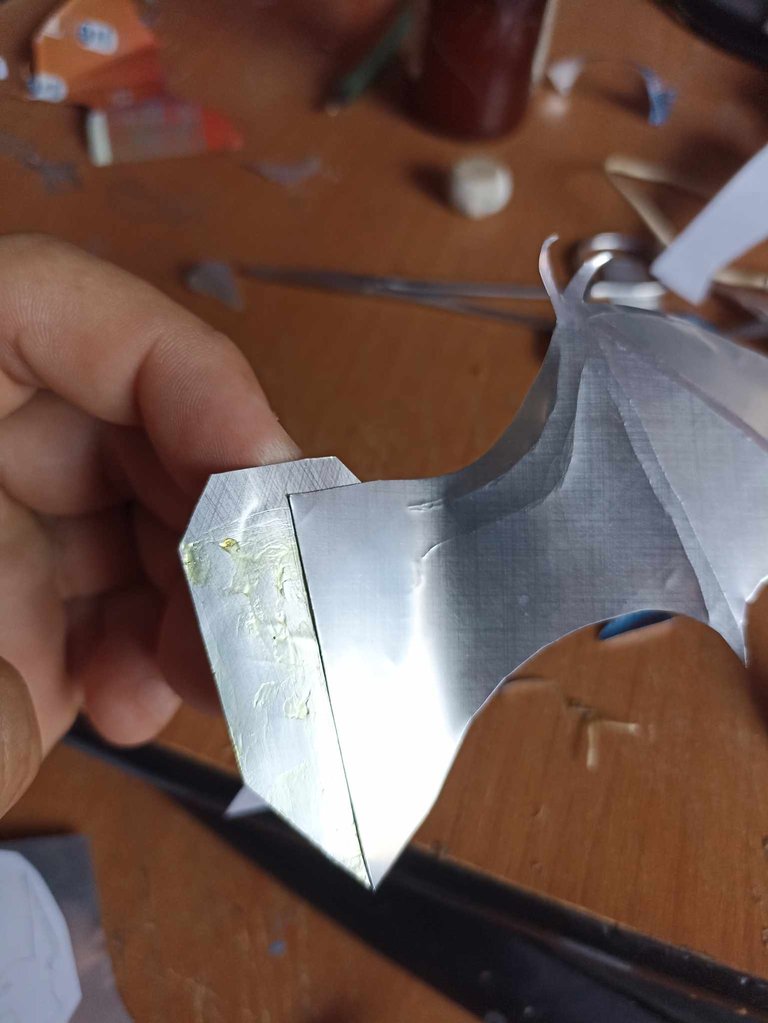
Next I cut the second of the wings, repeating the previous process. Although I had a small error in measuring the drawings and one was larger than the other, I nevertheless made the template again the same size and now both wings were the same size.
Seguidamente corté la segunda de las alas repitiendo el proceso anterior. Aunque tuve un pequeño error en la medición de los dibujos y una me quedó mas grande que la otra, sin embargo hice de nuevo la plantilla del mismo tamaño y ahora si ambas alas me quedaron del mismo tamaño.
 |  |  |
|---|---|---|
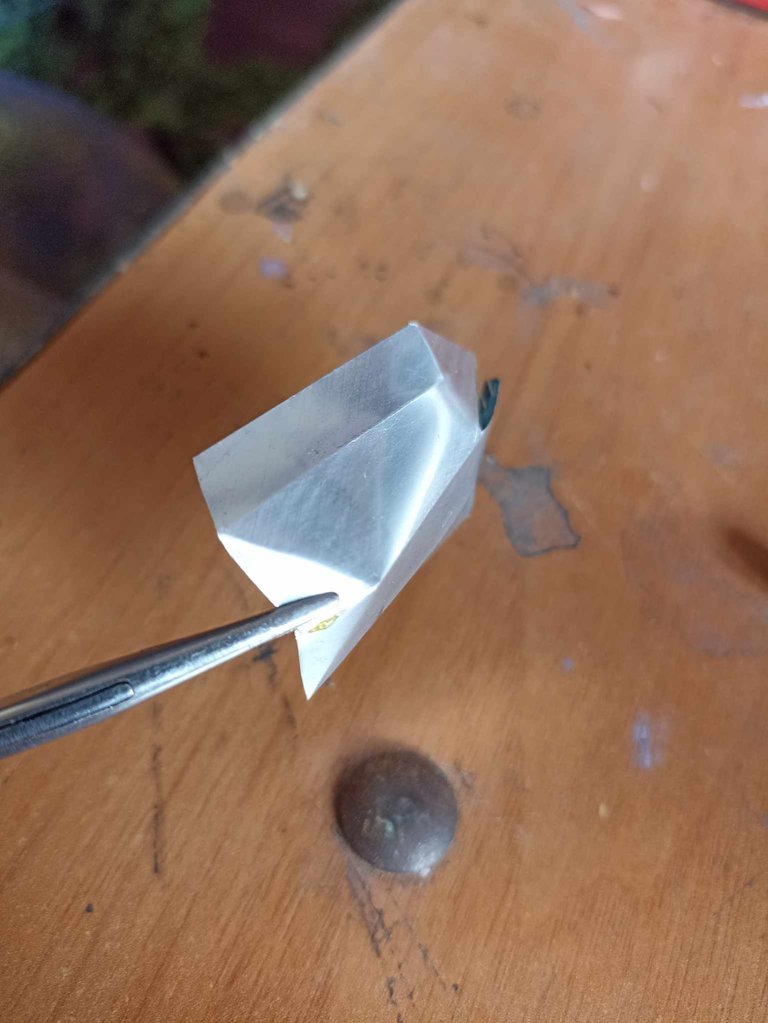 | 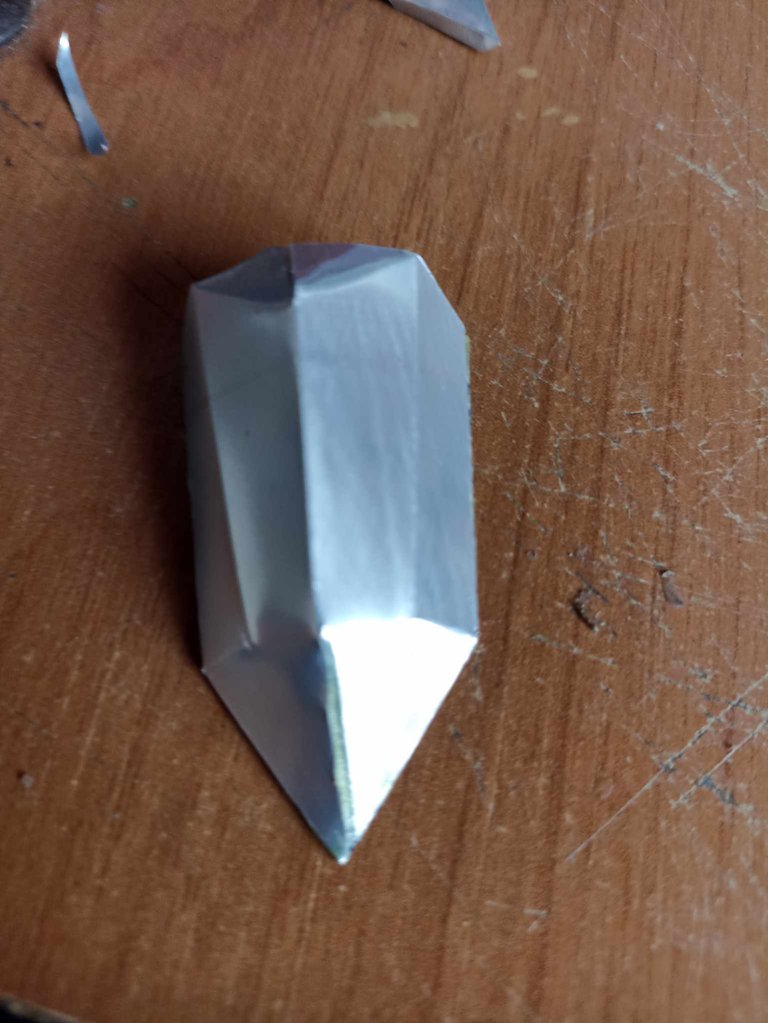 |  |
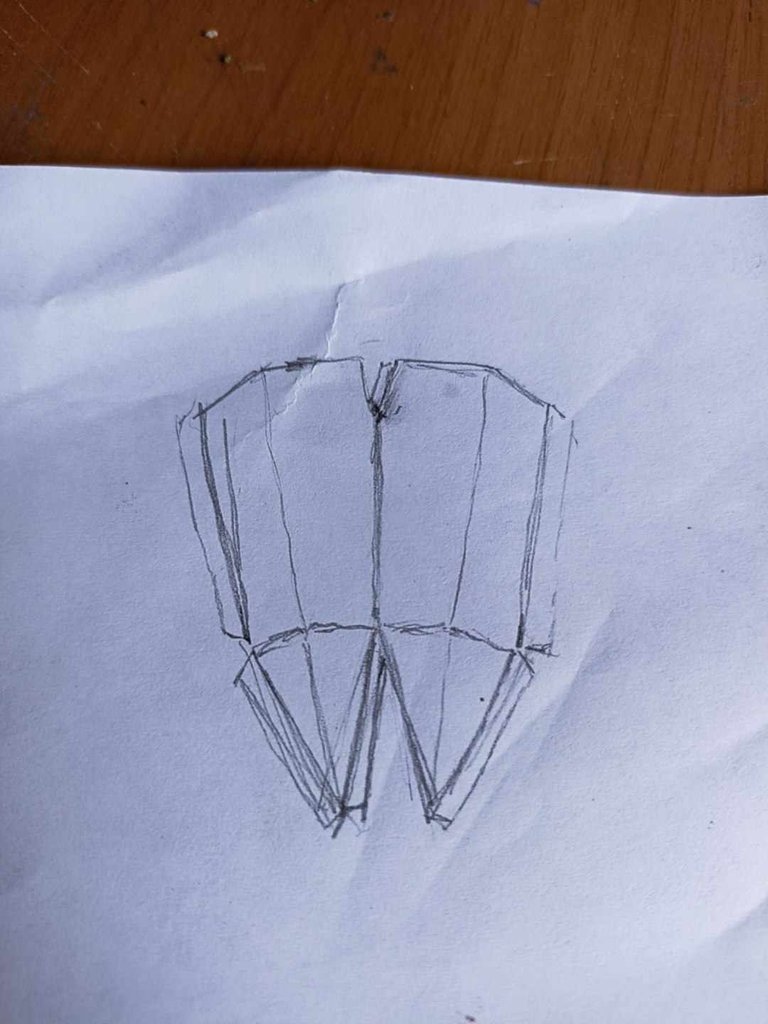
The next step was to make the body, which is small, basically, bats are mice with wings, so following these criteria I made the body somewhat small, a template with some cuts that I then joined with glue until I got the shape. Finally, I placed another aluminum cover to seal it, this would correspond to the back.
El siguiente paso fue hacer el cuerpo, el cual es pequeño, básicamente, los murciélagos son ratones con alas, así que siguiendo estre criterio hice el cuerpo algo pequeño, una plantilla con algunos cortes que luego uní con pegamento hasta sacar la forma. Por último colocuqé otrra tapa de aluminio para sellarlam esto correspondería a la espalda.
|  | |
|---|---|---|
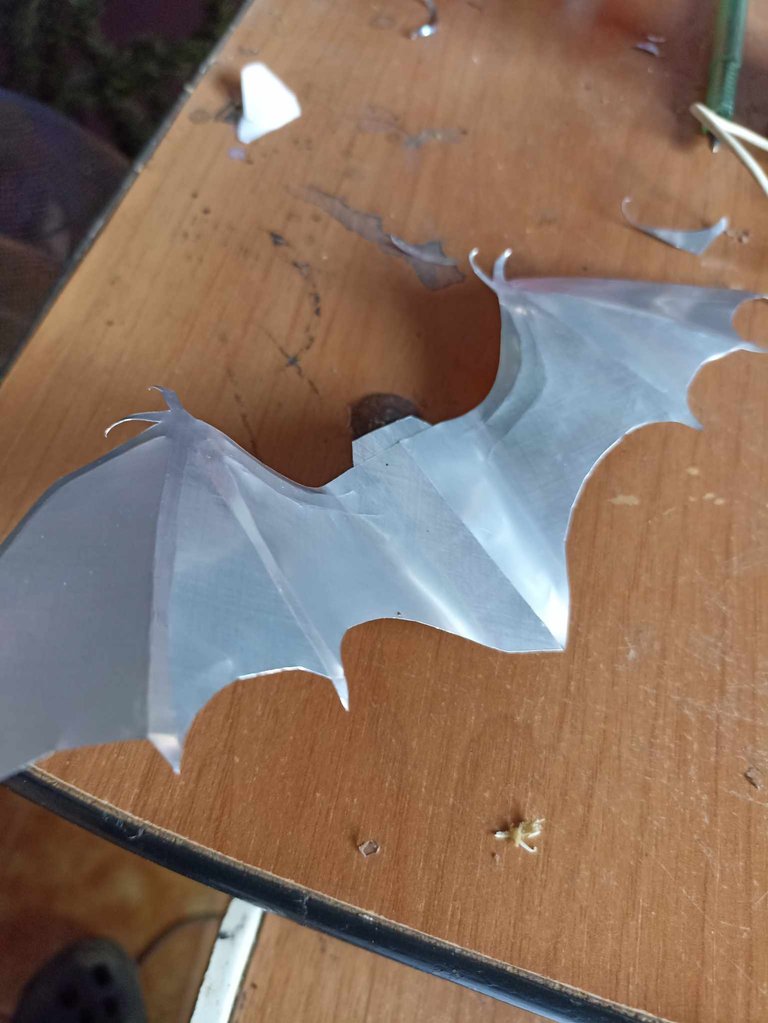 |  |
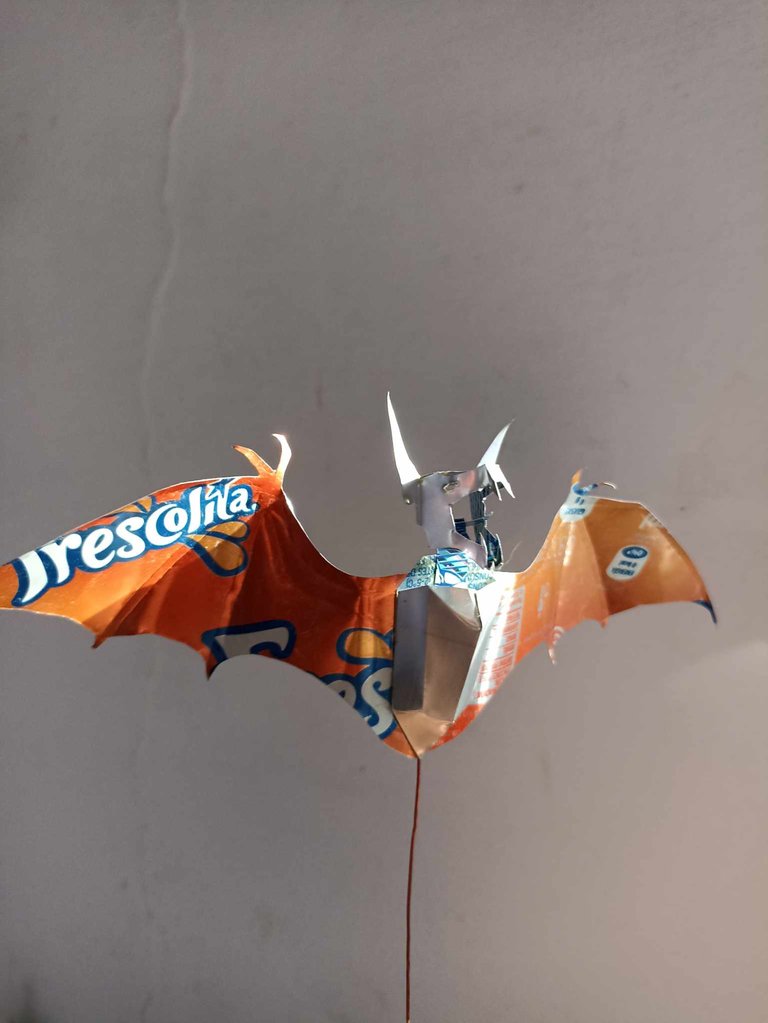
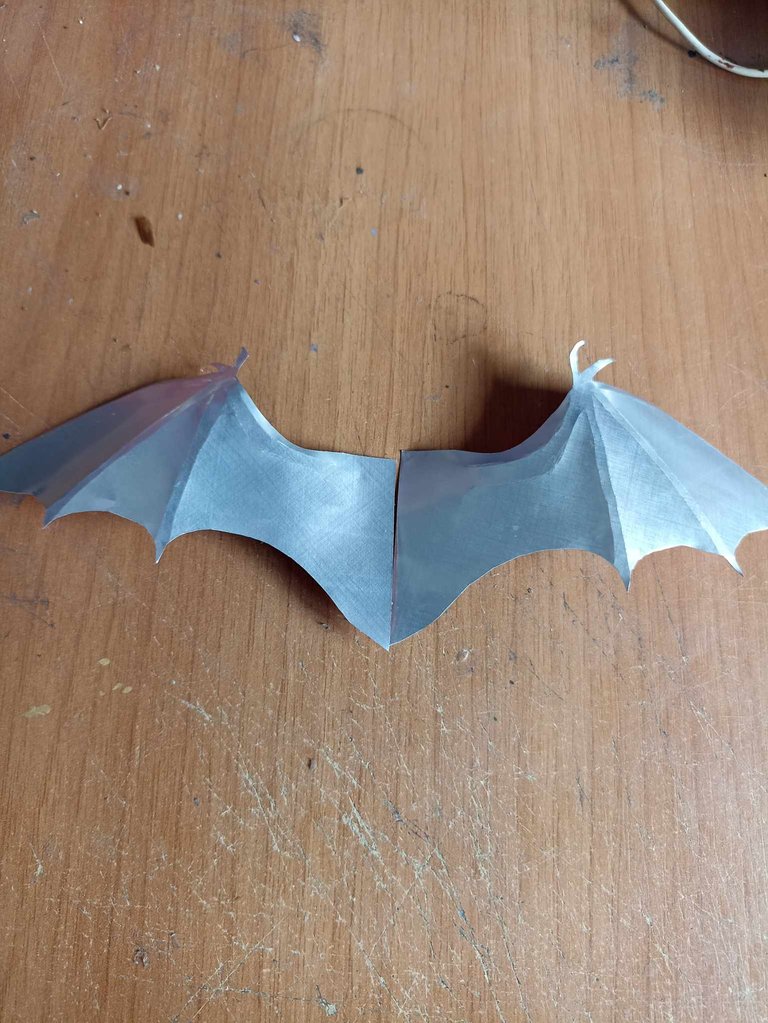
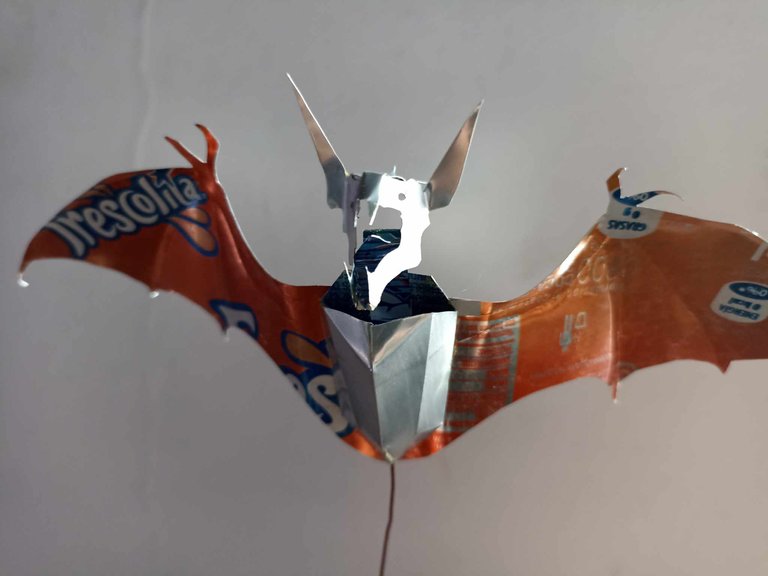
Then I start with the first part of assembling the sculpture, placing both wings on the body figure. For this I make the lines on the back so that both wings are in the right place, then I put glue on both pieces and little by little and with a lot of patience I join them so that they are perfect. After both wings are well glued , I blow them up a little so that they have a little more life and you can see that they are in full flight.
Luego commienzo con la primera parte del armado de la escultura, coloca ambas alas sobre la figura del cuerpo. Para esto hago los trazos sobre la espalda para que ambas alas queden en l lugar indicado, después les pongo pegamento a ambas piezas y poco a poco y con mucha paciencia las voy uniendo para que queden perfectas. Luego de que ya esten bien pegadas ambas alas, las soblo un poco para que tengan un poco más de vida y se vea que va en pleno vuelo.
|  |  |
|---|---|---|
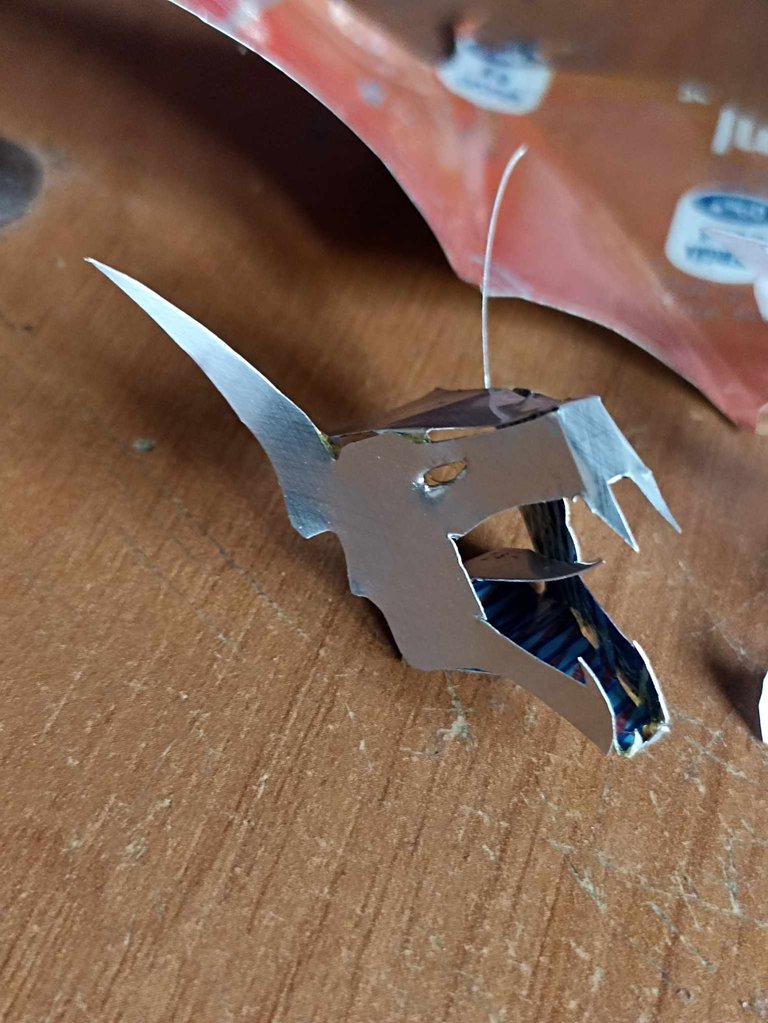 | 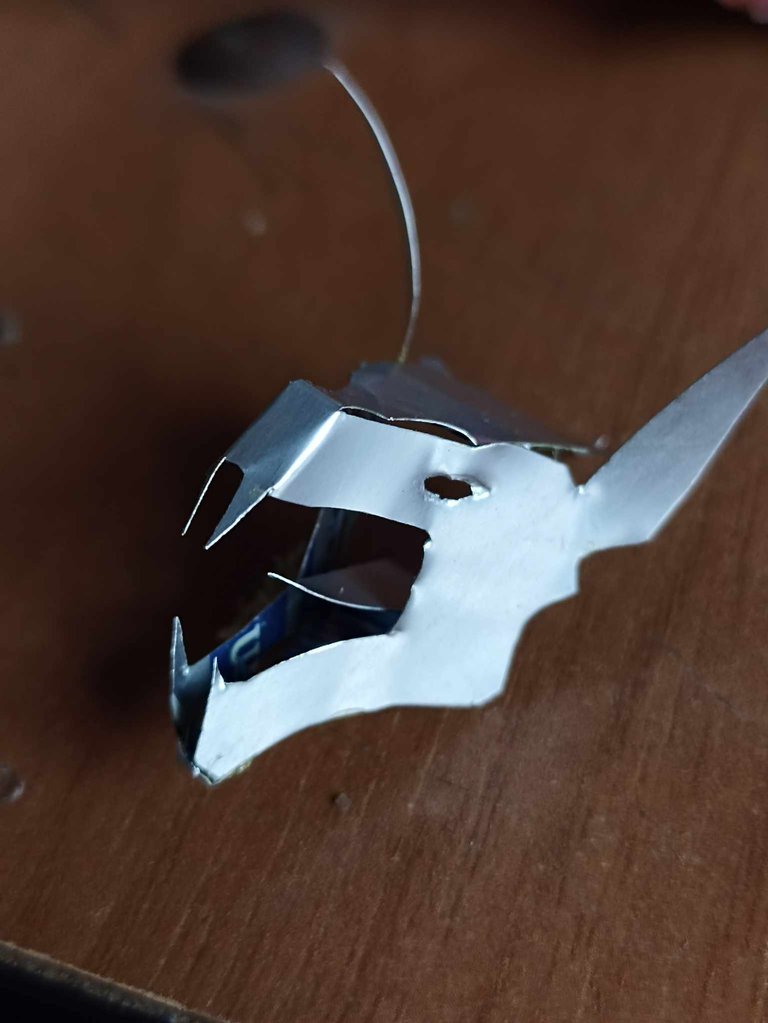 | 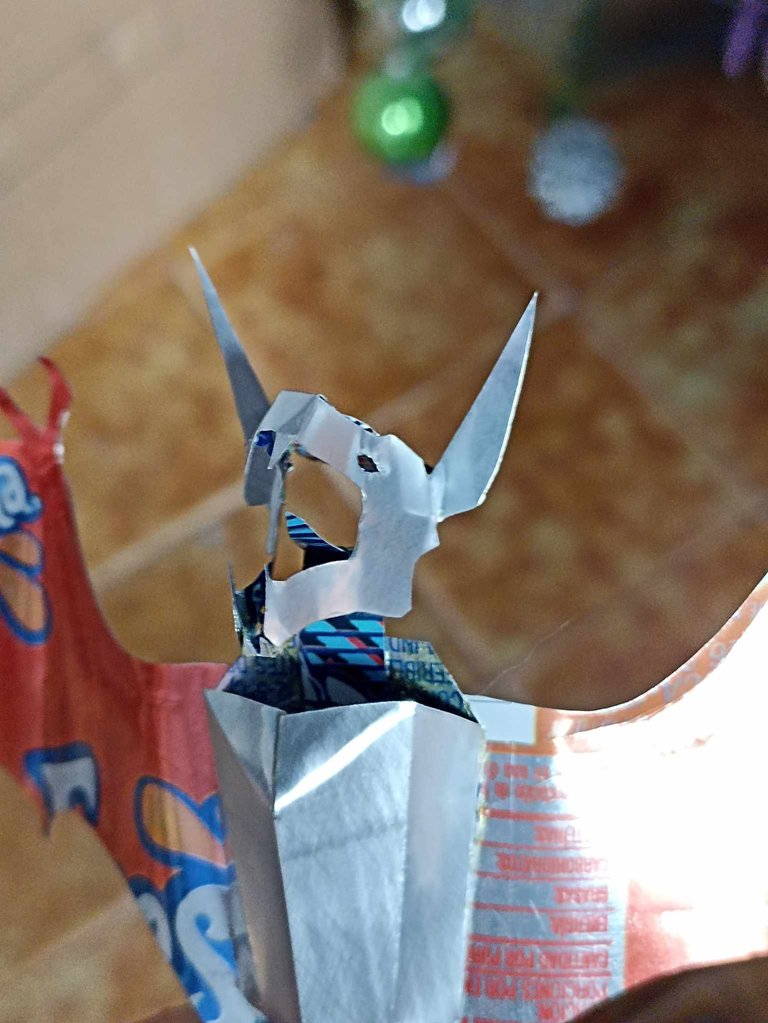 |
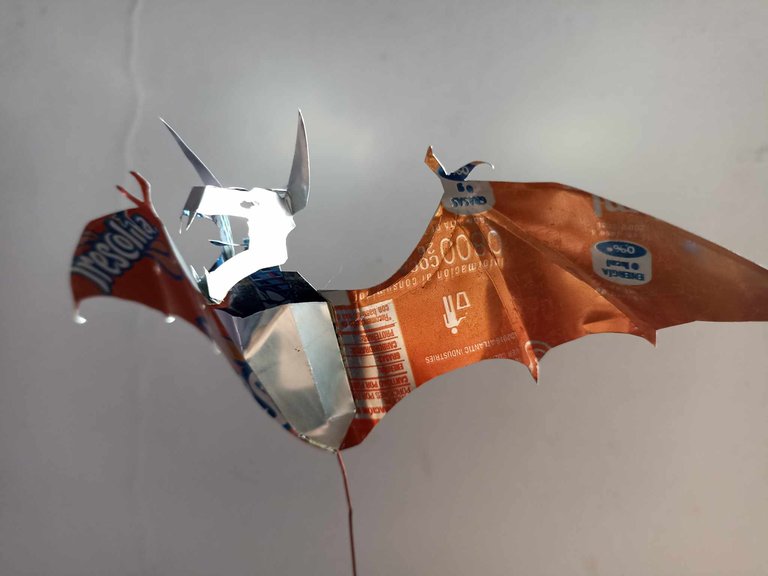
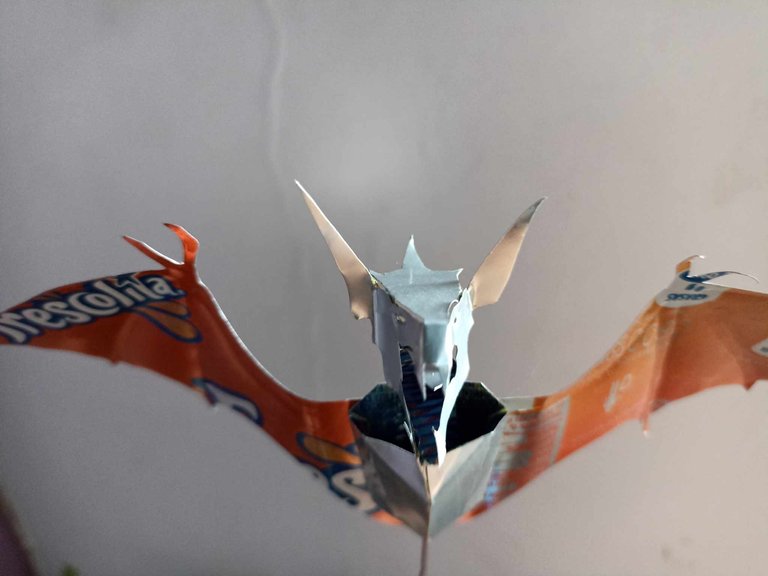
And the last step was to make the head, a little difficult since the head of bats does not look at all like a mouse, but it does look like dragons, at least like the dragons imagined in mythologies. I made the cut carefully with scissors so as not to damage the piece, I joined it with glue and finally I glued it to the rest of the body, I made a small base with wire so that the sculpture can stand.
Y el ultimo paso fue hacer la cabeza, un poco dificil ya que la cabeza de los murciélagos no se parece en nada a un ratón, pero si a los dragones, al menos a los dragones imaginados en las mitologías. Hice el corte cuidadosamente con las tijeras para no estropear la pieza, la uní con pegamento y por último la pegué al resto del cuerpo, hice una pequeña base con alambre para que la escultura pueda sostenerse.
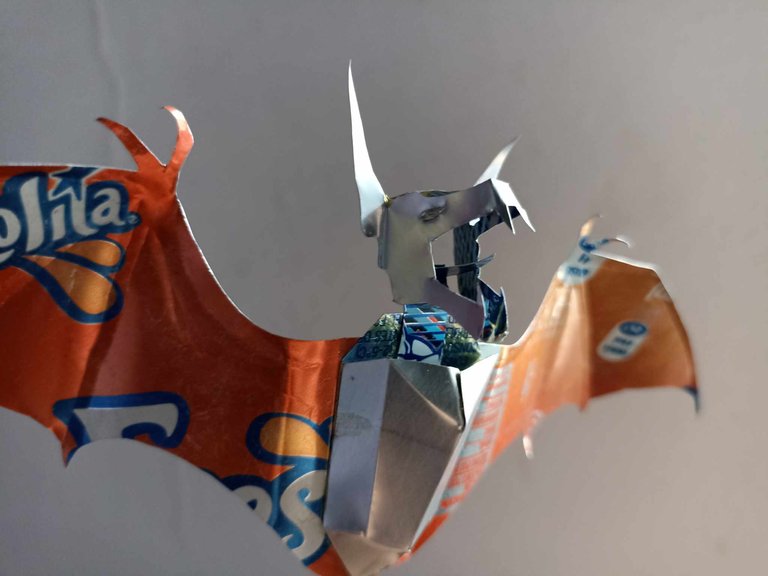

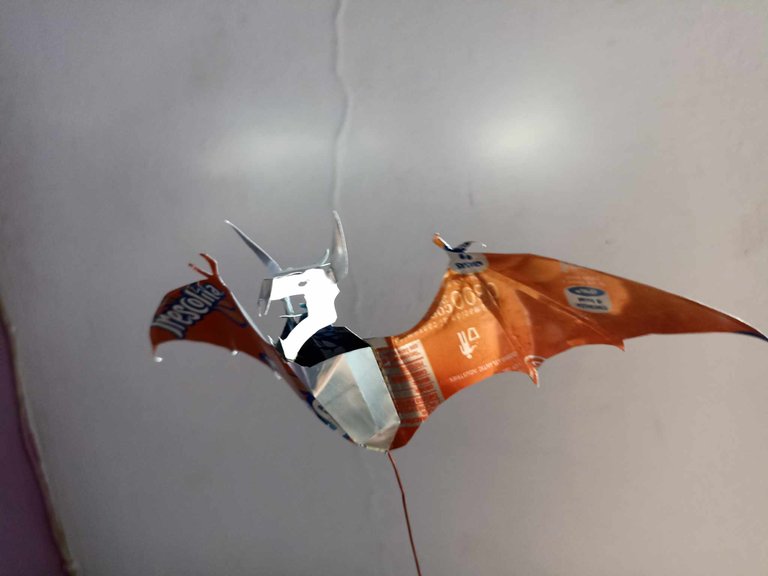
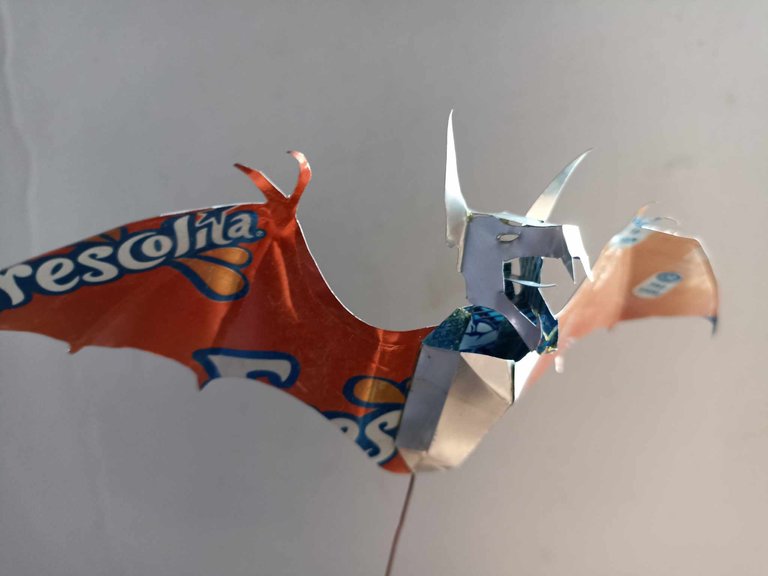
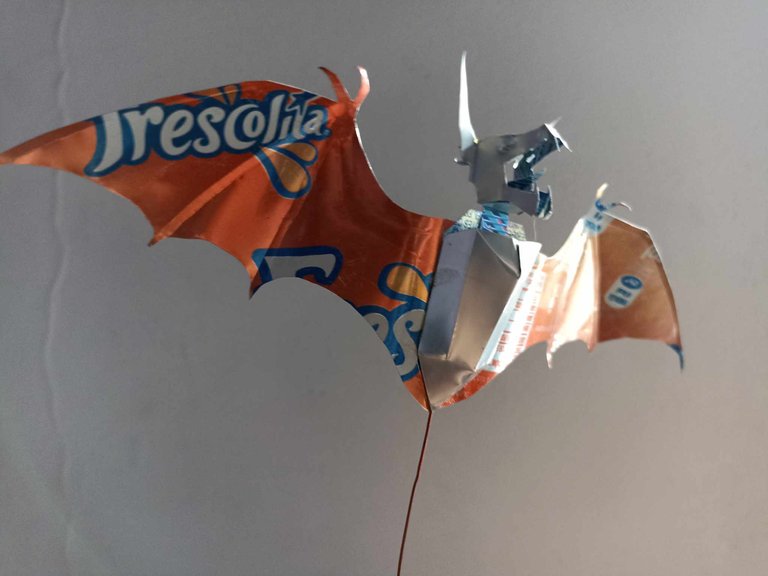
This is how this sculpture of the Vampire Bat card was finished, did you like the design? or the colors, I think if I had had a black can it would have looked very cool, some dark blue color. It is very difficult to find cans of those colors, since the psychology of color to sell sodas uses red, blue, yellow and green, the rest, with small exceptions. However, I think I achieved my goal, I was very happy with the final result, and like in every piece I make there is always one part that gets all my attention and in this case it is the wings. I say goodbye for now, I hope you liked it and if so, don't stop commenting, I invite you to participate in this fun contest that helps us always improve our skills, See you soon friends!
Así quedó finalizada esta escultura d la carta Vampire Bat, les gustó el diseño? o los colores, creo que si hubiera tenido una lata de color negro habría quedado muy genial, de algún color azul oscuro. Es muy dificil encontrar latas de esos colores, ya que la psicología del color para vender sodas se usa el rojo, el azul, el amarillo y el verde, del resto, con pequeñas excepciones. Sin embargo creo que logré mi cometido, quedé muy contento con el resultado final, y como en cada pieza que realizo siempre hay una parte que se lleva toda mi atención y en este caso son las alas. Yo por ahora me despido, espero que les haya gustado y si fue así no dejen de comentar, los invito a participar en este divertido concurso quen nos ayuda a mejorar siempre nuestras habilidades, Hasta pronto amigos!
Te quedo muy genial esta escultura Fixie o__o leyéndote me asombra que usaras un bolígrafo para repujar el aluminio y sus detalles, no se por qué imagine cualquier otra herramienta, como una gubia finita, pero no, me encanto ese dato y lo tomare en cuenta la próxima que quiera trabajar ese material. Y aunque no consiguieras una lata de color oscuro, creo que el hecho de que se note que fue hecho con una lata de "frescolita", le da un plus o un encanto extra a la pieza. Ojala ganes el concurso, ¡mucha suerte! 👏 👏 👏
La publicidad que trae cada lata es lo que hace que cada pieza sea especial, y cuando los colores concuerdan con el diseño original el resultado es aún más impresionante. Con lo del bolígrafo me pareció de lo más acertado, la pequeña bolita que tiene la punta del bolígrafo es genial, es como escribir sobre la lata y ayuda a conseguir el mejor resultado. Saludos y muchas gracias por pasar por aquí!
Bastante genial. Los detalles son los que más han llamado mi atención, me hiciste recordar a mi juventud cuando una docente nos enseño un lindo juegos de muebles decorativos hecho en lata, quedé fascinada con tal detalle y trabajo. Te felicito, yo tengo pavor de trabajar este tipo de materiales, siento mucho miedo de cortarme. Bendiciones y mucho éxito
Si da miedo cortarse, pero si lo pensamos bien, es fácil también cortarse con una hoja de papel, se puede usar guantes de latex, yo como le tomé confianza rápido a este material lo trabajo sin seguridad, aunque he tenido mis pequeños accidentes de vez en cuando!
Está increíble!
Muchas gracias, que bueno que te haya gustado!
!discovery 35
This post was shared and voted inside the discord by the curators team of discovery-it
Join our Community and follow our Curation Trail
Discovery-it is also a Witness, vote for us here
Delegate to us for passive income. Check our 80% fee-back Program
thank you very much for your support
I love your paper work, absolutely amazing creations!
I'm glad you liked how this figure turned out!
What a gorgeous piece!! I actually like the soda can print the way it is. The orange is a good color. This would be fun to hang from the ceiling.
https://twitter.com/hivediy47901/status/1735714491776532551
This is so cool! and creative! I especially love how you mapped out the head and then folded it. The wings look like they are straight out of a comic book. Kudos!
The wings are truly a plus for this figure, I also really liked how it turned out. Thanks for comment