Splinterlands Art Contest Week 270 - DJINN MUIRAT FAN ART ORIGAMI SCULPTURE [ENG-ESP]
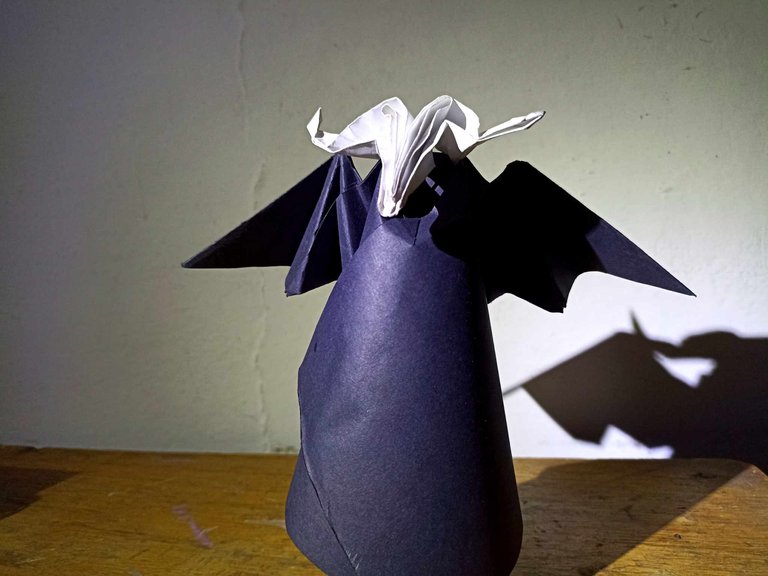
Hello dear friends, I hope you are feeling very well, today I want to share my new contribution to the weekly Splinterlands 270 contest, on this occasion I have made a paper sculpture using the Japanese technique of origami, a technique that I recently learned thanks to a challenge on this occasion and it is something that I want to continue putting into practice. On this occasion the card that I took as a reference is DJINN MUIRAT, a powerful being with a very powerful and terrifying aesthetic, I have taken the most important symbols of the design such as the goat skull and its terrifying aesthetic, I have transformed it into darkness and terror making a paper goat skull with a large black tunic and as a special detail, giant bat wings, I hope you like it!
Hola queridos amigos, espero que se encuentren muy bien, hoy quiero compartir mi nuevo aporte al concurso semanal de Splinterlands 270, en esta oportunidad he realizado una escultura de papel usando la técnica japonesa del origami, una técnica que aprendí hace poco gracias a un reto en esta oportunidad y es algo que quiero seguir poniendo en práctica. En esta oportunidad la carta que tomé como referencia es DJINN MUIRAT, un poderoso ser con una estética muy poderosa y aterradora, he tomado los símbolos más importantes del diseño como por ejemplo el cráneo de cabra y su estética aterradora, yo la he transformado en oscuridad y terror haciendo un cráneo de cabra de papel con una gran túnica negra y como detalle especial, unas gigantescas alas de murciélago, espero que les guste.!

 |  | |
|---|---|---|
 |  |
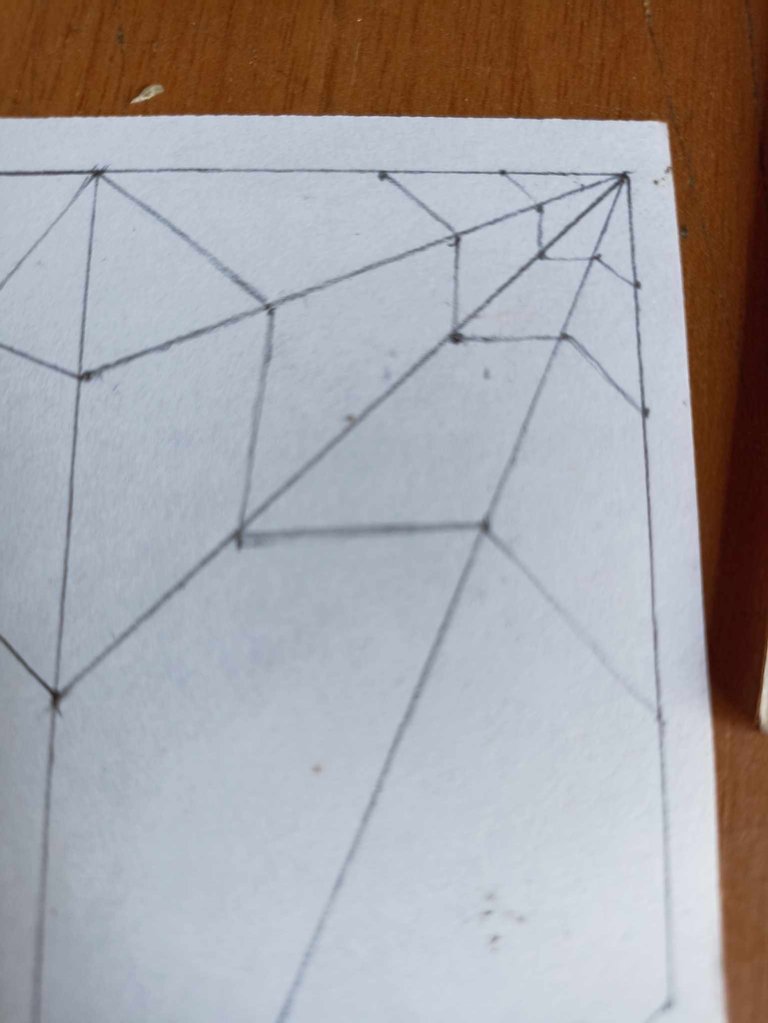
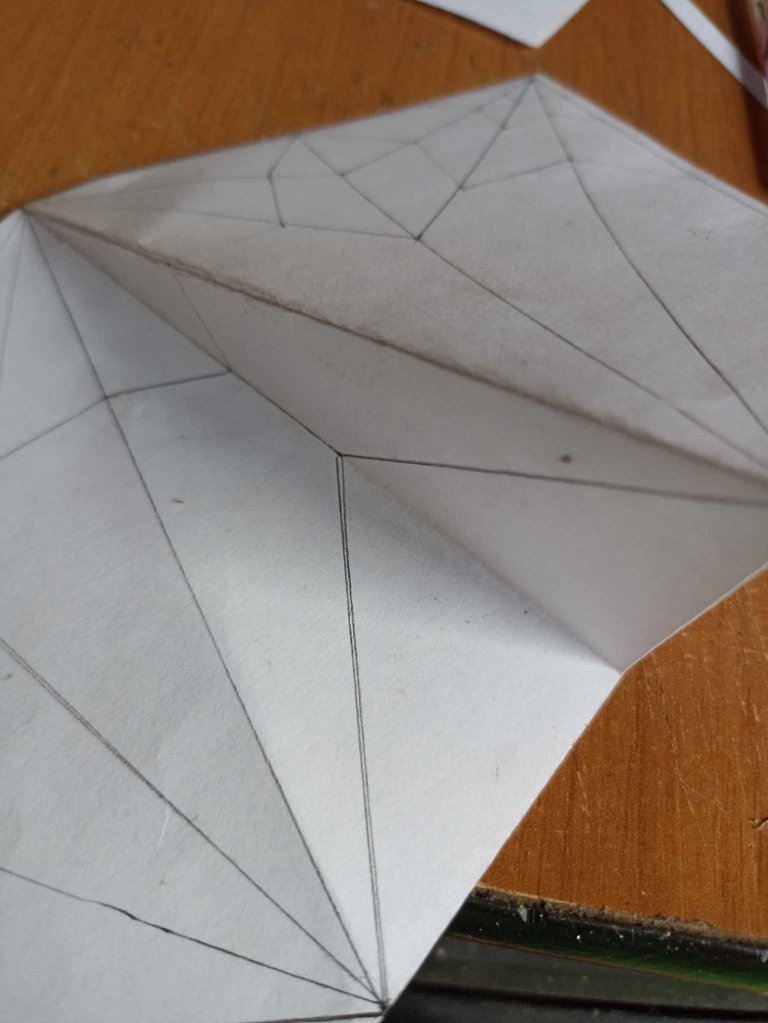
I started by making a template, I used one of the skull of a ram as a model, but I really had no idea how to fold the paper, it had parts that were difficult to follow, so I made some modifications to be able to do it. In this case I made the modifications to be able to make the skull of a bull, since this one has the horns a little easier to make on paper, I realized that to make the ram a very advanced level is needed.
I started by making a template, I used one of the skull of a ram as a model, but I really had no idea how to fold the paper, it had parts that were difficult to follow, so I made some modifications to be able to do it. In this case I made the modifications to be able to make the skull of a bull, since this one has the horns a little easier to make on paper, I realized that to make the ram a very advanced level is needed.
 |  |  |
|---|---|---|
 | 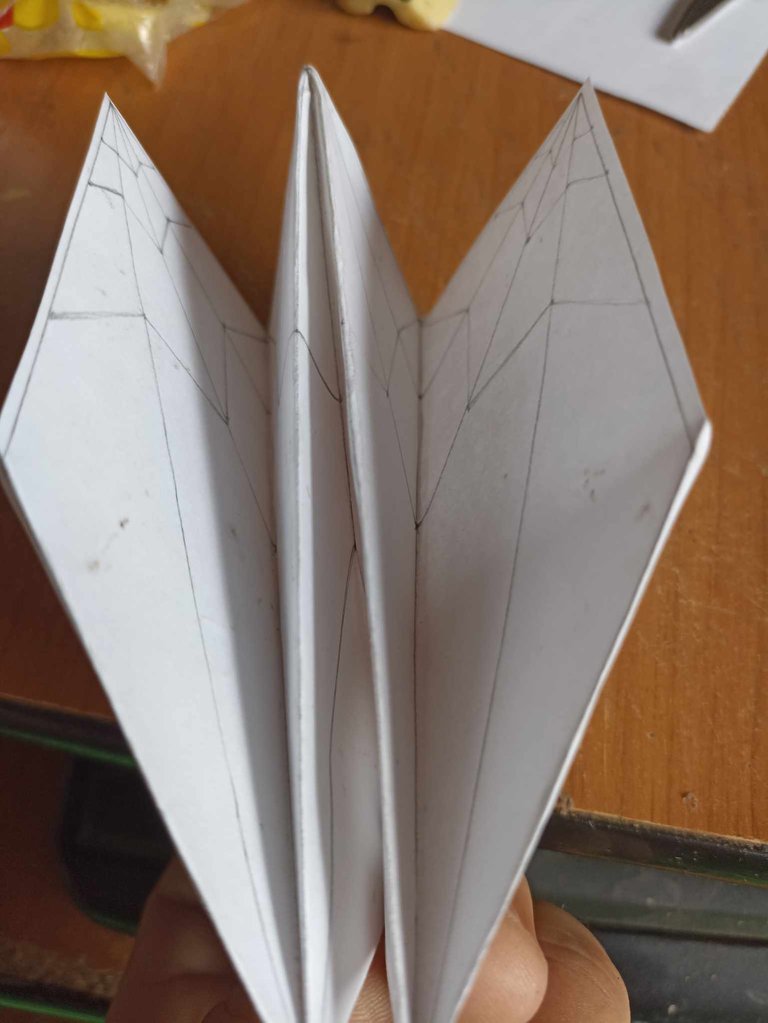 |  |
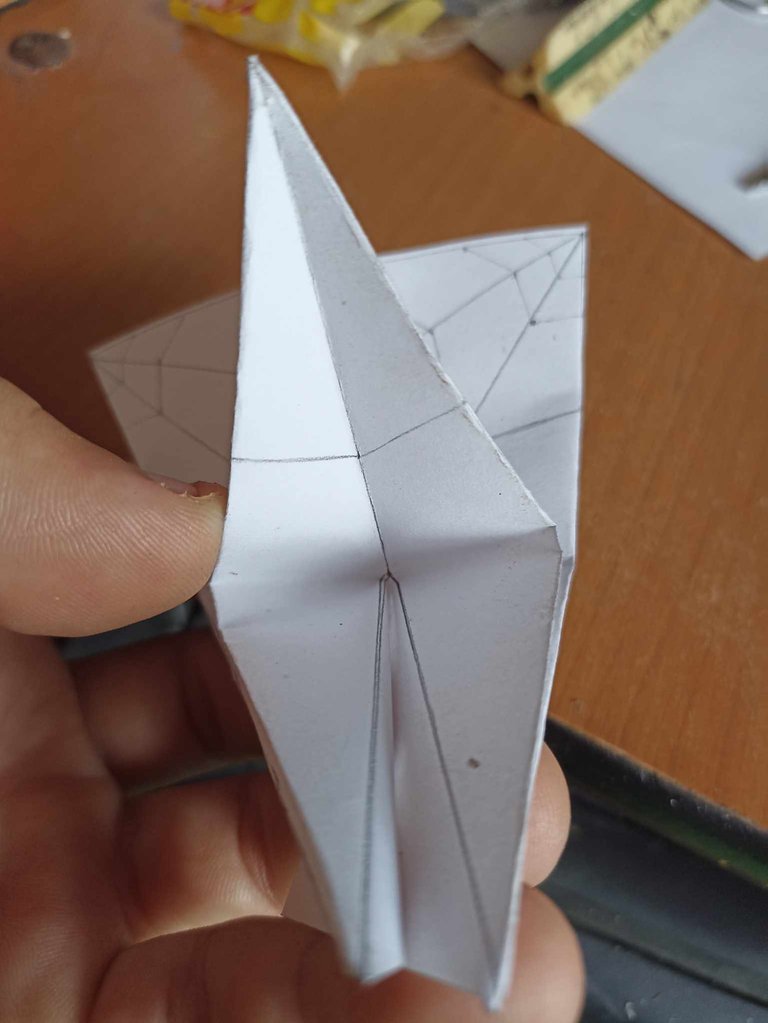
To start folding the paper I do it from the line in the middle of the paper, from there I fold it at the ends until I complete a figure very similar to a paper airplane. On the paper I drew the longest lines, each one must be folded in the opposite of the next, so that airplane shape can be achieved, this folding of the paper is mainly to make the skull.
Para comenzar a doblar el papel lo hago desde la línea de la mitad del papel, a partir de ahí lo voy doblando en los extremos hasta completar una figura muy parecida a un avión de papel. En el papel dibujé las lineas más largas, cada uno debe doblarse al contrario de la siguiente, así puede conseguirse esa forma de avión, este doblez del papel es para hacer el cráneo principalmente.
 |  |  |
|---|
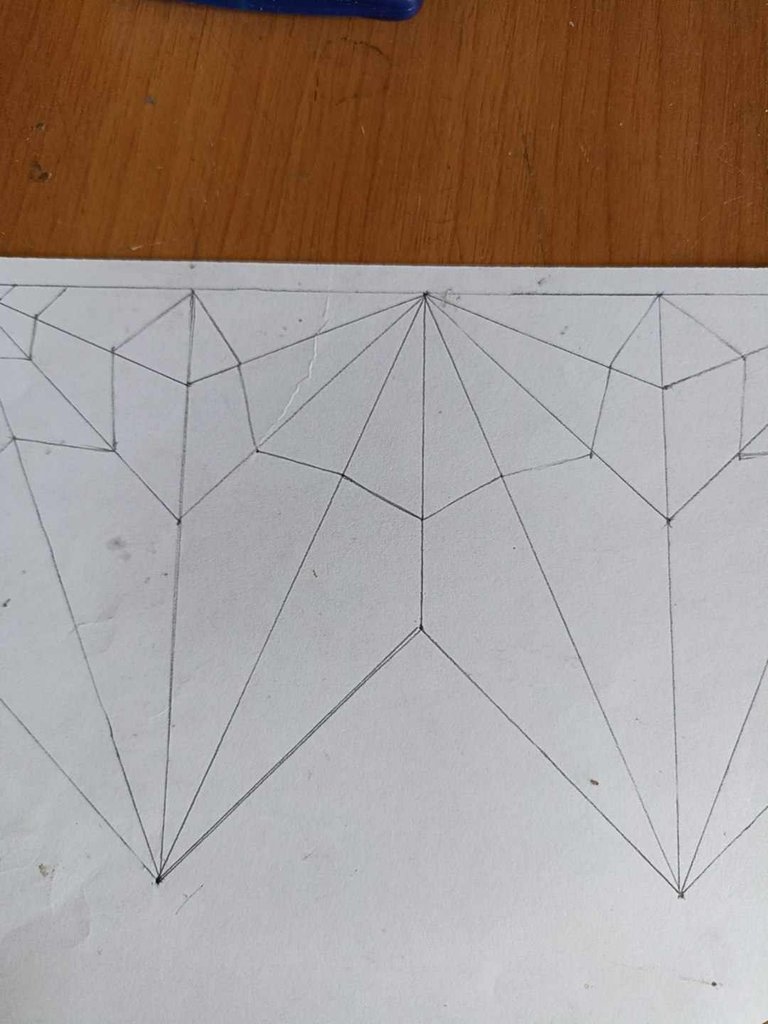
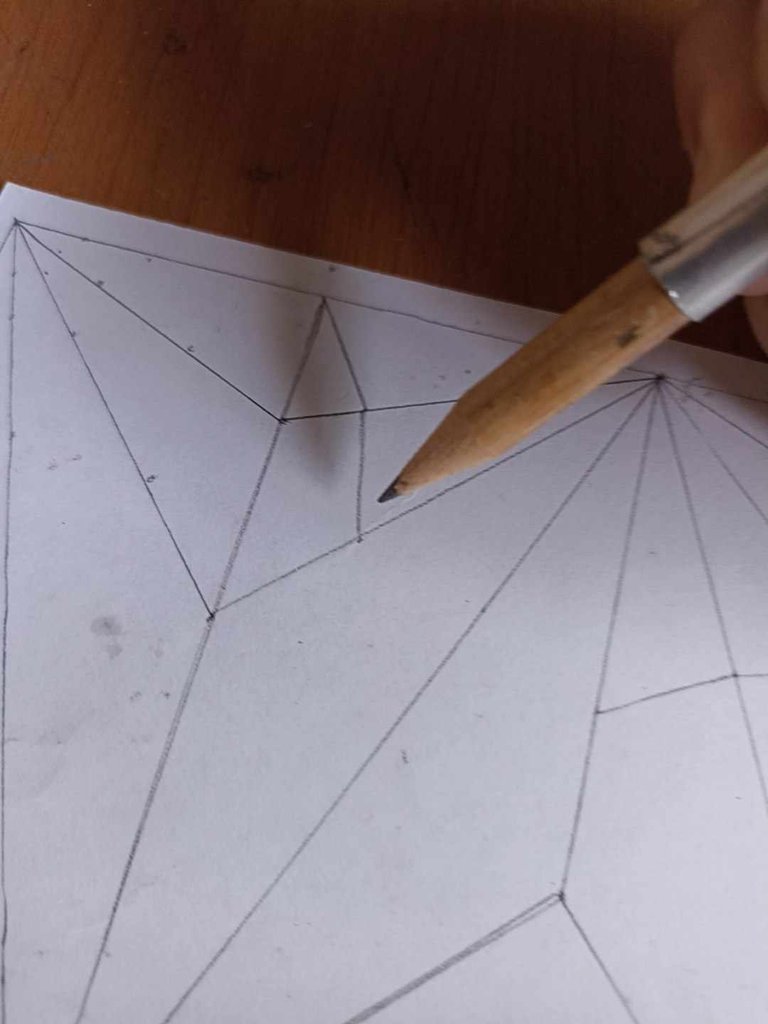
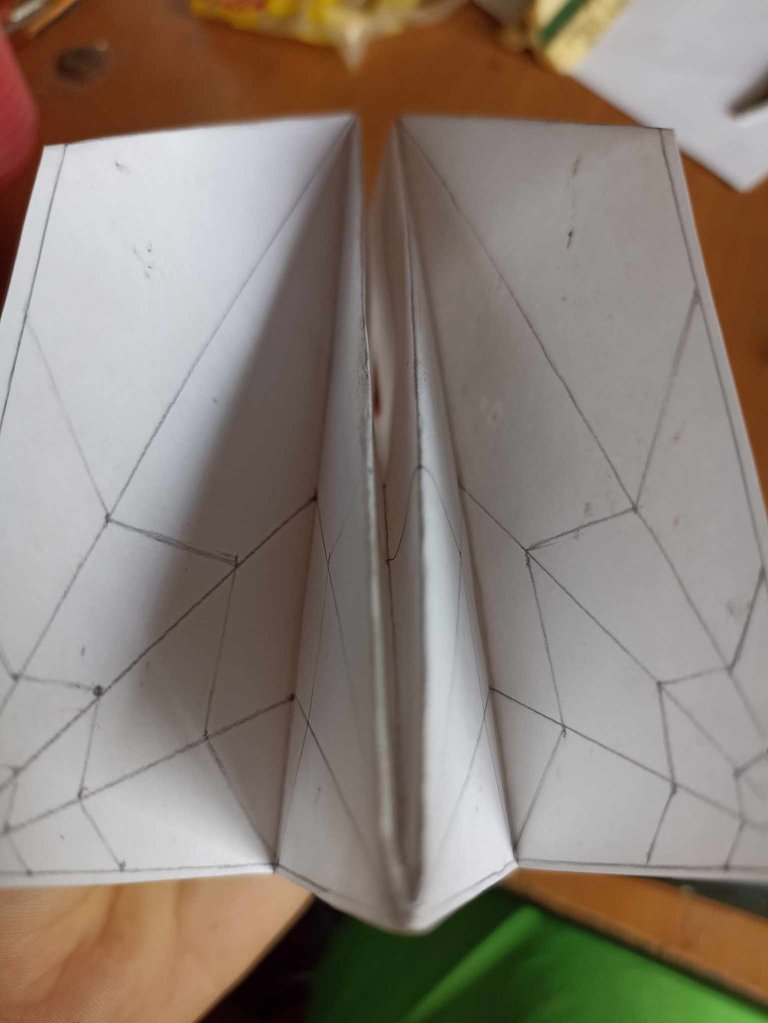
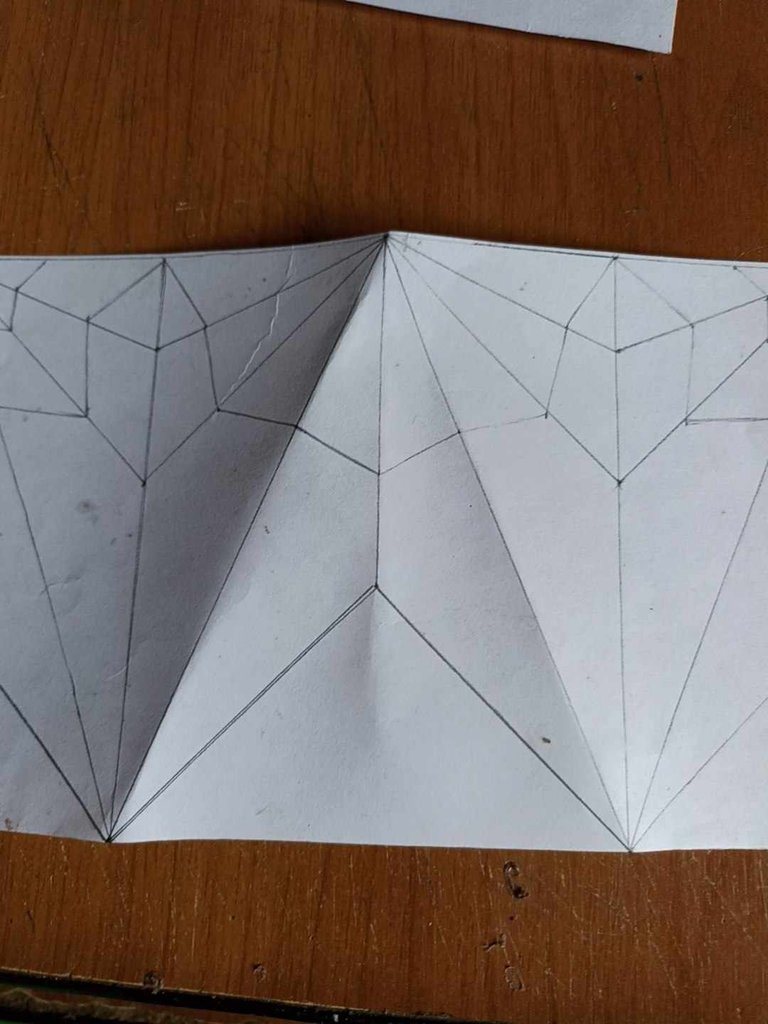
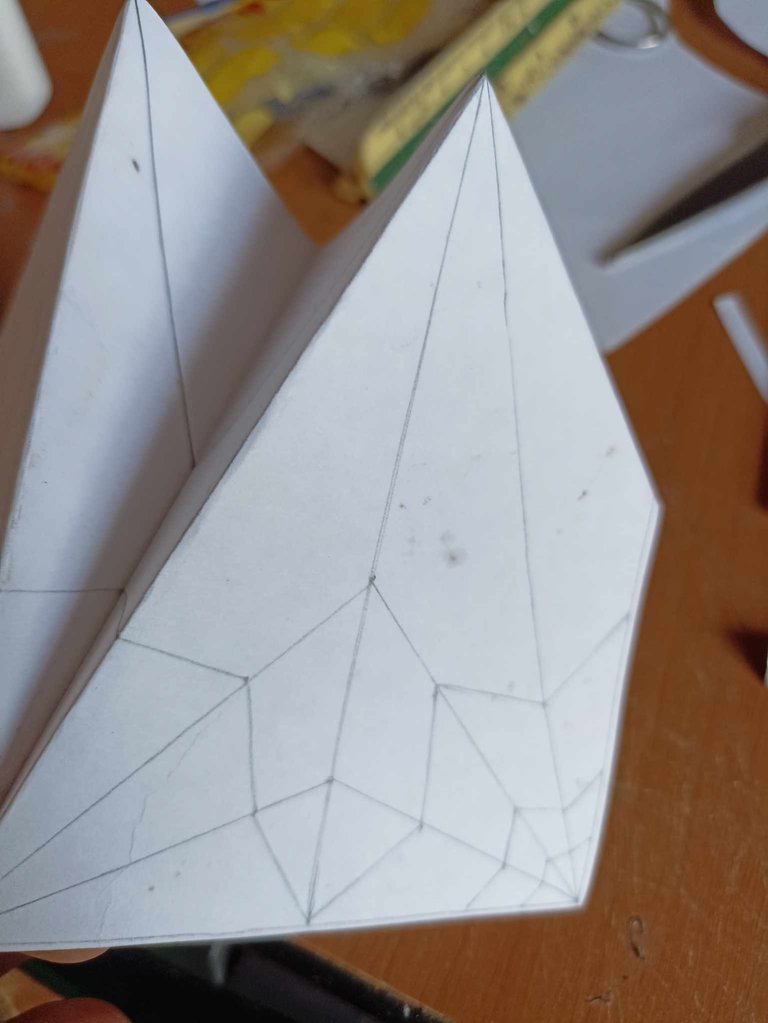
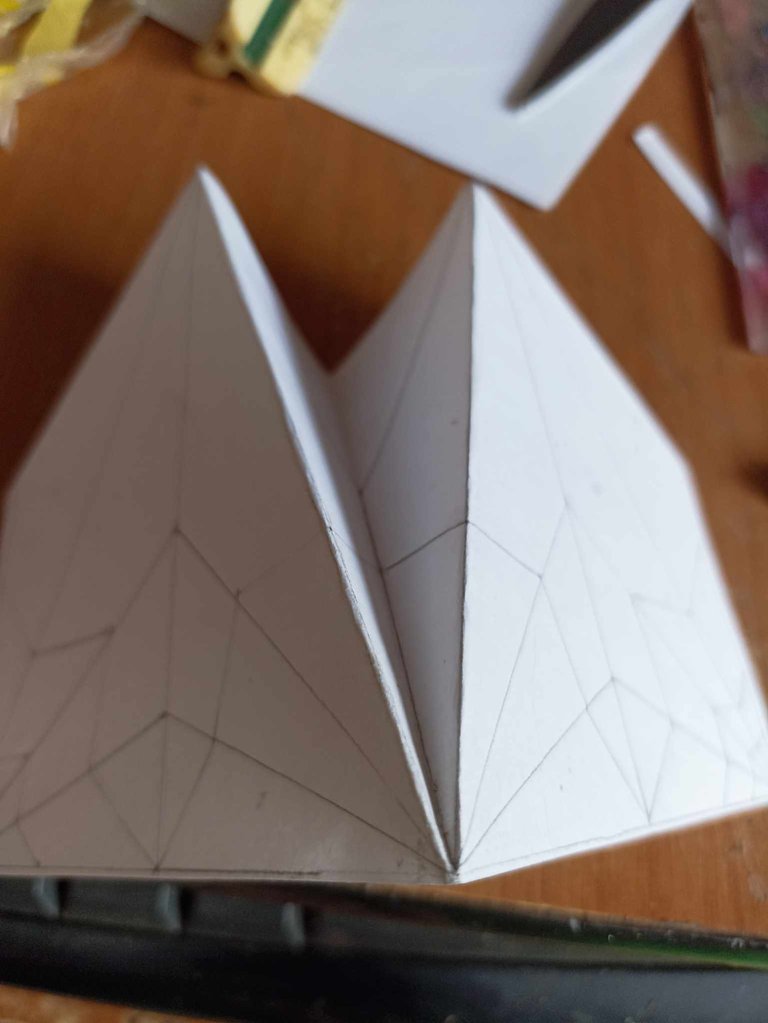
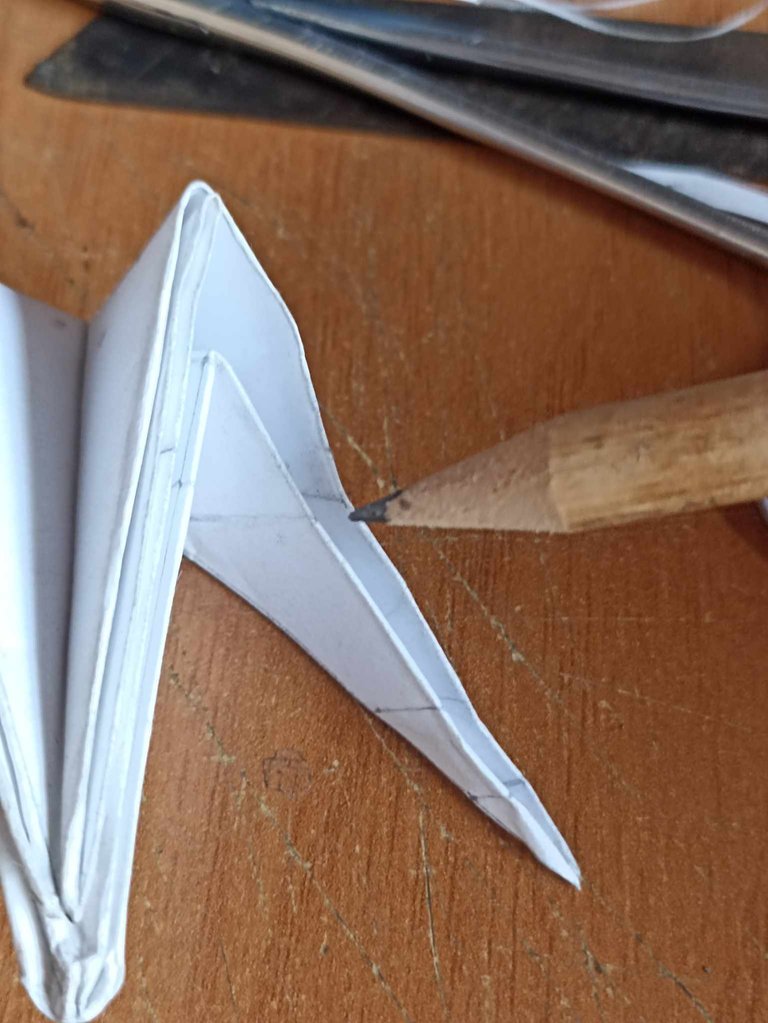
After making the shape of the plane, the lateral lines are drawn, these lines are the beginning of the horns and it is a little difficult to keep track of them. What I did was fold them on both sides, to be sure if I was following the design of the template.
Despues de hacer la forma del avión, quedan dibujadas las líneas laterales, estas líneas son el inicio de los cuernos y es un poco dificil seguirles el rastro. Lo que hice fue doblarlas para ambos lados, para estar seguro de si iba siguiendo el diseño de la plantilla.
 |  |  |
|---|---|---|
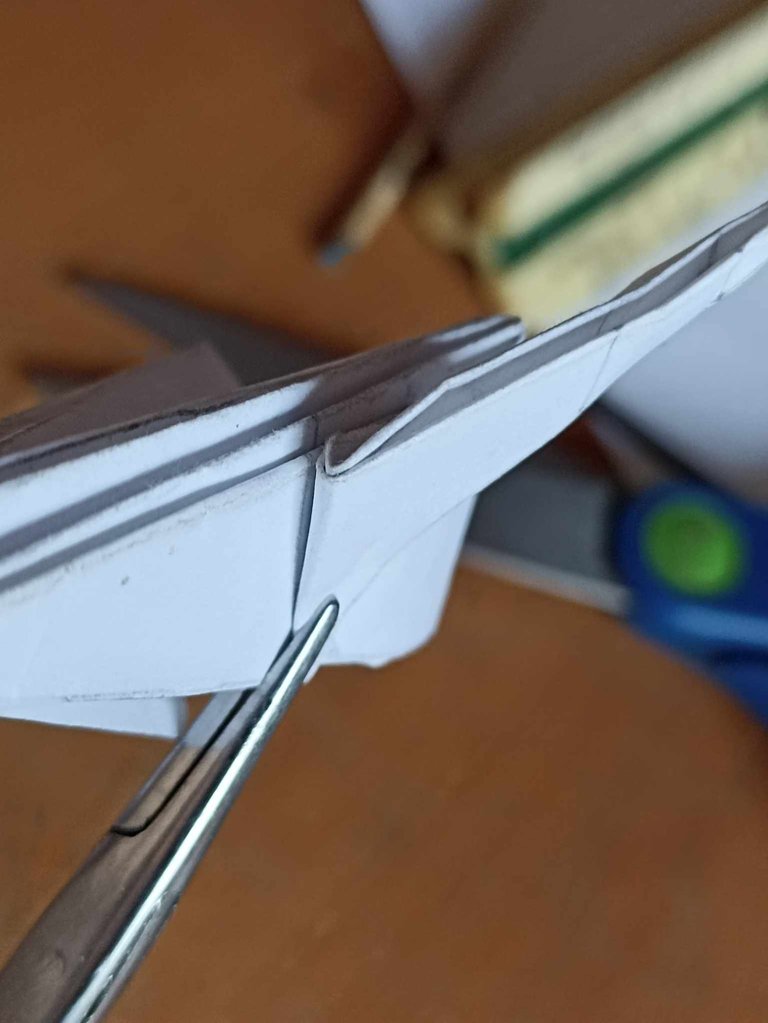 | 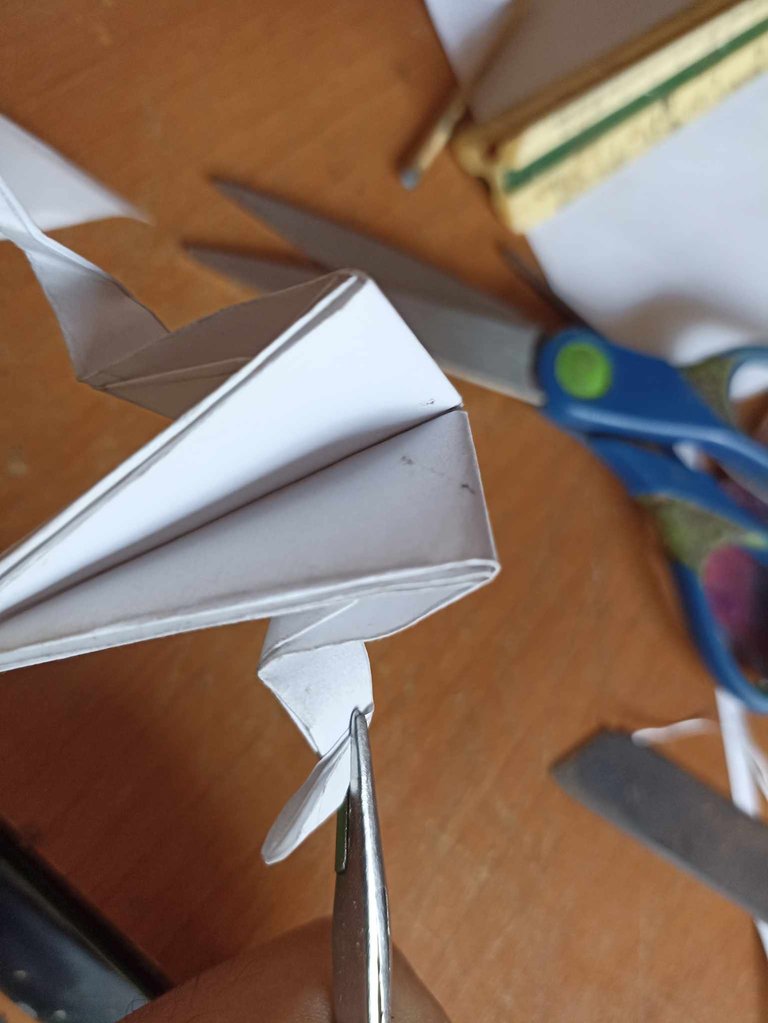 |  |
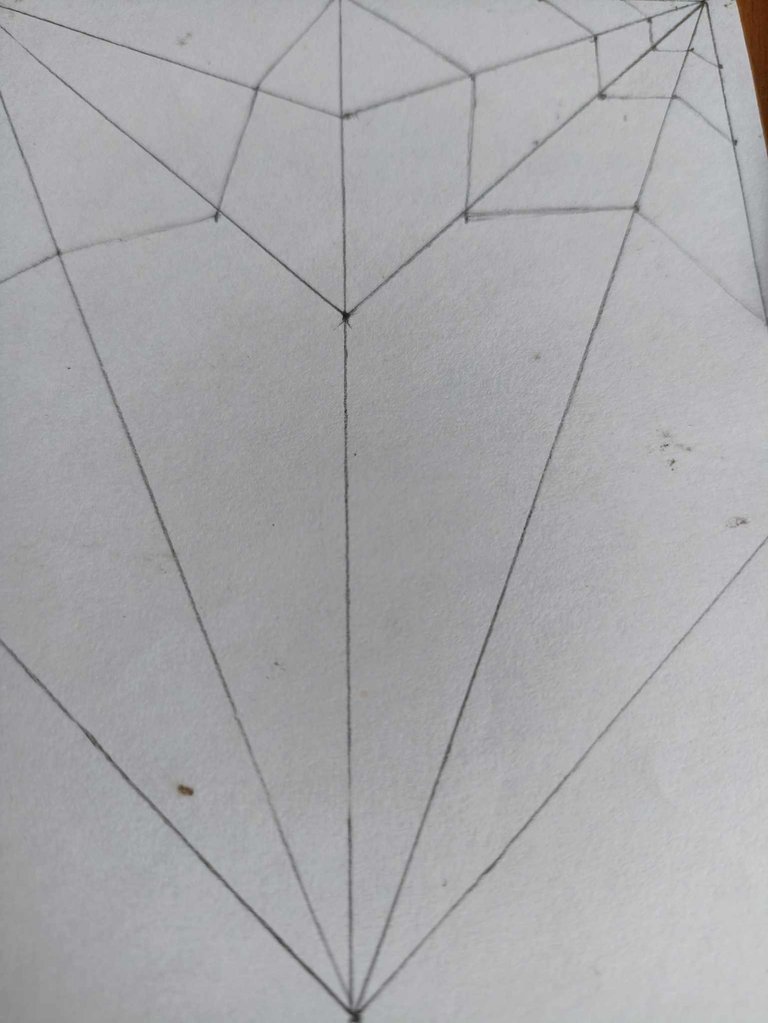
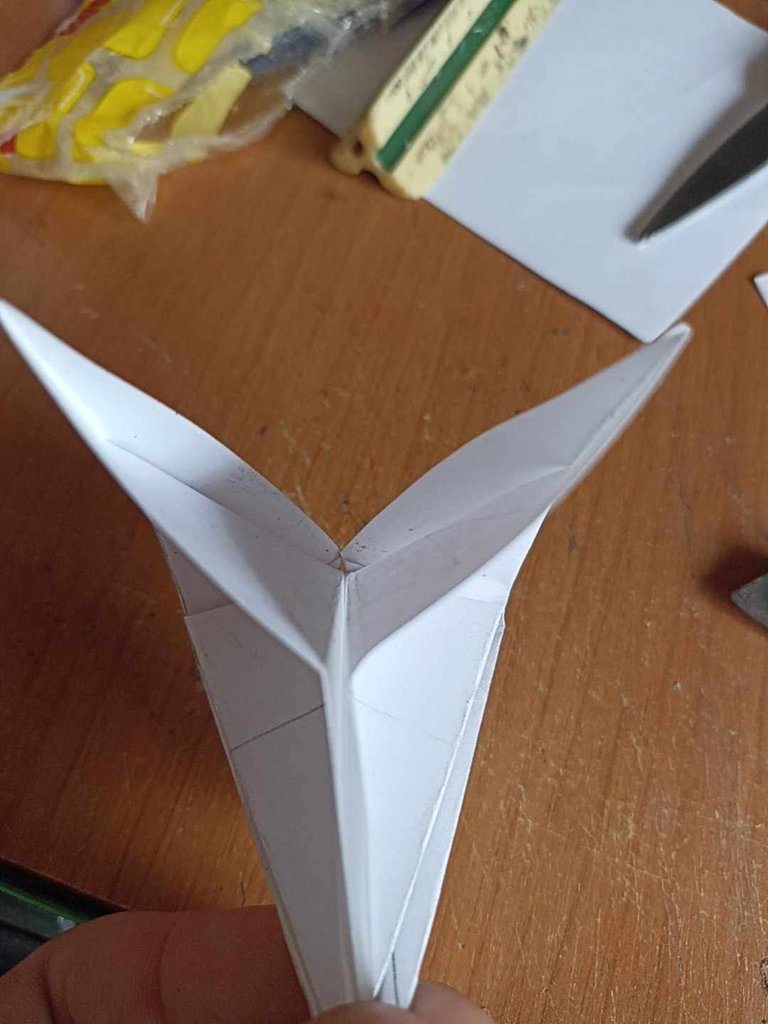
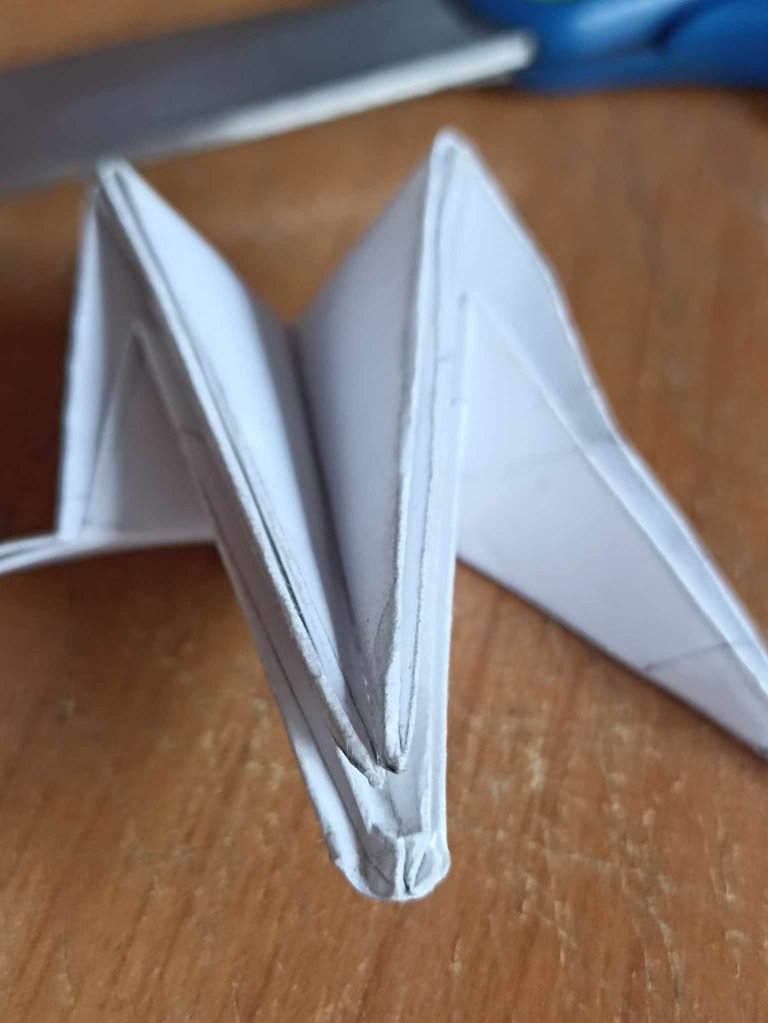
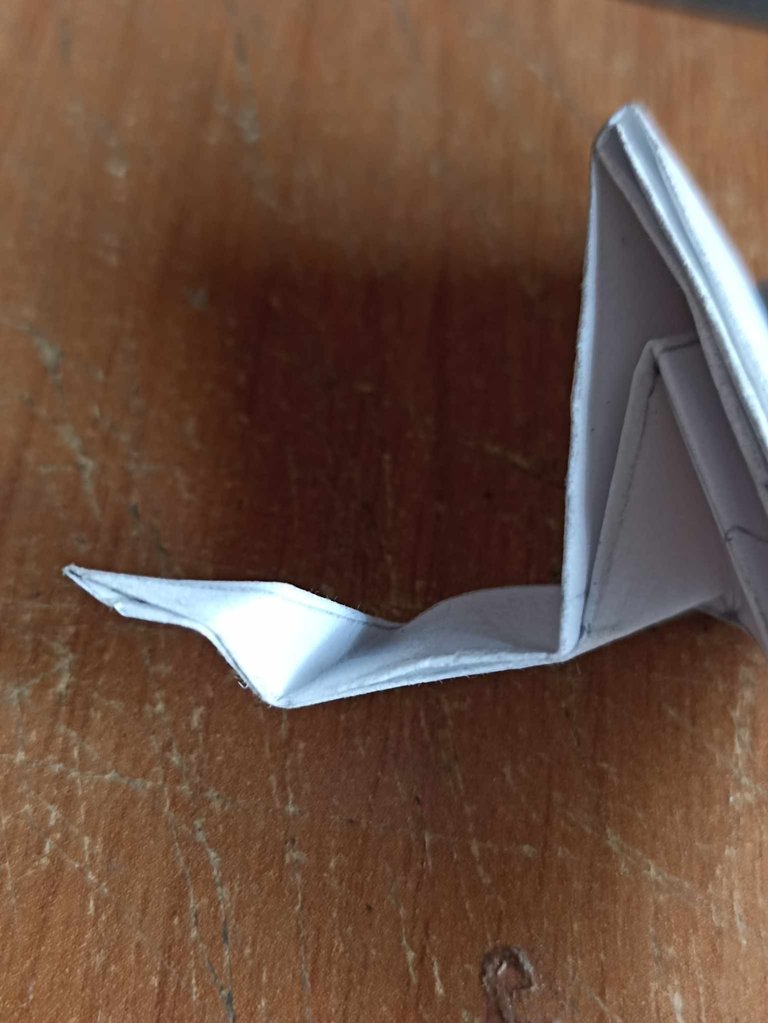
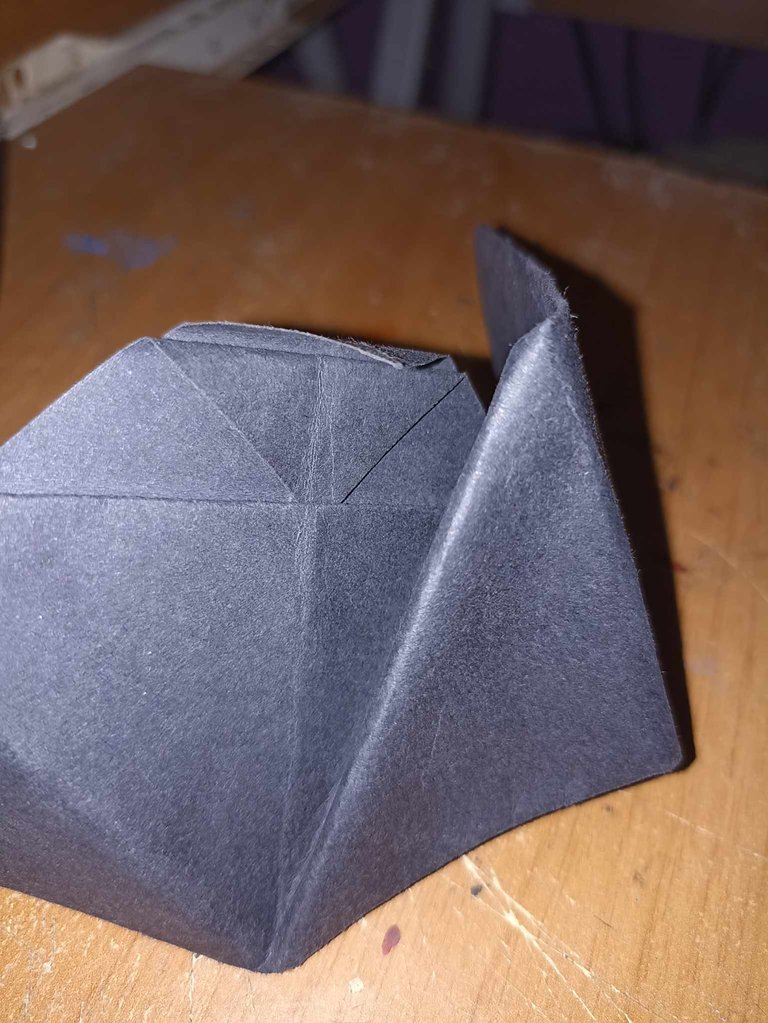
Then there are two wings to the sides, these wings are also marked by oblique lines on both sides. With a tweezer I folded them, I didn't use my hands but I used tweezers, with these tweezers I was able to fold the paper with more precision, without folding it badly and breaking it, it was a very useful tool. After bending the horns, in the center of the skull I open some tabs so it can have a final shape.
Luego queda hacia los lados dos alas, estas alas también estan marcadas por lineas oblicuas por ambas caras. Con una pinza voy doblandolas, no usé las manos soino que usé unas pinzas, con estas pinzas pude doblar el papel con mas precisión, sin doblarlo mal y romperlo, fue una herramienta muy útil. Luego de doblar los cuernos, en el centro del cráneo abro algunas pestañas para que pueda tener una forma final.
 |  |  |
|---|---|---|
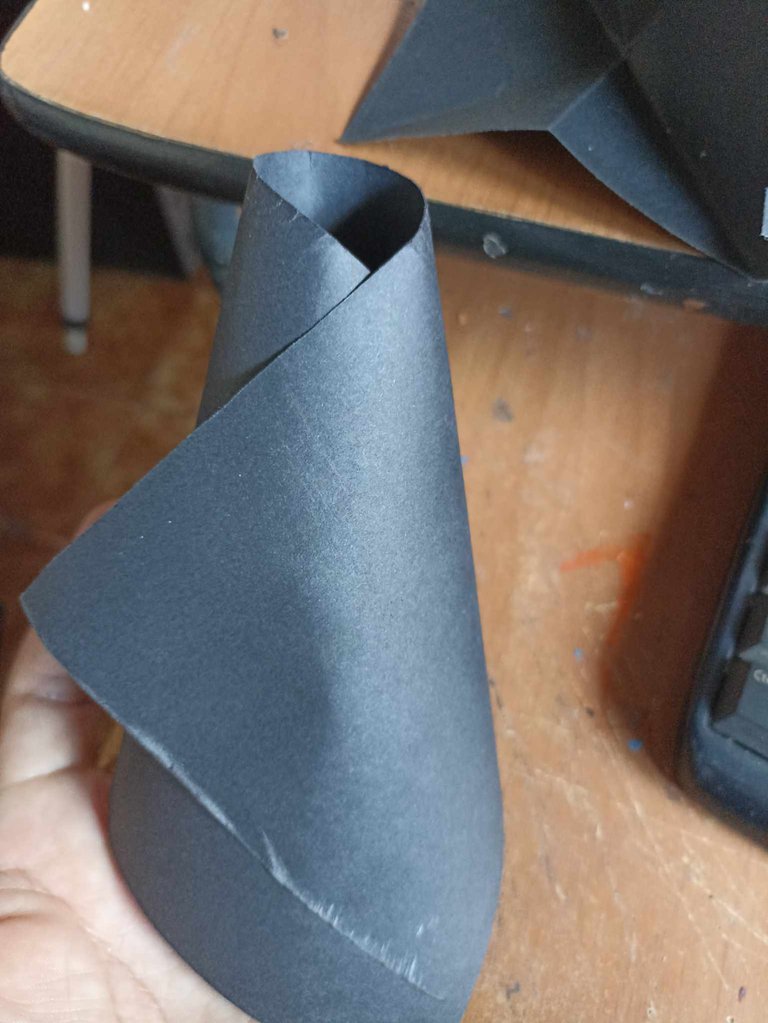 | 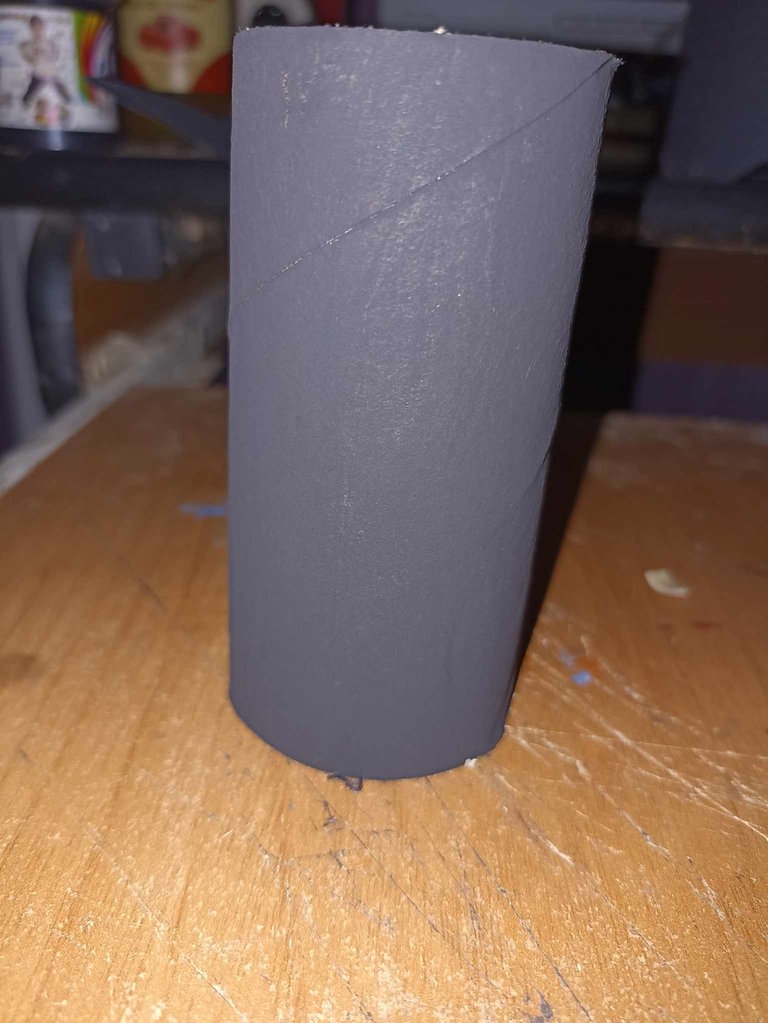 |  |
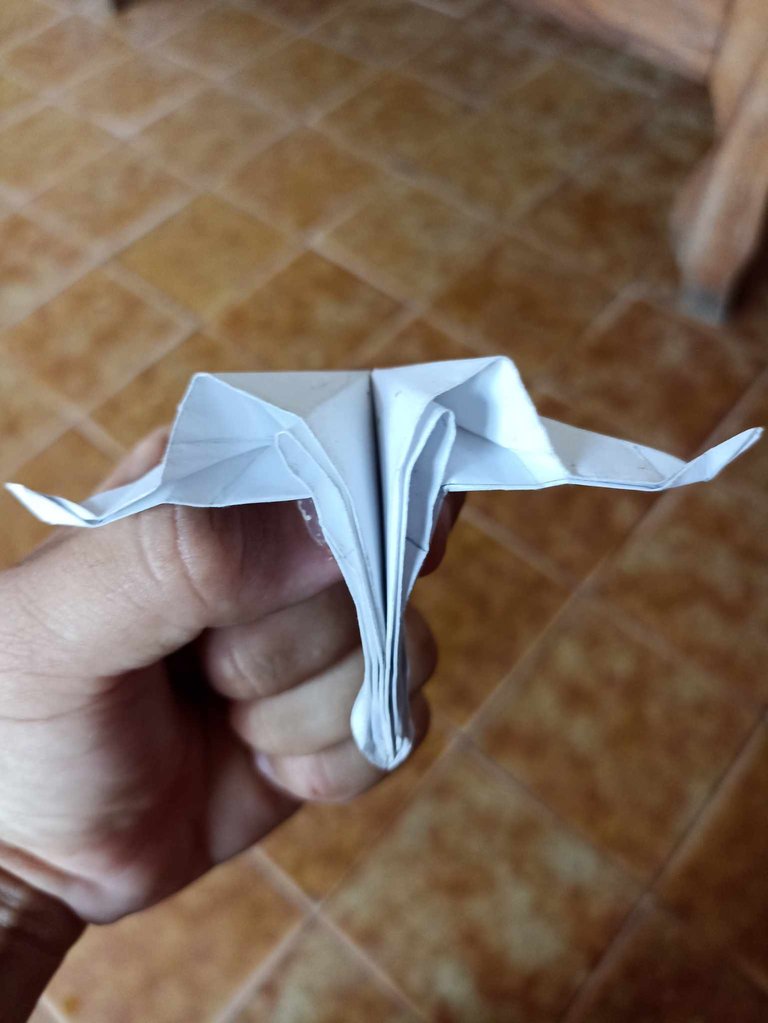
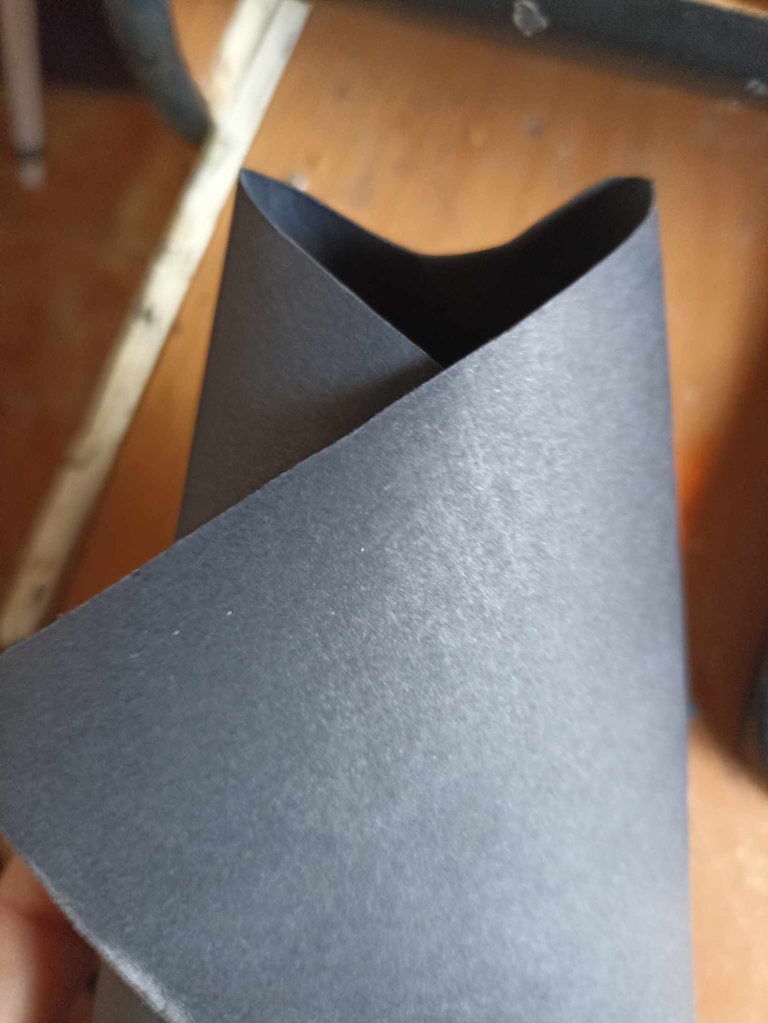
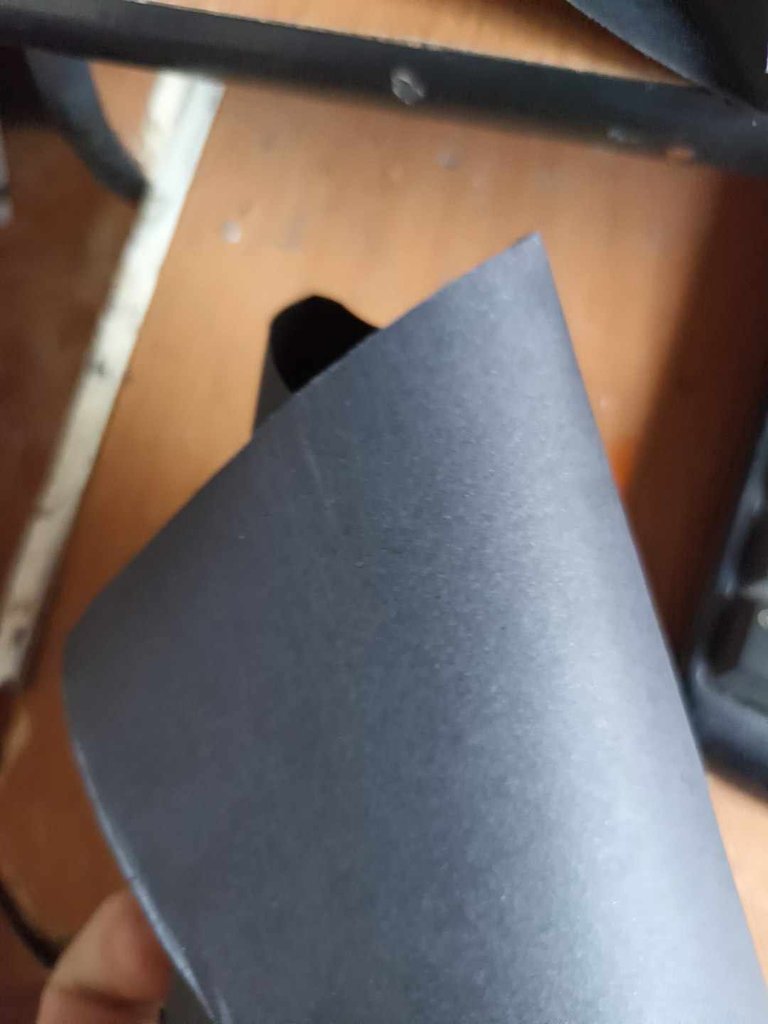
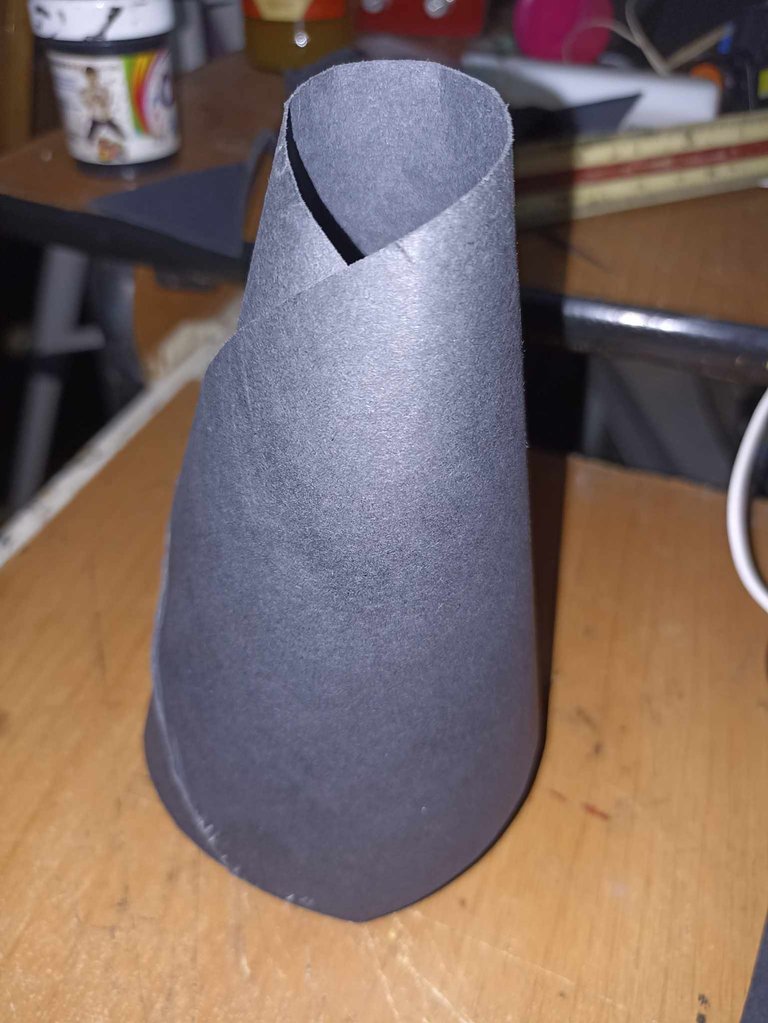
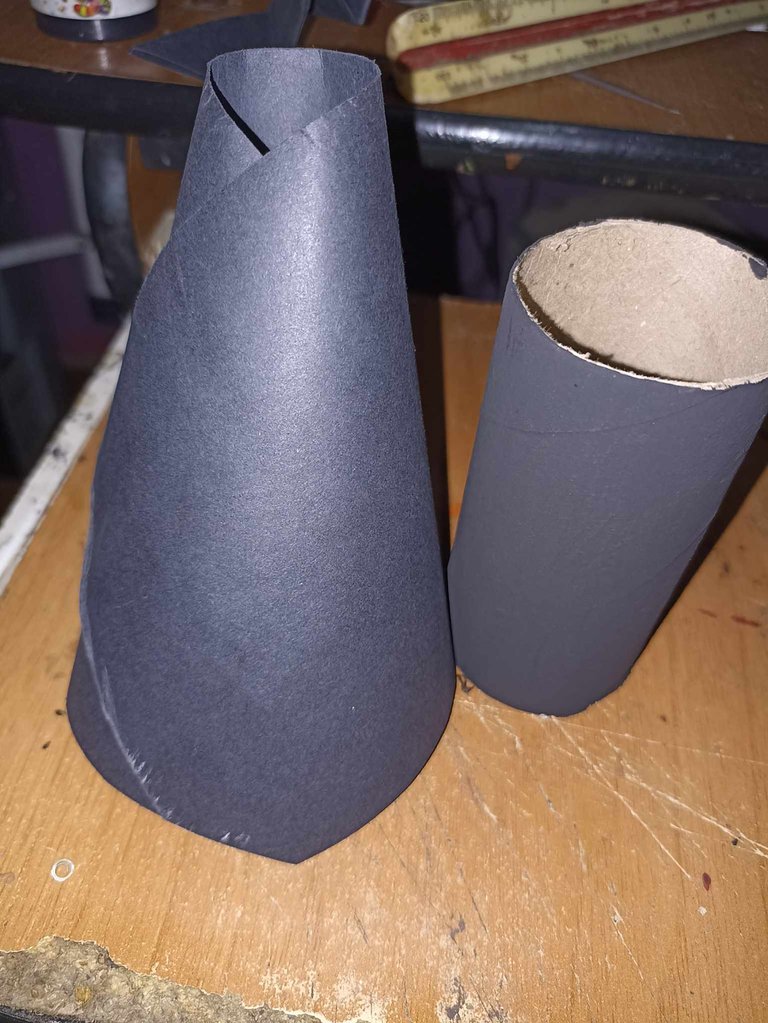
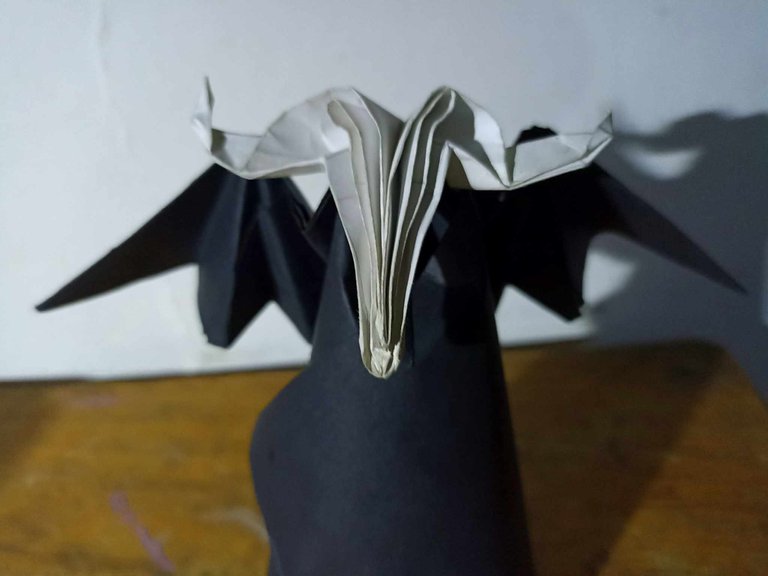
When I made the skull I began to make the tunic, I made it very similar to that of death. I cut a long strip of black paper which I folded in a spiral shape, I wanted it to be with one of its ends raised, as if I were holding my cape with my hands. Then I put the skull to see how it looked and it looked very good, I also made a paper base to put inside the tunic so it could stand up.
Al hacer el cráneo comencé a hacer la túnica, la hice muy parecida a la de la muerte. Corte una larga tira de papel de color negro el cual lo doble el forma de espiral, quería que quedara con una de sus puntas levantadas, como si estuviera sosteniendo su capa con las manos. Luego puse el cráneo para ver como quedaba y lucía muy bien, también hice una base de papel para meter dentro de la túnica y así pudiera estar en pie.
 |  |  |
|---|---|---|
 | 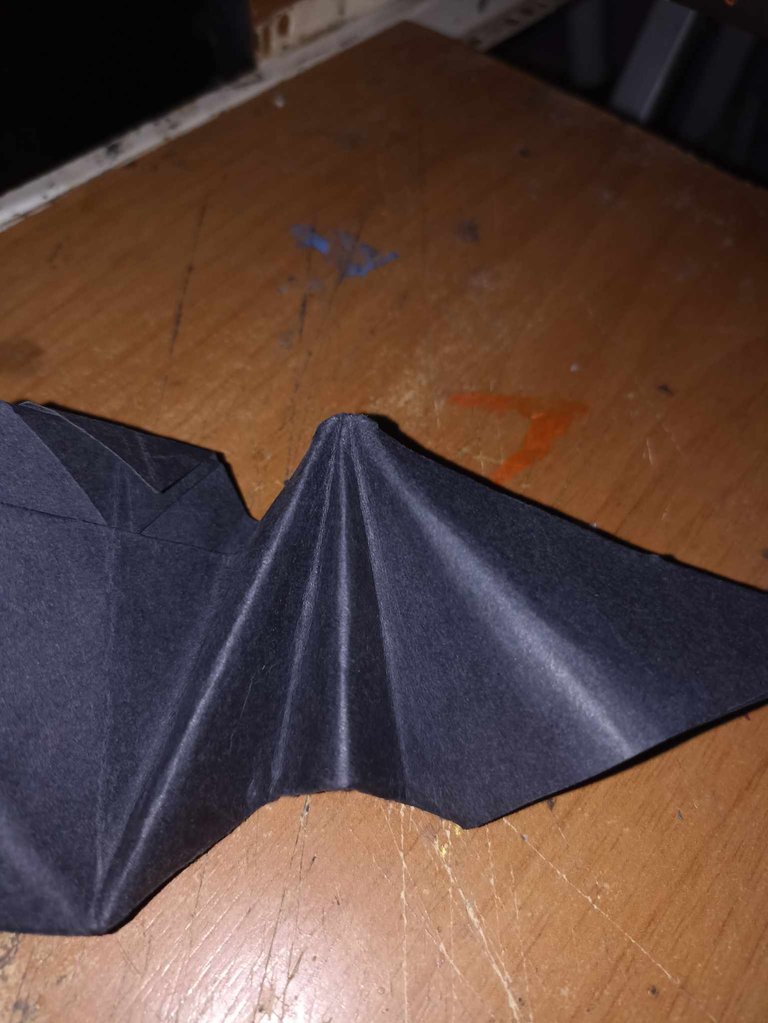 | 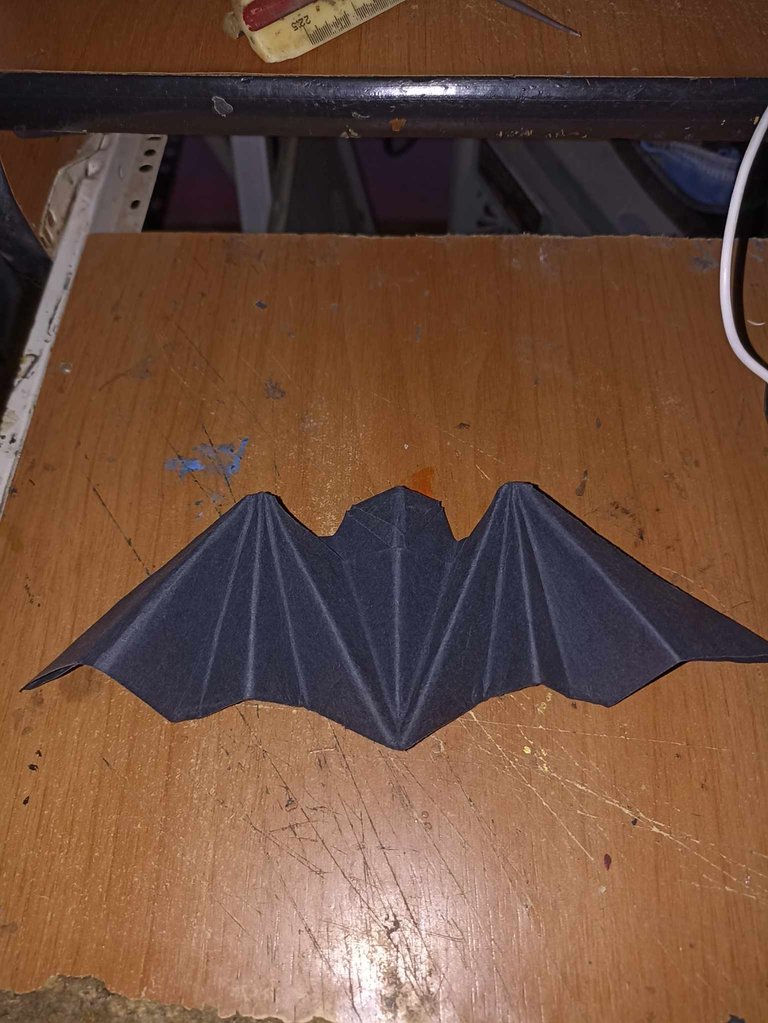 |
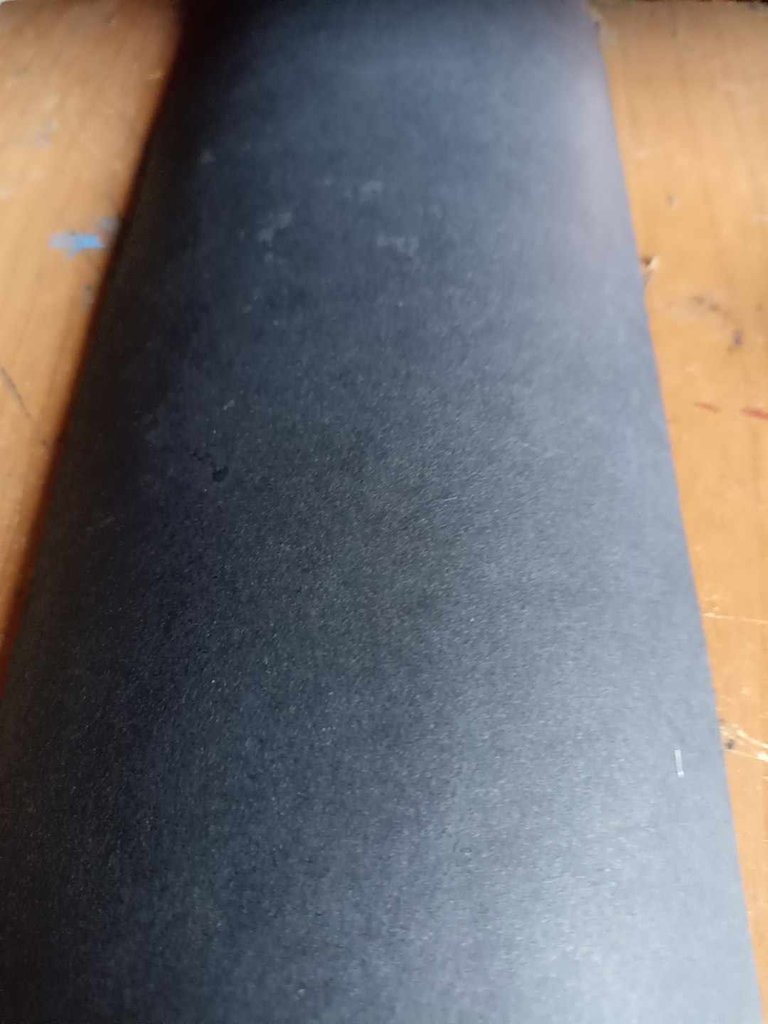
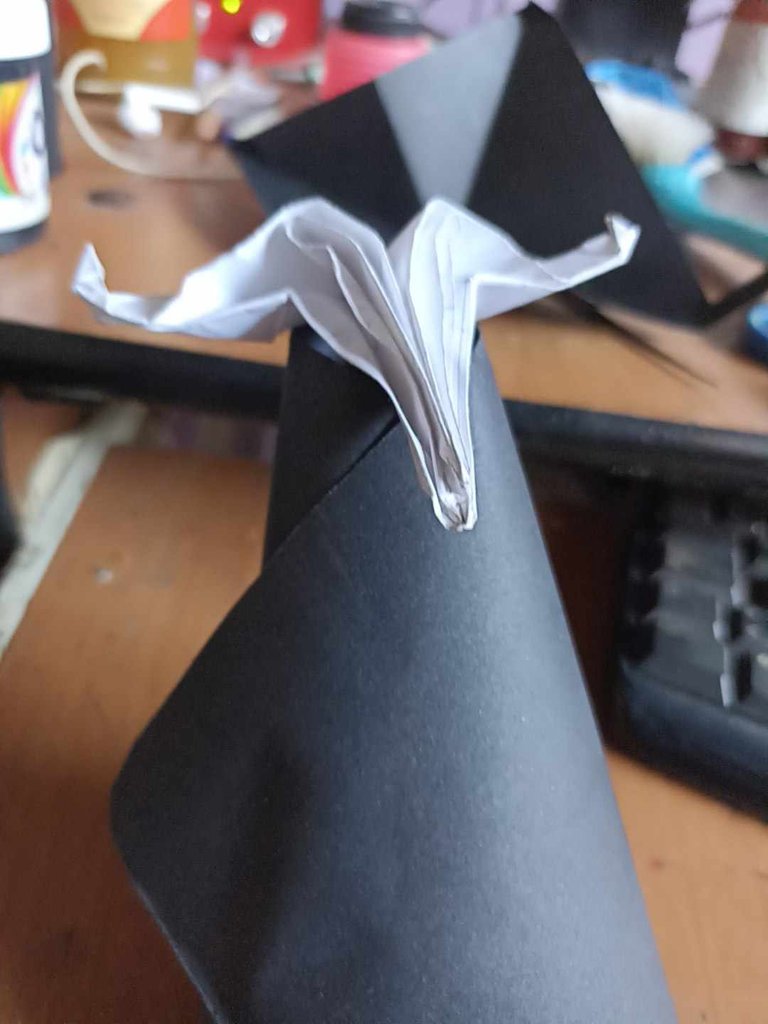
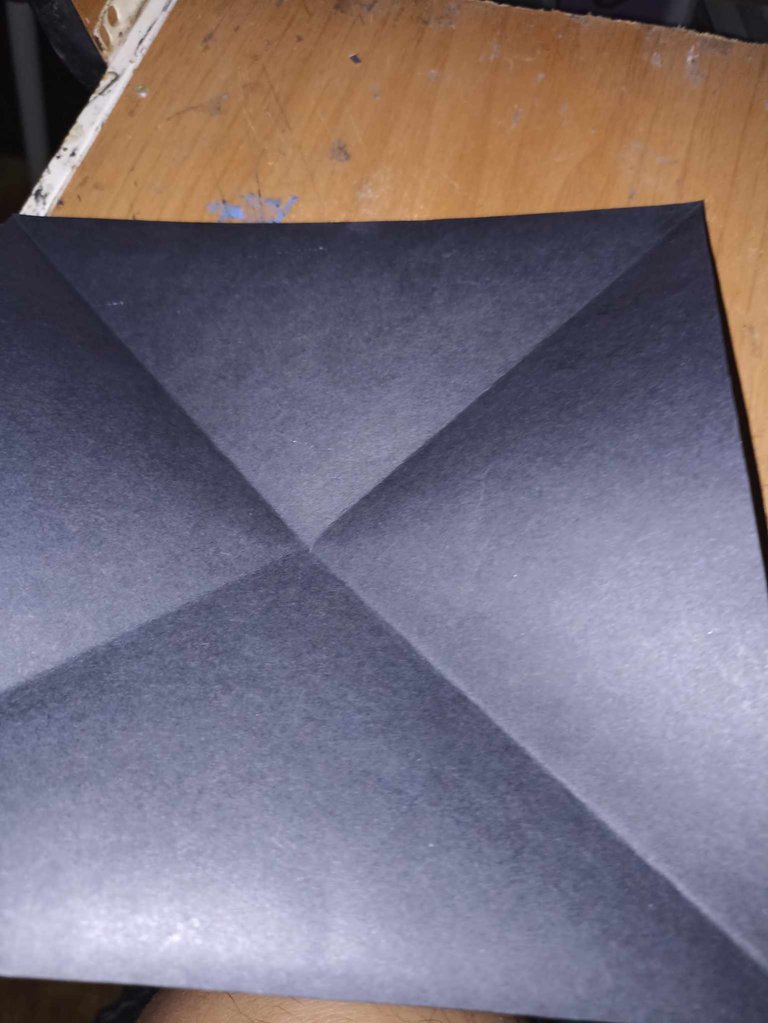
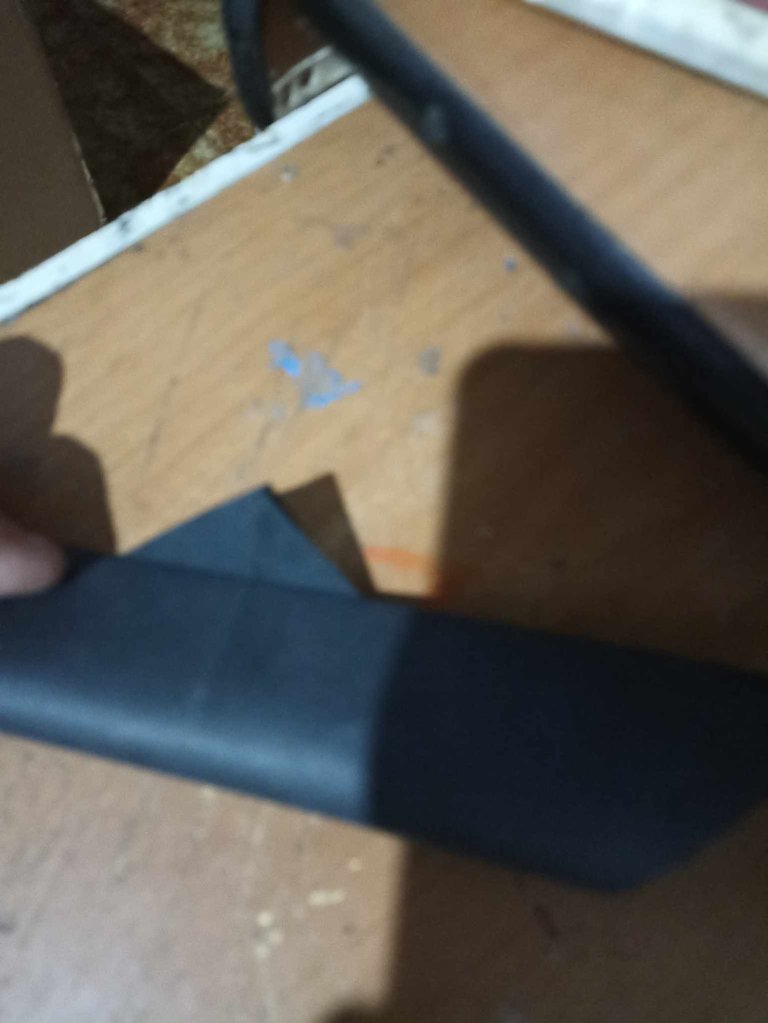
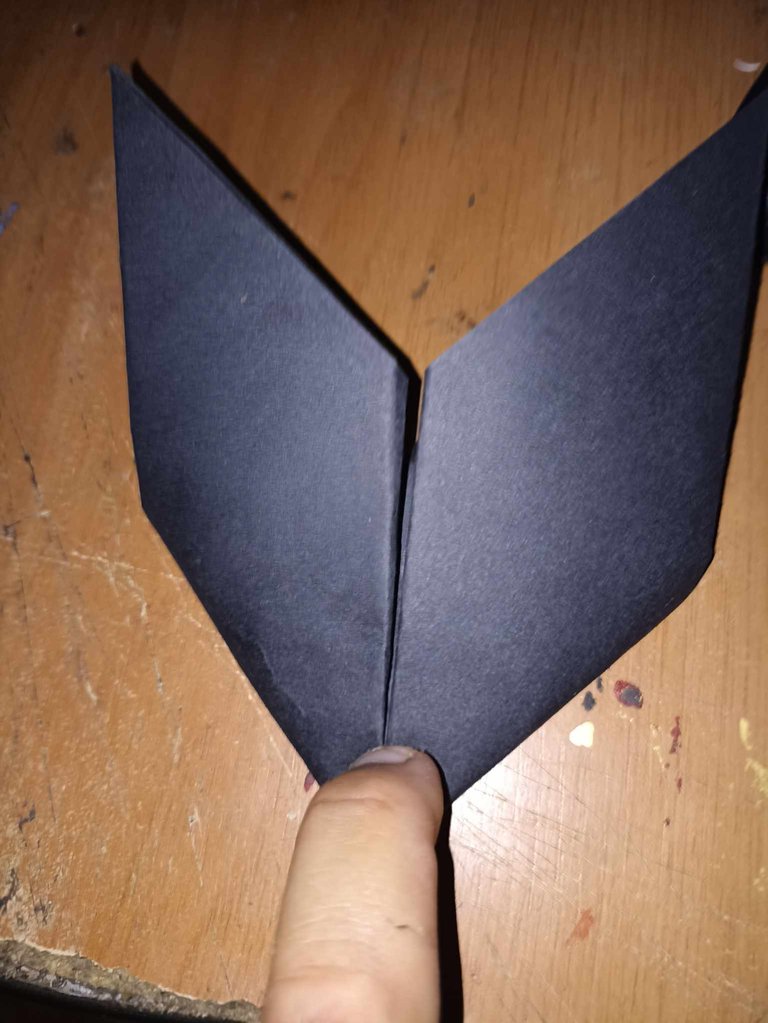
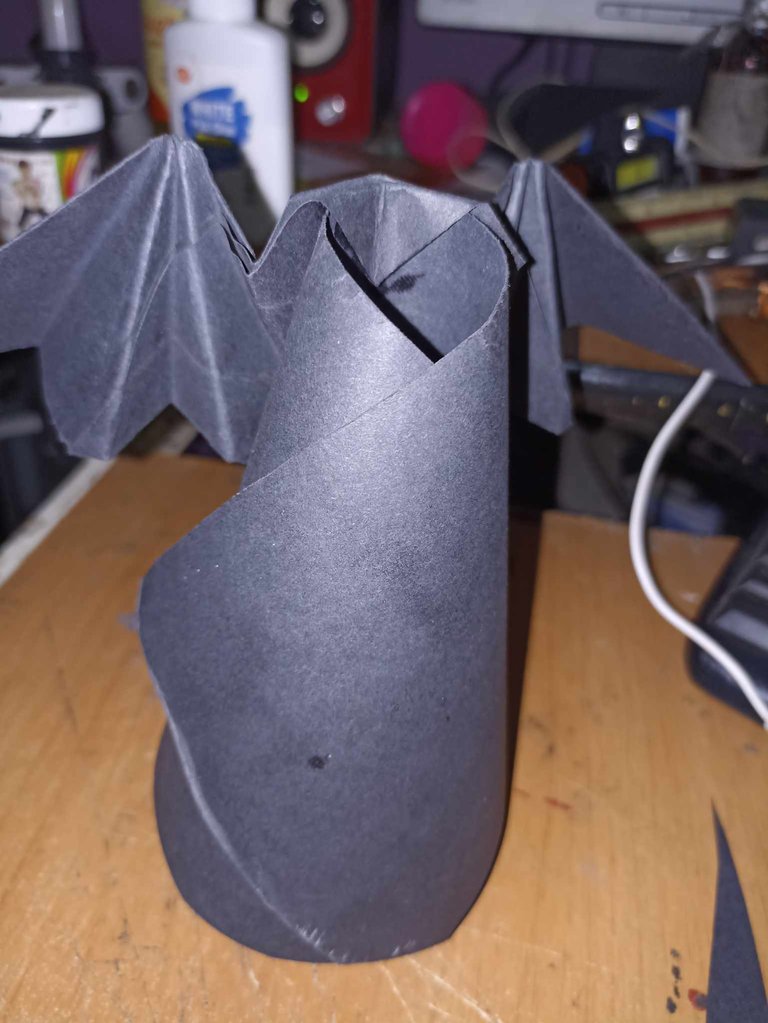
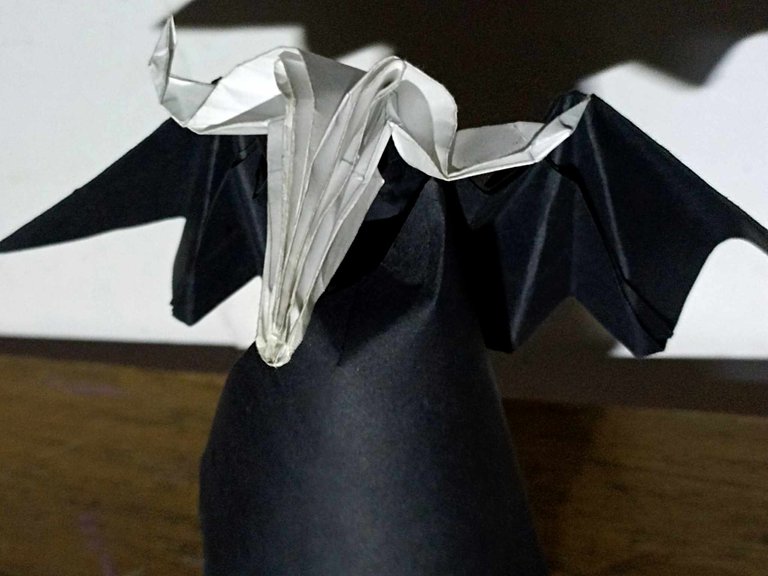
As an additional detail that does not have the original design, they were some bat wings, I made them with a sheet of black paper that measures 15 centimeters on all sides, then I folded it in the shape of an X and between each of the tips I made the shape of a paper boat. I folded each end into a fan shape and that's how the bat wings turned out.
Como detalle adicional y que no tiene el diseño original fueron unas alas de murciélago, las hice con una hoja de papel negro que mide 15 centímetros por todos sus lados, luego lo doblé en forma de X y entre cada una de las puntas hice la forma de un barco de papel. Cada extremo lo doble en forma de abanico y así quedaron las alas de murciélago.
 |  | |
|---|---|---|
 | 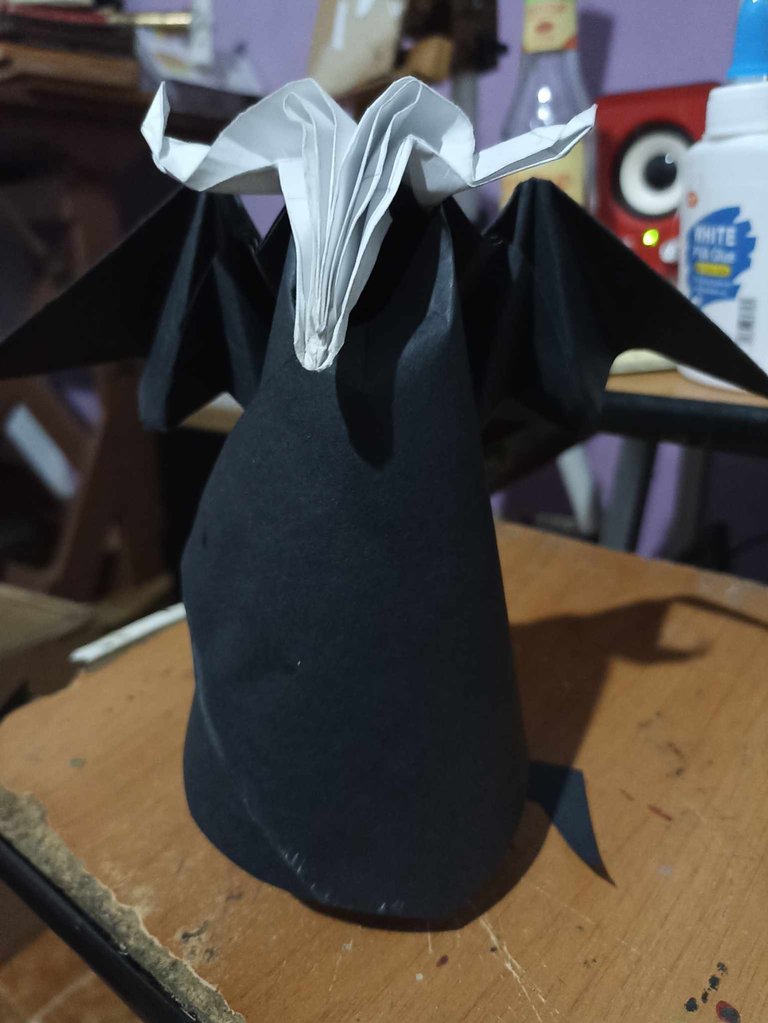 |
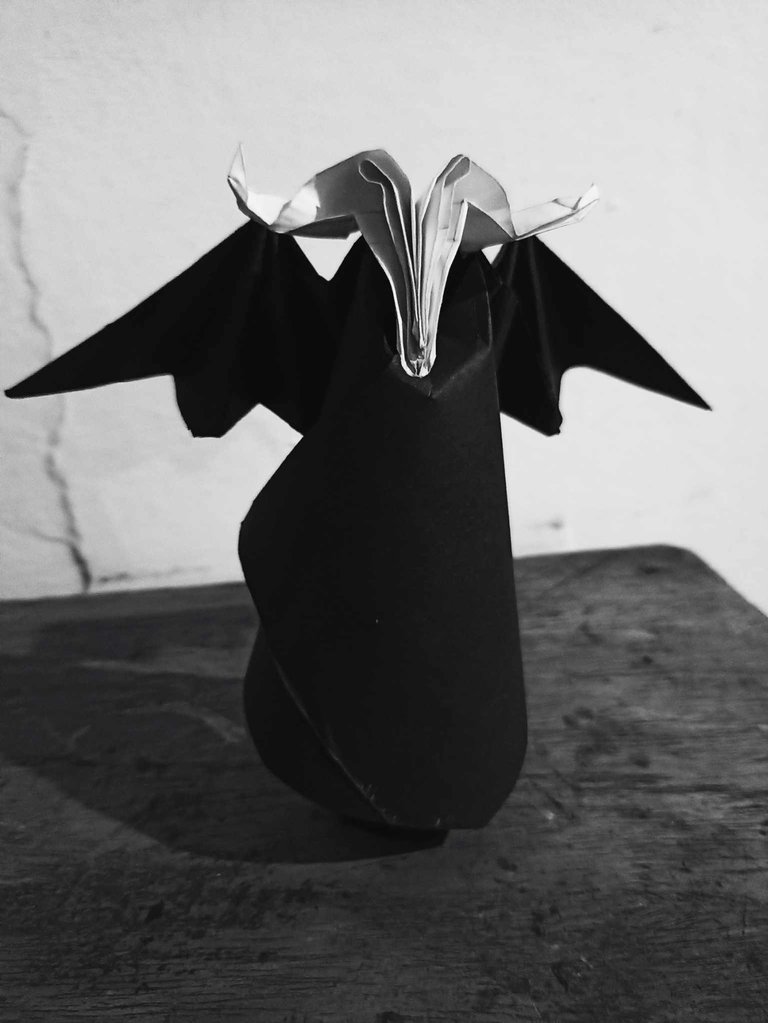
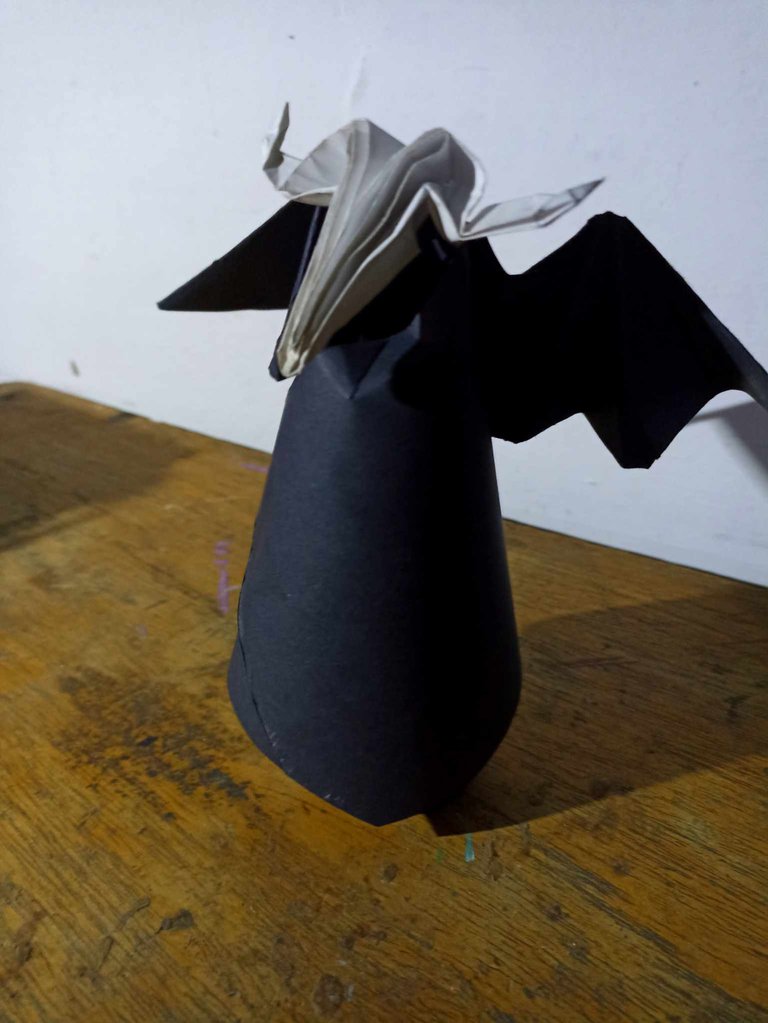
The last step was to fit each of the pieces together until completing the dinal figure of Djinn Muirat. First the tunic, inside it the cardboard circle, then the bat wings on the back and finally the big skull of everything. In this way it was finished.
El último paso fue encajar cada una de las piezas hasta completar la figura dinal de Djinn Muirat. En primer lugar la túnica, dentro de ella el círculo de cartón, después las alas de murciélago en la parte de la espalda y por último el gran cráneo de todo. De esta manera quedó finalizado.
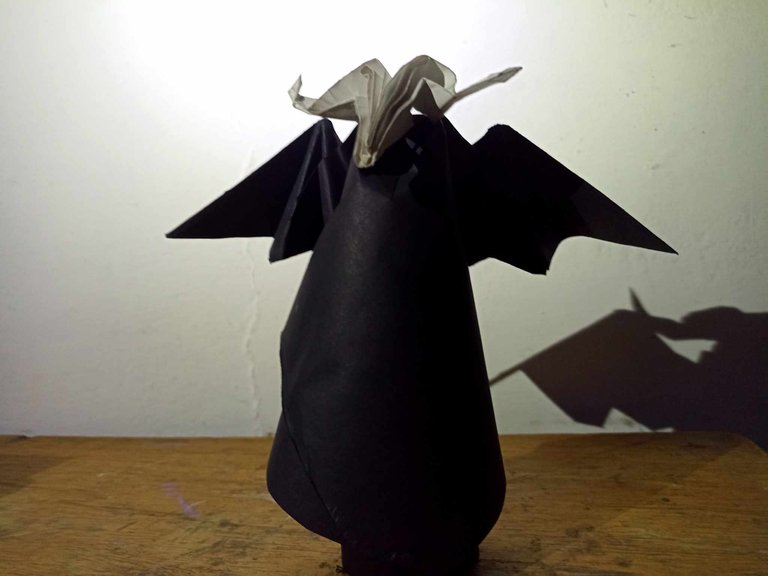
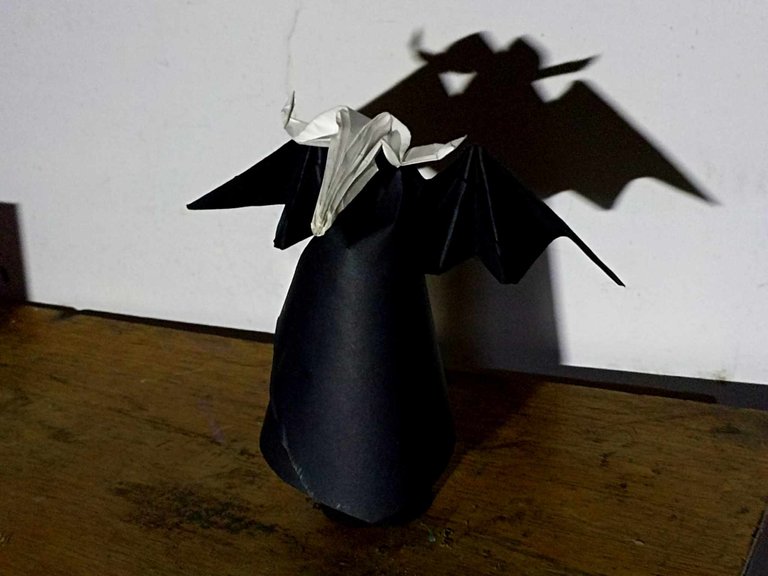
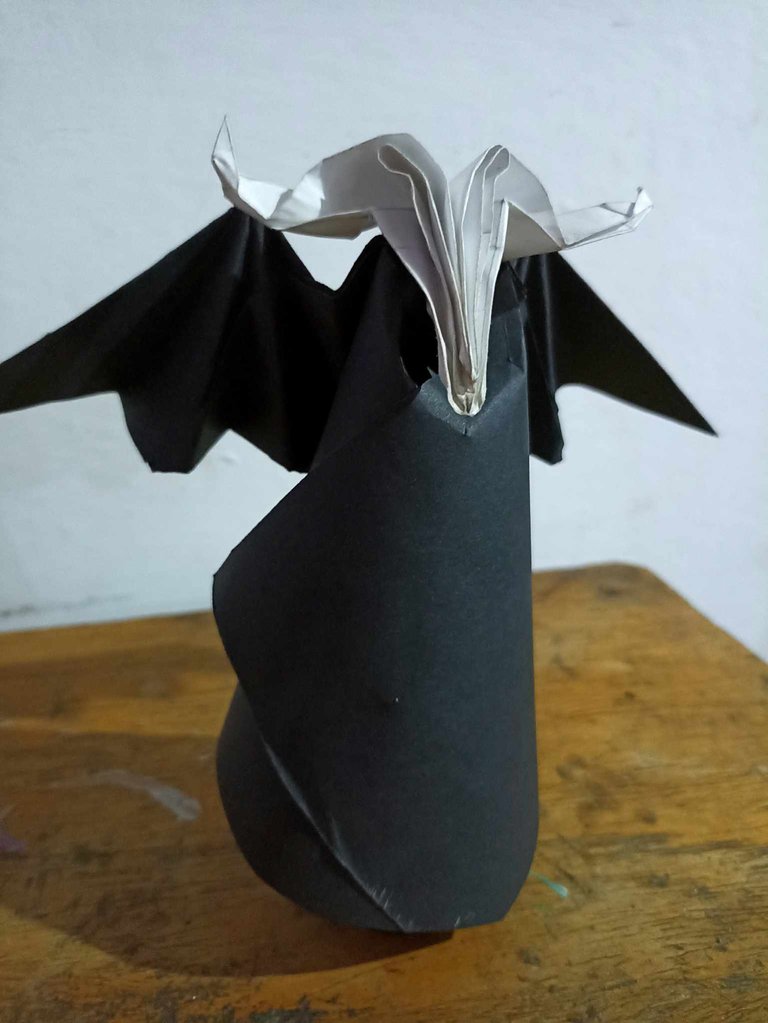
This is how it was finished, I think it looks like a tender angel that has come out of hell itself to celebrate Christmas, the best thing about making fan art is taking a design and then giving it that personal touch, there are many ways to do it and for this opportunity I chose the Japanese origami as a technique to make this sculpture of the Djinn Muirat card. I hope you liked it, don't forget to leave your opinion and comment on your opinions, they are important to me. I say goodbye until a new opportunity and I wish you all well and in good health!
Así quedó finalizada, creo que parece un tierno ángel que ha salido del mismo infierno a celebrar la navidad, lo mejor de hacer un fan art es tomar un diseño y luego darle ese toque personal, hay muchas formas de hacerlo y para esta oportunidad elegí el origami japonés como técnica para hacer esta escultura de la carta Djinn Muirat. Espero que les haya gustado, no olviden dejar su opinión y comentar sus apreciaciones, para mi son importante. Me despido hasta una nueva oportunidad y les deseo que se encuentren muy bien y con mucha salud!
Genial amigoooo. Ohh esto me encanto...
!DIY
algo diferente aunque dificil ajjaja
You can query your personal balance by
!DIYSTATSnice :D
thank you!
Te quedo precioso, el efecto que lograste con el papel fue maravilloso, la figura tiene movimiento. Felicidades. Saludos
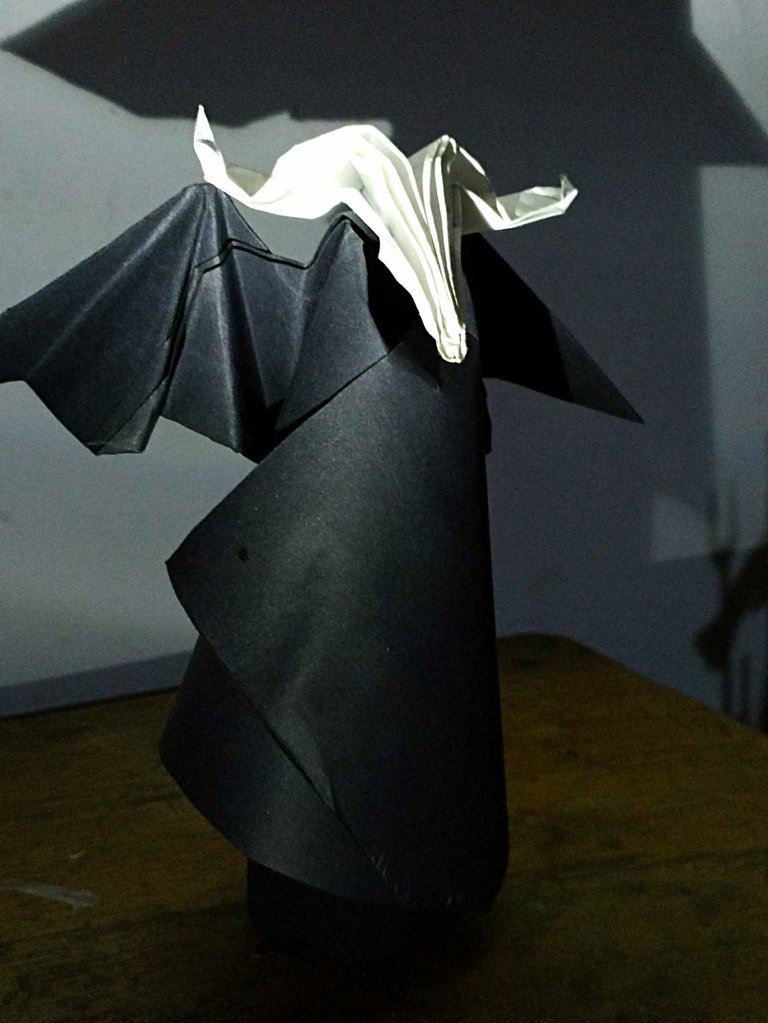
Con una pequeña linterna le di ese efecto de luz para tomarle la foto y que e viera aterrador jeje
So interesting, the last pictures are like being at a theater performance!
With a small flashlight I made the light reflections like this in the distance. I had not noticed this, the truth is that it looks like a theater stage
Please upvote this comment to support upvote-suggestor @bhattg
Join Our Community Discord: https://discord.gg/5FZZqrz6wj
Guaooo que dedicación, genial te quedó, maravilloso
Muchas gracias, me alegra que te haya gustado!
Amigo, su versión del personaje ha sido muy ingeniosa y luce bastante bien.