Splinterlands Art Contest: Lily Shieldpaw Number 2
Greetings fellow splinterlands and art lovers. Quite some time ago I shared with the community a rather interesting figurine of the Lily Shieldpaw card.
You can see that post by following this link:
https://peakd.com/hive-130560/@gaboamc2393/ybtayxav
But if you look closely at the card, in addition to the beautiful red panda, there are also two more beasts accompanying the main character. There are three little beasts there on the card, of which I had made one so far, but with the addition of this little panda that I show you in today's post, there will now be three.
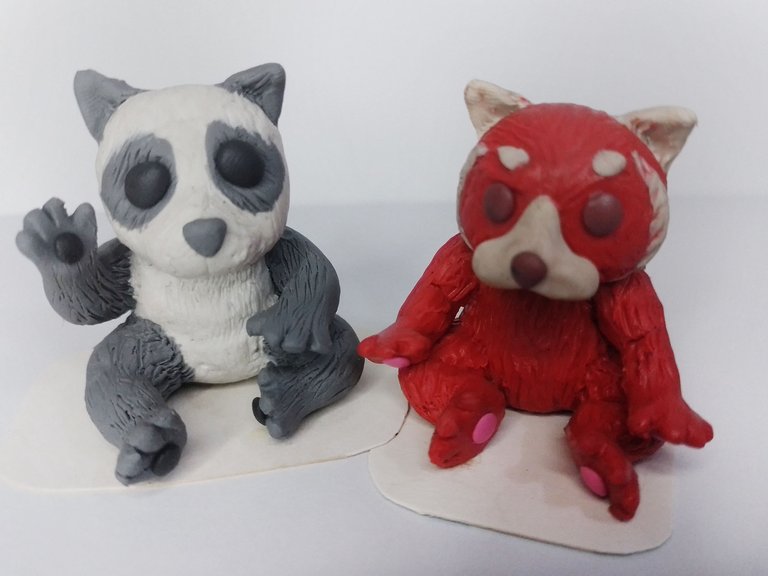
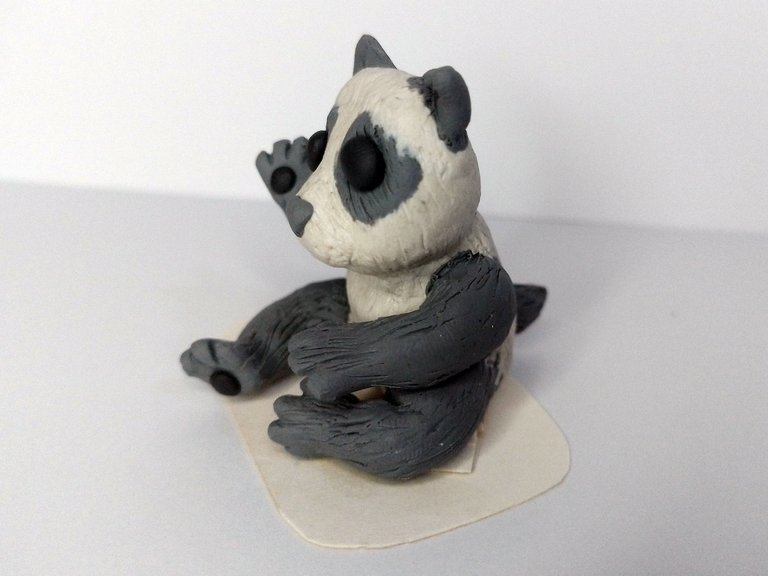
This sculpture of the normal panda now accompanies the little red panda, there are already two, but I'm still missing one which I will show later, but for now look how cute these two look:
Español
Saludos amigos amantes del arte y de splinterlands. Hace bastante tiempo compartí con la comunidad una figurita bastante interesante de la carta de Lily Shieldpaw.
Pueden ver esa publicación siguiendo este enlace:
https://peakd.com/hive-130560/@gaboamc2393/ybtayxav
Pero si se fijan bien en la carta, además del hermoso panda rojo, también hay dos bestias más que acompañan al personaje principal. Son tres pequeñas bestias que hay allí en la carta, de las cuales hasta ahora había hecho una, pero con la incorporación de este pequeño panda que les muestro en la publicación de hoy, ya serán tres.
Esta escultura del panda normal acompaña ahora al pequeño panda rojo, ya son dos, pero me sigue faltando una la cual mostraré más adelante, pero por ahora miren lo lindos que se ven estos dos:
You can see the letter I was inspired by below:
Pueden ver la carta en la que me inspiré a continuación:
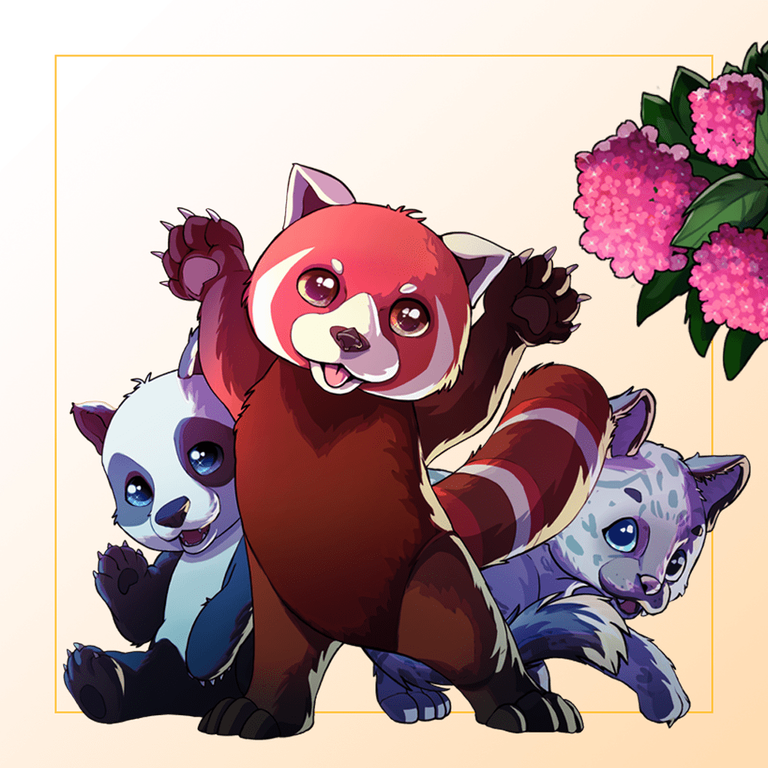
Source / Fuente:
https://next.splinterlands.com/card-detail/554/regular/7?tab=lore
These are two very cute representations of these two game card characters.
Step by step
It is customary for me to show you the step by step of my works. In the case of this little panda is a little simpler to do, for all those who want to have a little panda like this in their homes.
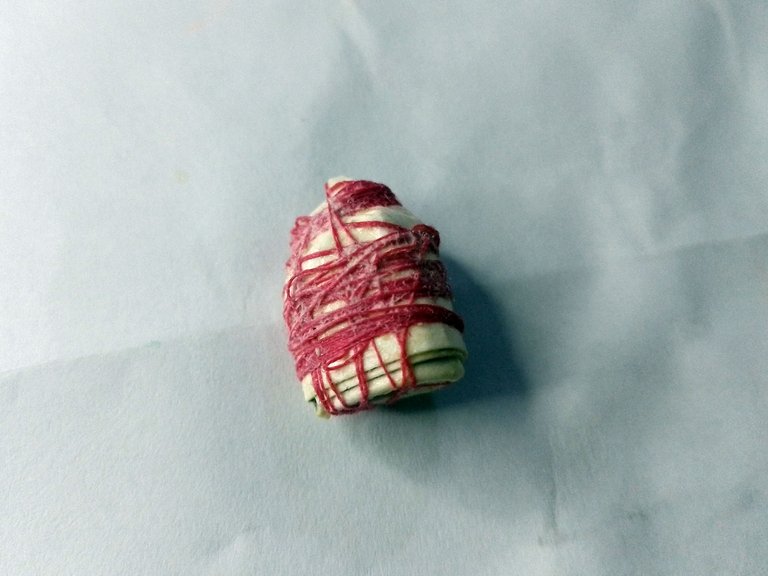
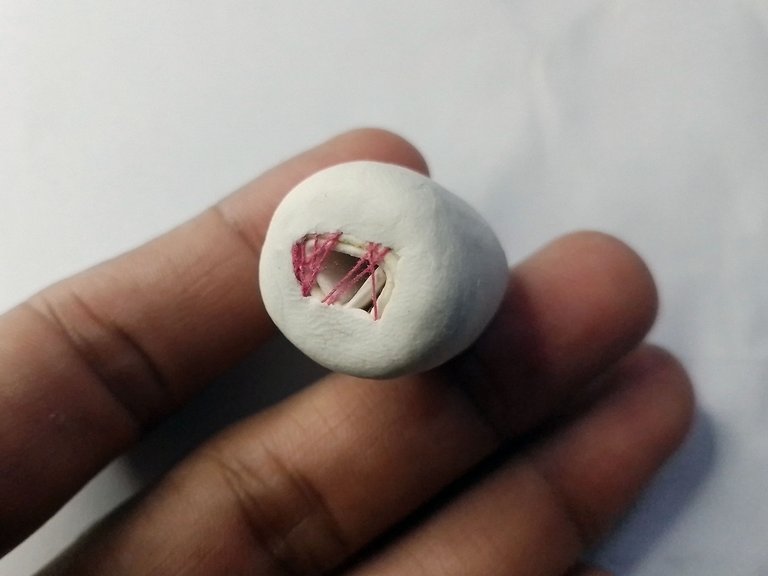
The first thing I did was to roll up a bunch of paper or cardboard, to serve as stuffing for the fat body of the panda. I used yarn to wrap it around the paper, so that it would keep its shape. Then I covered it with white plasticine, leaving the lower area uncovered.
Son dos representaciones muy lindas de estos dos personajes de la carta del juego.
Paso a paso
Es costumbre para mi enseñarles el paso a paso de mis obras. En el caso de este pequeño panda es un poco más sencillo de hacer, para todos aquellos que quieran tener un pequeño panda como este en sus casas.
Lo primero que hice fue enrollar un montón de papel o cartulina, para que sirva de relleno para el cuerpo gordo del panda. Usé hilo para enrollarlo alrededor del papel, para que este mantuviese la forma. Luego de esto lo cubrí con plastilina blanca, dejando descubierto la zona inferior.
 |  |
|---|
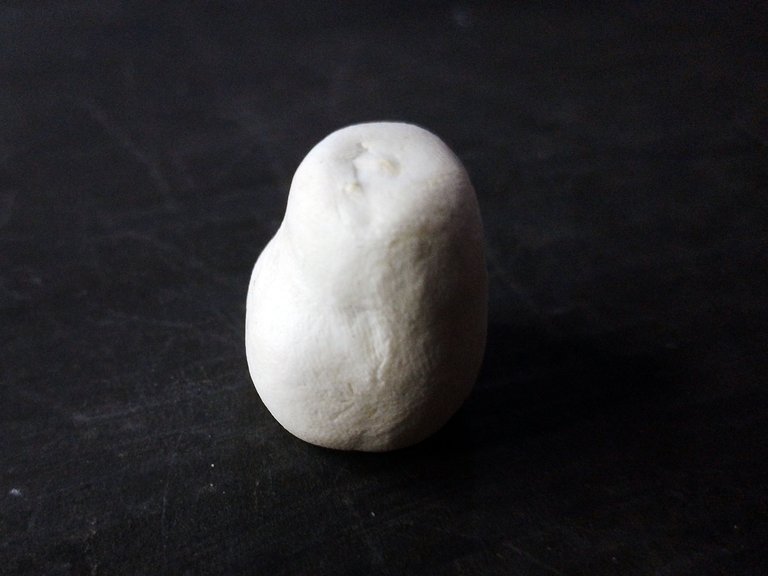
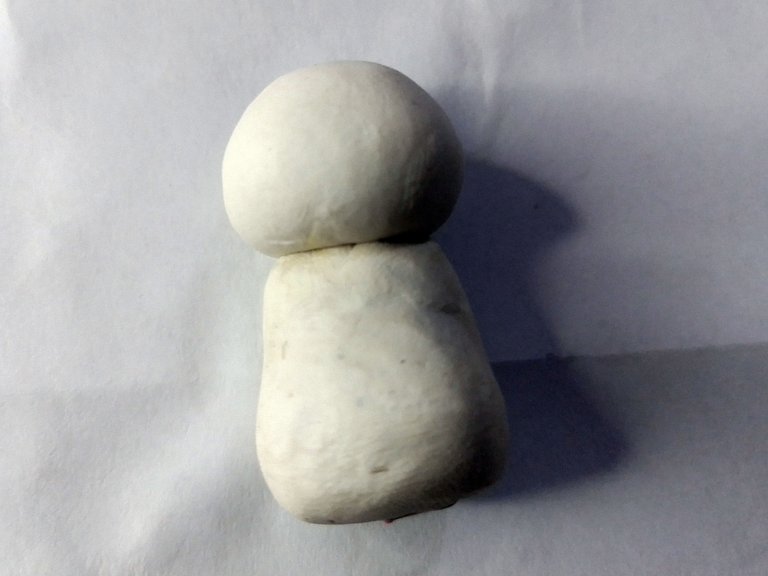
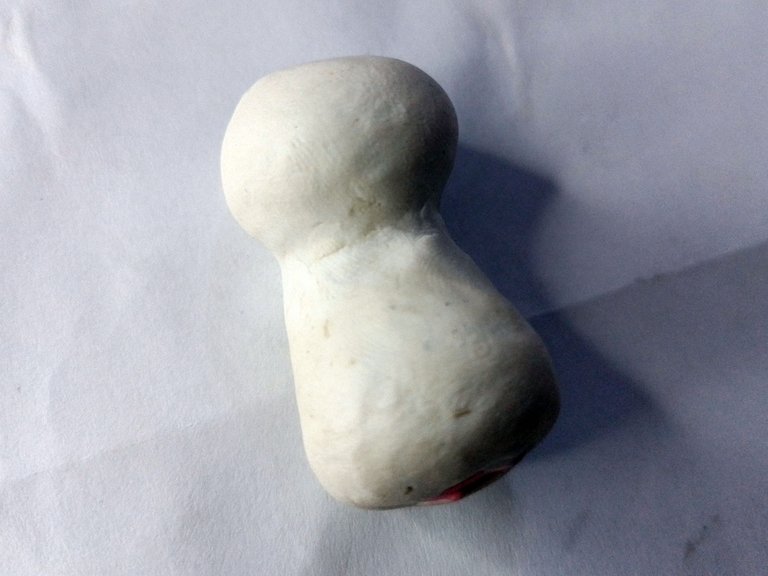
Once the body area was covered with plasticine, I gave it a shape similar to a pear, to give the panda a little belly, as you can see in the image below, where it is a little wider at the bottom than at the top.
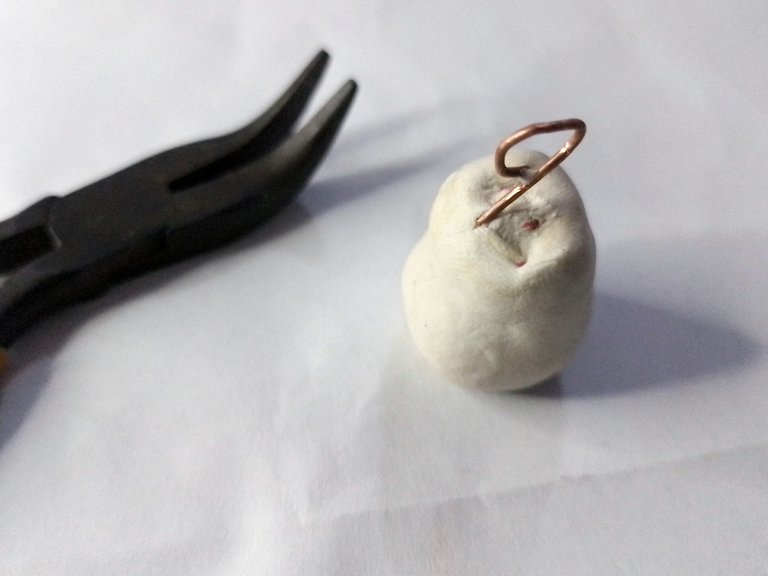
Once molded, I placed a small hook that will serve to support the head.
Una vez cubierta con plastilina el área del cuerpo, le di una forma parecida a una pera, para darle una pancita al panda, tal como pueden verlo en la imagen de abajo, en donde se aprecia un poco mas ancho en la parte inferior que en la superior.
Una vez moldeado, le coloqué un pequeño gancho que servirá para soporte de la cabeza.
 |  |
|---|
For the head I used a complete white plasticine sphere. I didn't make any support for it except for the hook I mentioned earlier, which will serve to hold it in place.
I simply placed it there and smoothed the joints to create a flat surface.
Para la cabeza usé una esfera de plastilina blanca completa. No le hice ningún soporte salvo el gancho que les mencioné anteriormente, que servirá para mantenerla en su lugar.
Esta simplemente la coloqué allí y alisé las uniones para crear una superficie plana.
 |  |
|---|
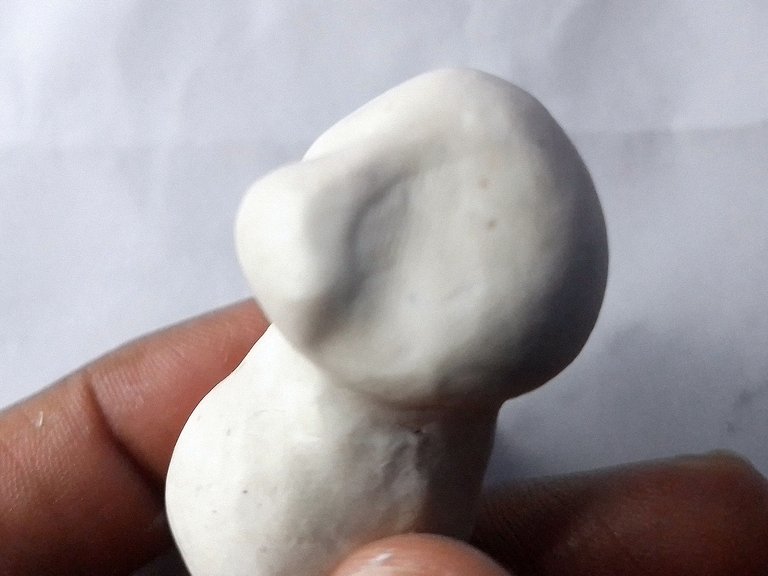
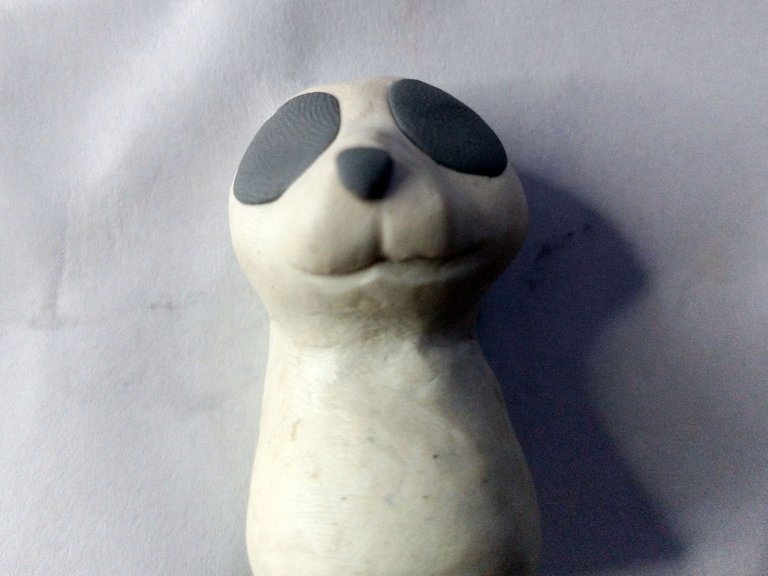
For the front of the head, I used my thumb and forefinger to create the eye sockets. I also stretched the plasticine a little to make the animal's snout.
Para la parte frontal de la cabeza, usé el dedo pulgar y el dedo índice para crear las cuencas de los ojos. De igual manera estiré un poco la plastilina para hacer el hocico del animal.
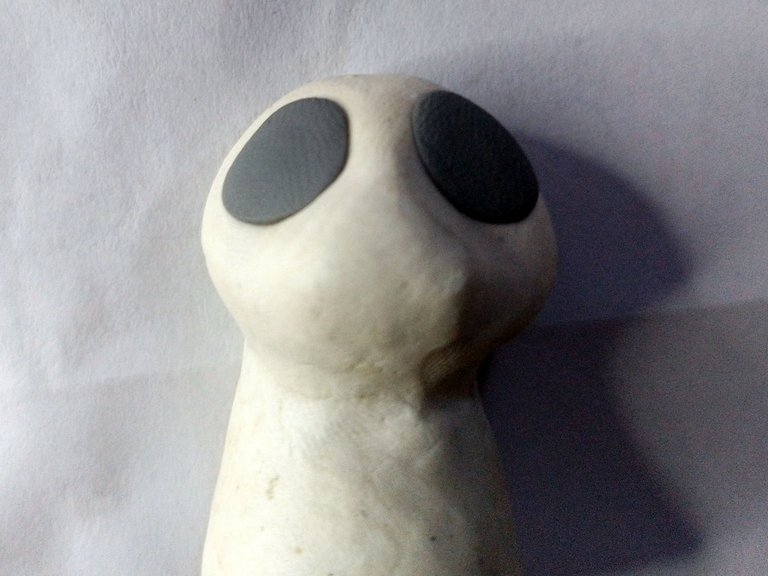
Later I placed the eye spots and other details such as the nose and the shape of the mouth, which I made using a small pin with which I made this line.
Posteriormente coloqué las manchas de los ojos y otros detalles como la nariz y la forma de la boca, la cual hice usando un pequeño alfiler con el que hice esta línea.
 |  |
|---|
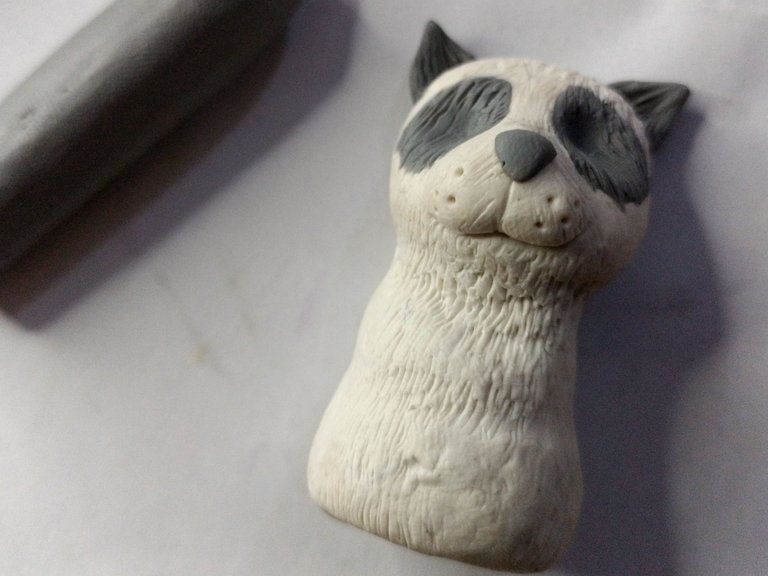
The neck of the bear I noticed that it was a little thin, so I corrected this by adding more clay around the neck, to make it chubbier in this part and make it look a little more robust.
At this point, I smoothed all the plasticine and with the help of a pin I made the small lines that give resemblance to the fur.
El cuello del osito me fijé que estaba un poco delgado, así que corregí esto agregando más plastilina alrededor del cuello, para hacerlo más gordito en esta parte y hacerlo parecer un poco más robusto.
Ya en este punto, alisé toda la plastilina y con ayuda de un alfiler hice las pequeñas líneas que dan semejanza al pelaje.
 |  |
|---|
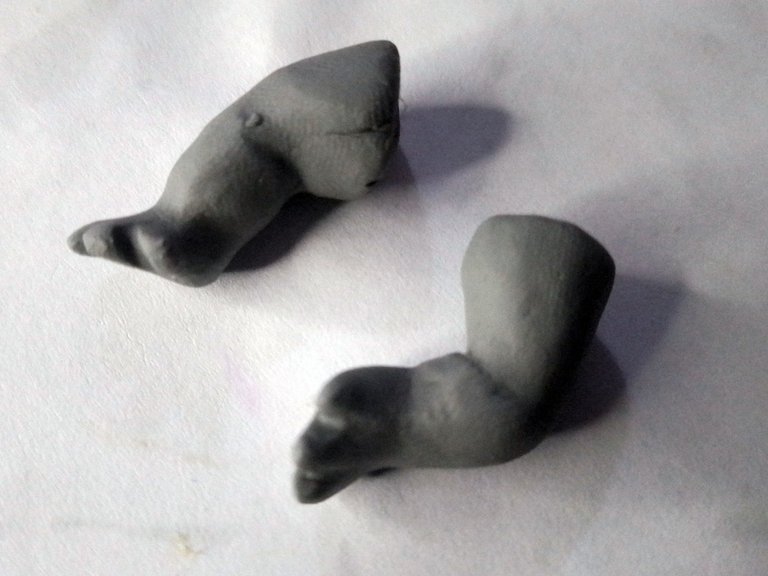
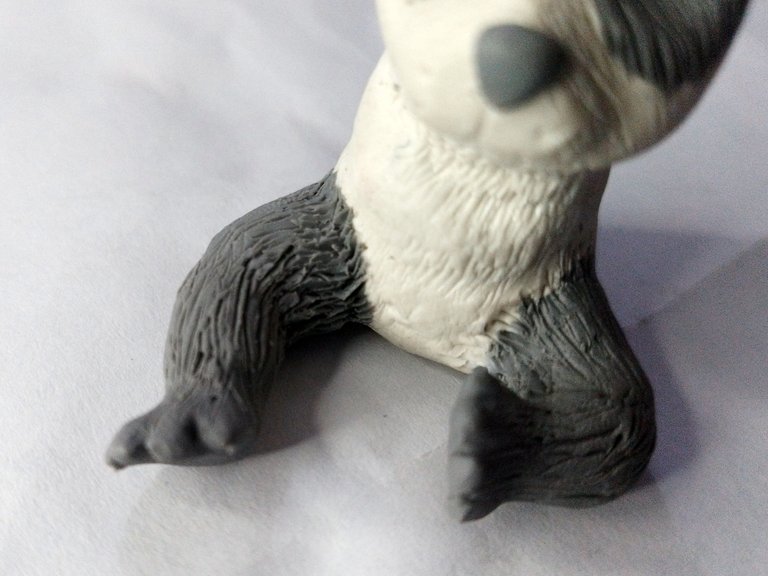
For the hind legs I used a much darker plasticine, since he is a panda. I molded it into a suitable shape for his little legs.
I placed them on both sides of the bottom area of the figurine and then used the same pin to make little lines to give the appearance of fur.
Para las patas traseras usé una plastilina mucho más oscura, pues es un panda. La moldeé hasta lograr una forma adecuada para sus patitas.
Estas las coloqué a ambos lados de la zona inferior de la figurita y entonces usé el mismo alfiler para hacer pequeñas líneas que dieran la apariencia del pelaje.
 |  |
|---|
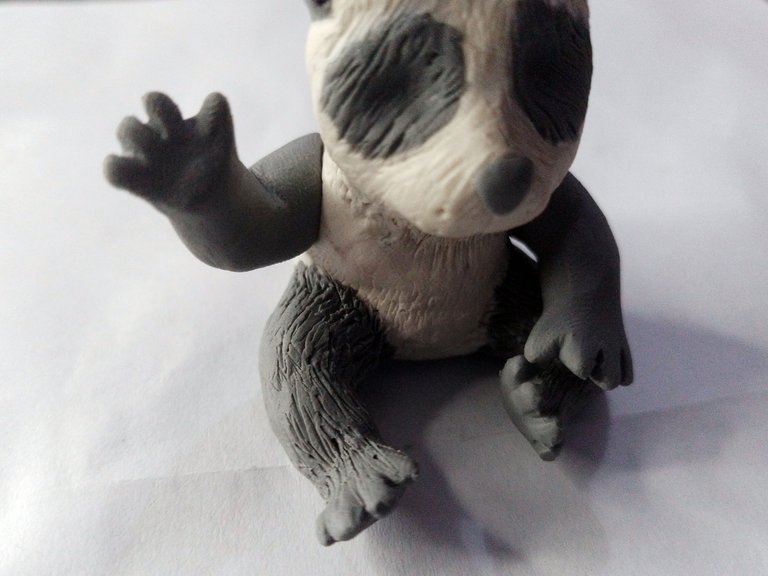
For the front legs is simply to repeat the same process as with the hind legs, only that these should be placed a little higher and give it a shape a little more like a pair of arms.
For these two legs I placed them in a dynamic way, one waving and the other falling over the left leg. After giving this shape I did the same as I did with the others using the pin.
Para las patas delanteras es simplemente repetir el mismo proceso que con las patas traseras, solo que estas se deben colocar un poco más arriba y darle una forma un poco más parecida a la de un par de brazos.
Para estas dos patitas las coloqué en forma dinámica, Una saludando y la otra caída sobra la pierna izquierda. Después de darle esta forma hice lo mismo que hice con las otras usando el alfiler.
 |  |
|---|
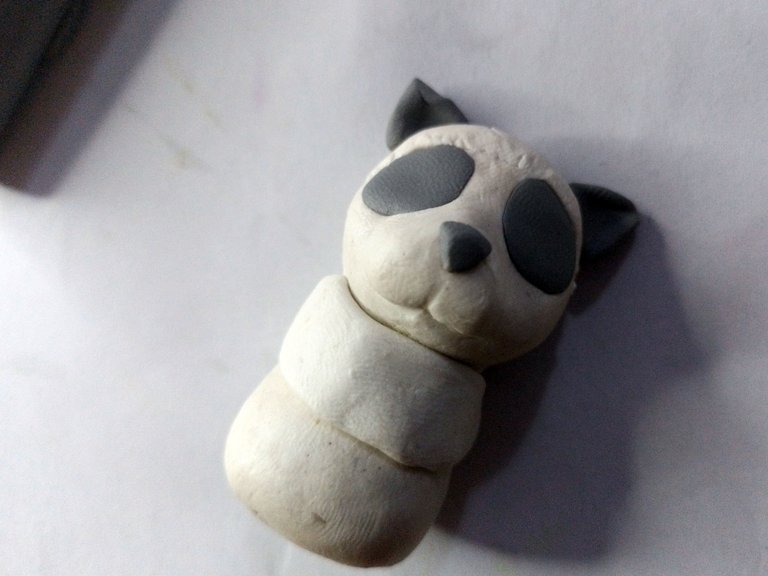
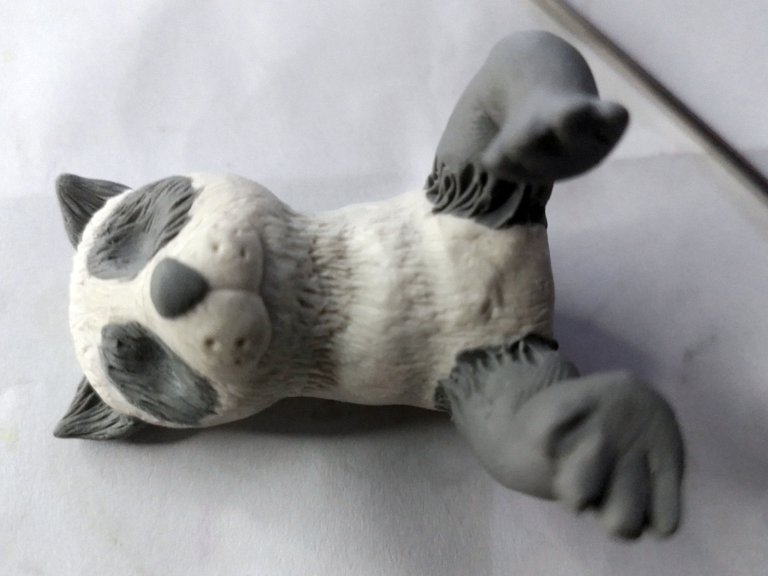
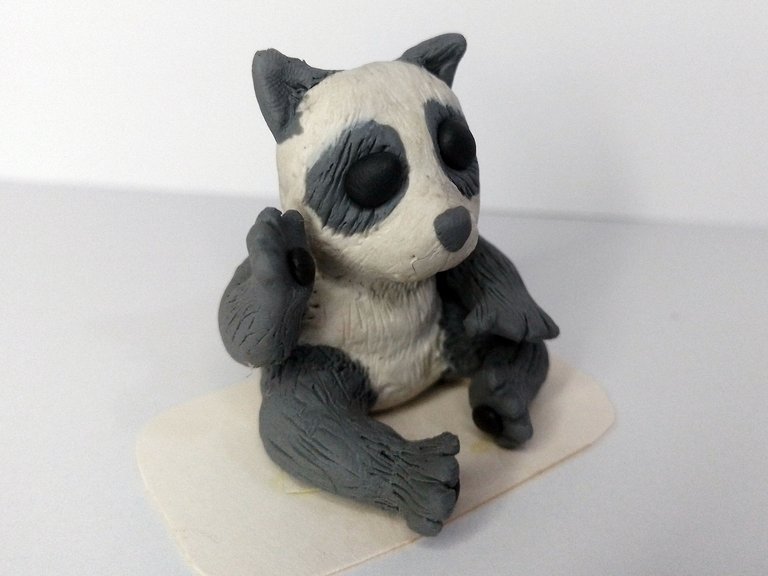
The final step for this lovely panda sculpture was to add the ears, in addition to the eyes, which are simply flattened plasticine spheres, I also placed these spheres on the hands and feet, simulating the pads of the paws.
El paso final para esta escultura de este panda encantador fue agregar las orejitas, además de los ojos, que son simplemente esferas de plastilina un poco aplastadas, también coloqué estas esferas en manos y pies, simulando las almohadillas de las patas.

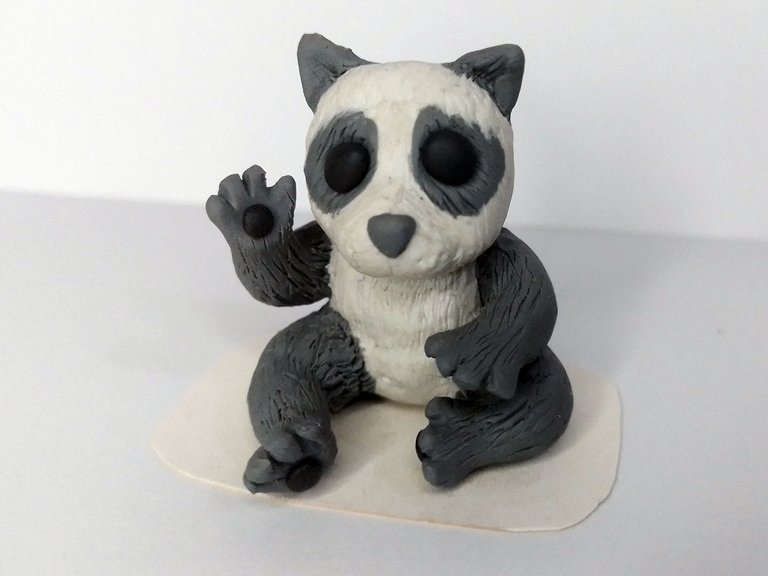
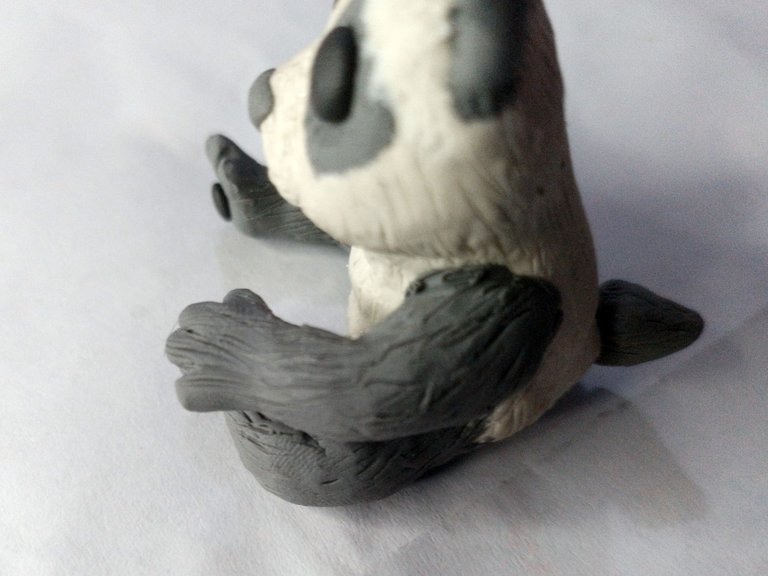
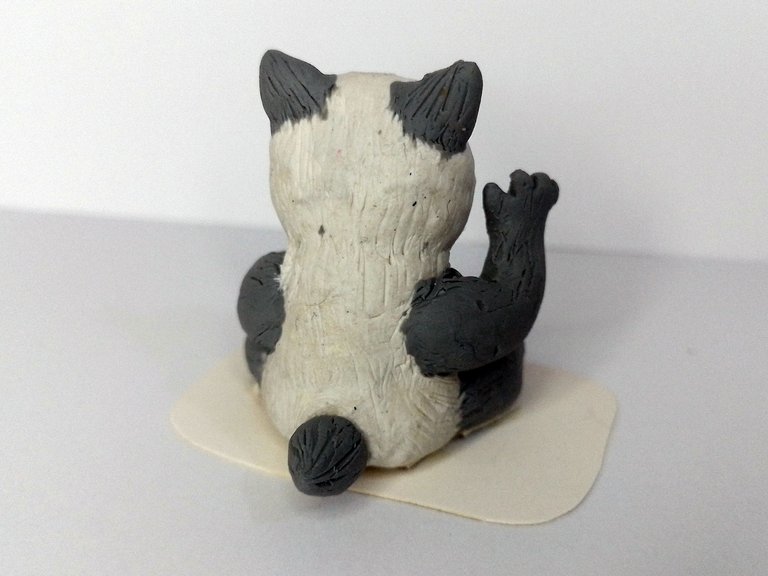
This way the figurine was finished. I leave you a series of photographs of the final result:
De esta manera la figurita quedó terminada. Les dejo una serie de fotografías del resultado final:
Well friends, that's all for now. As you can see, a lovely teddy bear will now accompany one of the characters on the card. One is missing, so stay tuned for my next posts.
If you like to know more about the contest, you can visit the following link:
https://peakd.com/hive-13323/@splinterlands/splinterlands-art-contest-week-269
I invite you to leave your thoughts below in the comments, as always I will be happy to read them. With nothing more to add, I'll say goodbye then...
See you next time!
Bien amigos, esto ha sido todo por ahora. Como ven, un osito encantador que ahora acompañará a uno de los personajes de la carta. Falta uno, así que atento a mis próximas publicaciones.
Si gustan saber más sobre el concurso, pueden visitar el siguiente enlace:
https://peakd.com/hive-13323/@splinterlands/splinterlands-art-contest-week-269
Los invito a dejar sus opiniones abajo en los comentarios, como siempre estaré encantado de leerlos. Sin más que agregar, me despido entonces...
¡Hasta la próxima!


Ainssss pero esta es una bellezura, que cuchi, la verdad que cuando tengas la colección entera va a lucir realmente hermosa. Como siempre deleitándonos con tu gran arte. Gracias por ello...
Éxitos en el concurso @gaboamc2393 💙
!DIY
Me falta uno pero ciertamente se ven muy lindos los dos y cada uno tiene su propio encanto. No tengo ni idea de cómo voy a hacer al tercero pero a ver qué se me ocurre más adelante jejeje.
You can query your personal balance by
!DIYSTATSBeautiful fan-art was very cute. Thanks for giving us your art in the community. Best wishes...
que bello! un excelente trabajo
what a beautiful job!
Gracias! Me gusta que te parezca lindo este osito panda.
Es un osito muy bonito. Hecho con plastilina y se ve tan real.
Los dos quedaron bellos, el tercero también quedará Cuchi como estos.
Bueno la idea es que quede así bien lindo. Espero poder hacer pronto el tercero para completa la colección.
Hermoso trabajo, un adorable osito. Saludos
Siii quedó muy lindo. Muchas gracias por pasar a comentar mi post.