Splinterlands Art Contest Week 256: Spineback Turtle
Greetings friends, it is always a pleasure for me to share with you my splinterlands inspired art. This week I had less time to dedicate to make my artwork, but I did my best not to miss the contest and participate.
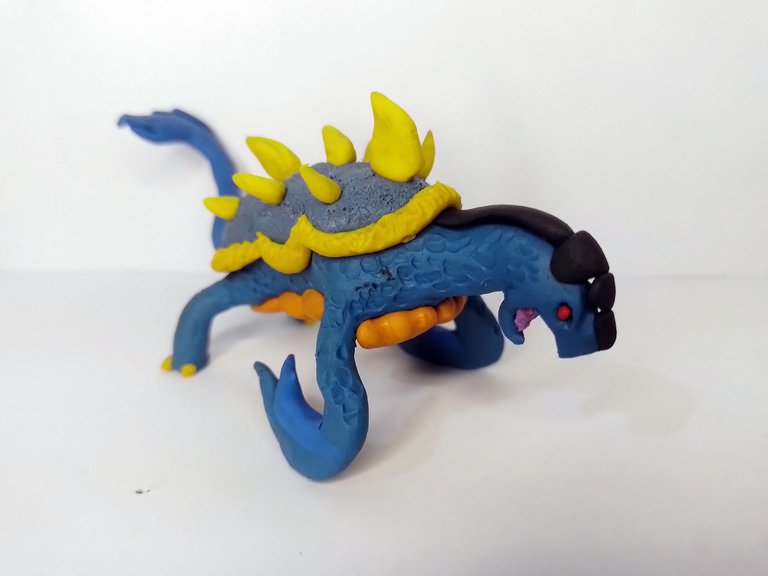
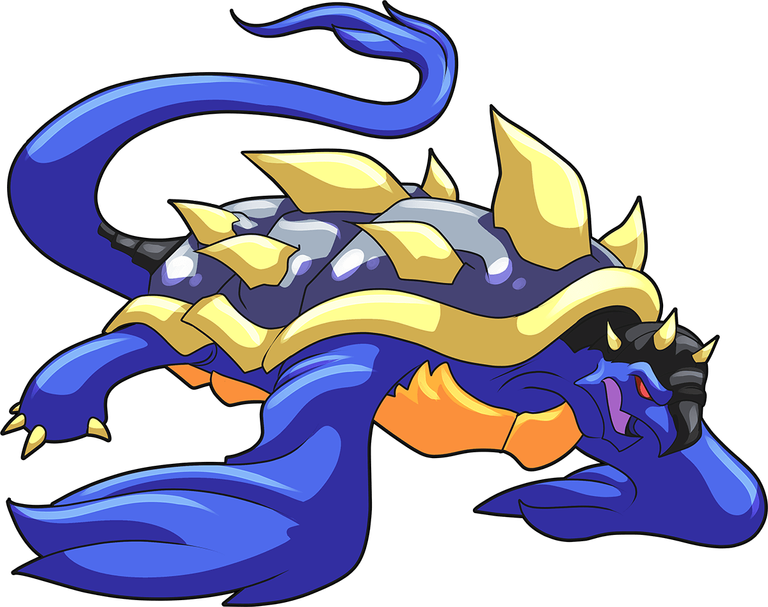
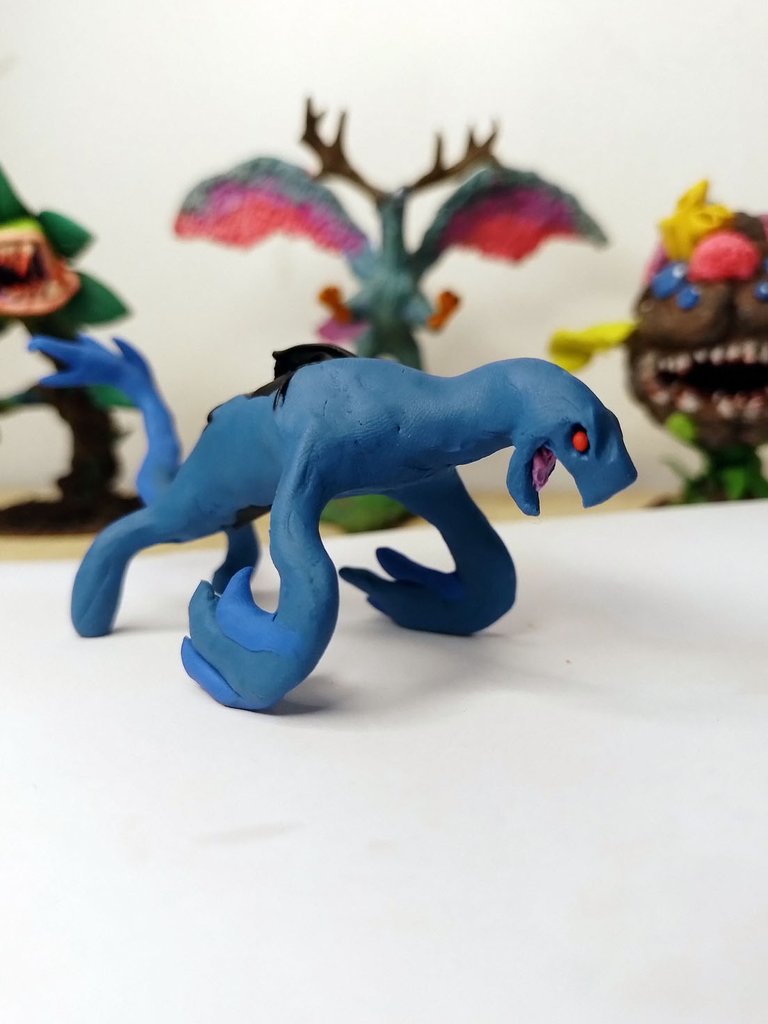
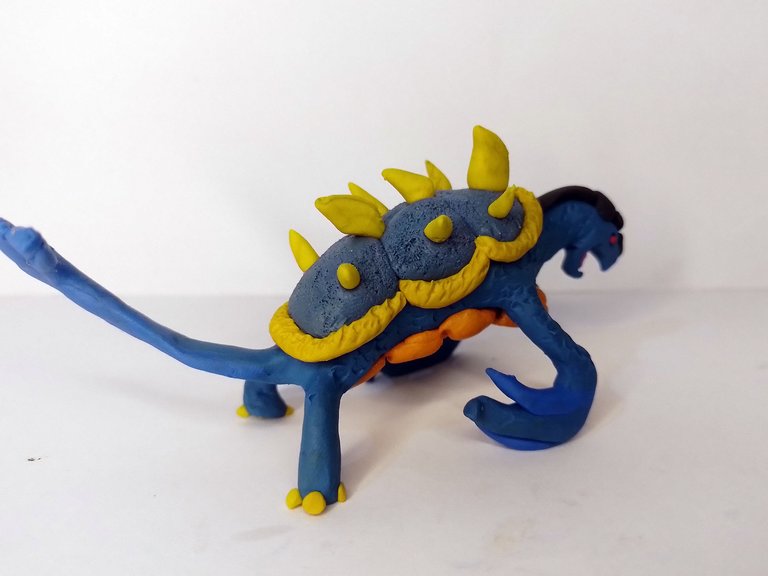
This time I made another water figure, inspired by a card called Spineback Turtle. It is quite nice and interesting from my point of view and I wanted to do it with the same cartoon style but with some realism.
Below you can see the sculpture.
Saludos amigos, siempre es un placer para mi compartir con ustedes mi arte inspirado en splinterlands. Esta semana tuve menos tiempo para dedicarme a hacer mi obra, pero hice lo posible por no perderme el concurso y participar.
Esta vez hice otra figura de agua, inspirada en una carta llamada Spineback Turtle. Es bastante simpática e interesante la carta desde mi punto de vista y quise hacerla con el mismo estilo caricaturizado pero con algo de realismo.
A continuación pueden ver la escultura.
You can also take a look at the card I was inspired by. As I said, it's a water card and although the sculpture is not 100% the same, I dare say it does look quite similar.
También pueden darle un vistazo a la carta en la que me inspiré. Como dije, es una carta de agua y aunque la escultura no es 100% igual, me atrevería a decir que sí se parece bastante.
Source / Fuente
https://next.splinterlands.com/card-detail/13/regular/1?tab=lore
Step by step
As usual, I will show you the step by step of this sculpture.
The materials I used were the following:
- Wire
- Paper and Adhesive Tape
- Plasticine
- Tools: Cutting tweezers and wooden needles/sticks.
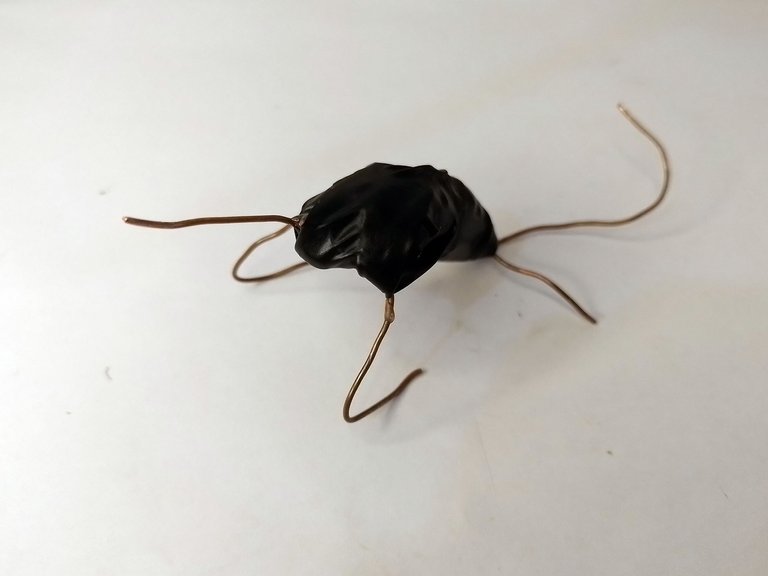
Well, to start with my sculpture I made the skeleton or support. It was a turtle so I didn't need such a thick support, however, I made it in such a way that it was fat and wide enough so I didn't use so much plasticine and it wasn't so heavy.
Paso a paso
Como siempre acostumbro, les mostraré el paso a paso de esta escultura.
Los materiales que utilicé fueron los siguientes:
- Alambre
- Papel y Cinta Adhesiva
- Plastilina
- Herramientas: Pinzas para cortar y agujas/palillos de madera
Bien, para comenzar con mi escultura le hice el esqueleto o el soporte. Era una tortuga así que no necesitaba un soporte tan grueso, sin embargo, lo hice de tal manera que fuese lo suficientemente gordo y ancho para no usar tanta plastilina y que no fuese tan pesado.
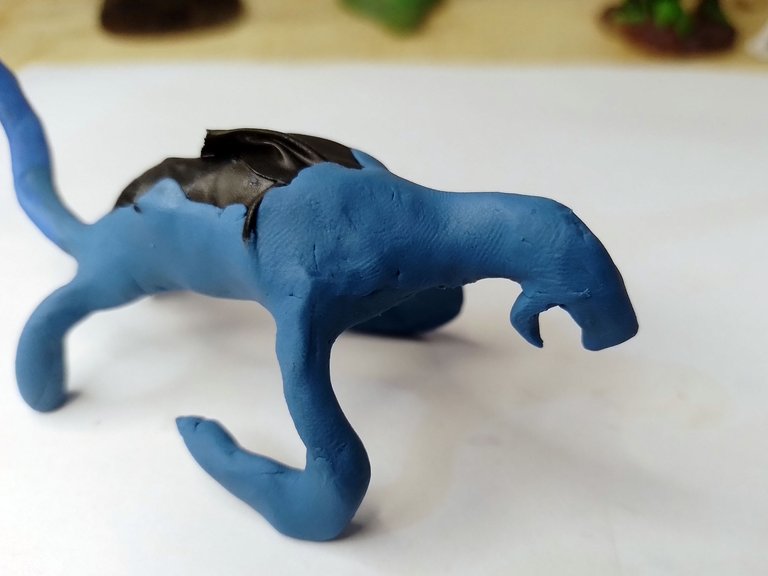
Although the blue of the sculpture is a bit strong and intense, I used a slightly more opaque blue, to make it look like a more oceanic color, so to speak.
Below you can see how I started to cover the skeleton of the figure with plasticine, from the neck to the legs.
Aunque el azul de la escultura es un poco fuerte e intenso, yo usé un azul un poco más opaco, para que se viera como un color más oceánico, por llamarlo de alguna manera.
Abajo pueden ver cómo comencé a cubrir el esqueleto de la figura con plastilina, desde el cuelo hasta las patas.
 |  |
|---|
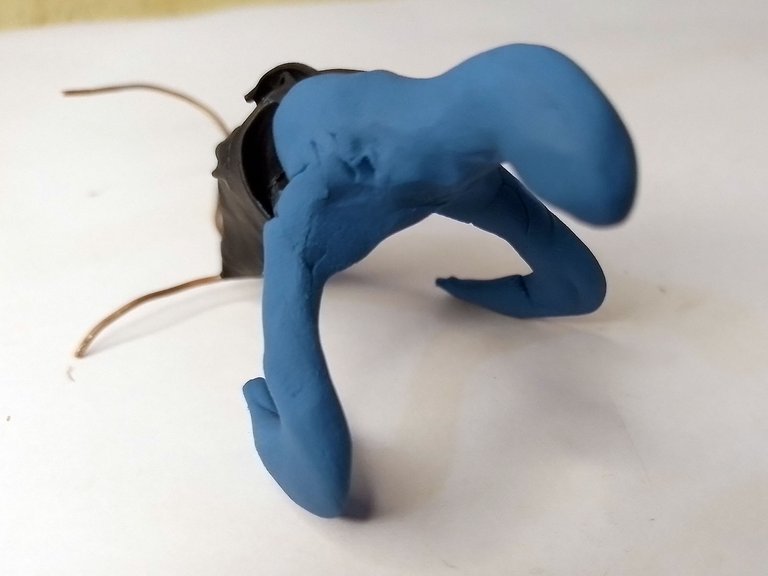
Notice that I covered only the lateral areas of the figure, since the upper and lower parts would be covered with other colors of plasticine.
I covered both the front and back legs with the same blue color.
Fíjense que cubrí solamente las áreas laterales de la figura, pues en la parte superior e inferior irían otros colores de plastilina.
Tanto las patas delanteras como las traseras las cubrí con el mismo color azul.
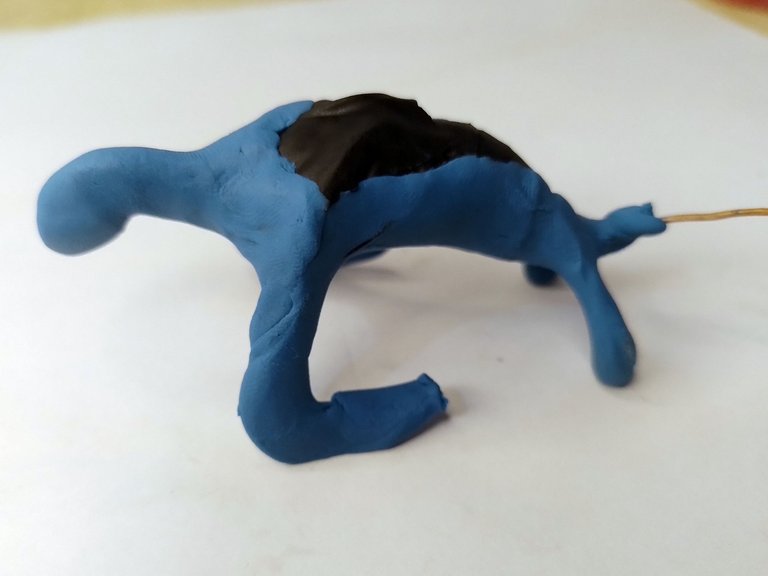
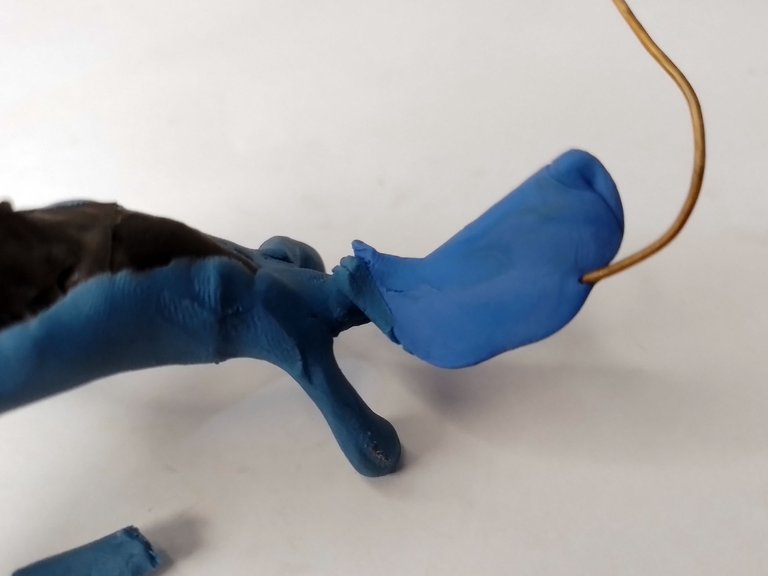
On the other hand, for the tail I used a slightly more intense blue, so that it would stand out slightly from the other blue.
First I covered all the wire of the tail, then I started to shape and smooth it, finally I added some barbs or something similar to fins.
Por otra parte, para la cola usé un azul un poco más intenso, para que resaltara levemente del otro azul.
Primero cubrí todo el alambre de la cola, luego comencé a darle forma y alisarlo, finalmente le agregué unas púas o algo parecido a aletas.
 |  |
|---|

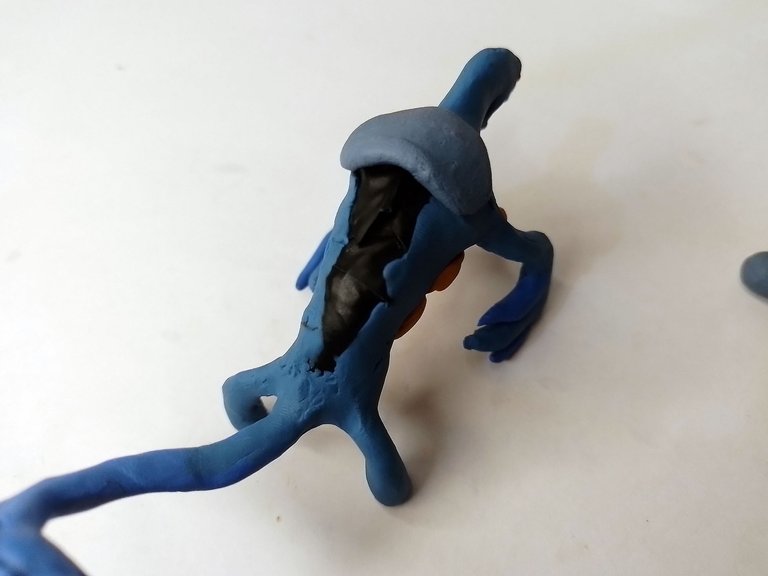
After making the tail I concentrated on the head.
I tried to give it a shape similar to that of an ordinary turtle, only with a slightly sharper bite, so to speak.
It's like the bite of this turtle, the Alligator snapping turtle.
Después de hacer la cola me concentré en la cabeza.
Traté de darle una forma parecida a la de una tortuga común y corriente, solo que con una mordida un poco más afilada, por llamarlo de alguna forma.
Es como la mordida de esta tortuga, la tortuga Caimán.
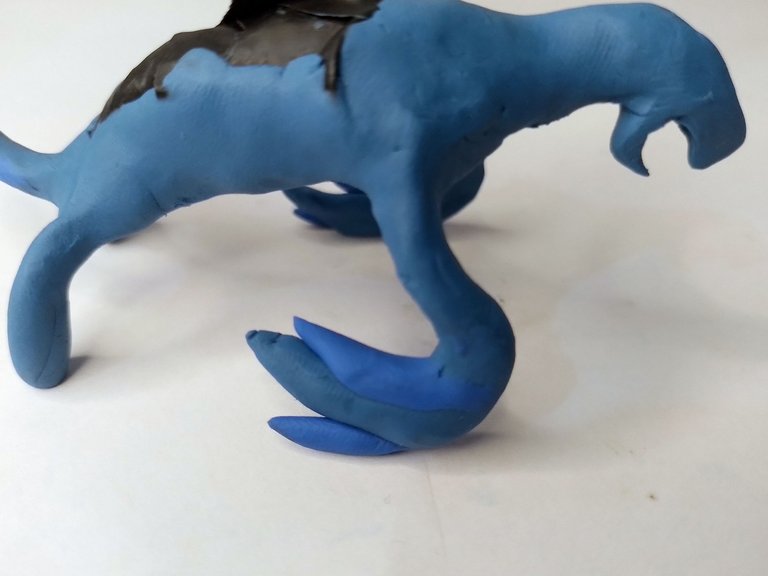
Once the head was molded, I continued with the front flippers, which more than the flippers of a turtle, reminded me of the flippers of a walrus.
First I made the main flipper, which you have already seen, then I made two more lines of plasticine, as if they were fingers, but I made them in a different color, the same blue as the tail.
Una vez moldeada la cabeza, continué con las aletas delanteras, que más que a las aletas de una tortuga, me recordaron a las aletas de una morsa.
Primero hice la aleta principal, la cual ya han visto, luego le hice dos líneas más de plastilina, como si fuesen dedos, pero estas las hice de un color distinto, el mismo azul de la cola.
 |  |
|---|
Let's go again with the head, this time the tongue and the eyes.
For the tongue I used a color similar to violet, which is white with purple and blue. I placed the tongue at the opening of the tongue.
Vamos nuevamente con la cabeza, esta vez la lengua y los ojos.
Para la lengua usé un color parecido al violeta, que es blanco con morado y azul. Le coloqué la lengua en la apertura de la lengua.
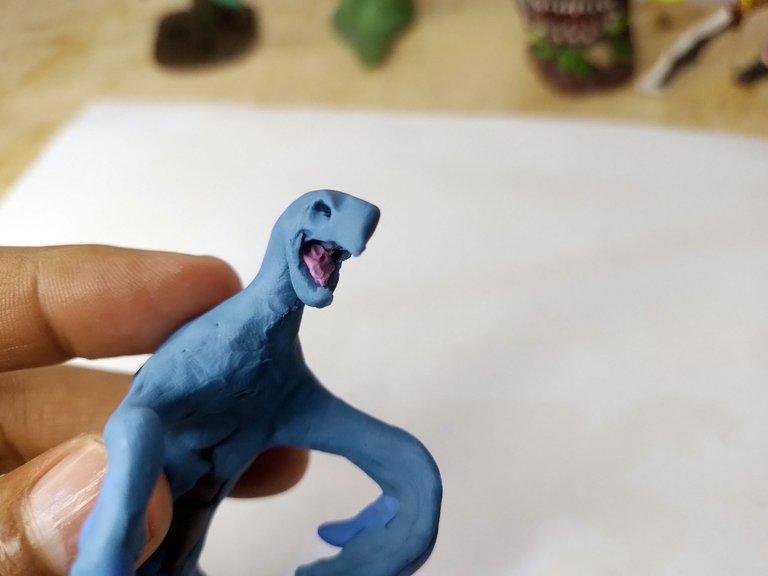
I made the eyes with two little red plasticine spheres. I had to make the beads first, with a small knitting needle.
Below you can see how the figure has been looking so far, without the shell.
Los ojos los hice con dos pequeñitas esferas de plastilina roja. Tuve que hacerle las cuentas primero, con una pequeña aguja de tejer.
A continuación pueden ver cómo iba quedando la figura hasta ahora, sin el caparazón.
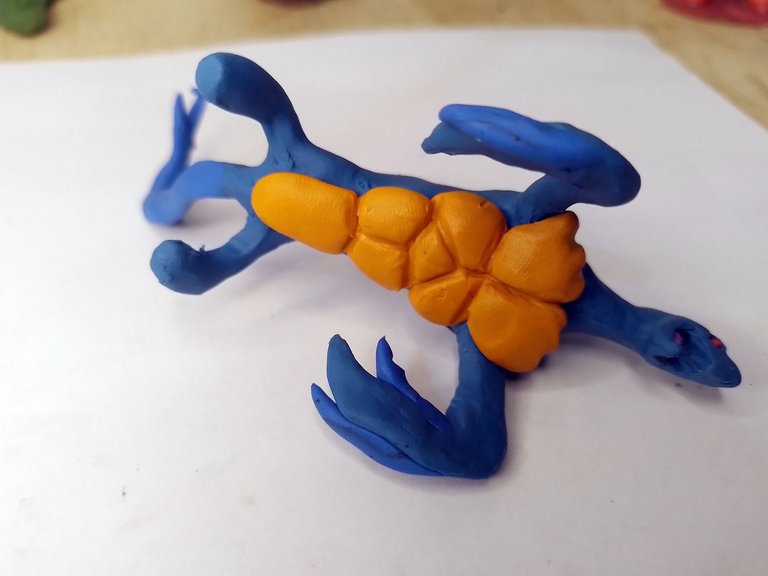
Time to make the shell. This one is not so difficult, at least I didn't find it difficult at all because the shell is composed of relatively basic pieces.
See what the bottom of the turtle looked like before and after putting on the bottom shell.
Hora de hacer el caparazón. Este no es tan difícil, al menos a mi no me pareció para nada difícil porque el caparazón está compuesta de piezas relativamente básicas.
Vean cómo era la parte de abajo de la tortuga antes y después de colocar el caparazón de abajo.
 |  |
|---|
The upper shell is a bit more complicated. I made it in sections, with a plasticine a little darker than the skin, which differs very well from the color of the turtle's skin.
El caparazón superior es un poco más complicado. Lo hice por secciones, con una plastilina un poco más oscura que la de la piel, que se diferencia muy bien del color de la piel de la tortuga.
 |  |
|---|
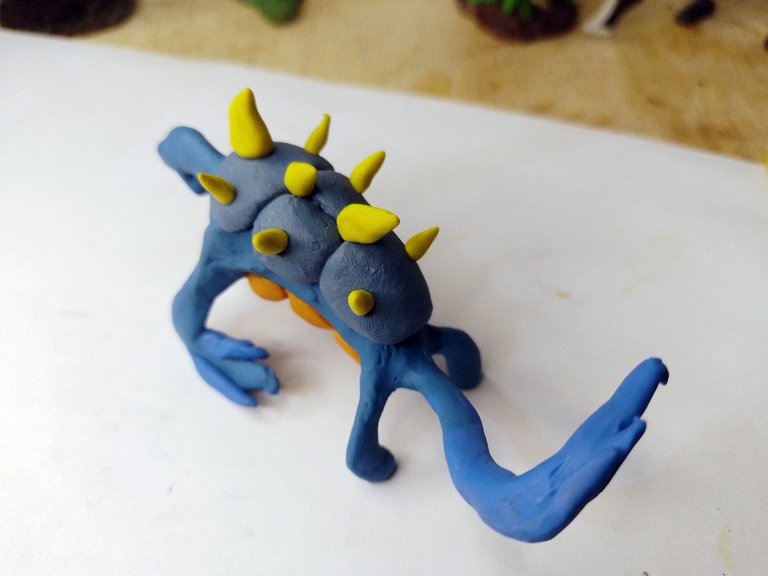
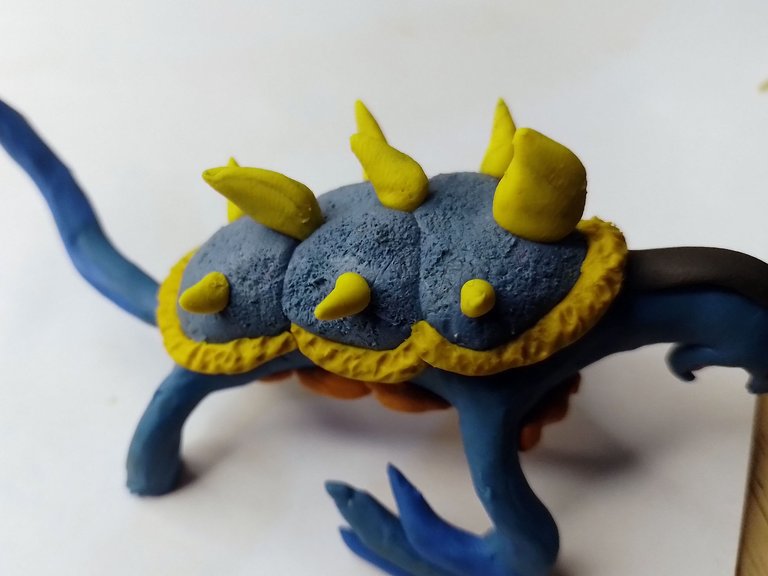
I placed all the plasticine plates that I had to make for the shell, then I placed the yellow spikes and the edge of the shell itself, as you can see in the images below.
Coloqué todas las placas de plastilina que debía hacer para el caparazón, después le coloqué las púas amarillas y el borde propio del caparazón, tal como pueden ver en las imágenes de abajo.
 |  |
|---|
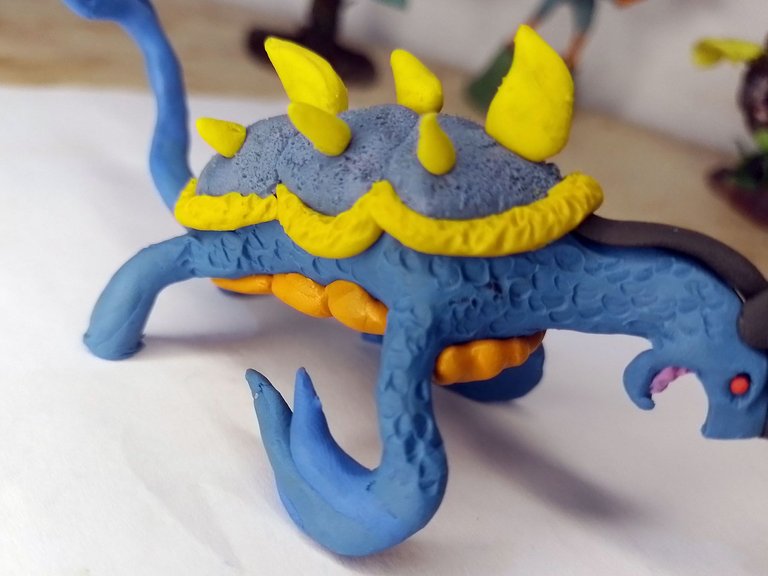
I did not place the yellow border of the front plate of the carapace, because first I had to place a kind of black plasticine plate that covers the head, together with other pieces of the same color that are like protective plates.
After placing these black plates I placed the yellow border of the front plate of the shell.
El borde amarillo de la placa delantera del caparazón no lo coloqué, pues primero debía colocar una suerte de placa de plastilina negra que cubre la cabeza, junto a otros trozos del mismo color que son como placas protectoras.
Después de colocar estas placas de color negro le coloqué el borde amarillo de la placa delantera del caparazón.
 |  |
|---|
For the more realistic touch I wanted to give to the figure, I gave texture to both the shell and the skin of the figure.
I made small holes in the shell with a square brush. With the rounded tip of the knitting needle I made those little circles on the turtle's skin.
Para el toque más realista que quise aportarle a la figura, le di textura tanto al caparazón como a la piel de la figura.
El caparazón le hice pequeños agujeros con un pincel cuadrado. Con la punta redondeada de la aguja de tejer le hice esos pequeños círculos a la piel de la tortuga.
 |  |
|---|
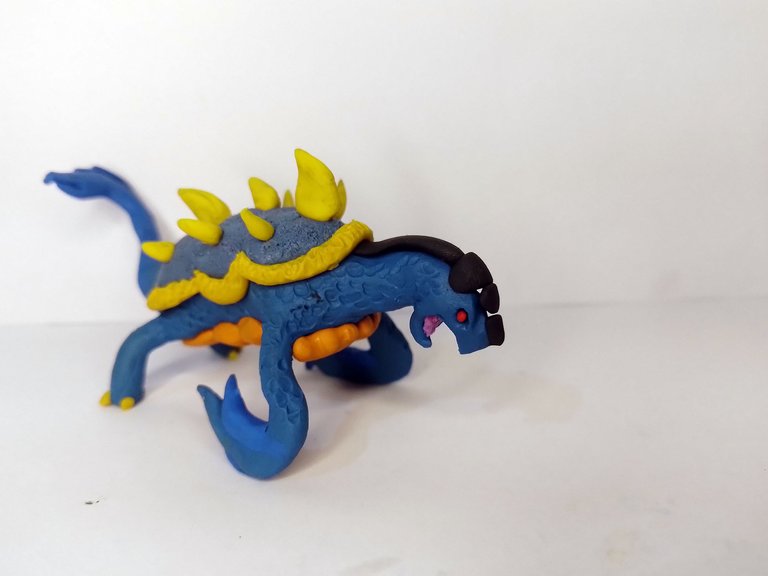
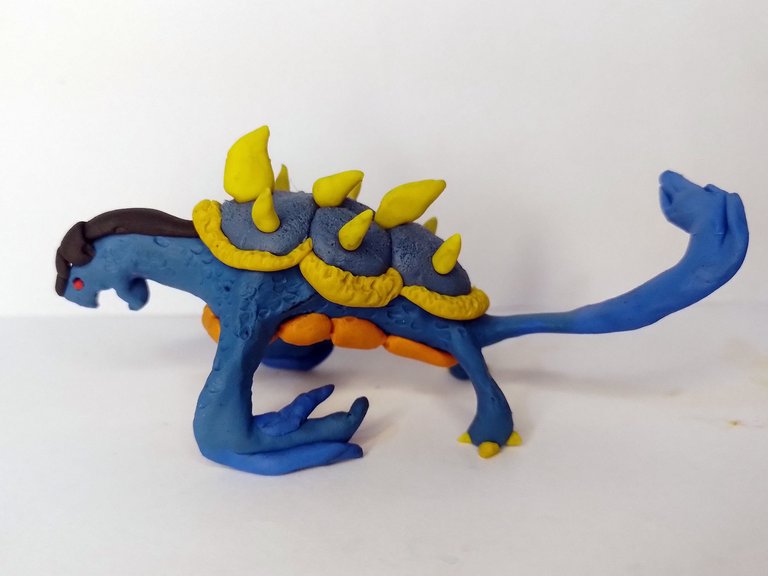
This way the sculpture was finished. Here are a series of photographs of the final result.
De esta manera la escultura quedó terminada. A continuación les dejo una serie de fotografías del resultado final.


Well folks, that's all for now, what did you think of the sculpture? I would love to know your opinions about it, you can leave them below in the comments, as always I will be happy to read them.
If you want to know more about the contest you can read the following publication:
https://peakd.com/hive-13323/@splinterlands/splinterlands-art-contest-week-256
Thank you very much for taking the time to read my publication. With nothing more to add, I will say goodbye then...
See you next time!
Bien amigos, esto ha sido todo por ahora. ¿Qué les ha parecido la escultura? Me gustaría saber sus opiniones al respecto, pueden dejarla abajo en los comentarios, como siempre estaré encantado de leerlos.
Si gustan saber más sobre el concurso pueden leer la siguiente publicación:
https://peakd.com/hive-13323/@splinterlands/splinterlands-art-contest-week-256
Agradezco mucho que se tomaran el tiempo de leer mi publicación. Sin más que agregar, me despido entonces...
¡Hasta la próxima!

This is a cool sculpture you made there. Well done and good luck with the contest.
Congratulations @gaboamc2393! You have completed the following achievement on the Hive blockchain And have been rewarded with New badge(s)
Your next target is to reach 600 posts.
You can view your badges on your board and compare yourself to others in the Ranking
If you no longer want to receive notifications, reply to this comment with the word
STOPTo support your work, I also upvoted your post!
Check out our last posts:
Thanks for sharing! - castleberry#6859

Thanks for the support!
Me encantan tus figuritas de plastilina... Eres muy ingenioso para representar los personajes de las cartas.
!VSC
@chacald.dcymt has sent VSC to @gaboamc2393
This post was rewarded with 0.1 VSC to support your work.
Join our photography communityVisual Shots
Check here to view or trade VSC Tokens
Be part of our Curation Trail
@chacald.dcymt ha enviado VSC a @gaboamc2393
Éste post fue recompensado con 0.1 VSC para apoyar tu trabajo.
Únete a nuestra comunidad de fotografía Visual Shots
Consulte aquí para ver o intercambiar VSC Tokens
Se parte de nuestro Trail de Curación
Hola Gabo! Espero estés muy bien 😍 aunque mencionas que no tuviste tanto tiempo para invertirle a esta escultura te quedo muy genial, me gusta mucho tu trabajo y sobre todo que seas tan generoso con esas fotos detalladas desde el esqueleto (me intriga mucho de las esculturas de plastilina esa parte). Felicidades por este trabajo tan bonito y mucho éxito en el concurso!