Splinterlands Art Contest Week 260: Raging Impaler
Greetings fellow art and splinterlands lovers. Welcome to my participation in the splinterlands art contest in its 259th week.
If you would like to know more about the contest you can read the following publication:
https://peakd.com/hive-13323/@splinterlands/splinterlands-art-contest-week-260
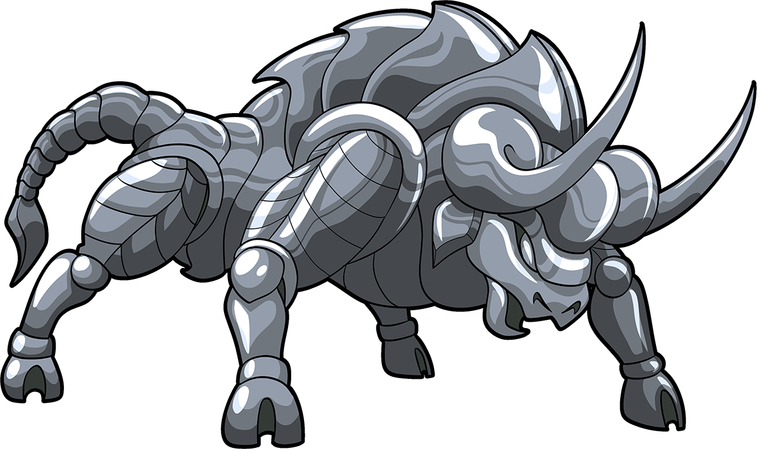
For this week I managed to complete a piece that I wanted to make for a long time, inspired by a card called Ragin Impaler, a bull made of metal that may well live up to its name because of the big antlers it has. Below you can see an image of the card:
Saludos amigos amantes del artes y de splinterlands. Sean bienvenidos a mi participación en el splinterlands art contest en su semana 259.
Si gustas saber más sobre el concurso puedes leer la siguiente publicación:
https://peakd.com/hive-13323/@splinterlands/splinterlands-art-contest-week-260
Para esta semana logré completar una pieza que quería hacer desde hace tiempo,inspirada en una carta llamada Ragin Impaler, un toro hecho de metal que bien puede hacer honor a su nombre por la gran cornamenta que tiene. Abajo pueden ver una imagen de la carta:
Source/Fuente:
https://next.splinterlands.com/card-detail/67/regular/1?tab=lore
I really wanted to make this piece so as soon as I had some free time I sat down at my desk and got to work. It wasn't easy, but below you can see some pictures of how this letter turned out.
Tenía muchas ganas de hacer esta pieza así que apenas tuve un tiempo libre me senté en mi escritorio y puse manos a la obra. No fue fácil, pero a continuación pueden ver unas fotos de cómo quedó esta carta.
 |  |
|---|
Step by step
For me it is always customary to show you the step by step of my work, especially when it comes to work like this where there is a lot of detail.
The materials I used were the following:
- Wire
- Paper
- Wire
- Plasticine
- Paint
- Glue
- Cardboard
- Tools: pins, tweezers, knitting needle.
Paso a paso
Para mi siempre es costumbre mostrarles el paso a paso de mi trabajo, más cuando se trata de trabajos como este donde hay mucho detalle.
Los materiales que utilicé fueron los siguientes:
* Alambre
* Papel
* Hilo
* Plastilina
* Pintura
* Pegamento
* Cartulina
* Herramientas: alfileres, pinzas, aguja de tejer.
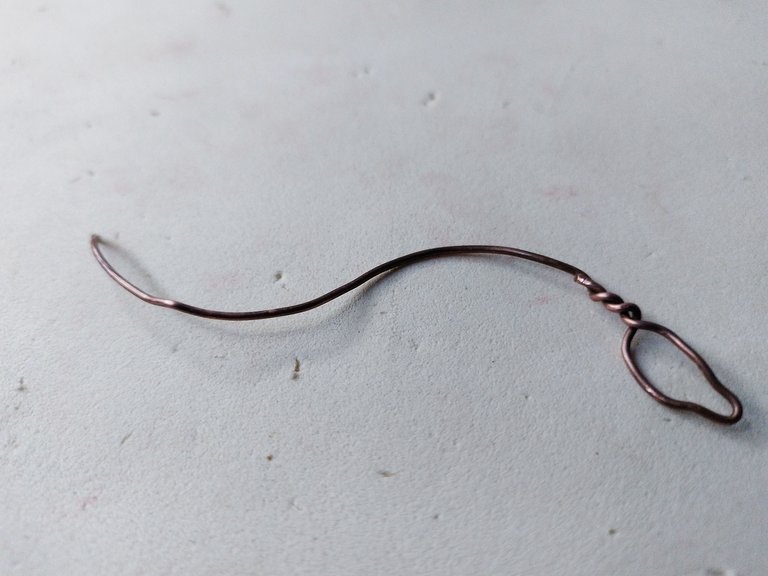
The first thing I did, of course, was the support for the sculpture, since it was a solid piece and would not support the weight without a support. Although for this occasion I thought of making a segmented support; that is, a separate support instead of a single support, this with the intention that the legs could move and adjust a little better to the base where I would place the sculpture.
As you can see I made a long wire column and then covered it with paper and thread.
Lo primero que hice desde luego fue el soporte de la escultura, pues era una pieza maciza y no soportaría el peso sin un soporte. Aunque para esta ocasión pensé en hacer un soporte segmentado; es decir, un soporte separado en lugar de un soporte único, esto con la intensión de que las patas pudieran moverse y ajustarse un poco mejor a la base en donde colocaría a la escultura.
Como pueden ver hice una columna larga de alambre y luego la cubrí con papel e hilo.
 |  |
|---|
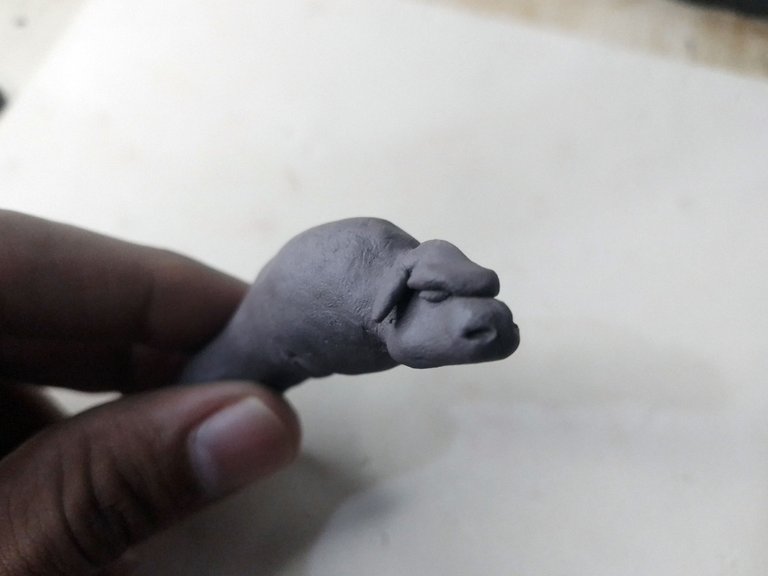
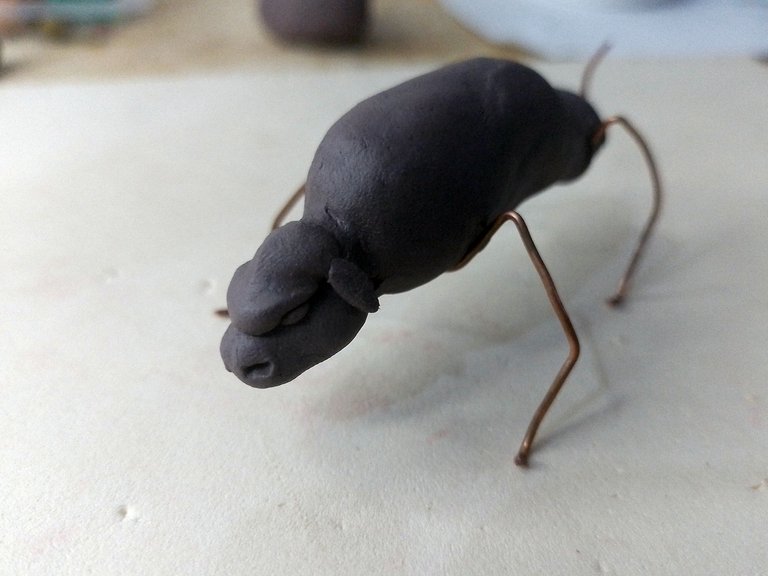
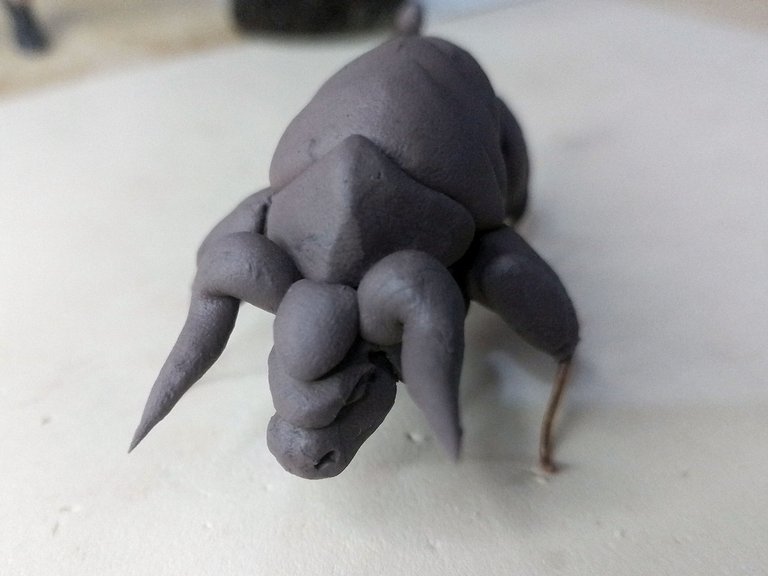
With the skeleton ready I began to mold the face of the figurine. It was not easy to achieve the shape of a bull but it is more or less a shape similar to that of a pear, being the thinnest part of the pear the nose of the bull, only that you have to make it a little flatter and flattened.
With this shape ready I made, with the knitting needle, the shapes of the eyes, the nose holes and the ears, as you can see in the image below.
Con el esqueleto listo comencé a moldear el rostro de la figurita. No fue fácil lograr la forma de un toro pero es mas o menos una forma parecida a la de una pera, siendo la parte más delgada de la pera la nariz del toro, solo que hay que hacerla un poco mas chata y aplastada.
Con esta forma lista hice, con la aguja de tejer, las formas de los ojos, los agujeros de la nariz y las orejas, como pueden observar en la imagen de abajo.
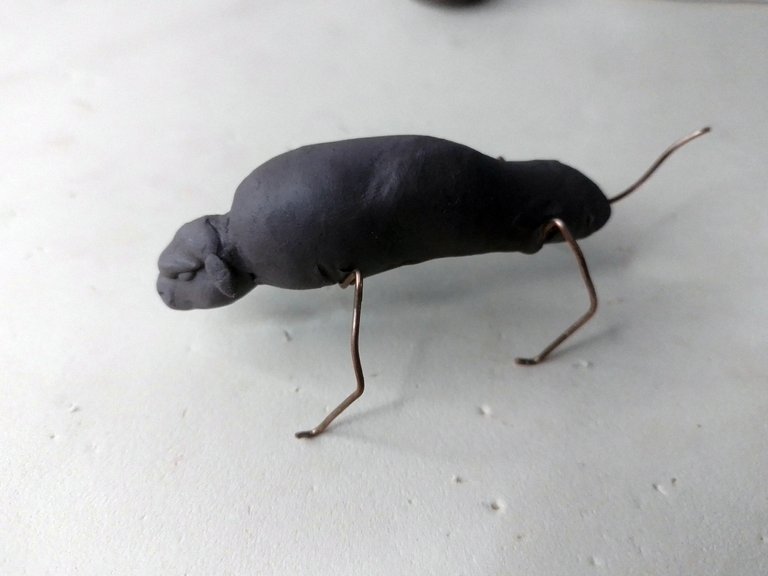
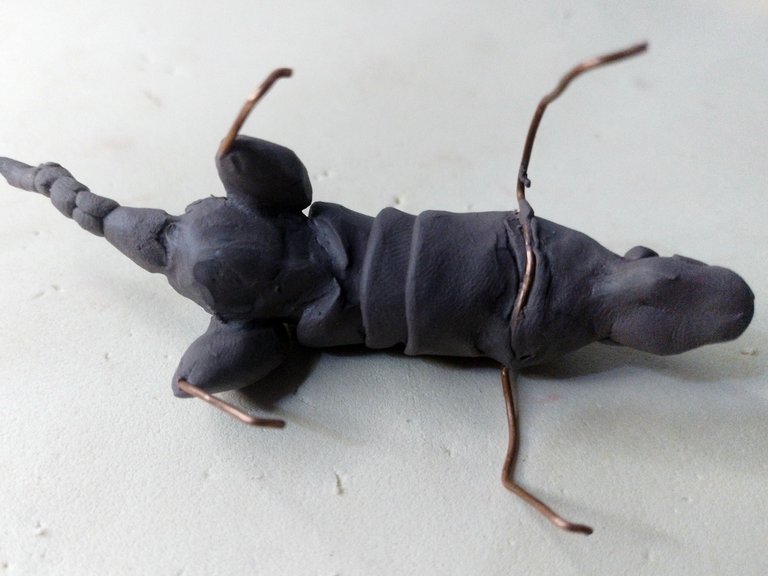
As I already mentioned, I made this skeleton separately, so as soon as I placed the rest of the plasticine that I would use to cover the inner part of the torso, I placed a sort of wire letter M for the legs, where the center of the M, in the shape of a V, would hold the body of the bull.
Below you can see how this wire support for the legs of the figure turned out.
Como ya les mencioné, este esqueleto lo hice separado, así que apenas coloqué el resto de la plastilina que usaría para cubrir la parte interna del torso, le coloqué una suerte de letra M de alambre para las piernas, donde el centro de la M, con forma de V, sostendría el cuerpo del toro.
Abajo pueden ver cómo quedó este soporte de alambre para las piernas de la figura.
 |  |
|---|
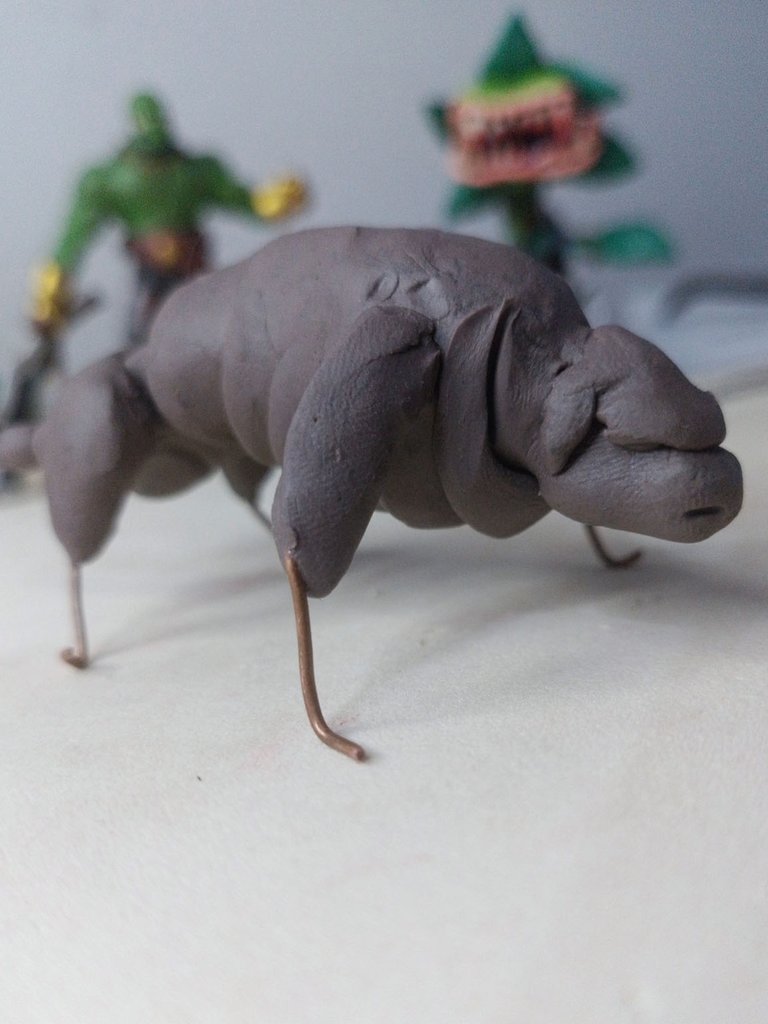
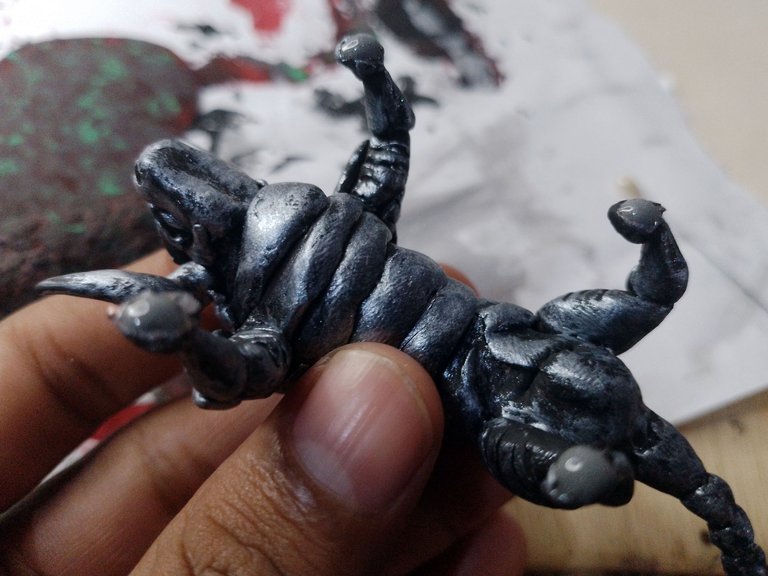
The wire support for the legs was fixed on the torso, then I continued molding the parts of the bull, such as the back part; that is, the tail. I started from the back, because this bull is made of overlapping sheets, so I started from the smallest sheets (the tail ones), to the biggest ones (the neck ones).
El soporte de alambre para las piernas quedó fijo sobre el torso, entonces continué moldeando las partes del toro, como la parte trasera; es decir, la cola. Comencé desde atrás, porque este toro está hecho de láminas que se superponen, así que comencé desde las láminas más pequeñas (las de la cola), hasta las más grandes (las de cuello).
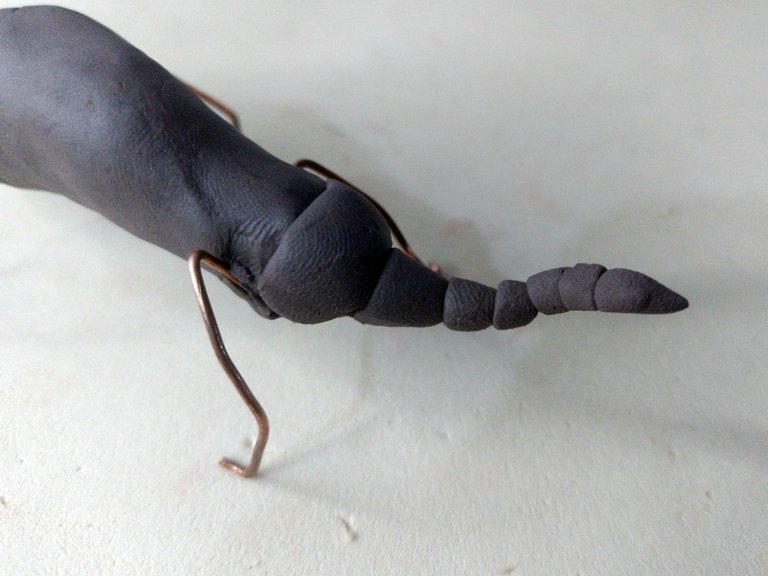
Of course, as I progressed down the length of the bull's body I started adding plasticine to other parts, such as the legs and belly of the figure, so as not to leave out any details.
Por supuesto, mientras avanzaba por el largo del cuerpo del toro comencé agregando plastilina en otras partes, como las piernas y el vientre de la figura, para no dejar de lado ningún detalle.
 |  |
|---|
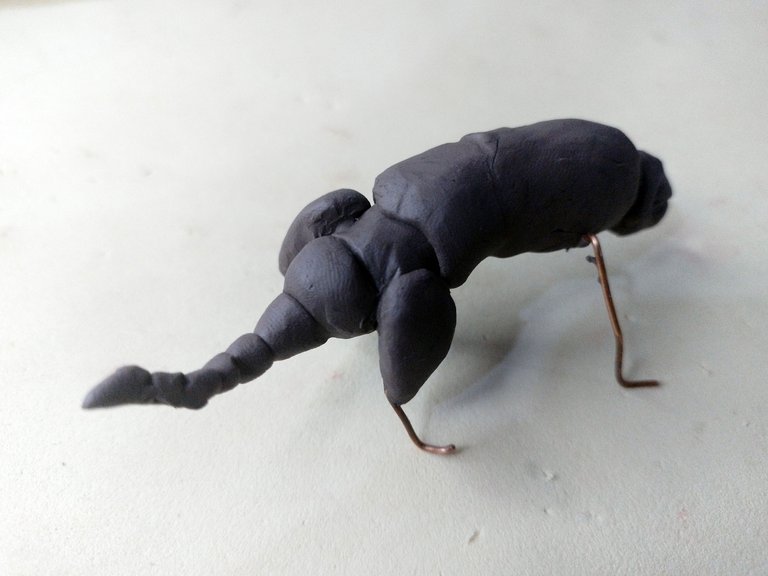
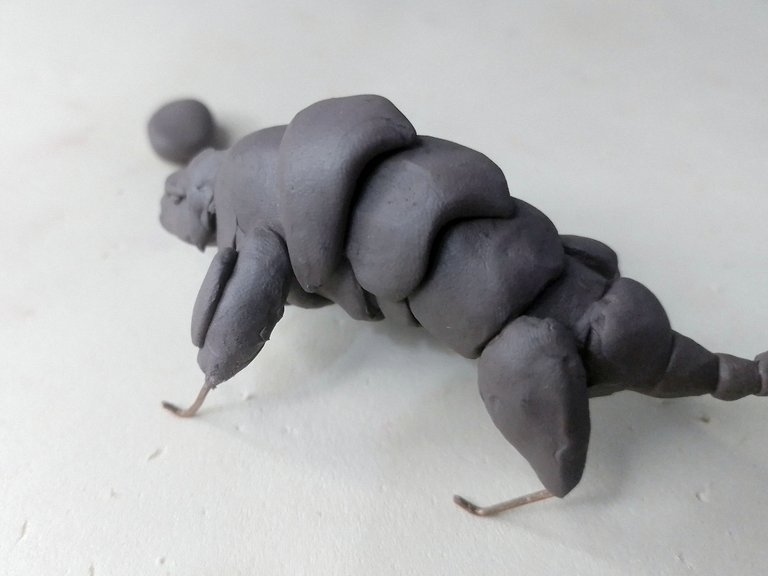
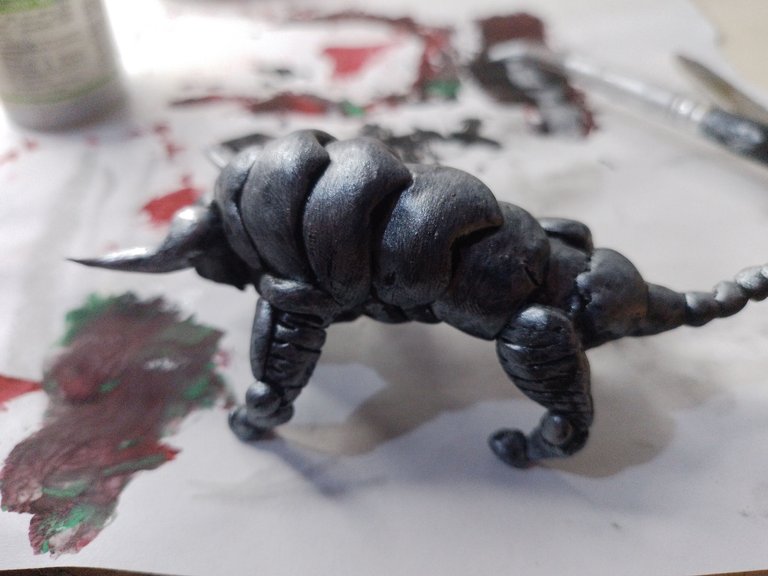
I continued with the upper plates; that is, the larger ones on the back, which in comparison to the rear plates, the difference in size was evident, the front ones were much larger and more robust. While making these plates, I also placed plasticine on the legs.
Continué con las placas superiores; es decir, las más grandes del lomo, que en comparación a las láminas traseras, la diferencia de tamaño era evidente, las delanteras eran mucho más grandes y robustas. Mientras hacía estas placas, también coloqué plastilina en las piernas.
 |  |
|---|
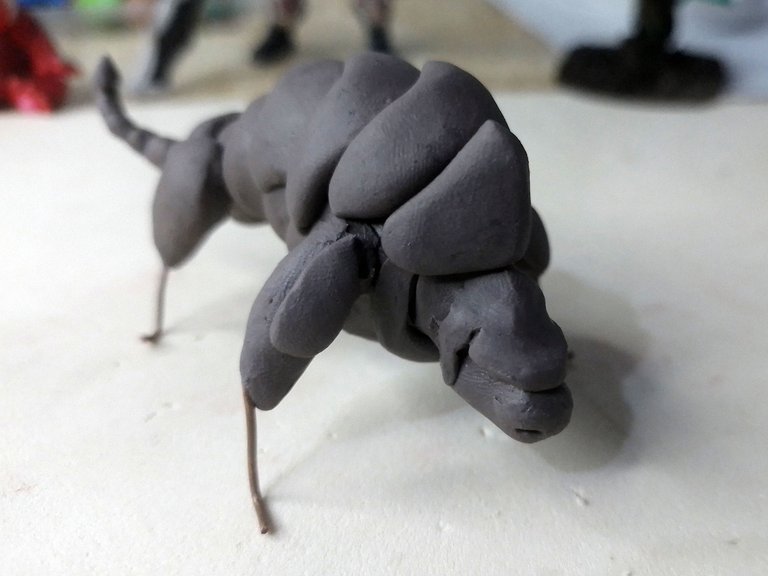
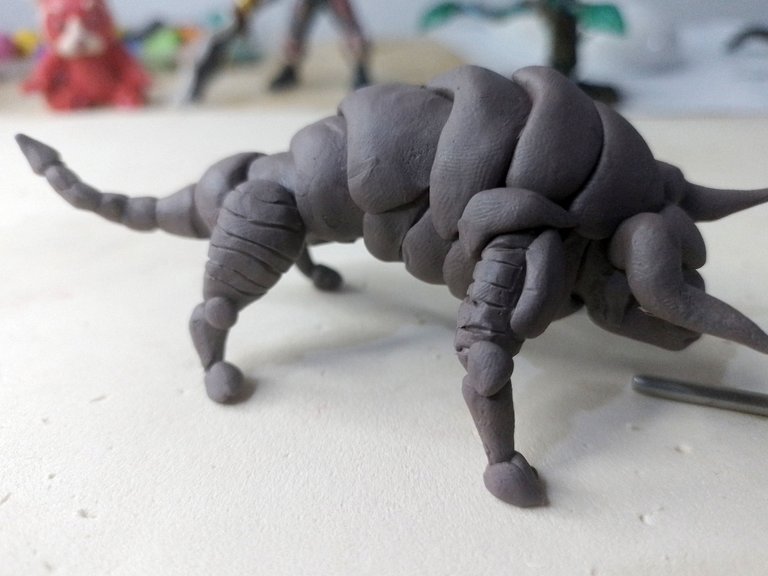
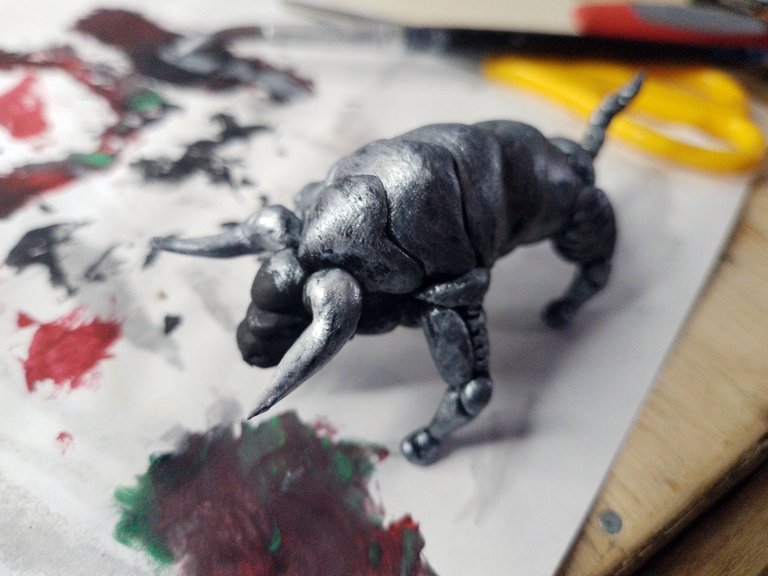
After placing all the plates of the back, including the last one that closes this line of protective plates of the bull, it was time to place what characterizes the bull, the antlers.
I made these horns a bit rolled up, but with the edge of the horns facing forward and a bit upwards. I placed a sort of plate on top of the head, between the two horns.
Después de colocar todas las placas del lomo, incluso la última que es la que cierra esta línea de placas protectoras del toro, llegó la hora de colocar lo que caracteriza al toro, la cornamenta.
Estos cuernos los hice un poco enrollados, pero con el filo de los cuernos hacia adelante y un poco hacia arriba. Coloqué una suerte de placa encima de la cabeza, entre los dos cuernos.
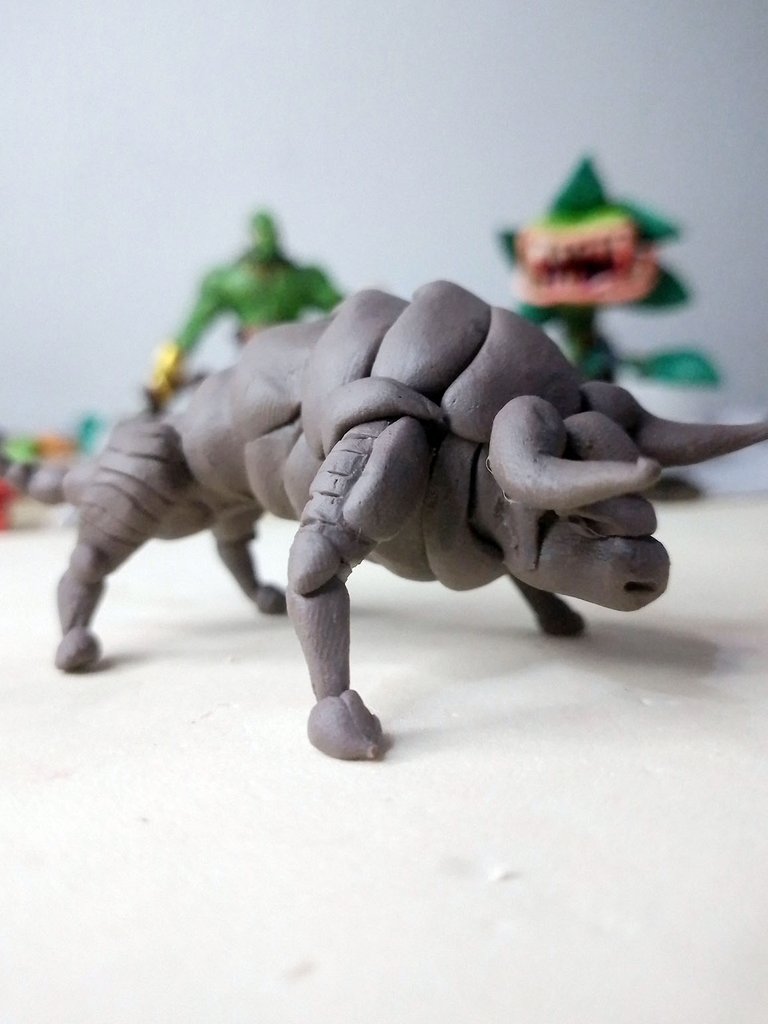
The last thing was to finish the details of the legs, like some horizontal lines on the upper part of the legs, then I covered the rest of the legs and placed the hooves, as well as a series of plasticine lines that would serve as "shoulder pads", for lack of a better word.
This is how the base molding of the figure was finished.
Lo último fue terminar los detalles de las piernas, como unas líneas horizontales en la parte superior de las patas, luego cubrí el resto de las patas y coloqué los cascos, además de una serie de líneas de plastilina que servirían como “hombreras”, a falta de una mejor palabra.
De esta manera quedó terminada el moldeado base de la figura
 |  |
|---|
Painting time
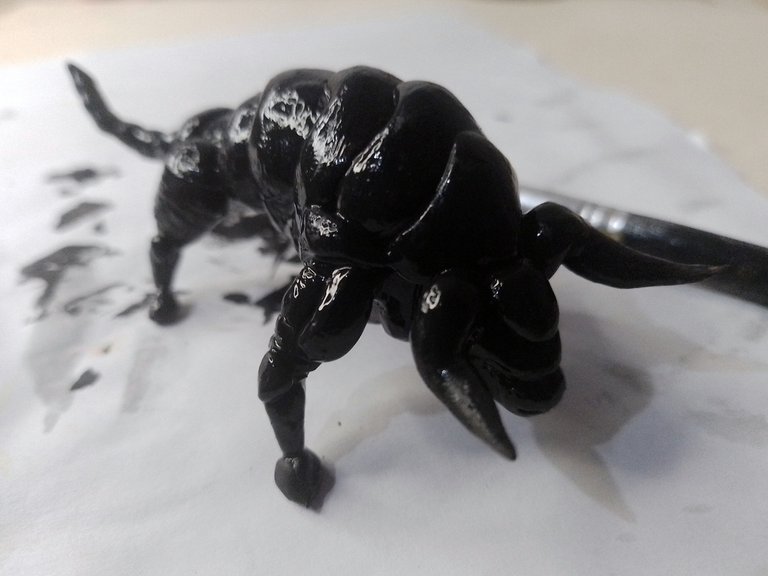
When I make this kind of figures I usually paint them using black as a base color, as this serves to detail certain grooves, holes and imperfections that look good on the metal and can serve to give a similar finish to the metal when the metallic paint is applied, which I will apply later.
But for now I only applied the black color, as I said, being this a base to eliminate the brown color that had the plasticine.
Hora de la pintura
Cuando hago este tipo de figuras suelo pintarlas usando como color base el negro, pues este sirve para detallar ciertas ranuras, orificios e imperfecciones que se ven bien en el metal y pueden servir para dar un acabado similar al metal cuando se le aplica la pintura metalizada, que la aplicaré más adelante.
Pero por ahora solo apliqué el color negro, como dije, siendo este una base para eliminar el color marrón que tenía la plastilina.
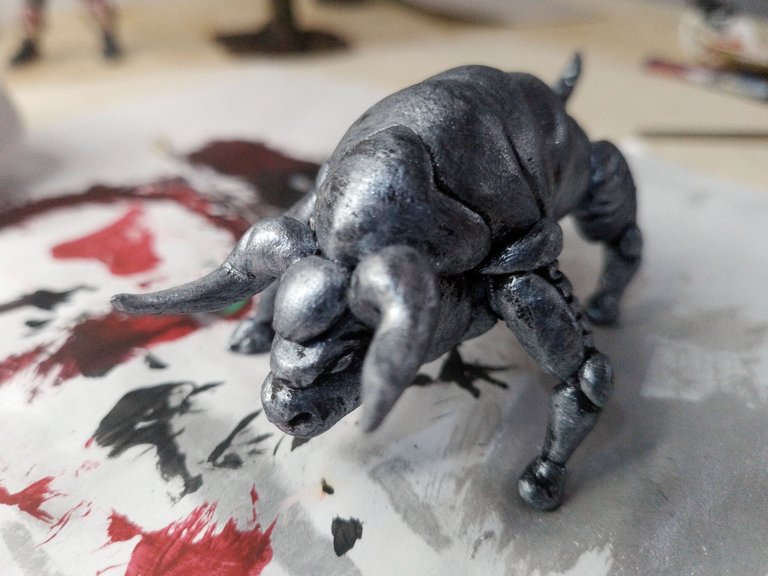
After letting it dry completely, I started to apply the metallic paint using the dry painting technique.
I tried to cover the whole body of the figure, without painting too much in the grooves, as leaving them black creates a shadow-like effect and accentuates more the dividing lines between the plates.
Después de dejar que secara por completo, comencé a aplicar la pintura metalizada usando la técnica del pintado en seco.
Traté de cubrir todo el cuerpo de la figura, sin pintar demasiado en las ranuras, pues al dejarlas de color negro esto crea un efecto similar al de sombra y acentúa más las líneas divisorias entre las placas.
 |  |
|---|
 |  |
|---|
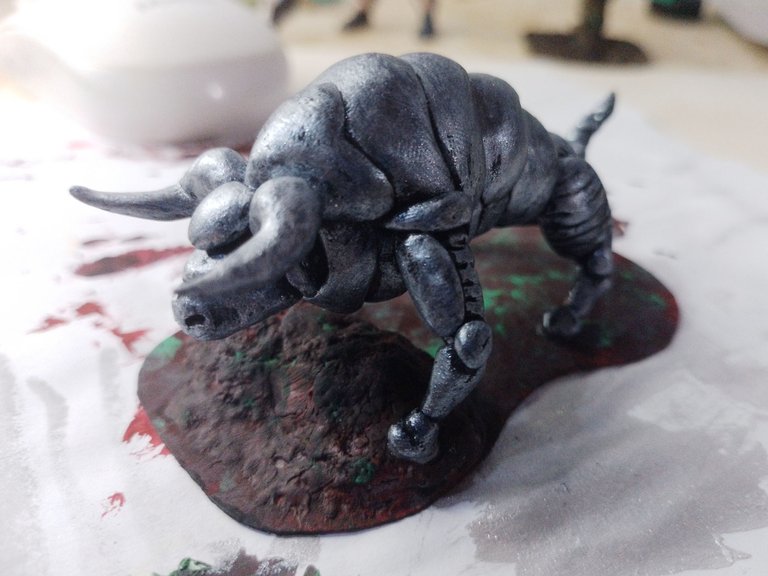
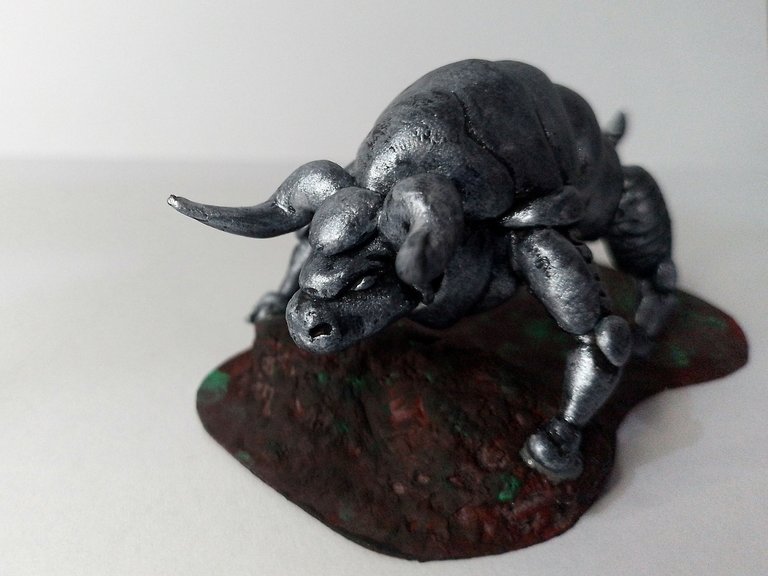
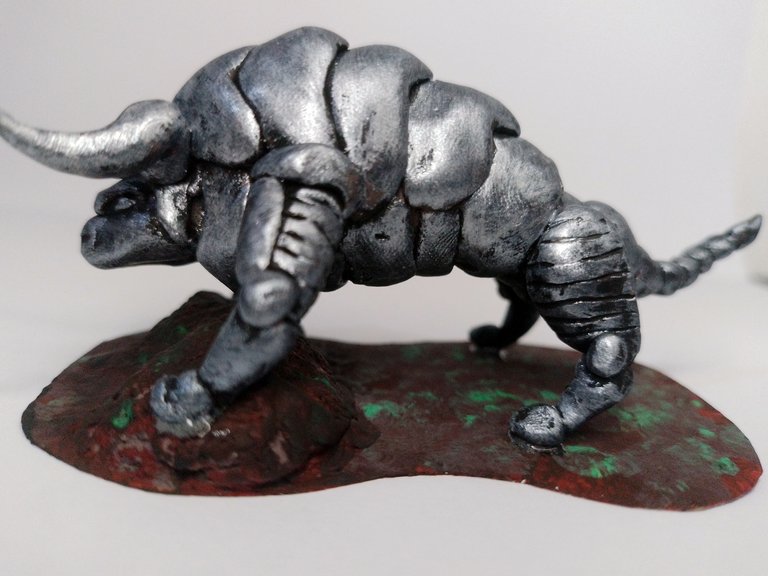
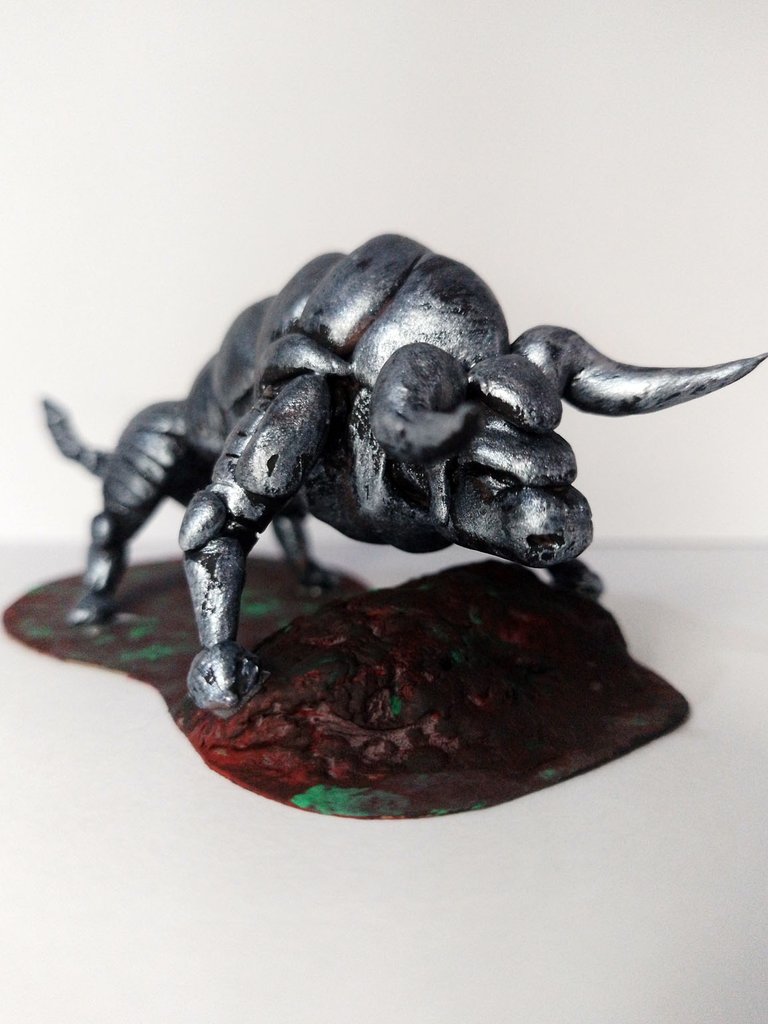
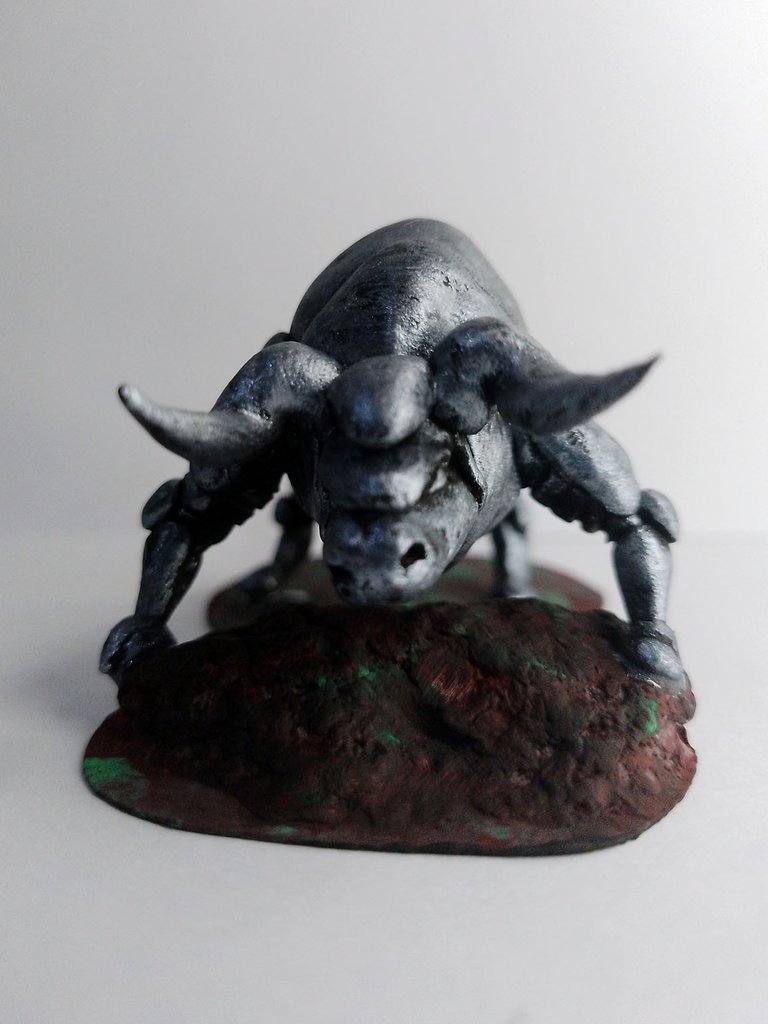
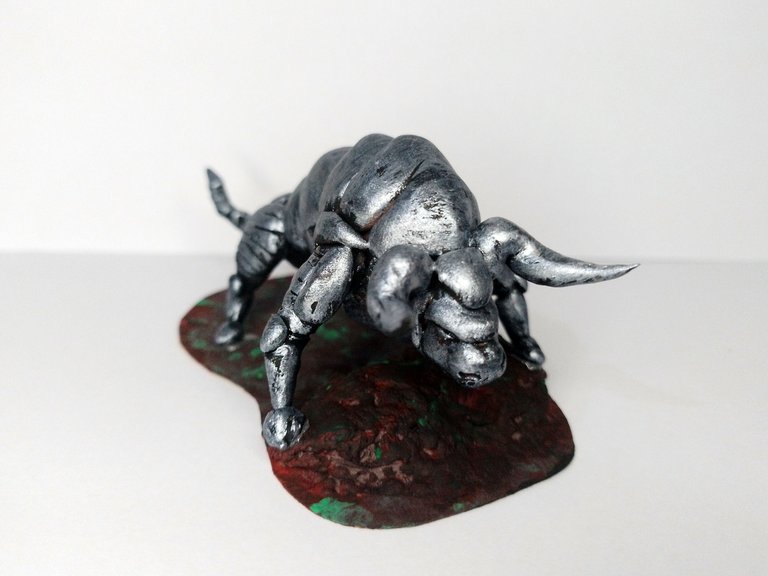
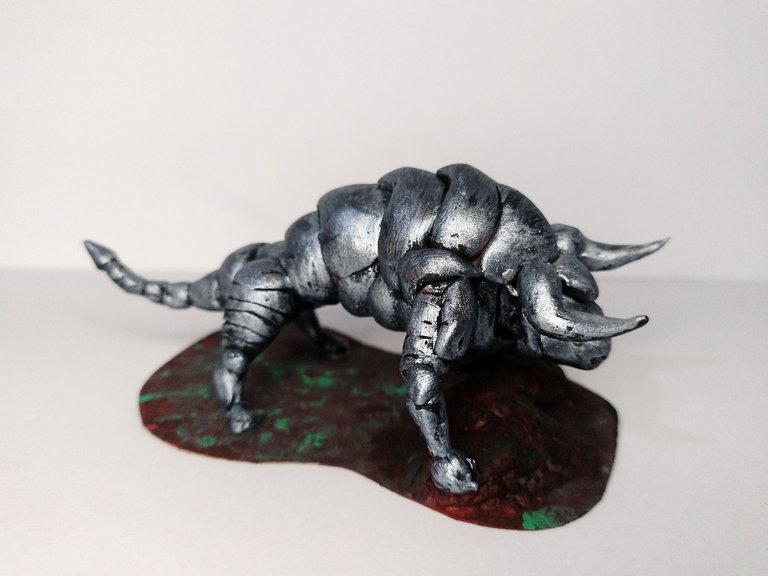
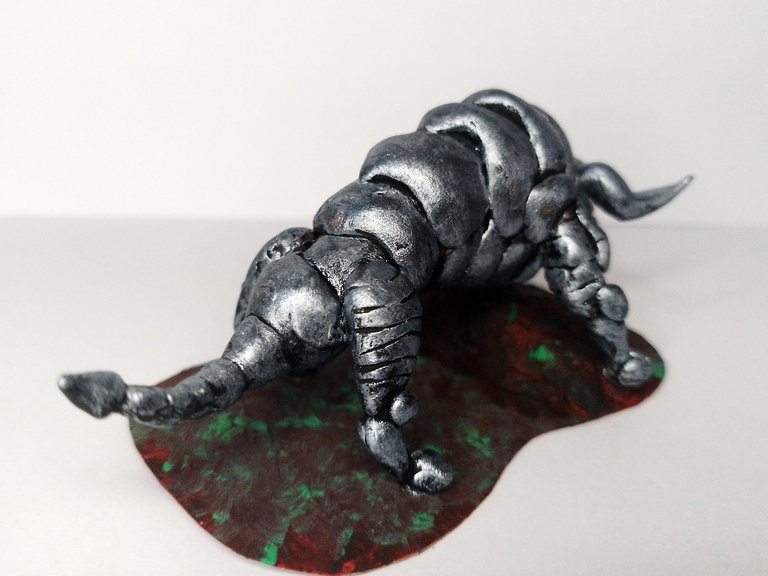
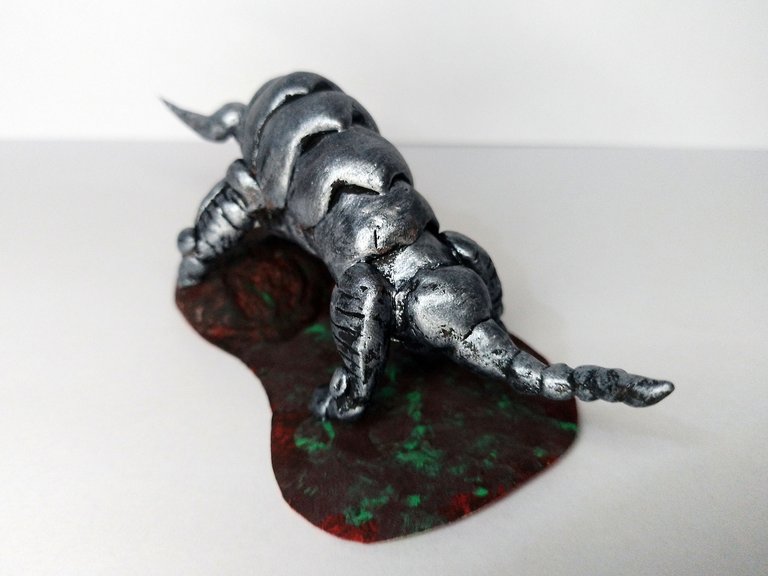
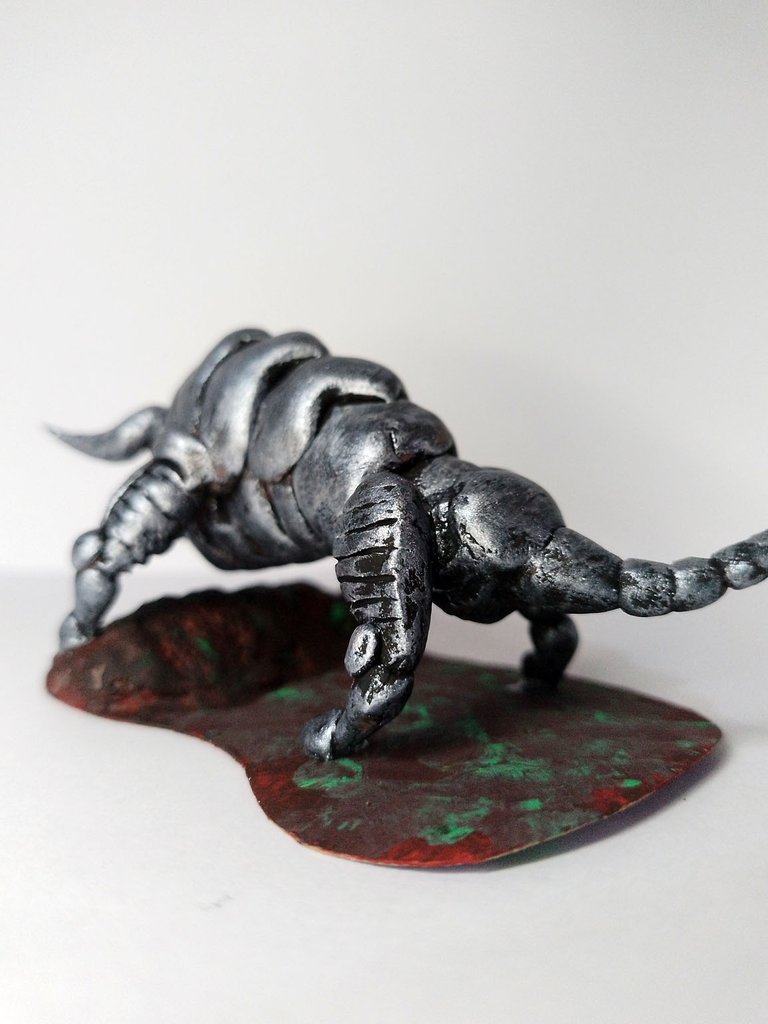
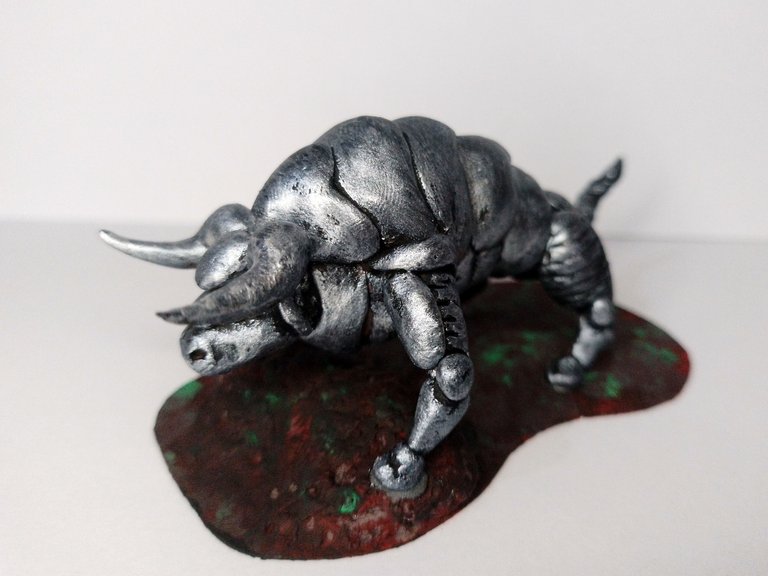
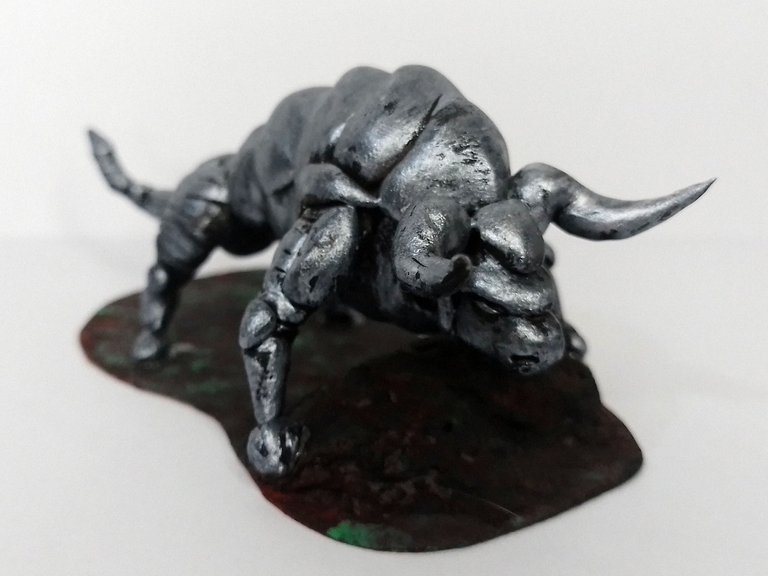
This is how the figurine was finished, here are some pictures of the final result:
De esta manera quedó terminada la figurita, a continuación una serie de fotografías del resultado final:
Well friends, what did you think of the figure? For me it has been a pleasure to have shared this piece with you. I invite you to leave your opinions below in the comments, as always I will be happy to read them.
I appreciate you taking the time to read my publication. With nothing more to add, I'll say goodbye then...
See you next time!
Bien amigos, ¿Qué les ha parecido la figura? Para mi ha sido un placer haber compartido esta pieza con ustedes. Los invito a dejar sus opiniones abajo en los comentarios, como siempre estaré encantado de leerlos.
Agradezco que se tomaran el tiempo de leer mi publicación. Sin más que agregar, me despido entonces…
¡Hasta la próxima!

Hermano definitivamente eres un crack. Cada obra es un nuevo reto superado. Ya debes tener todo un estante repleto de figuras como esta. El don que Dios te ha ofrecido es invaluable ❤️
Jajaja oye que bueno que lo veas así porque ciertamente trato de hscer detallitos nuevos y aplicar tecicas nuevas en cada cosa, siempre es un aprendizaje, uno nunca deja de aprender.
Y sí, gracias a Dios por este don.
😮 Woooowww por Dios esto está "ESPECTACULAR" 😍
La semejanza es impactante, cada detalle, el color, QUE NIVEL 🔥
Muchísima suerte en el concurso, merece un lugar en el podio.
Que tengas un bello día amigo @gaboamc2393 🌻
!DIY
Ey hay muchos artistas talentosos participando en el concurso, asi que ya veremos pero estoy complacido con el resultado.
Pero cada uno tiene su percepción del arte y de los resultados de las obras artísticas, esa es mi opinión, pase o no 🙂
Éxitos...
You can query your personal balance by
!DIYSTATSA really fascinating sculpture and very similar to the original. Great job, a pleasure to see your process in our community. // Una escultura realmente fascinante y muy semejante al original. Gran trabajo, un placer ver tu proceso en nuestra comunidad.
This is so beautiful and so sensible you have the sense of doing this, it really beautiful thank you for your explanation, well done
I'm glad you liked it, I try to do my best to make it something of quality. Thank you very much for your visit to my publication
!giphy good job
!PIZZA
!DHEDGE
@sagarkothari88 reward 0.05 HP
Via Tenor
💐 🎁 Gift 🎁 💐
Empowering DIYHub
Upvote This Comment
Thanks for comment! ❤
This post has been selected for upvote from our token accounts by @bhattg! Based on your tags you received upvotes from the following account(s):
- @dhedge.bonus
- @dhedge.oneup
@bhattg has 5 vote calls left today.
Hold 10 or more DHEDGE to unlock daily dividends and gain access to upvote rounds on your posts from @dhedge. Hold 100 or more DHEDGE to unlock thread votes. Calling in our curation accounts currently has a minimum holding requirement of 100 DHEDGE. The more DHEDGE you hold, the higher upvote you can call in. Buy DHEDGE on Tribaldex or earn some daily by joining one of our many delegation pools at app.dhedge.cc.
$PIZZA slices delivered:
@bhattg(8/10) tipped @gaboamc2393
This is very cool!
Do you think so? Hehehe thank you very much for telling me, I'm glad you liked it.
Luce realmente muy bien su miniatura, se necesita de cierta habilidad para hacer ese trabajo.
Y paciencia jajaja son piezas muy chiquititas.
Te quedó espectacular ....parece que fuera una armadura metálica ...cuantos detalles en las divisiones.
Cada vez me gustan más tus trabajos .
!discovery 45
!VSC
@chacald.dcymt has sent VSC to @gaboamc2393
This post was rewarded with 0.1 VSC to support your work.
Join our photography communityVisual Shots
Check here to view or trade VSC Tokens
Be part of our Curation Trail
@chacald.dcymt ha enviado VSC a @gaboamc2393
Éste post fue recompensado con 0.1 VSC para apoyar tu trabajo.
Únete a nuestra comunidad de fotografía Visual Shots
Consulte aquí para ver o intercambiar VSC Tokens
Se parte de nuestro Trail de Curación
Hay que ser muy cuidadoso en los detalles, la mágia está allí. Muchas gracias por tu apoyom
This post was shared and voted inside the discord by the curators team of discovery-it
Join our Community and follow our Curation Trail
Discovery-it is also a Witness, vote for us here
Delegate to us for passive income. Check our 80% fee-back Program
Sigue, contacta y se parte del testigo en: // Follow, contact and be part of the witness in:
Keychan - Hive.blog - Ecency - Peakd
Felicidades!!! haz hecho un excelente trabajo como siempre destacandote, me dio mucha risa las imagenes del inicio se veia feito y después booom la transformación, demasiado!!! @gaboamc2393
Hay imfotos eb las que parece un coco o un insecto raro jajaja es que nada a medio terminar se ve bien
Well detailed content. Your art work is so cute and adorable.
!DIY
Although you say it's cute and cuddly I wanted to give a reckless look to this bull hahaha but for the size of the figure, a miniature, I think it does fit the definition of cute and cuddly hehehehe.
You can query your personal balance by
!DIYSTATSEsto es tan hermoso . Me gusta mucho.
Oohhh no había visto esta carta, que hermoso toro de metal y excelente trabajo, me gustó mucho el acabado metálico y la forma en general quedó como para ponerlo en escritorio así todo lujoso de alguien con un cargo importante. Saludos 😊
Thanks for sharing! - castleberry#6859
