Splinterlands Art Contest 176: Xenith Monk [ESP – ENG]
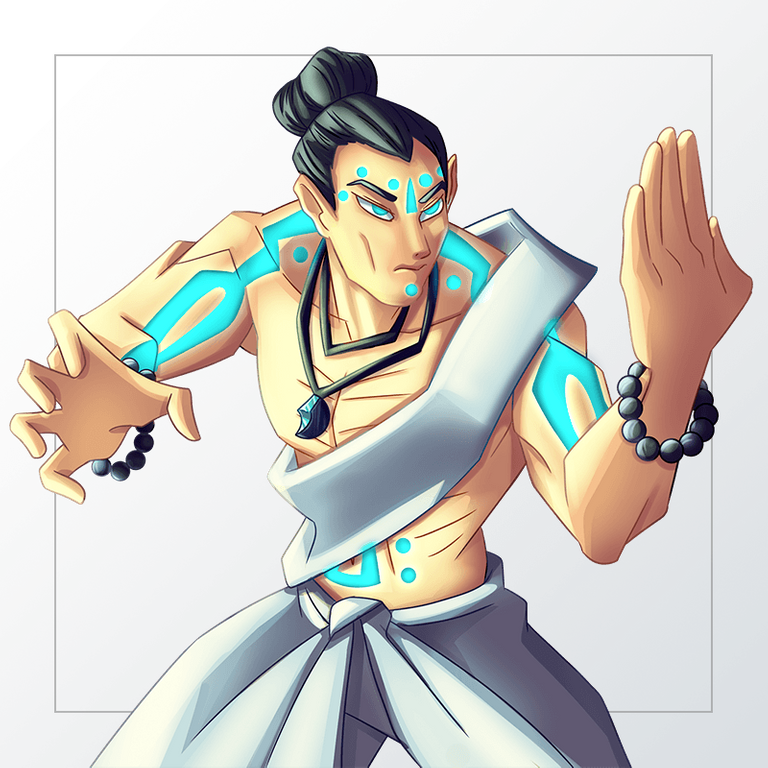
Saludos a todos los miembros de la comunidad, ¿cómo están? Decidí participar de nuevo en lo que se está convirtiendo para mí en parte de mi proceso de aprendizaje en esto del dibujo digital, pues debo decir que este concurso está despertando mis ganas de dibujar. El personaje en el que ahora me inspiré fue Xenith Monk, me gustó mucho porque en cierta medida me recordó al Avatar, pues los tatuajes tienen cierta semejanza con el color, así que decidí intentar hacerlo.
I decided to participate again in what is becoming for me part of my learning process in this digital drawing, because I must say that this contest is awakening my desire to draw. The character in which now I was inspired was Xenith Monk, I liked it a lot because to some extent it reminded me of Avatar, as the tattoos have some similarity with the color, so I decided to try to do it.
Proceso - Process
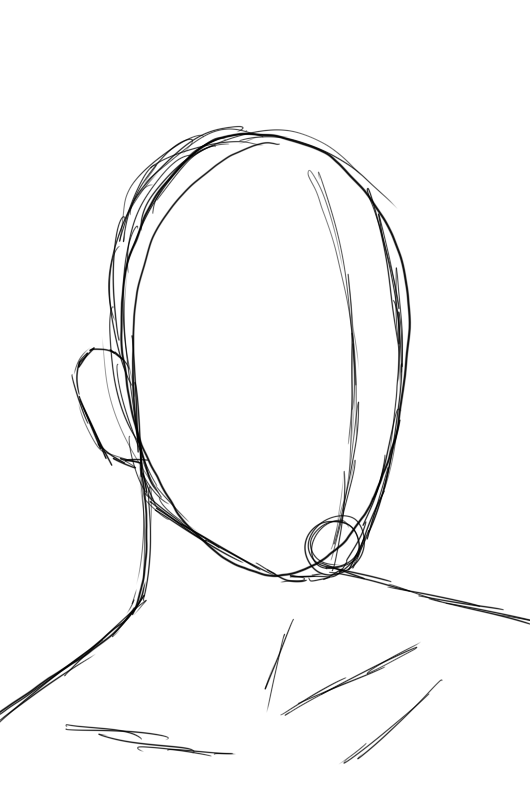
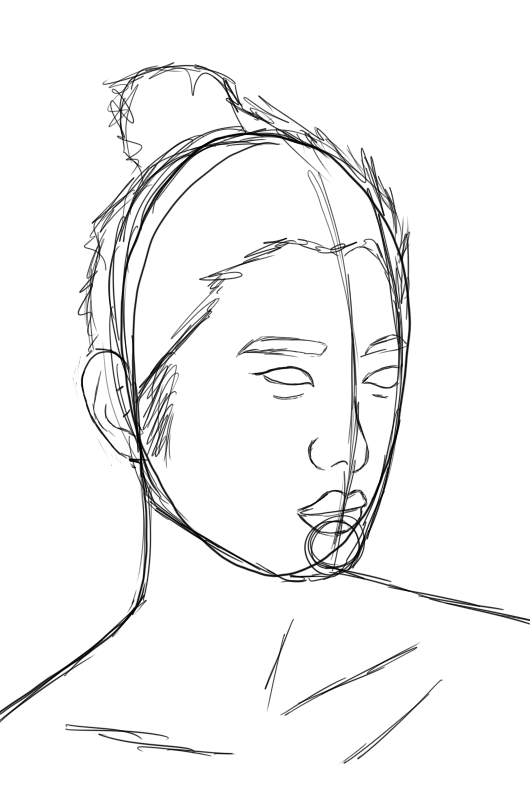
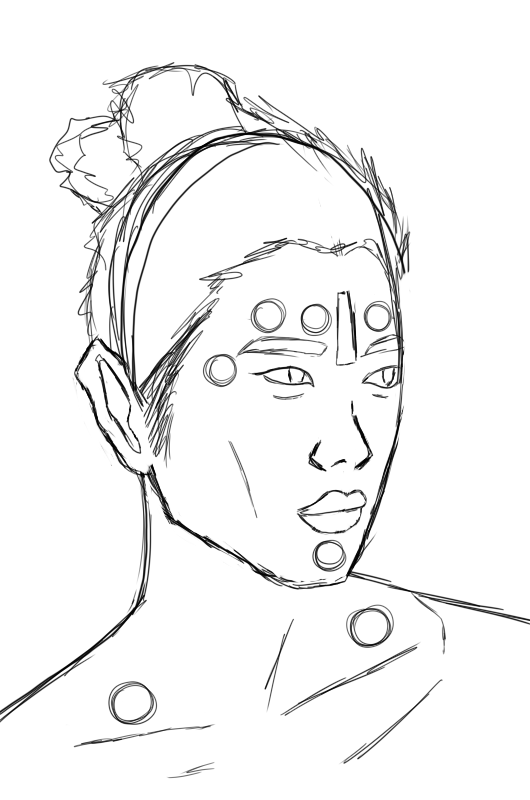
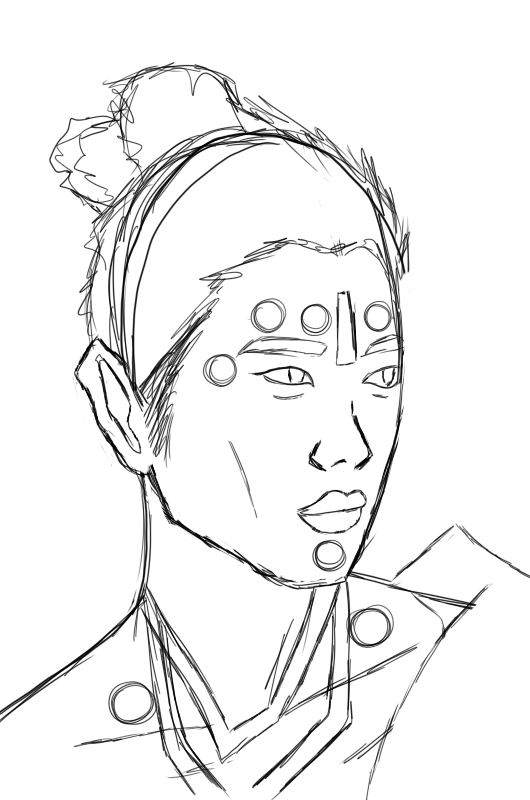
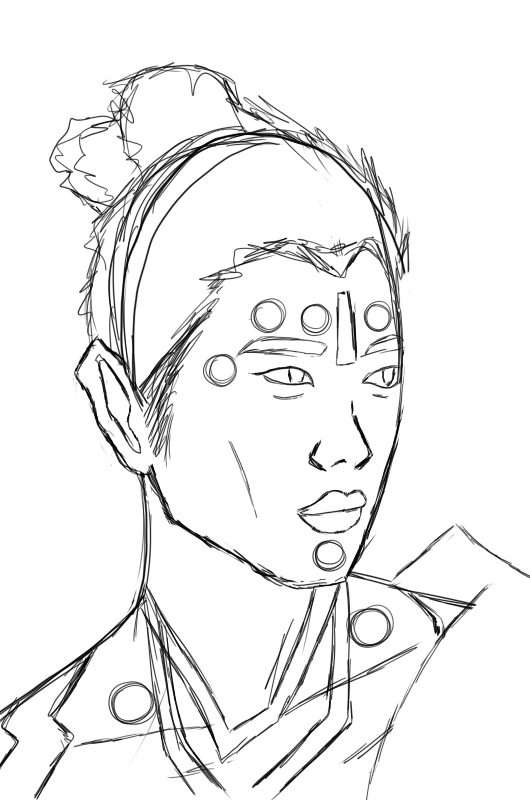
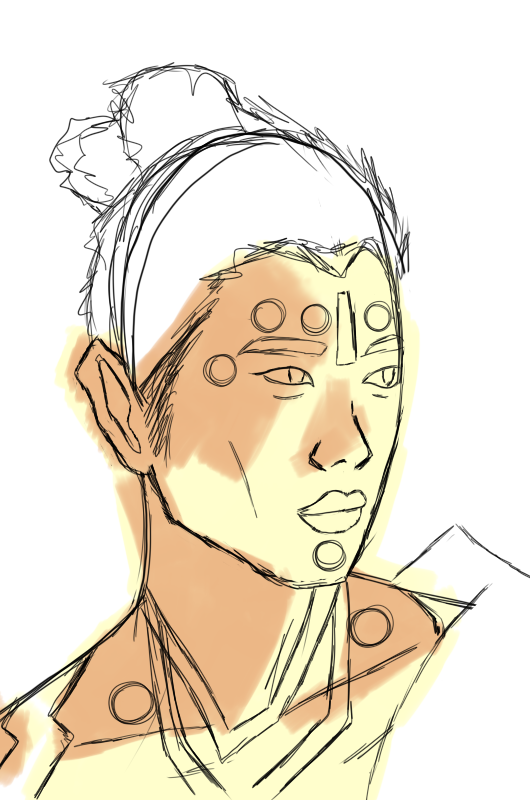
Empecé haciendo el primer bosquejo con las formas básicas de la postura, para luego colocarle sus rasgos faciales, dígase, la nariz, boca, ojos, y cejas, los cuales decidí dibujar fieles al modelo del que me estuve guiando en un principio. Después de limpiar algo los trazos, con algunos añadidos de los detalles de la oreja, le dibujé el cabello. En este punto decidí agregarle características que le dieran mayor esencia del personaje, así que endurecí las líneas de su mandíbula cambiándole la forma, y su oreja también la cambié por una más cuadrada. Además, le añadí la ubicación del interior de los ojos. Me di cuenta que también podría marcar un poco la forma de la nariz para hacerla cuadrada, al igual que la oreja, en un intento por irle dando mayor parecido. Borré algunas líneas del boceto, añadí los tatuajes que tiene, una nueva incorporación al moño del cabello, los collares que posee y la parte de la banda que cruza su pecho correspondiente a la posición en la que está.
I started by making the first sketch with the basic shapes of the pose, and then I placed his facial features, namely, the nose, mouth, eyes, and eyebrows, which I decided to draw faithful to the model I was guided by in the beginning. After cleaning up the strokes a bit, with some additions of the ear details, I drew the hair. At this point I decided to add features that would give him more essence of the character, so I hardened the lines of his jaw changing its shape, and his ear I also changed it for a more square one. In addition, I added the location of the inside of the eyes. I realized that I could also mark a little bit the shape of the nose to make it square, as well as the ear, in an attempt to give it more resemblance. I erased some lines from the sketch, added the tattoos he has, a new addition to the hair bun, the necklaces he has and the part of the band that crosses his chest corresponding to the position he is in.


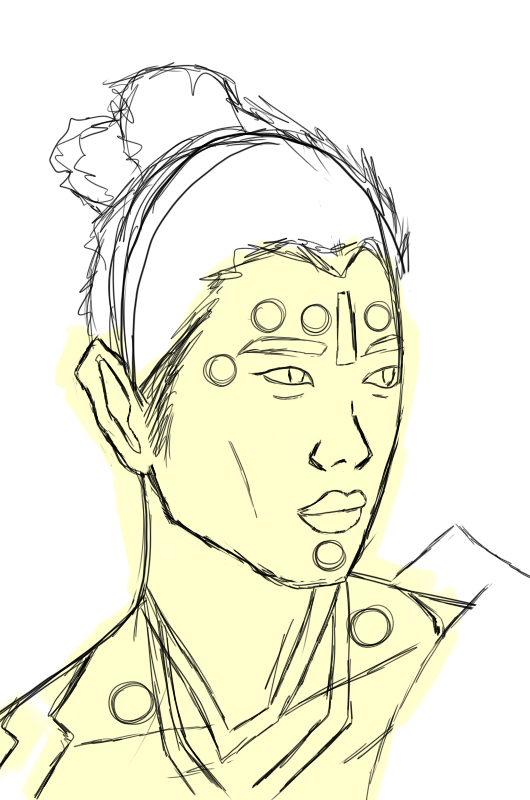
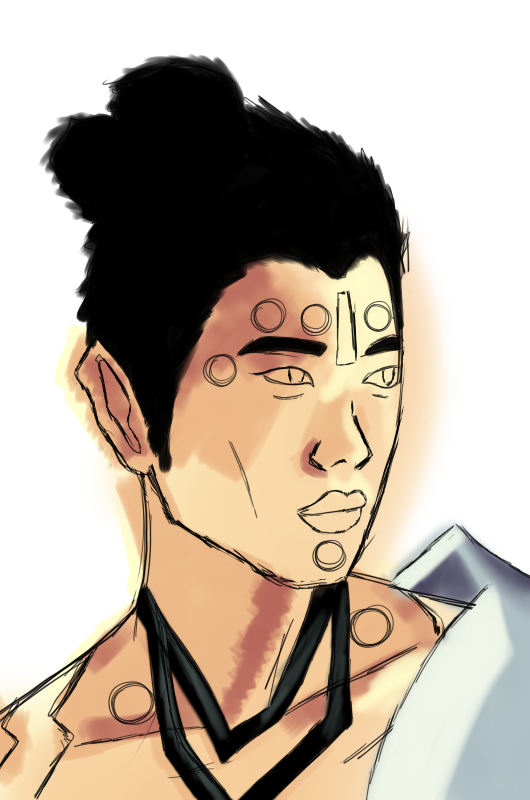
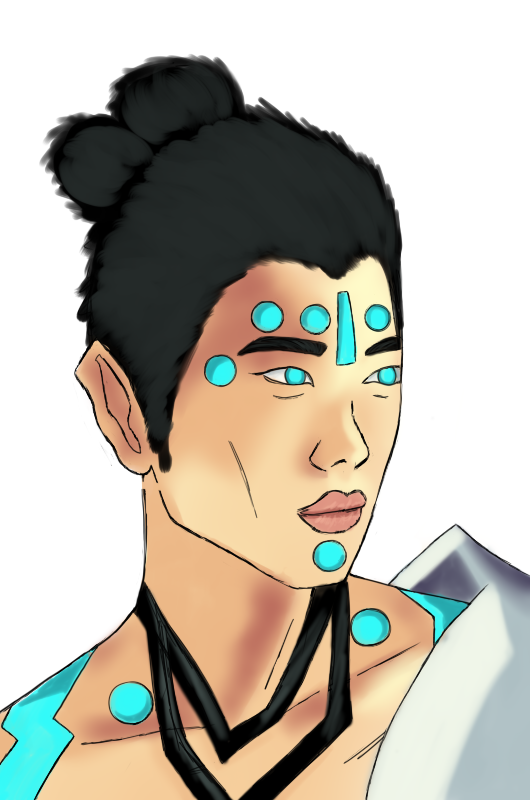
Una vez listo todo el bosquejo, coloqué el color base, decidí elegir una paleta de colores cercana al mismo color del personaje. Luego agregué el color de la sombra, con una segunda capa de sombra más oscura en ciertas áreas donde me parecía que iba. Después pinté la base del cabello en negro, mismo color que usé para la base de ambas cejas, y collares. Noté que el color que elegí para toda la base de la piel no estaba combinando bien con los demás así que lo cambié por uno que fuese al mismo tono que el color que usé para la primera capa de sombra pero algo más ligero, y quedó un tanto mejor. Ahora sí al no haber quedado la base de la piel tan tenue como estaba antes, le añadí algunas luces para resaltar.
Once all the sketch was ready, I placed the base color, I decided to choose a color palette close to the same color of the character. Then I added the shadow color, with a second layer of darker shadow in certain areas where I thought it would go. I then painted the base of the hair in black, the same color I used for the base of both eyebrows, and necklaces. I noticed that the color I chose for the entire base of the skin was not blending well with the others so I changed it to one that was the same shade as the color I used for the first layer of shadow but a little lighter, and it looked a little better. Now that the base of the skin wasn't as subdued as it was before, I added some highlights to make it stand out.
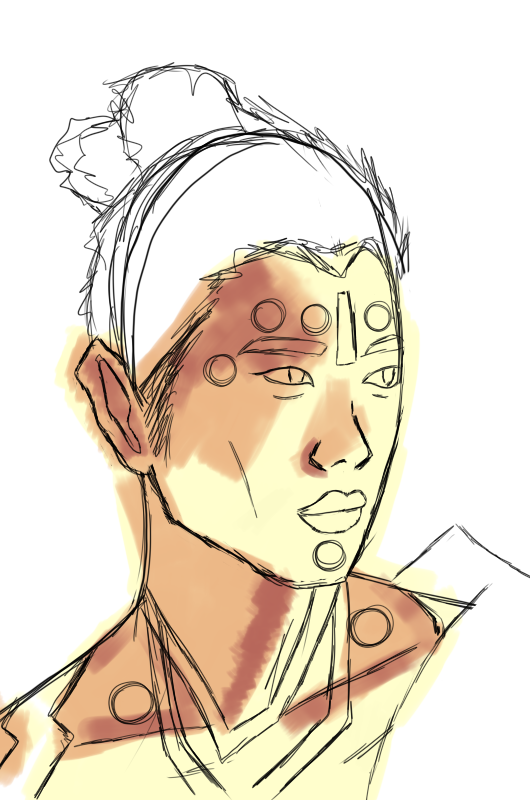
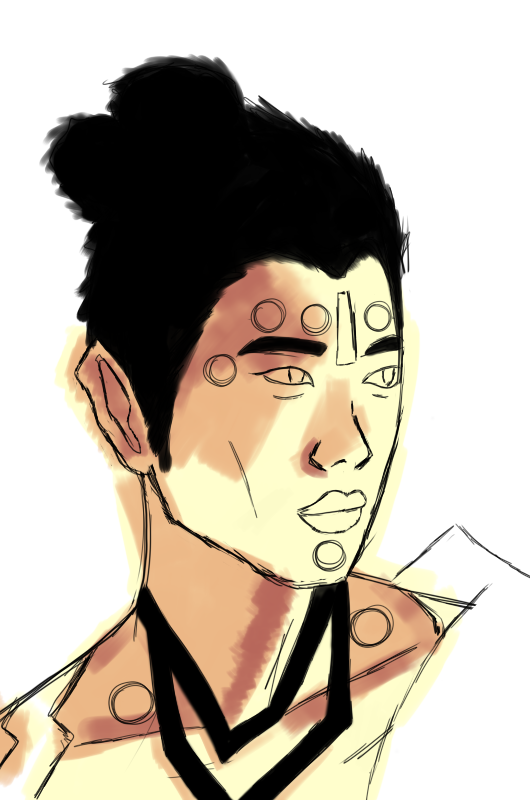

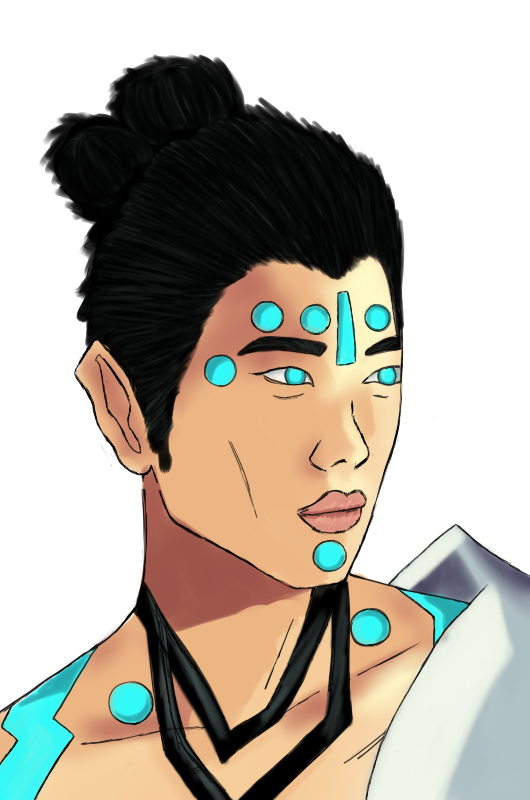
Comencé a trabajar en la parte de la banda que tiene colocándole la capa de sombra, para darle su forma. Le agregué el color base de la banda, traté de que la paleta de colores fuese similar a la que el personaje tiene, añadiéndole entonces las luces para luego utilizar la herramienta de difuminar. Terminada la banda le coloqué las luces a los collares. Luego me enfoqué en los labios pintándoles la base, agregué una ligera capa de sombra en el medio, y después líneas de luces para añadirles el detalle de las marcas que se le hacen a los labios, usé una paleta de colores similar a la que usé por la piel y creo que combinó muy bien porque el resultado no se ve tan mal.
I started to work on the part of the band that has the shadow layer, to give it its shape. I added the base color of the band, I tried to make the color palette similar to the one the character has, then I added the lights and then I used the blur tool. Once the band was finished I added the lights to the necklaces. Then I focused on the lips painting the base, I added a light layer of shadow in the middle, and then lines of lights to add the detail of the marks that are made to the lips, I used a color palette similar to the one I used for the skin and I think it combined very well because the result doesn't look so bad.


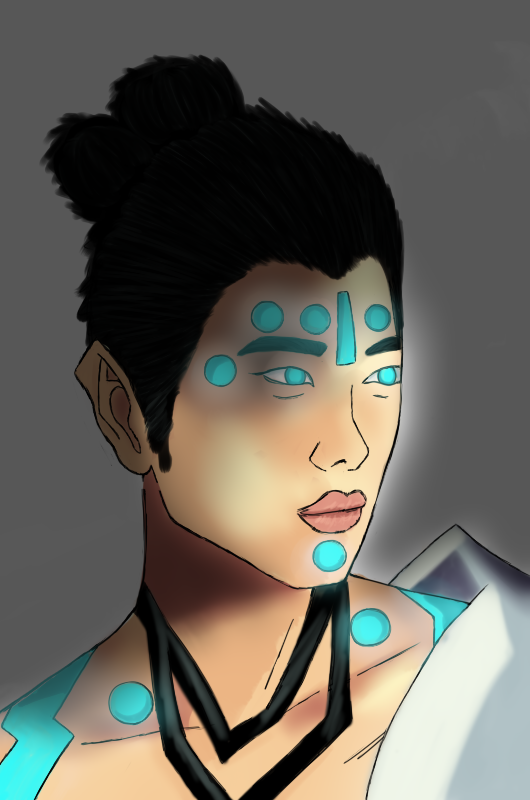
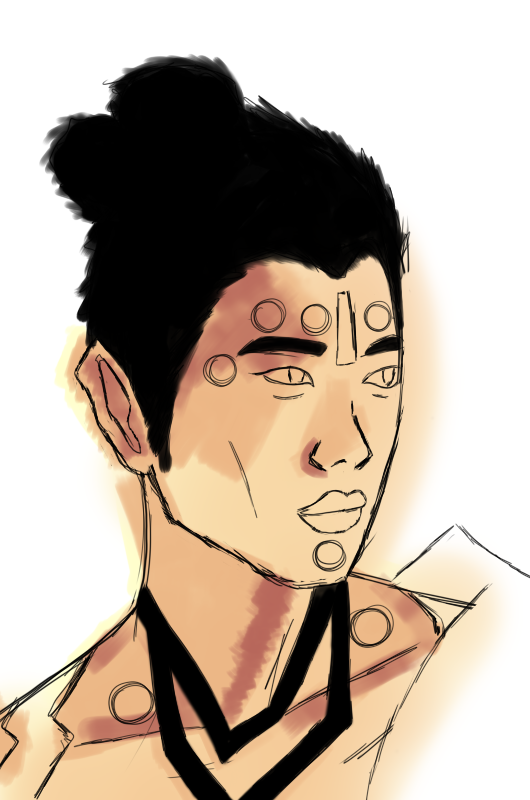
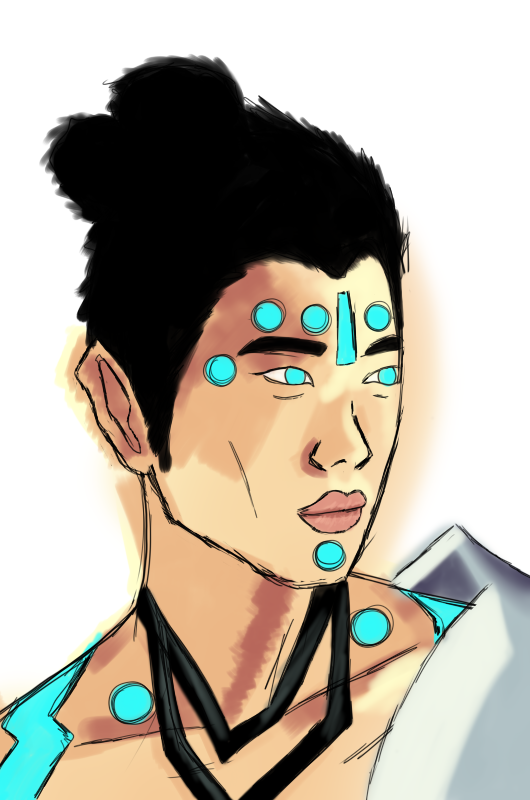
El color de los tatuajes traté de hacerlo fiel al personaje, les pinté la base, y lo mismo con los ojos a los que luego les quité el color piel del fondo para ponerlo blanco. Añadí la sombra a los tatuajes y a los ojos, agregándole al fondo de estos un tenue color gris para hacerle las sombras también. Los excesos de líneas del bocelo los fui eliminando poco a poco para que quedara todo más limpio por ya estar llegando al final. Volví a usar la herramienta de difuminado esta vez sobre la piel para que las marcas de los colores se suavizaran.
The color of the tattoos I tried to make it faithful to the character, I painted the base, and the same with the eyes to which then I removed the skin color of the background to make it white. I added the shadow to the tattoos and the eyes, adding a faint gray color to the background to make the shadows as well. I eliminated the excess of the lines of the drawing little by little so that everything would be cleaner since I was getting to the end. I used the blurring tool again, this time on the skin to soften the marks of the colors.

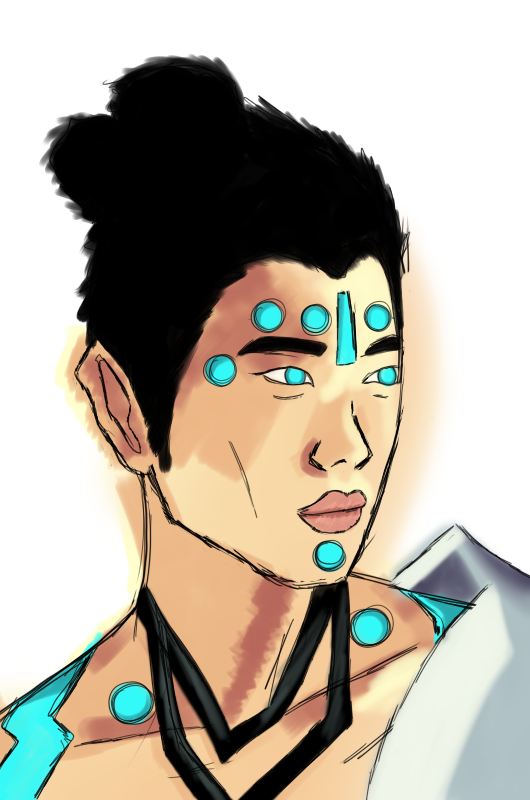

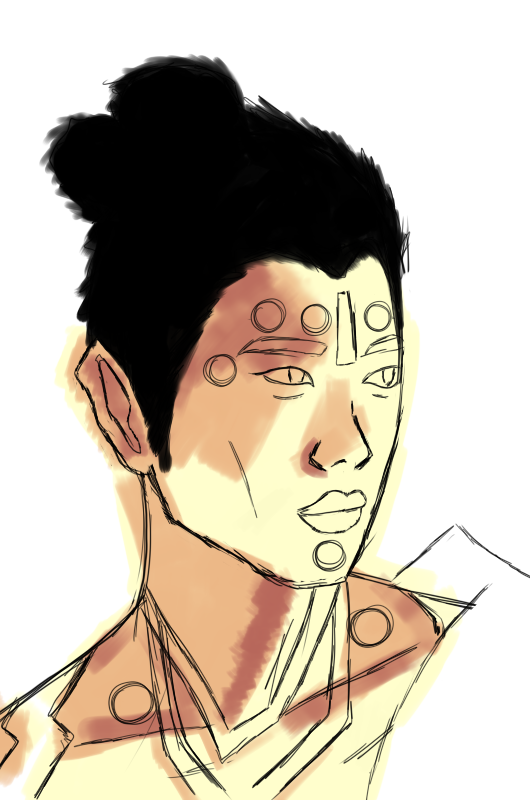
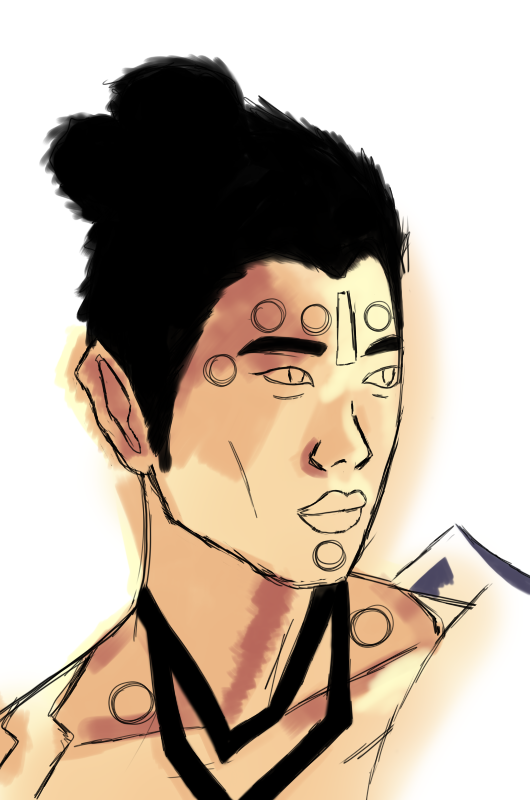
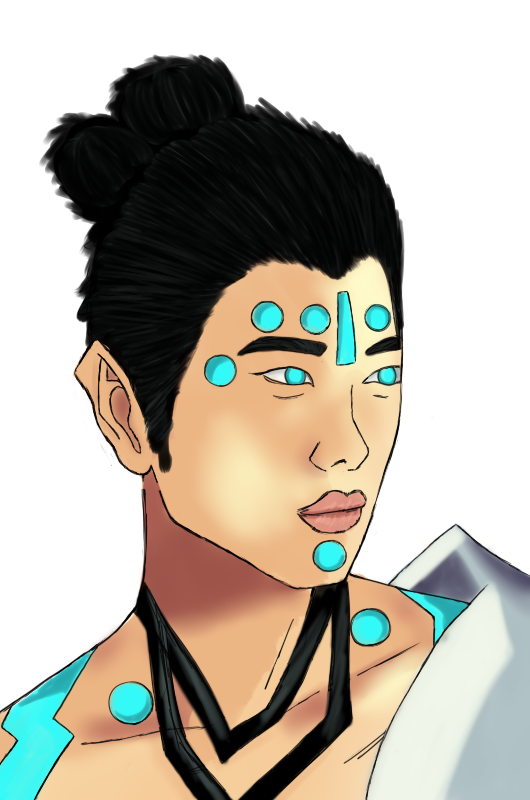
Borré otras líneas sobrantes del boceto y agregué una segunda capa sobre la base color negro que había colocado en el cabello, después le fui intentando dar los detalles de hebras de cabello con el mismo color de la base en una capa diferente, dándole forma. Terminado me di cuenta de que con la posición de las sombras me había equivocado y decidí arreglarlo, así que las cambié borrándolas mientras al mismo tiempo añadía nuevas en otra ubicación. También añadí más luces. Cambié por igual un poco la nariz, además del interior de la oreja que se encontraba completamente mal en su composición, añadiéndole entonces sus respectivas sombras acordes a su nueva forma, luego, usé nuevamente la herramienta de difuminado.
I erased other lines left over from the sketch and added a second layer over the black base that I had placed on the hair, then I tried to give the details of the hair strands with the same color of the base in a different layer, giving it shape. Finished I realized that with the position of the shadows I had made a mistake and decided to fix it, so I changed them by erasing them while at the same time I added new ones in another location. I also added more lights. I also changed the nose a bit, as well as the inside of the ear that was completely wrong in its composition, adding their respective shadows according to its new shape, then, I used the blur tool again.


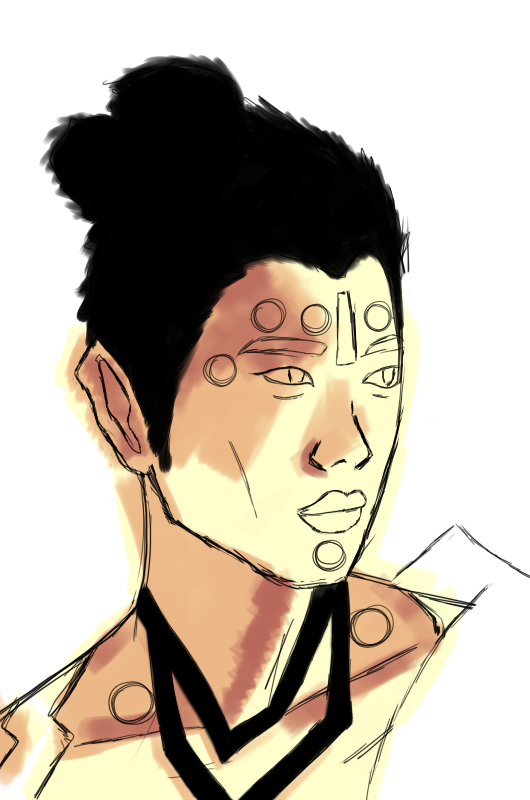
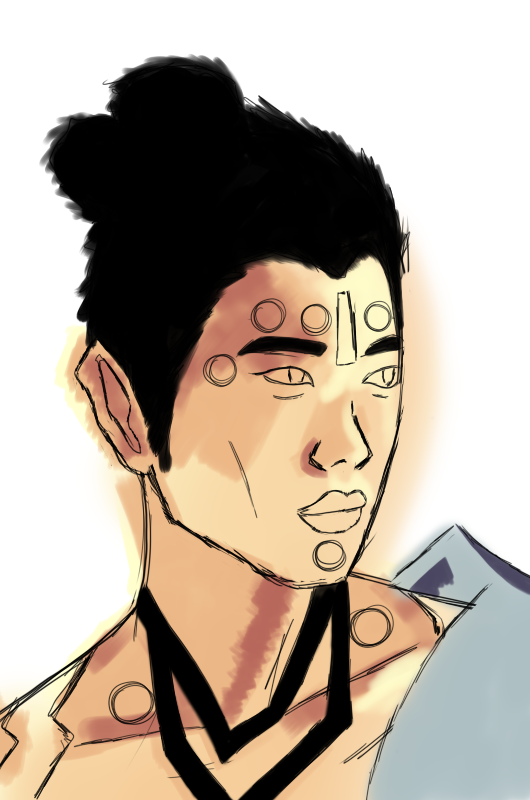
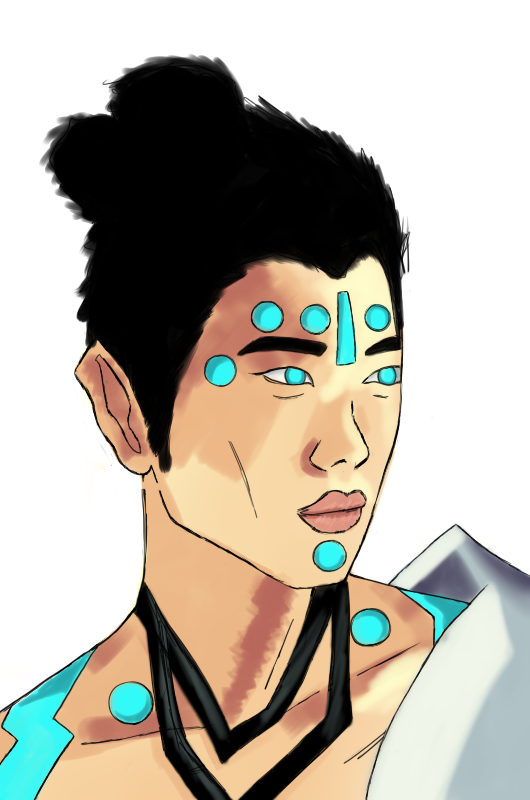
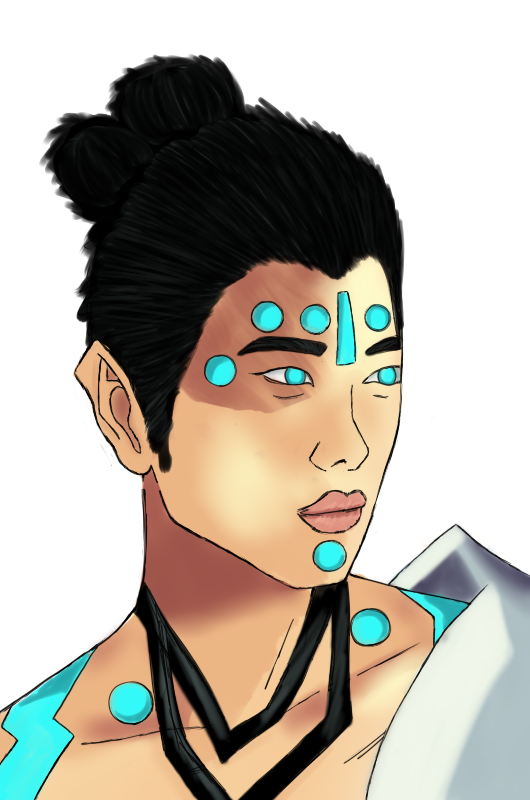
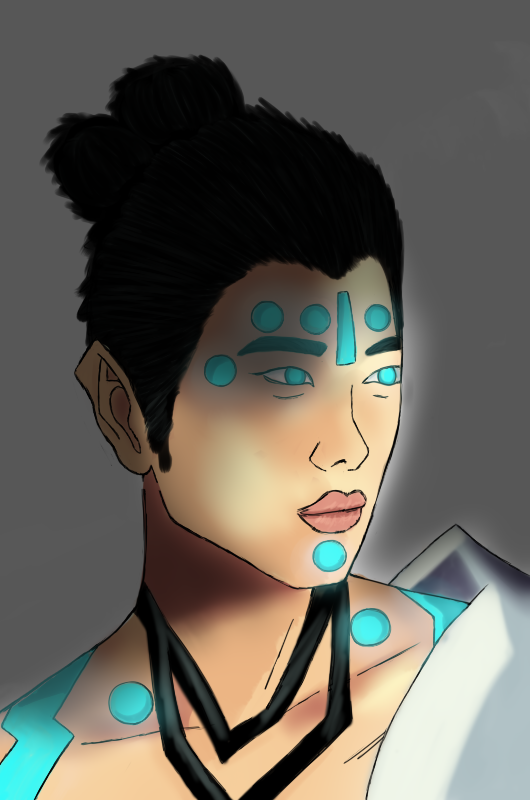
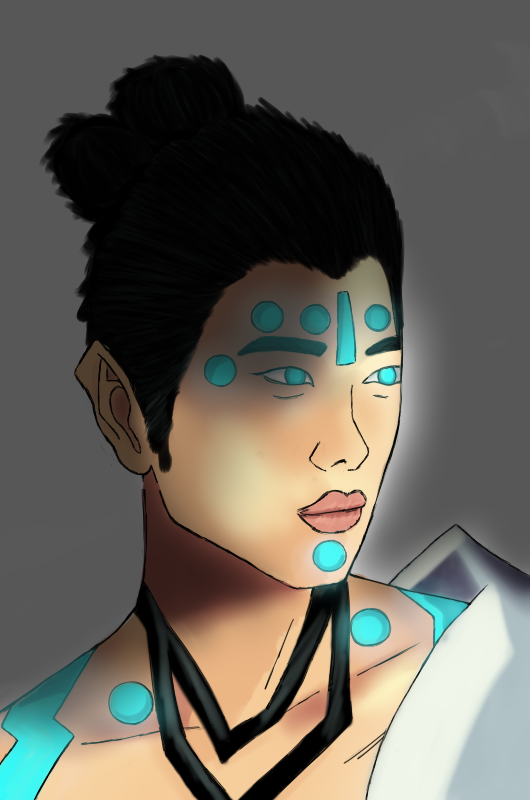
En esta última parte agregué una especie de fondo usando la herramienta de gradación en negro y la apliqué para además añadir sombra, sin embargo, no quedé conforme y usé de igual manera en una nueva capa una sombra con un menor porcentaje de opacidad pues no estaban resaltando los tatuajes y los ojos de la manera en la que yo quería, ya que a estos les apliqué encima una capa del mismo color base con efecto luminoso para darles ese aspecto que están brillando. Al hacerlo, por lo menos resaltaban más, pero no me pareció correcto que los que estaban en la zona oscura en el rostro quedaran así, si brillan deberían iluminar un poco también la piel, así que con la borra, pues les terminé de dar los últimos detalles para dar con el resultado final.
In this last part I added a kind of background using the gradation tool in black and applied it to also add shadow, however, I was not satisfied and I used in the same way in a new layer a shadow with a lower percentage of opacity because they were not highlighting the tattoos and eyes the way I wanted, since I applied on top of them a layer of the same base color with luminous effect to give them that appearance that they are shining. By doing so, at least they stood out more, but I didn't think it was right that the ones in the dark area on the face were like that, if they shine they should also illuminate a little the skin, so with the eraser, I finished giving them the last details to give the final result.


Espero que les haya gustado, estoy tratando de mejorar cada día y espero llegar a los niveles de un gran número de personas talentosas que participan dentro de la comunidad. Esto ha sido todo por ahora, siéntanse libres de decirme qué les pareció el dibujo, las críticas son muy bien recibidas con los brazos abiertos pues quiero seguir avanzando y para ello agradezco cualquier consejo. Muchas gracias por leer, hasta pronto.
I hope you liked it, I'm trying to improve every day and I hope to reach the levels of a large number of talented people who participate in the community. This has been all for now, feel free to tell me what you thought of the drawing, criticisms are very welcome with open arms as I want to keep moving forward and for that I appreciate any advice. Thank you very much for reading, see you soon.
0
0
0.000
Electronic-terrorism, voice to skull and neuro monitoring on Hive and Steem. You can ignore this, but your going to wish you didnt soon. This is happening whether you believe it or not. https://ecency.com/fyrstikken/@fairandbalanced/i-am-the-only-motherfucker-on-the-internet-pointing-to-a-direct-source-for-voice-to-skull-electronic-terrorism
Congratulations @gabrieladifazio! You have completed the following achievement on the Hive blockchain and have been rewarded with new badge(s):
Your next target is to reach 80 posts.
You can view your badges on your board and compare yourself to others in the Ranking
If you no longer want to receive notifications, reply to this comment with the word
STOPTo support your work, I also upvoted your post!
Check out the last post from @hivebuzz:
Support the HiveBuzz project. Vote for our proposal!
Thanks for sharing! - castleberry#6859
