Gargoya Scrapper | Splinterlands Social Media Challenge
Join this magical battle and let's face the chaos together!
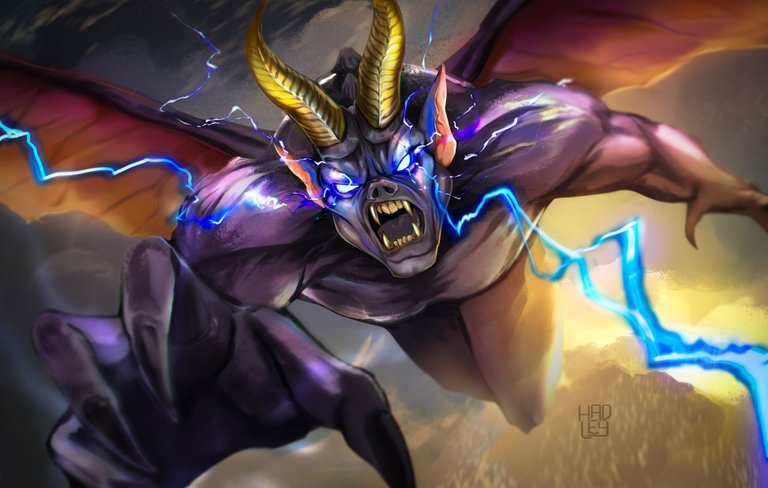
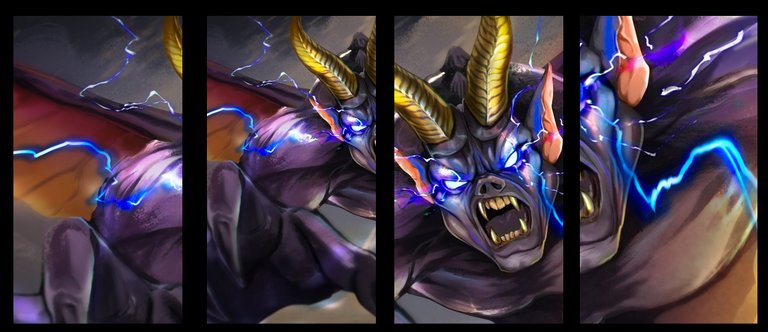
I'm excited to share my latest digital fan art of "Gargoya Scrapper" from Splinterlands. This brave gargoyle survived the devastating Chaos Legion attack on the great castle of Gargoya. Some gargoyles fled, but the Scrappers, as they are now known, decided to stay and rebuild their kingdom. Their goal is to create more Gargoyles and avenge their fallen brethren.
So I have decided to paint one of these fierce creatures rising in the sky overflowing magic from his eyes, announcing that soon there will be an army of gargoyles to take revenge against the chaos legion.

Play Splinterlands Now❕

-Step 1:
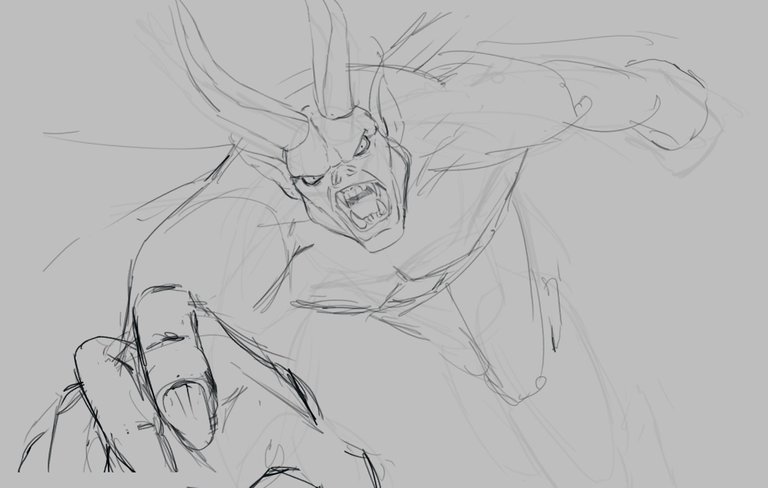
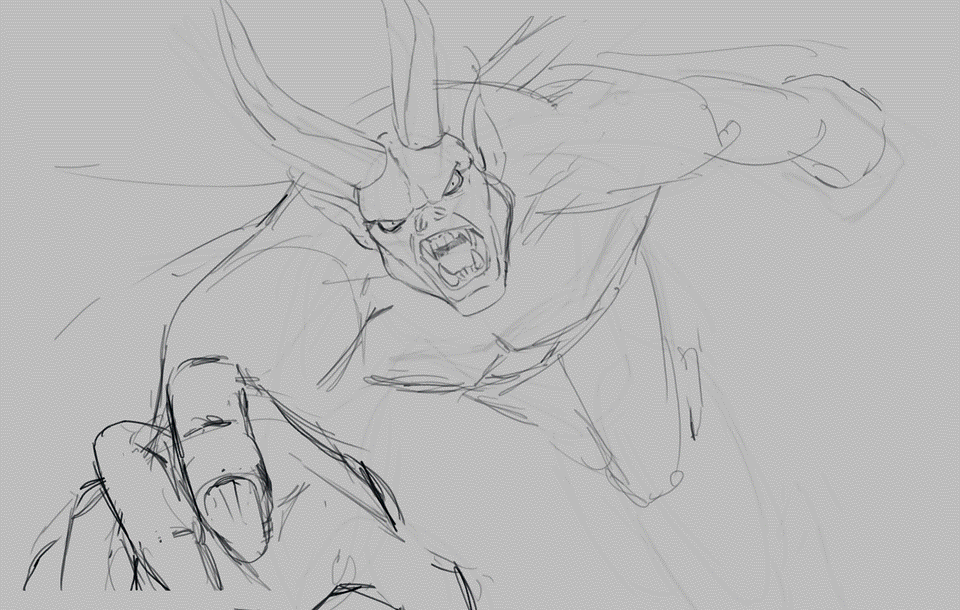
The choice of pose was key. I wanted to convey her determination and courage in the battle against chaos. I opted for a pose in which Gargoya goes straight towards the camera, occupying as much space as possible on the canvas. In this way, his imposing presence shines through in every detail.
 | 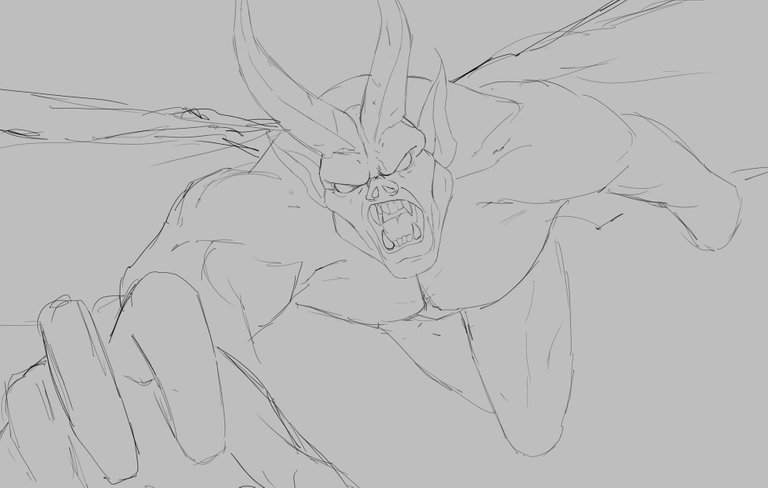 |
|---|
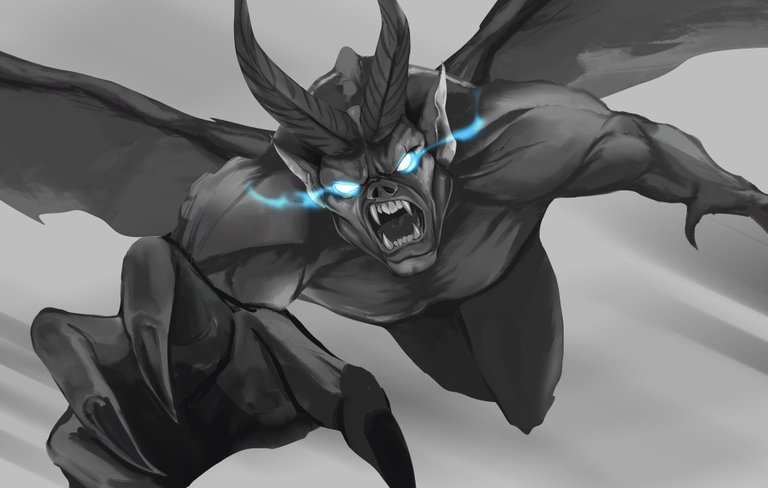
-Step 2:
I used grayscale to give detail and volume to the gargoyle. The shades of gray gave depth and realism to his figure, creating a three-dimensional effect that highlights his imposing muscular body that is between the naturalness of the muscles and the resistance of the stone.
But the magic touch was reserved for his eyes. I decided to add an intense blue glow in his eyes to reflect his power and magic that now glow with an unearthly energy, conveying his resolute determination in the fight against the Legion of Chaos. Although it was really to make it look cool the touch of color in the midst of so much gray. 😅
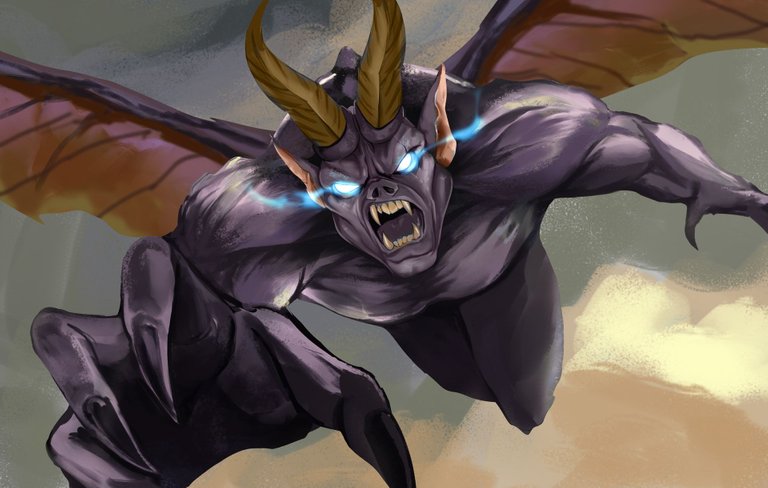
-Step 3:
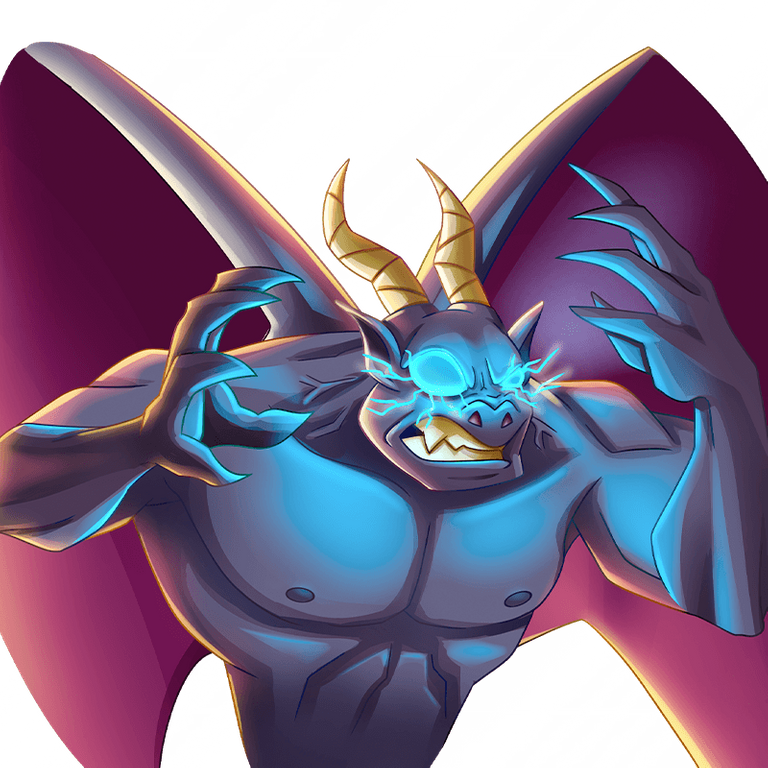
For coloring of course I used the "color" fusion mode, with this I could color quickly and effectively the body of the gargoyle without altering the work done in grays, also I could experiment with different illuminations of other colors, but I wanted to stay attached to the dark violet tone that originally has this character in the Splinterlands cards.
 |  |
|---|
-Step 4:
I wanted to focus most of the detailing on the monstrous face of the gargoyle, so I proceeded to improve the horns and give them a more vivid color tone and according to the magic emanating from his eyes, in the original design there are rays coming from his glowing eyes, this of course I was going to capture it in my fan art, so with a white color I designed the path of the rays, to which I then applied the effect of "external brightness" to illuminate them quickly of the blue / violet tone I wanted.
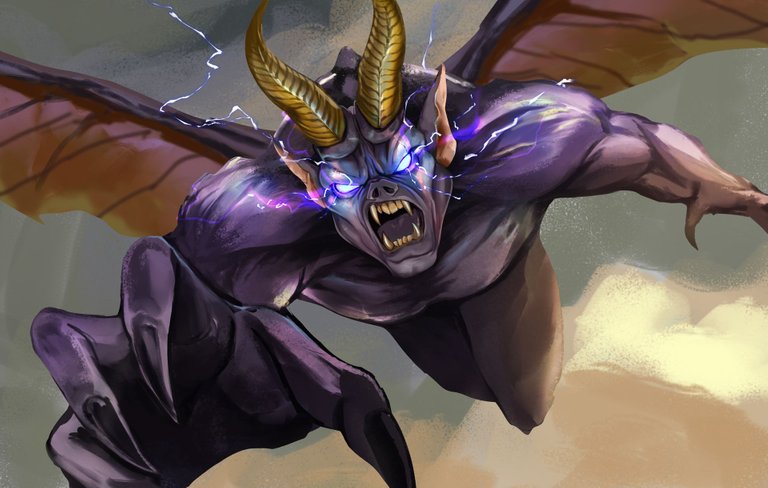
-Step 5:
So far the work on the painting was almost completely finished, so instead of spending a lot of time rendering every inch of the illustration and smoothing every brushstroke, I wanted to focus on improving the lighting, for that I first mixed everything in a new layer and proceeded to play with the filter options of Camera Raw, giving it more contrast with a little vignette on the edges, applying a little more saturation and other little things that I was playing with, also with the "hard light" blending mode I assimilated the brightness of the rays, including the new big rays that go outside the canvas. And that was all, maybe I still owe a little detail to the wings, but I have left a close up of the most important details of the gargoyle so you don't have to zoom in.
I will leave you a GIF with the whole process on it, so you can better appreciate the illustration process.

See you in a future post!
Thank You for Supporting My Artwork
▶️  |
| |
| |
| |
| |
| ◀️
◀️
TWITTER | GHOSTMARKET |TERRA VIRTUA |NFT SHOWROOM | INSTAGRAM | FACEBOOK
⬆️ Follow ⬆️
Realmente genial, debes tener muchas horas de práctica para poder pintar Así.me h aguantado ese efecto como de desenfoque que has agregado alrededor y los rayos en el gif final.
Gracias, si ya hace un par de años que pinto en digital, todo está en practicar constantemente. El efecto de desenfoque se consigue usando el desenfoque gaussiano, luego aplicarle una mascara de capa y con esta aplicar el efecto solo en las zonas que se desee 😁
Contáctenos para saber más del proyecto a nuestro servidor de Discord.
Si deseas delegar HP al proyecto: Delegue 5 HP - Delegue 10 HP - Delegue 20 HP - Delegue 30 HP - Delegue 50 HP - Delegue 100 HP.
Excellent. I like your style. You've done a great job with this character.
Thanks for sharing! - @mango-juice

ohhpaa me encanta el movimiento, parece que me quiere agarrar 😁
Con un desenfoque de movimiento radial lo clavas hahahhhaha
has visto a Bayard Wu
otro ejemplo.El hace mucho ese efecto no se si lo hace asi con el radial pero es lo que me parece a mi hahahha
he metido mi cucharada, excusemeee😘
Holi, vengo a responder 30 años después, gracias por el consejo ✨, aunque
lo estuve intentando y no me sale muy bien el efecto, creo que hacen falta mas elementos para distorsionarlos, pero si se siente que aumenta la ferocidad del personaje
hmmmmmmm
tarde pero sefguro hahha
de nada ahahha, si eso puede ser , pero si m es cierto que se nota un cambio, se ve con mas movimiento, habria que meterle el ojo e ir probrando , creo que la mano no se desenfocaria tal vez obtengas otro resultado con eso.
PD. felicidades por el concurso pasado, se veia super cool la tela super brillante