BATTLE MAGE SECRETS : EQUALIZER


Pros & Cons
 |  |
|---|---|
1. Equalizers will benefit players with weak Tanker collection, since bringing heavy Tanker with huge health will only benefit opponent. | 1. With high mana cap battle, this ruleset become a dillematic choice. Maximizing high mana cap will need balance between maximizing damage output while restraining from deploying card with too great health value. |
2. If the health turns out to equalize quite high, bringin Heal and Tank Heal will be a great benefit. | 2. Battle tend to run into long running round under this ruleset as the huge increase in health are not balanced with the basic damage value. |

Best Cards To Use
WATCH BATTLE
So here we have the battle experience with Equalizer as the ruleset. Click BATTLE LINK to see how the battle run.

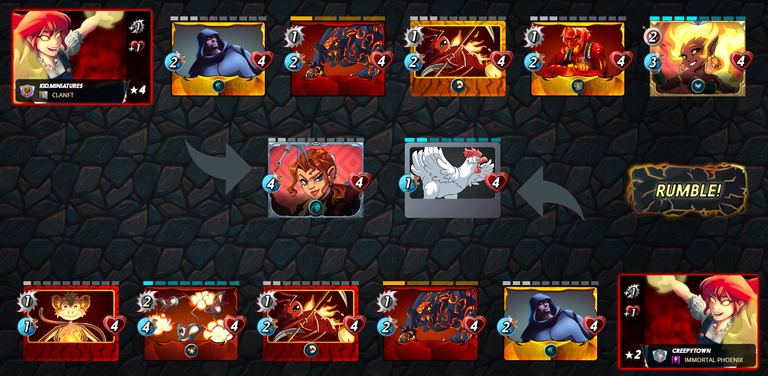
The battle has a maximum 12 mana cap, with Melee Mayhem and Equalizer as the rulesets; while all Splinters are made available except for the Water Splinter.
Its a battle with very limited mana (maybe the lowest possible), so there's no better strategy than to spread my formation thinly to fill all row as much as possible. I decided to go with Tarsa to gain melee buff, since deploying melee units will be the best strategy with Melee Mayhem rulest. The frontline will be Nimbledook Scout and Chaos Agent as cannon fodder units. Next there are Scorch Fiend which cost no mana and Ant Miners which should benefit from the Scavengers. And the next one is Radiated Scorcher and Flame Mephit. I think its a mistake to use Flame Mephit, not only it loss benefit of Tarsa, but also its a ranged which rely with Radiated Scorcher to be in front.
To my surprise my opponent goes with a very efficient formation. Tarsa also deployed as the summoner. The front are led by Furious Chicken, which although bested in term of abilities and speed compared to Nimbledook Scout, this card cost 0 mana. The rest follows my formation pattern. With the 5th row filled with Exploding Rats, which cost quite mana, but the 2 damage and Blast really will do well. Last but not least is Flame Monkey which cost only 1 mana.
My formation already took a heavy blow, when Nimbledook Scout hit with 3 damage from Exploding Rats. It took 3 units for me to be able to take down Furious Chicken.

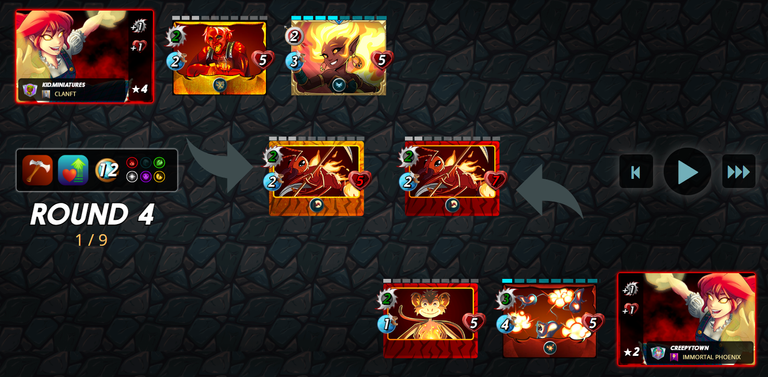
The battle run into 2nd round with my formation a bit fallen behind. Chaos Agent performs very well by evading Exploding Rats right after previous round managed to avoid Flame Monkey. But it doesn't run long, as Scorch Fiend finally land killing blow into Chaos Agent. After several exchange of blow, both formation ended up with 4 against 4, both spearheaded with 1 health Scorch Fiend.

Exploding Rats put a great difference here, the Blast damage is rounded up to 2 which effectively land extra damage to my backup cards. And by the end of the round my formation is again falling behind by 2 health.
With speed no batter than Exploding Rats, my formation find difficulty to handle the Blast damage. Ant Miners will fall from single damage coming from opposing Ant Miners. Fortunately my formation managed to swiftly make succesive strike to bring opposing Ant Miners to 1 health.
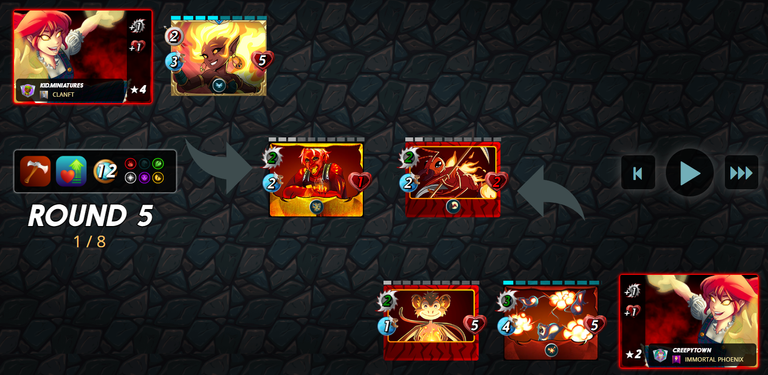
Fate doesn't seemed to sided with me in this battle with only Radiated Scorcher having 1 health remaining there's no chances for my formation to be able to handle the gang beating of my opponent. And so its ended with my loss.

CONCLUSION
There's several losing factors in this battle. First of all is Nimbledook Scout which possessed the greatest health thus benefit my opponent which had lower health. Then there's Falem Mephit which I put to fend off ambush attack with its Flying, but ended up ineffective. Also being able to deploy 2 (two) 0 mana cards is a great advantage to my opponent.
Spreading weak cards to maximize Equalizers effect seemed like an effective method. But when there're no cards could leverage the health, this could turn into a sudden death match. I always want to experiment if it possible to deploy a single high mana card, with high health and speed, and possessing Heal and Dodge, and run the battle into an attrition battle. It might took a very long round to slowly cut down the opponent card, but the single card will be invicible due to low damage absorbed and constant heal.

Click the banner below to find our guild.
Checkout our BDVoter Daily Hive Showcase & Participate into our Daily giveaway to win various prize.
Thanks for sharing! - @alokkumar121
