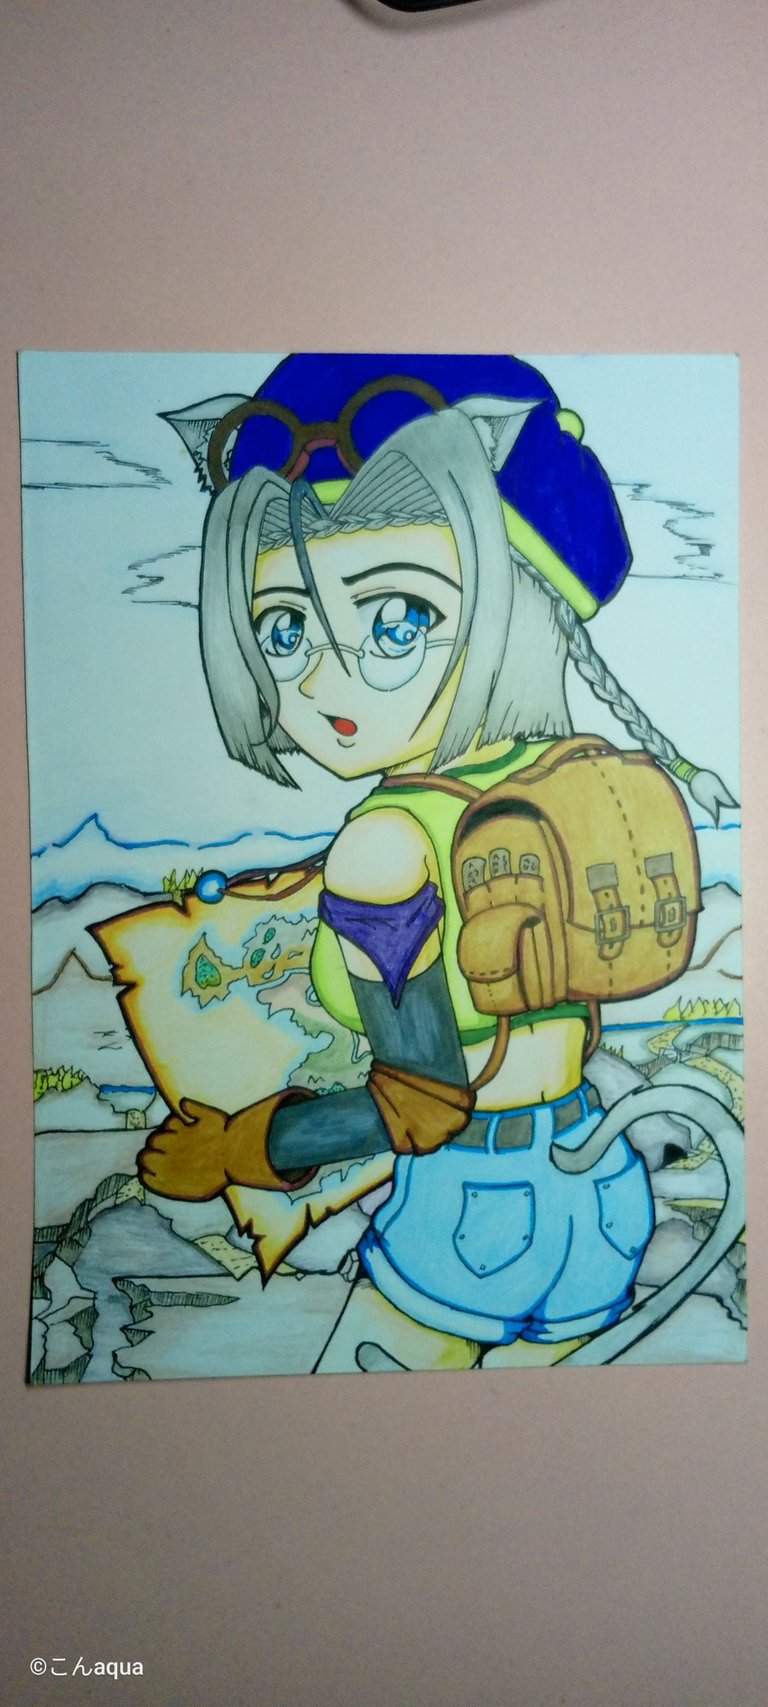
Aquamarine, the Cartographer
Edited in Canva Pro.

Sources and Materials
Below are the materials I used in this art.
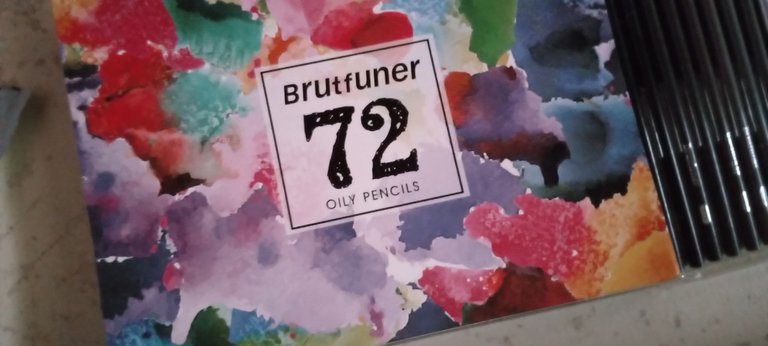
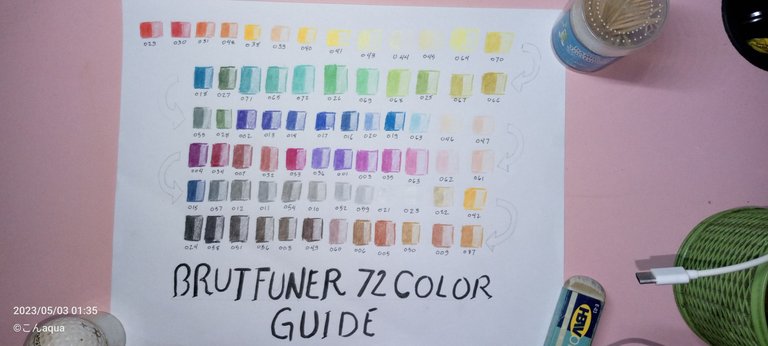
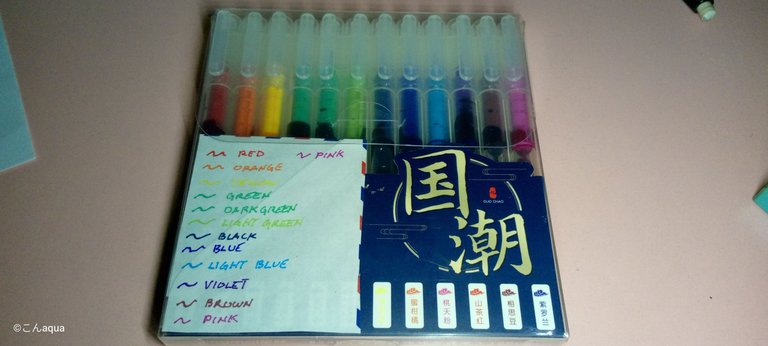
Photo taken using Tecno Spark Go.
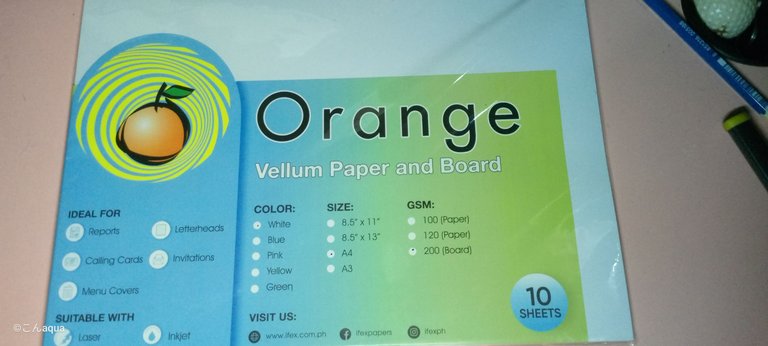
Photo taken using Tecno Spark Go.
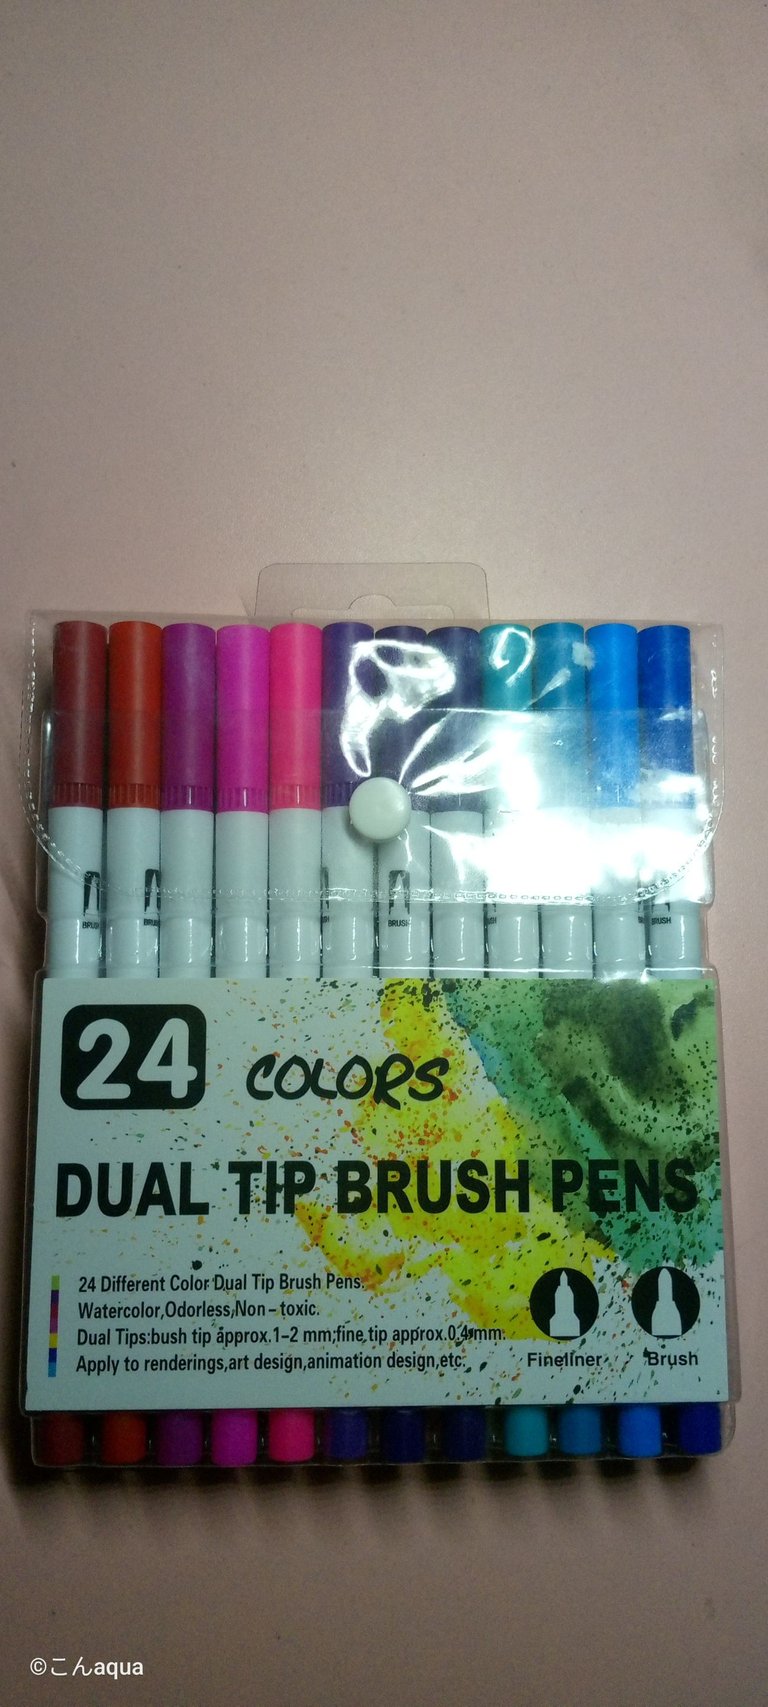
Photo taken using Tecno Spark Go.
𝕴𝖓𝖙𝖗𝖔𝖉𝖚𝖈𝖙𝖎𝖔𝖓
I am planning soon to make a Splinterlands light novel fan lore which I would enter for Social Media Contest in the future.
The fan lore will be an adventure of a young cat girl who is travelling throughout Splinterlands, in the continent of Praetoria, writing her experiences along her travels.
I am thinking that this character will be my representation for this game and the story combined. So, once again, today, I proudly introduce you my Splinterlands alter-ego, Aquamarine, the Cartographer.
Lore
Aquamarine is from the city of Shireboro, the Southmost city found in the Shimmering Coasts. Aquamarine is a demi-beast and a member of the Merkats which is an almost extinct race. She was left in Shireboro by her family when she was young as they flee from the Chaos Legions who wiped her entire race.
Aquamarine is curious in nature and has a natural love for discovery. Ever since she was young, the villagers of Shireboro kept her safe but this also meant hiding her from the rest of the world. When Aquamarine had her coming of age ceremony at 15 along with the other kids in the village, she vanished without a trace. The whole village, surprisingly, don't even remember her after that ceremony.
Aquamarine was last spotted by two stragglers at the top of a mountain in Gentry Heights on the Land of Prosperity. They described her as a human-like figure with cat ears and tails with a leather bag holding a map looking at the horizon.
However, like an apparition, all the witnesses don't remember anything else after they locked eyes with her.
Aquamarine is still on an adventure, and probably looking for the Chaos Legions to know more about her tribe and the aftermaths of the attack and those who met her along her travels, met the same experience with the stragglers. Their memories were blurred and fuzzied after locking eyes with the demi-beast despite not having any physical wounds.
"A mysterious figure looms at the top of Gentry Heights. She is part human and part beast. However, the most confusing about her is her eyes that will draw you in. The more you get close... closer... The more you think you know about her, the less you'll actually see." - From the statement of the knight from Tridale who investigated the two stragglers after the incident.
Fun Fact: I decided the name of Aquamarine since I was planning of the background to be in a cave where you can find precious stones, including Aquamarine. However, the job title, "Cartographer," a person who draws and produces maps, doesn't fit and the map she would be drawing is unusable inside a cave. (Unless she would be drawing a cave map, which doesn't fit as her objective on the lore.)
Therefore, I changed the background to fit the character. I did not change the name because it fits as my alter-ego. After all, the name is already in there.
Step 1 Draft

I want to make a character that fits as kind of an explorer. Since I keep learning new stuff about Splinterlands, whether techniques or lores, there's no better character than an explorer. While looking for references, I saw this drawing which fits what I had in mind.
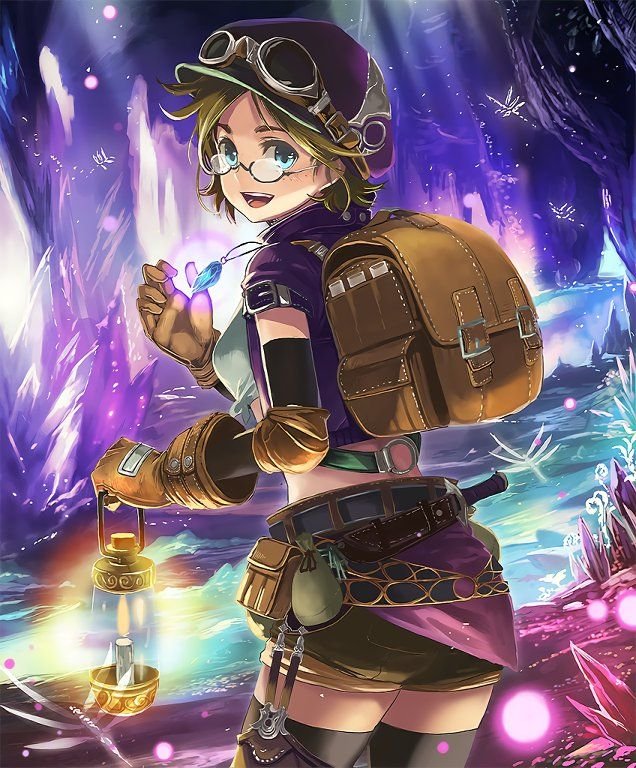
Photo from Google as a result of Google Search.
However, I want a cartographer or a map maker since it fits more with the theme I had in mind. So, I used another reference for the pose.
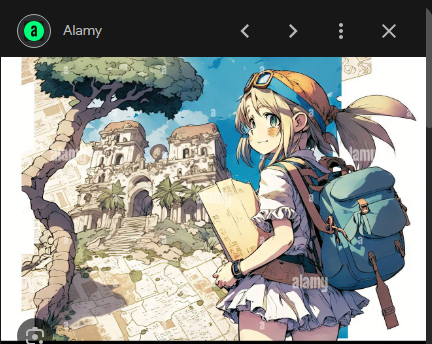
Photo from "How to draw Anime Girl in Glasses" by "Mkiss L Vartist" from Youtube
I also added my own touch by using the glasses on this one that I found on Youtube
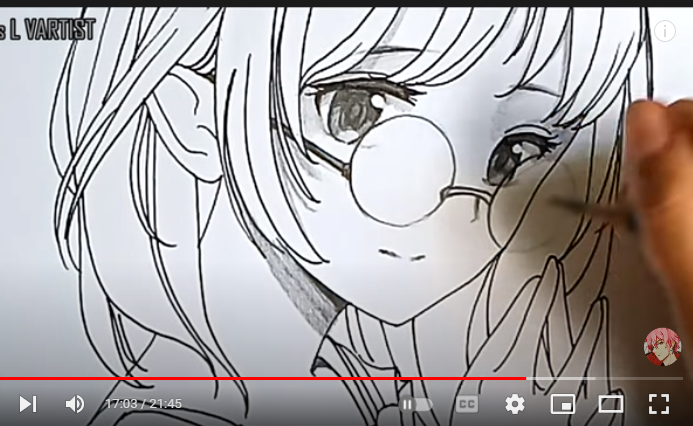
Photo from Google as a result of Google Search.
Step 2 Inking Stage
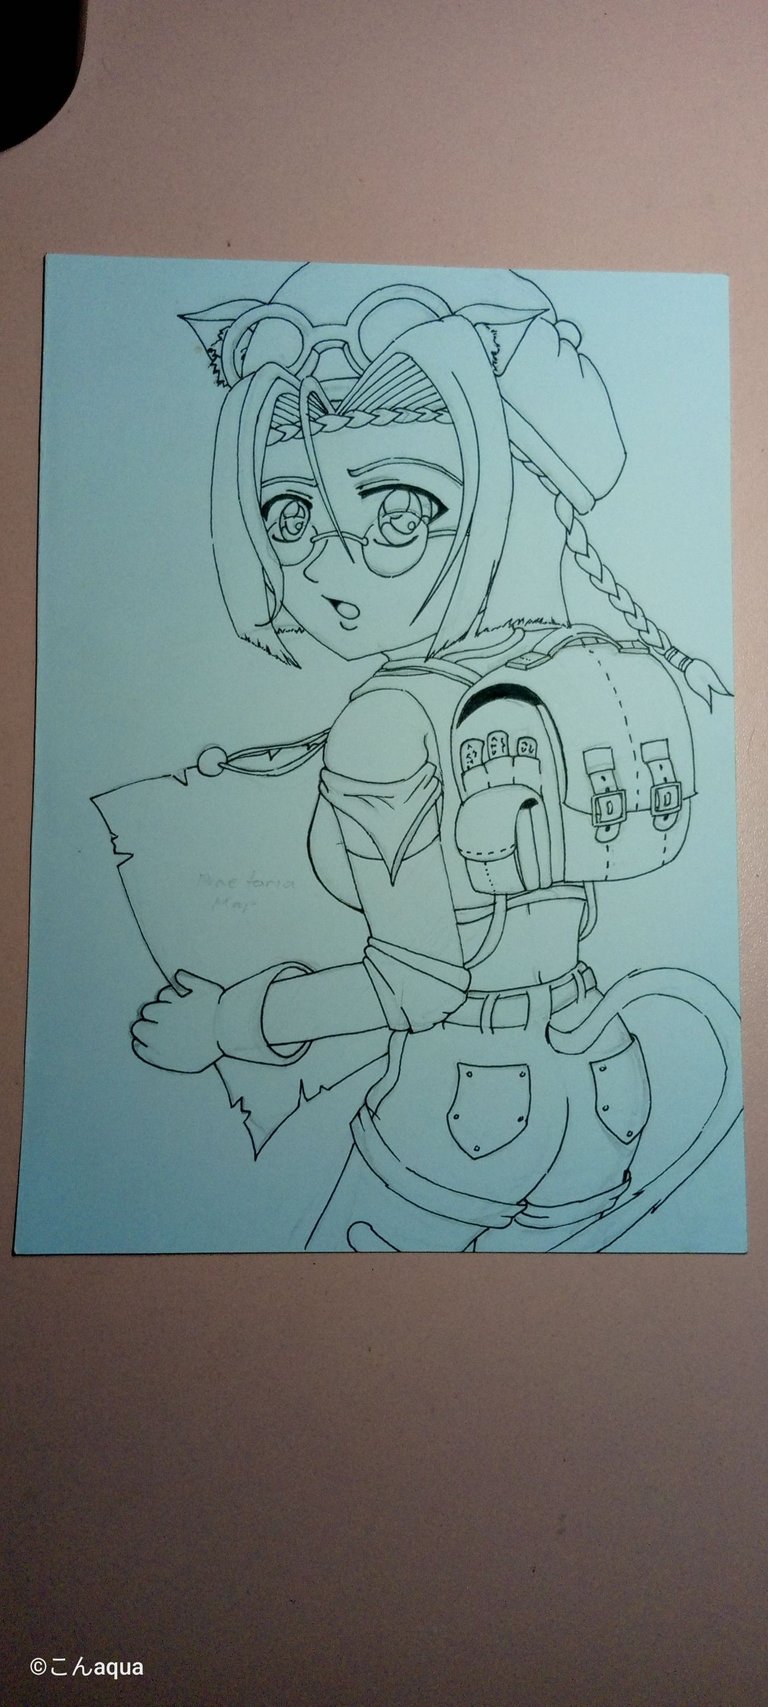
A looooooot happened during this step. Most of them was unexpected but it ended up all in a good note.
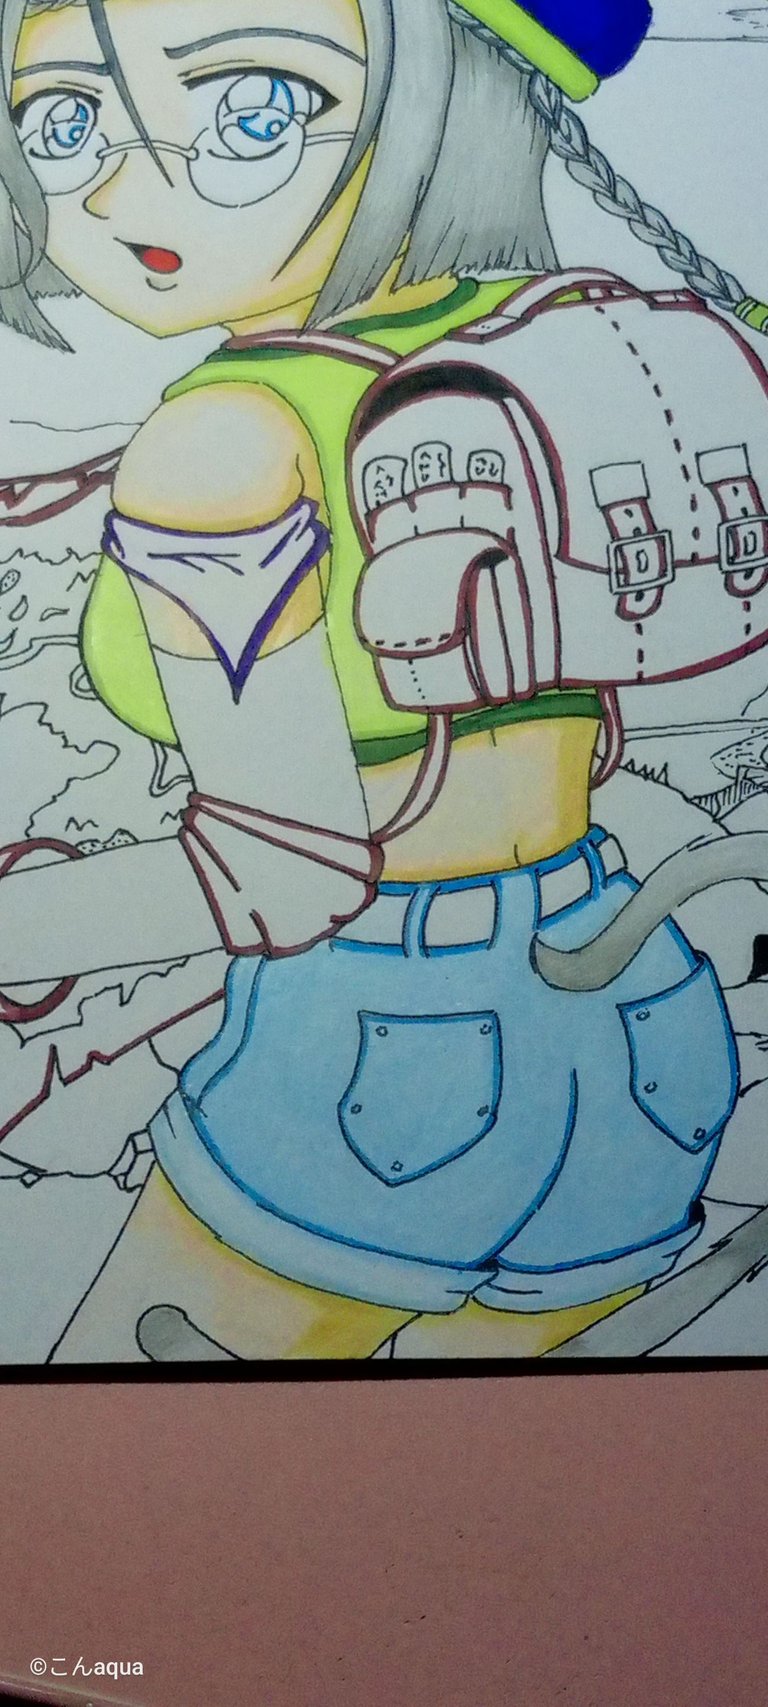
First, as usual, ink the main character to set it in place. I will be honest. The hands are wrong. It looked okay on the draft but not when inked.
I also decided to add the tiny designs during this step and/or the final step (Step 10 Re-ink). The design on the bag, the lcreases on the bandana on the arm, and something I didn't anticipated, unproportioned lower body.
As I ink the character, when I got to the belt, something feels off. I looked at it from a bit farther and noticed that the lower body is way small compared to the head and upper part. Here, I decided to re-draft the lower part before inking. I was not able to take a picture because I was focused but if you check the photo on the previous step and went side by side, you can see what I am talking about.
Step 2.1 Background Draft and Ink
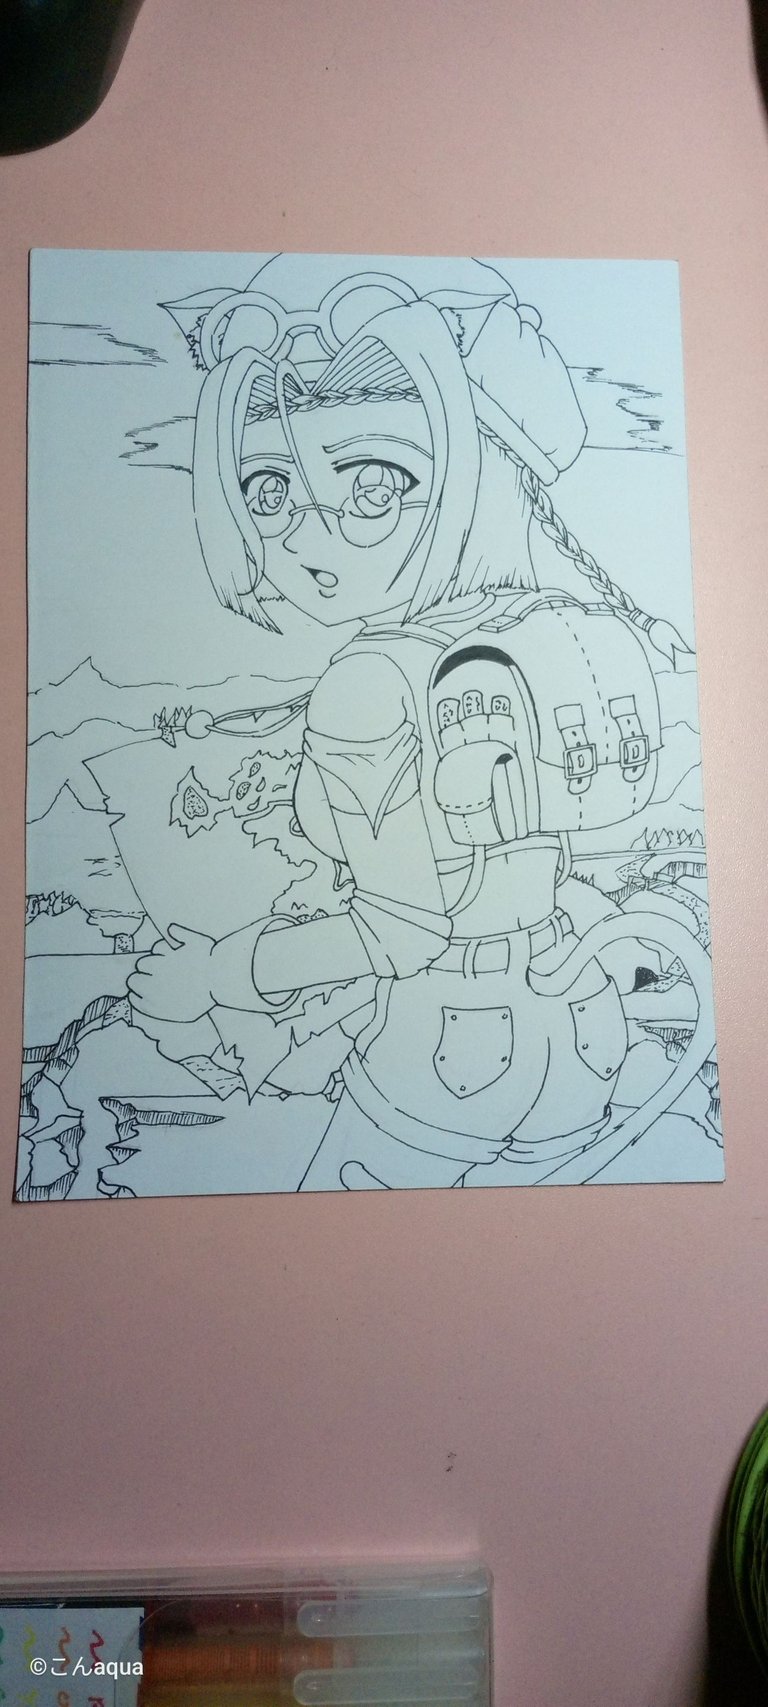
I made the background after doing the ink on the main character. I made a rough sketch and then inked it afterwards. This also includes the map of Praetoria that Aquamarine was holding.
Photo from Splinterlands.
Step 3 Colored Ink
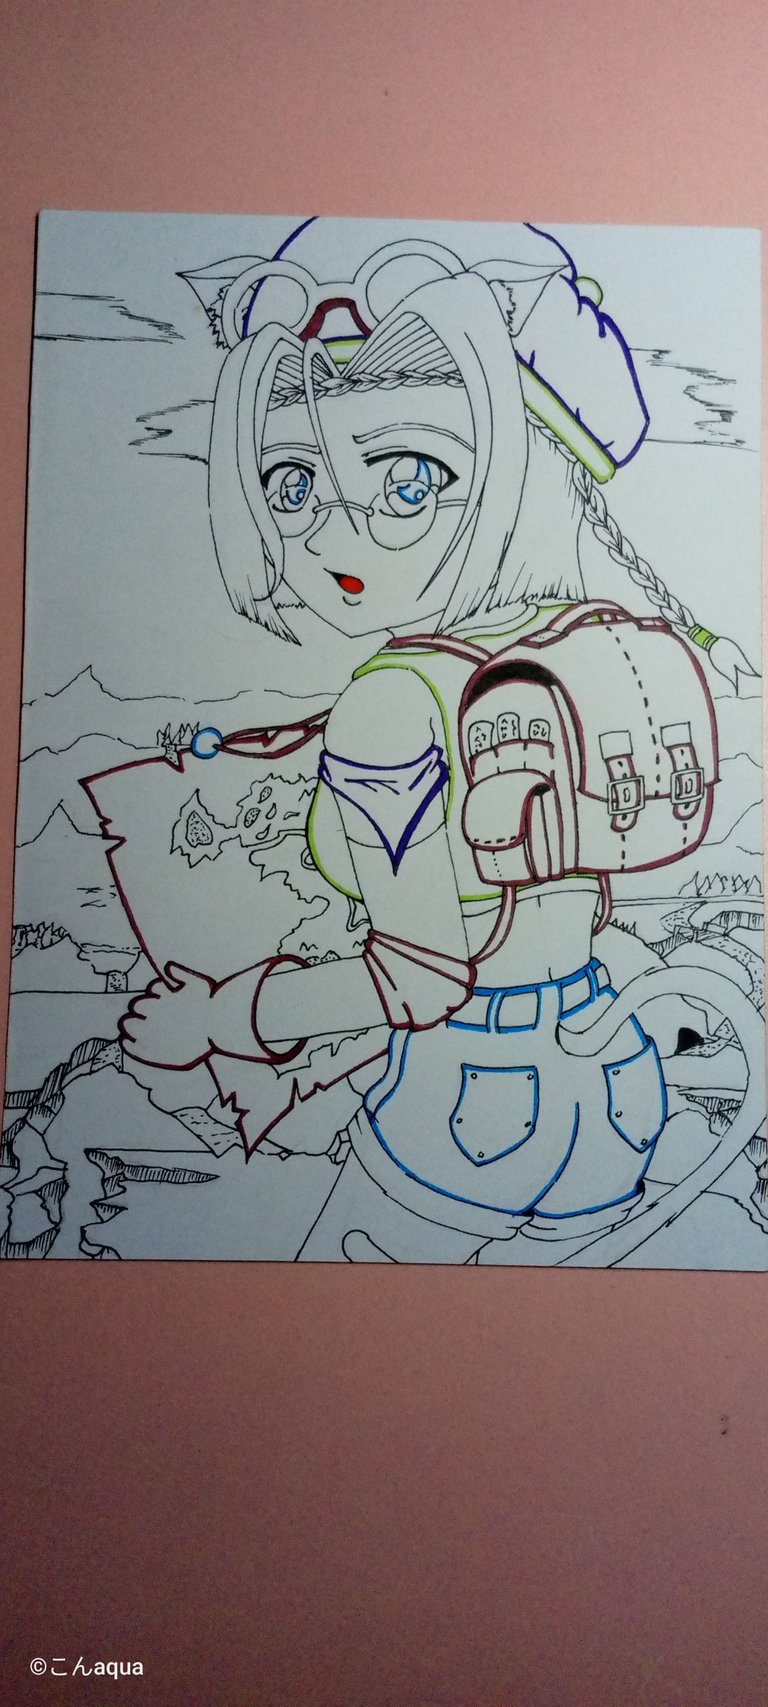
I decided to skip ink coloring the background in order not to overpower my main focus which is the character. I really need 2 more gel pens, gray and peach-colored. Until I get that, you will see an un-inked areas in this step here and there.
Step 4 Skin
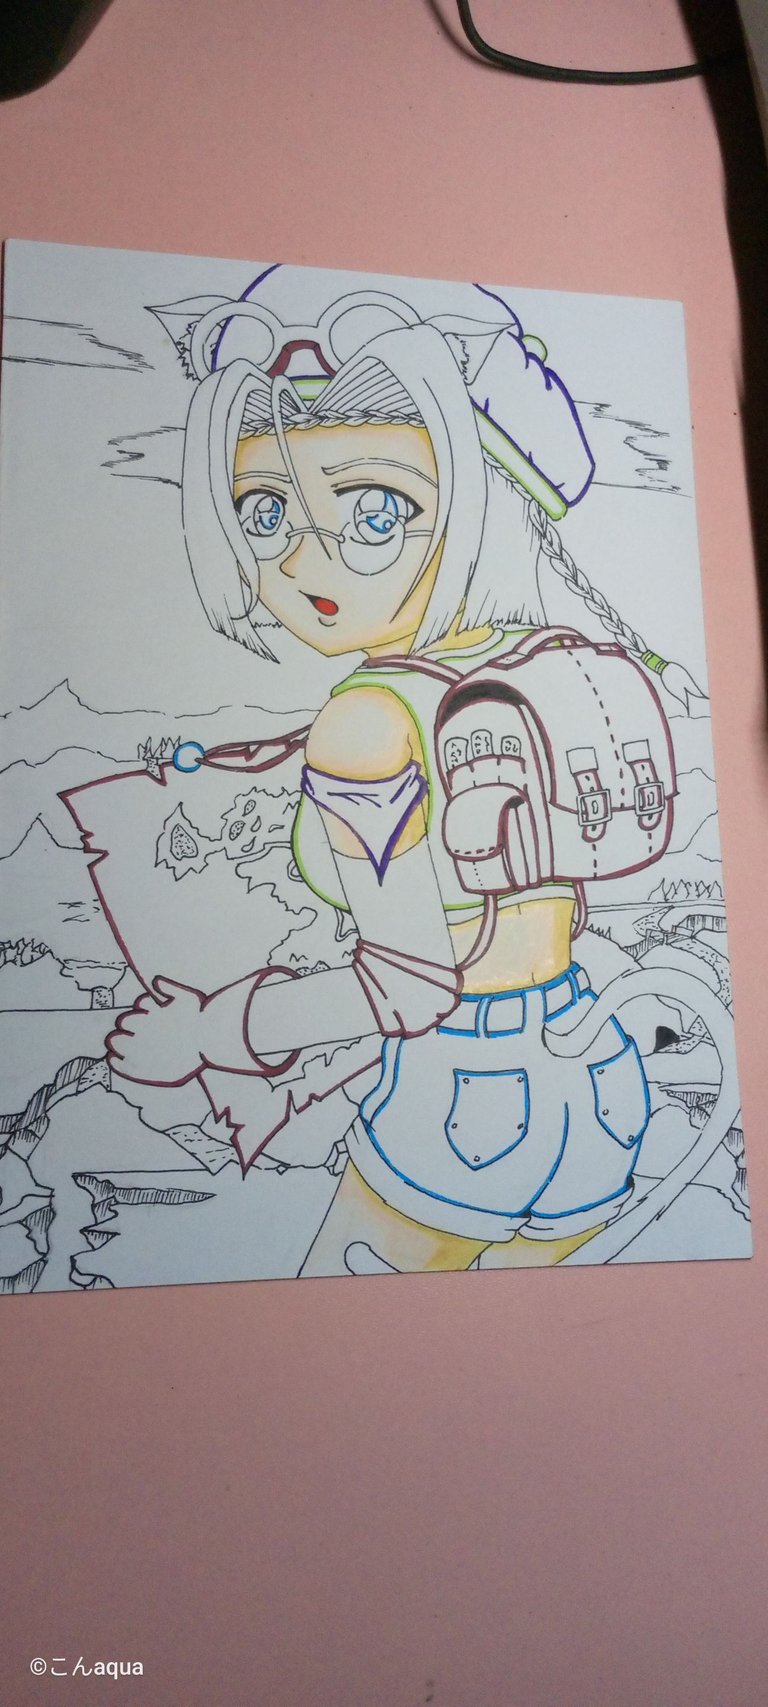
I found these three combinations of colors the best. The funny thing is it doesn't look good in person but it looks absolutely gorgeous in photo. That is the reason why I like the combination of these three.
Colors Used: 061 050 047
Step 5 Hair, Tail and Ears
All of the Hair, Tail and Ears have the same color and pattern.
Colors Used: 052 011
Step 6 Hat and Goggles

Hat:
The Hat is actually violet in color but the camera on my phone registers it as blue regardless of what option I use.
Colors Used: Pen Brush Violet 068 (Green)
Goggles:
I want to copy the one in the reference photo but it turned out differently and not in a good way.
Colors Used: Gel Pen Brown, Pen Brush Brown
Step 7 Clothes
Shirt:
I did a green colored shirt because I don't want to leave a lot of whites on my work since my sky background is mostly white. Once I get the hang of things, I can and will be able to add more whites in my drawings.
Colors Used: 068 Gel Pen Green
Short:
I wanted to make the shorts kind of those short jeans you see really famous a few years back. I had a problem since the 053 is my lightest blue but I need a lighter one than that for the folded part so I just blended it with a white.
Colors Used: 053 and White colored pencil
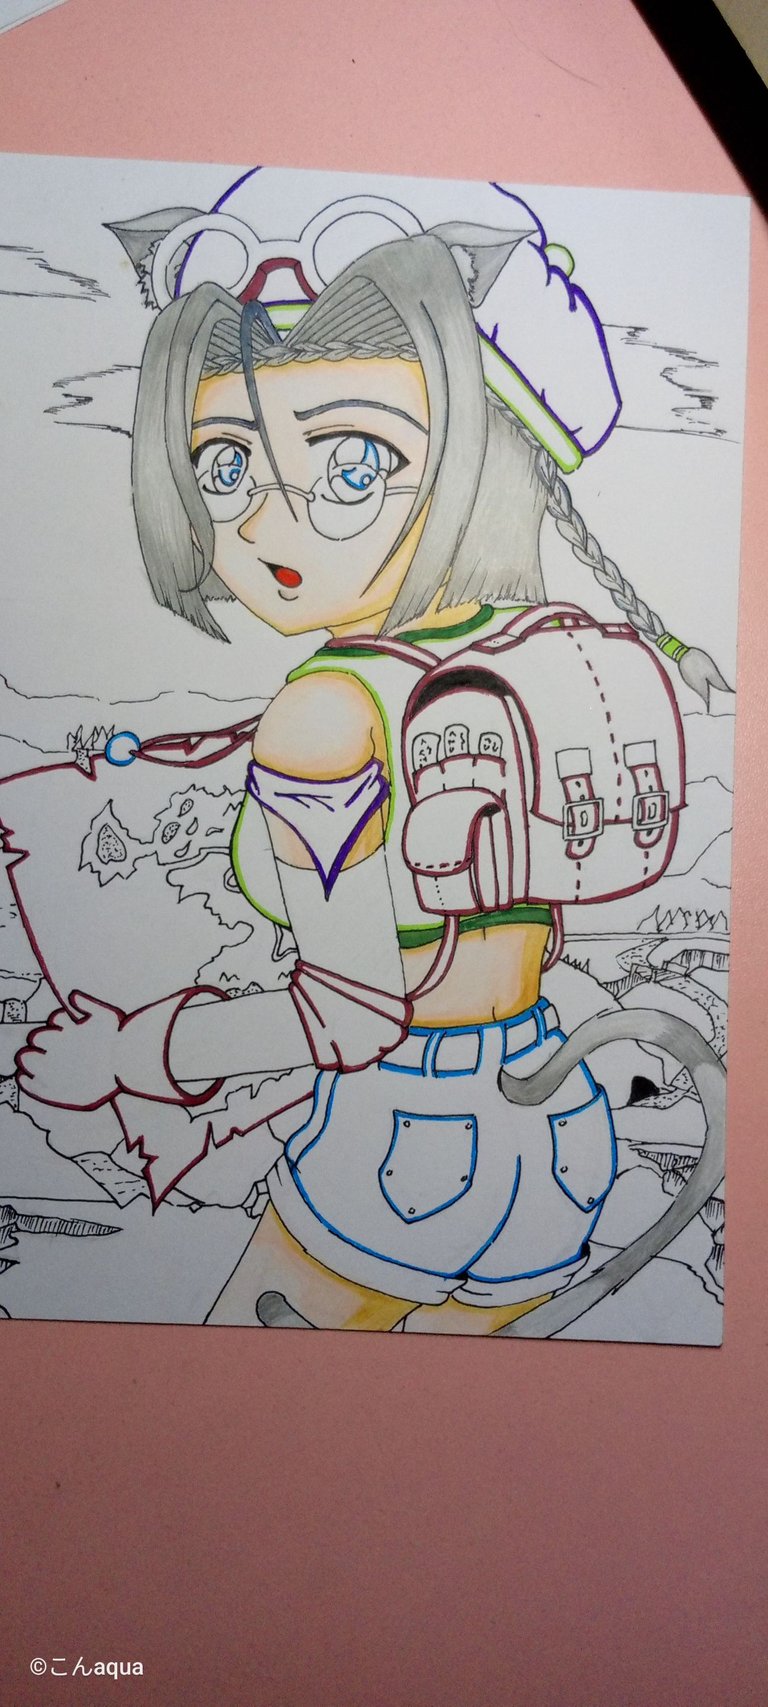
Step 8 Arm Accessories
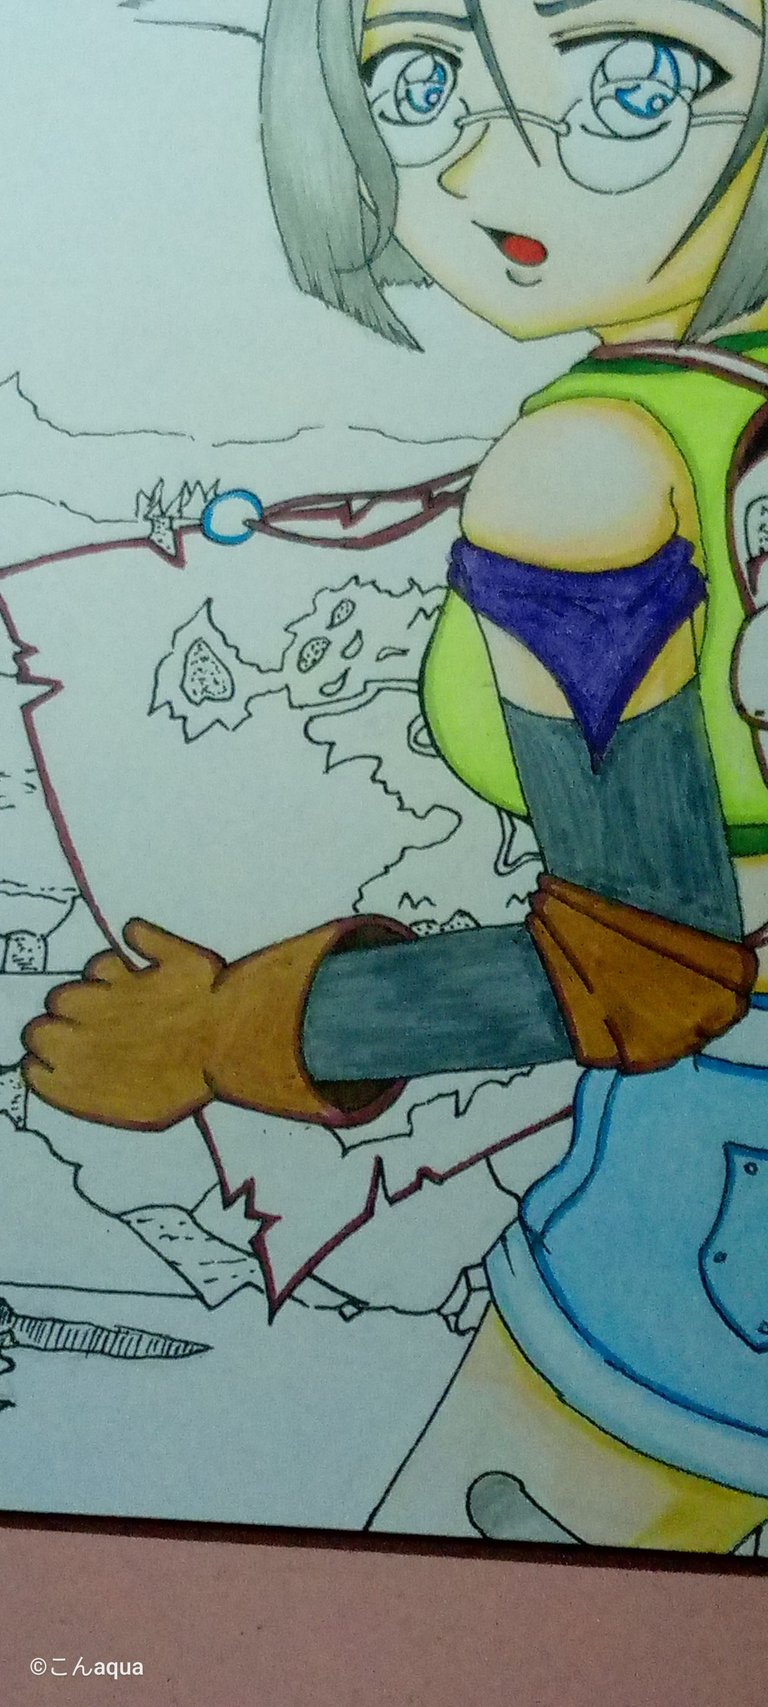
Violets
I want a bit of style and added a bandana-like cloth on her arms.
Colors Used: 002
Grays
There is a dark gloves in which I used a Pen Brush to color it then overlap a dark colored pen to make an ilussion of depth.
Colors Used: 012, Pen Brush Gray
Browns
The browns are the same color as the bag for the shoulder guard and
Colors Used: 006 Pen Brush Brown
Step 9 Bag and Belt
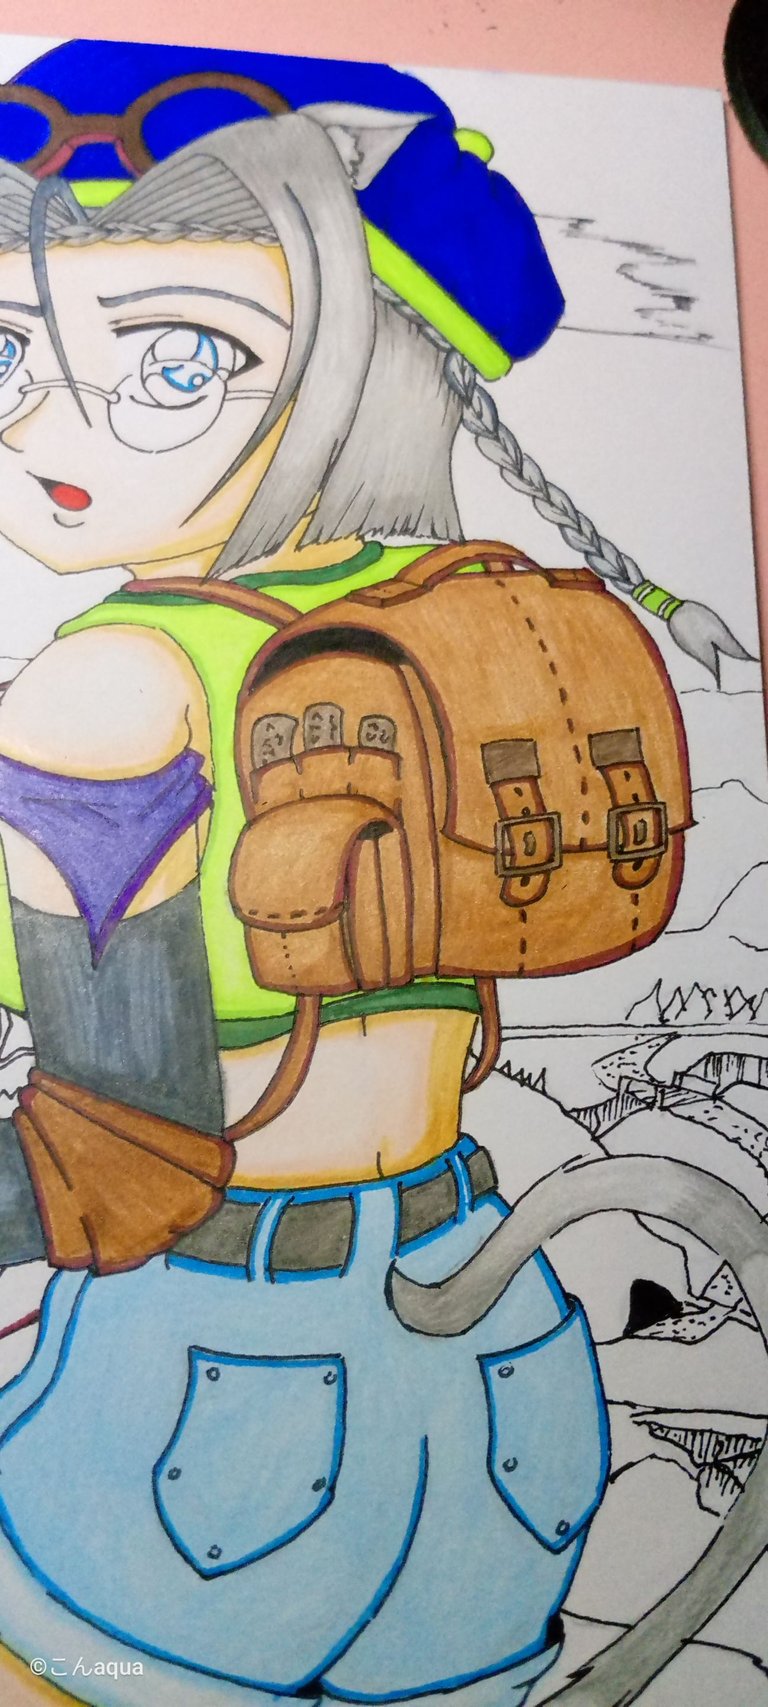
Bag
The bag is a brown leather one. It has the feel of what Lara Croft, the Tomb Raider, or Indiana Jones use.
Colors Used: 006 008
Belt
I originally wanted the belt to be black but I don't want to make everything too dark so I used a dark gray color instead.
Colors Used: 012
Step 10 Background
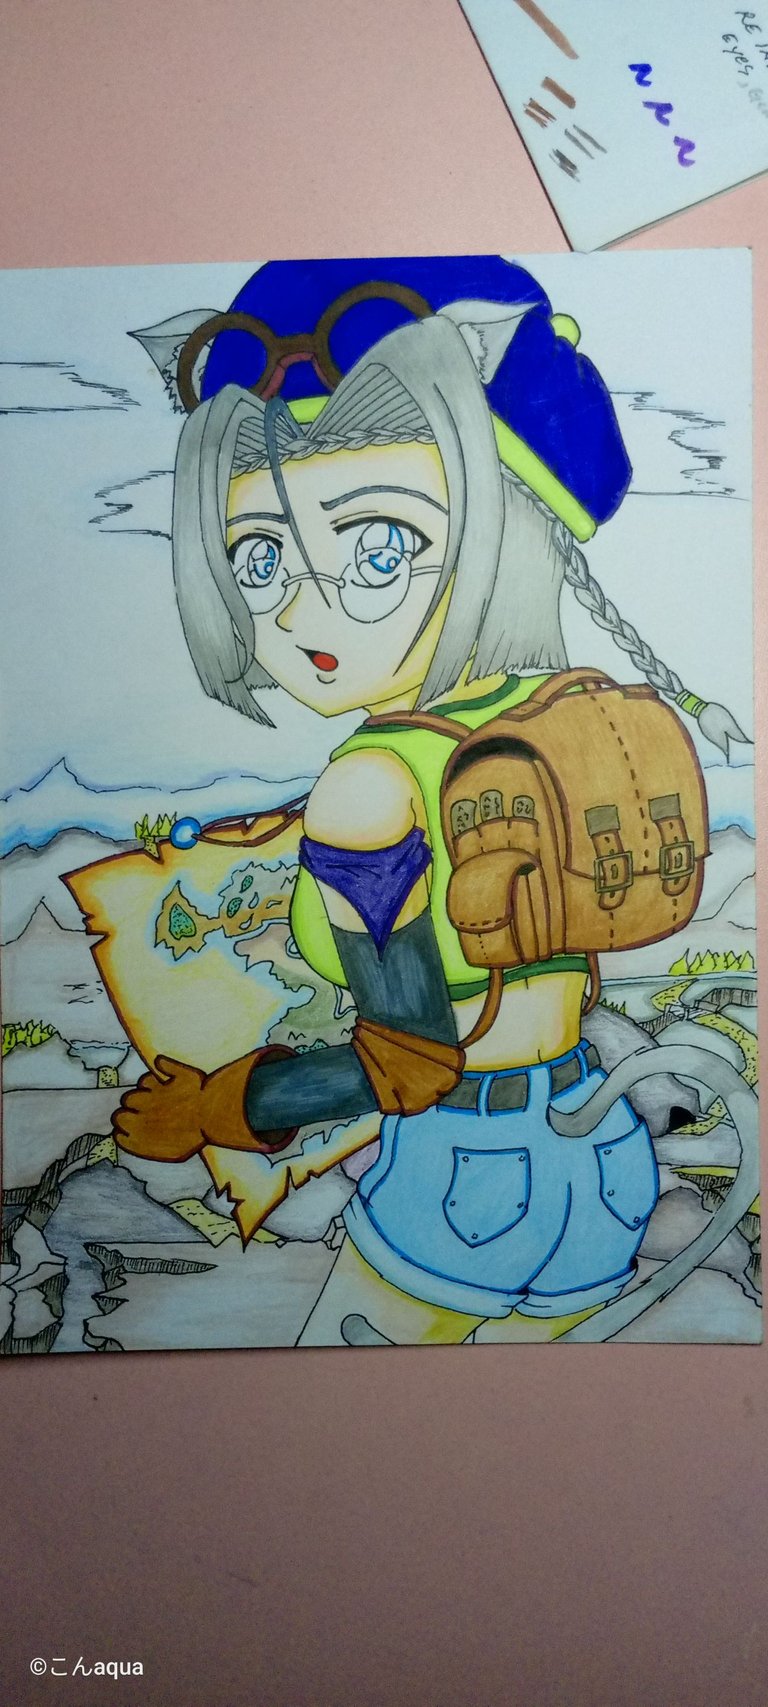
I used random colors using light pressure to not overpower the main character. I also used a pen brush to slightly line the mountains at the back to break down the space at the back.
Step 11 Re-ink, Eyes, Gem
I overlapped another layer of ink in order to highlight the lines and make the main character pop. I also added many small details that I think would increase the charisma of my drawing.

This week's art are very different. I learned that paper has a very big impact on the art. A better paper can accept more color and allows you to have more vibrant colors. I checked online what is the best paper to partner with colored pencils and Google said "Vellum Paper"...
... so I hop on Shopee and got one. The one I used is from a company called "Orange."
Apparently, vellum papers are weird. It is smooth to the touch but can accept colors better. Imagine the smoothness of a bond paper but the color acceptance of an oslo paper. Combine it and it is how I think about the Vellum paper. It is hard to explain it so I think you have to use it on your own to see but to me, it is the best paper I've used so far for colored pencil arts.
Another difference is the use of what I call
"Pen Brush."
It is like pentel pen tip with one side and gel pen tip on the other. On my Random art 5, I discovered that in the style I want to achieve, color pencils have limited uses. I need consistency in some of the areas where I need colors and color pencil cannot provide that due to some factors like how much weight you put in when drawing or how much the paper can accept the color.
To put things in a simpler way, pen brushes allow me to have a more consistent coloring by sacrificing the ability to blend colors. And in the style I am trying to perfect, color blending is not as important as cleanliness and consistency.
I think I am a step closer on the style I want to master and once I did, it would be time to use those experiences back on digital art. Also, I somehow realized how far I've progressed as you can see here in the photos below.
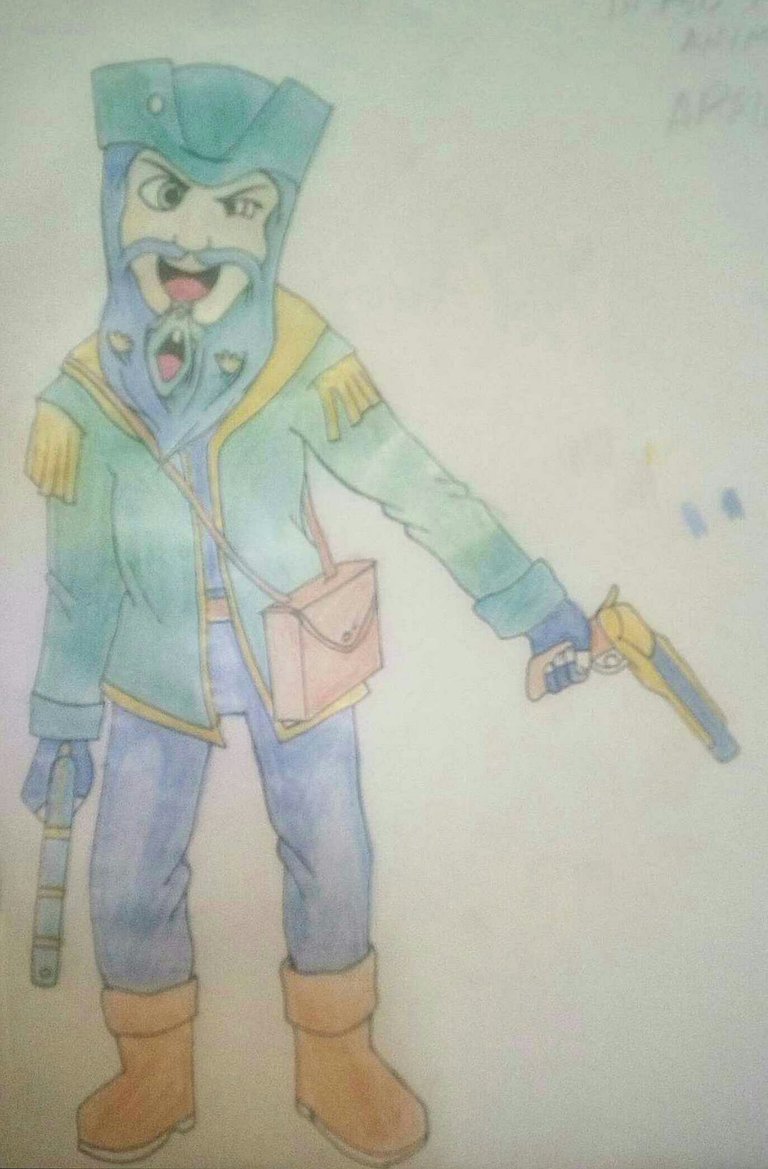
This is one of my first drawings of Two-Gun Pete when I started joining the Splinterlands contest a year ago:
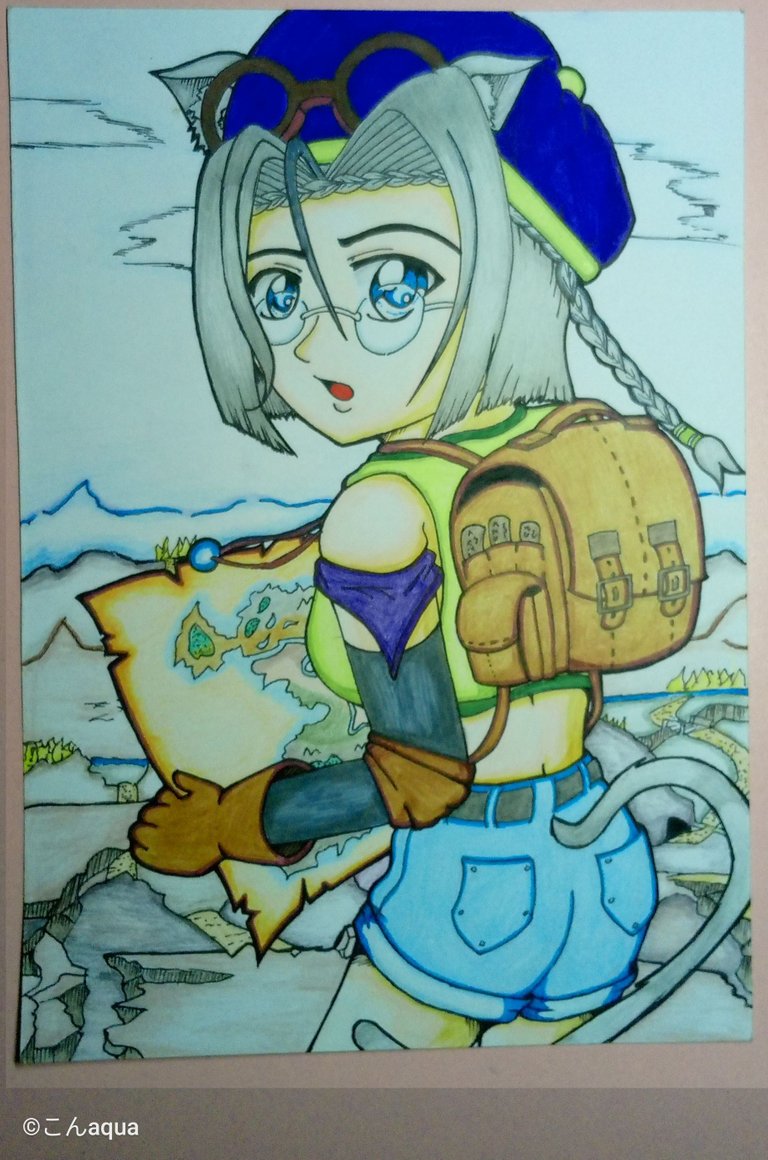
This is my current art. So, if you think your drawing sucks just like me when I was starting, keep practicing and you will find yourself slowly improving.

- This post is an entry for Splinterland's Art Contest.
- Other sources that I do not own are cited under their respective photos. Photos and drawings without cited sources are mine and made for this post.
- Animated Banners and Dividers are edited in Canva Pro.
- Some of the fonts used are from instafonts.io
If you're interested in playing the game, support me by registering using my referral link here
ᕼᗩᐯE ᖴᑌᑎ ᗪᖇᗩᗯIᑎG!
I quite like the result, it has a retro anime tv drawing effect.
Personally I'm afraid to use markers on the drawing.
The only thing I would recommend would be to photocopy the hand-drawn sketch art (without color), before trying to put graphics over it.
I mean, it has happened to me, that I made a sketch of a beautiful panther, but when applying graphics it turns into a blob with no shape.
Otherwise it's a good art you have.
Oh, like make a backup of the sketch before applying the colors? Yeah, I never thought about that. I would do that. Thanks.
The markers are very tricky especially since I am not using a professional one. The tips are not consistent. Some are soft tip and some are hard which annoys the heck out of me at times.
I do agree on the retro anime TV effect because I want to simulate like a web comic kind of drawing that was famous in the 2000s.
Thanks for sharing! - castleberry#6859
