[PART 2] My -in depth- Guide to Making My Prince Julian Good Luck Emote
PART III: Animation Stage
Step 13 Rigging Introduction
For this emote, I'll introduce a not so new concept. It's called, "Rigging." You can normally hear this term when you're following vtubers and their creators. Rigging is the way of animating an object in a way that if one area moves, other parts also move. Other names for this is bone animation. Below is a picture I found in google for what it looks like:
Upon further research, I believe the picture is from iexpressions, an extension for After Effects.
The green part is what you call the bones. The bigger part of the arrow is the source and the pointy part is what it affects when the source move. For a more realistic point of view, think of the source as your joints. If your shoulder moves, your biceps follow. Since the elbow is connected to your biceps, the arms move as well and so on and so forth.

Step 13.1 Manual Rigging
For this one, since I'm using an older version of After Effects, what we'll do is what I call, "Manual Rigging." I don't have the extension as it doesn't work in my version of After Effects but the logic should still apply.
We'll be using the circles we made earlier as the joints, parent the appropriate parts on those joints so that when we move the joints, the connected parts should also move like how a human body moves.
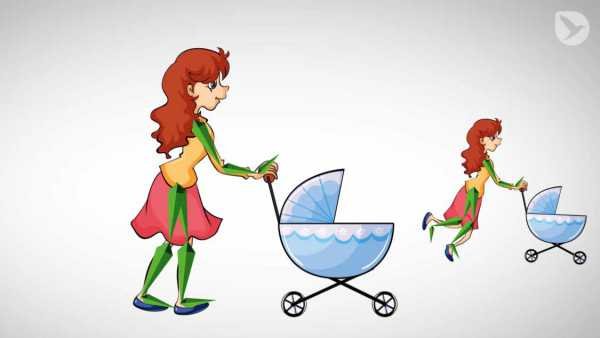
Giphy animation by @off60
Like the animation above, if we move the source, the other parts should also move.
Step 14 Connecting the Parts (a.k.a. Parenting)
Follow the parenting like these:
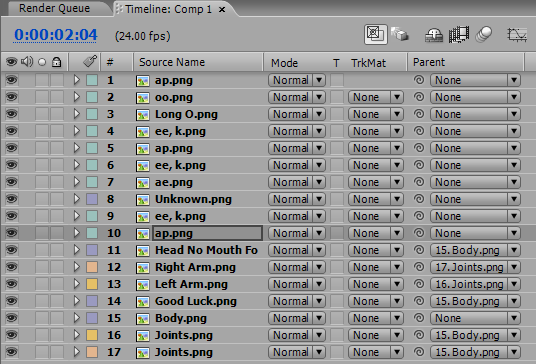
For the multiple joints, they are added per joint depending on what needs. Just drop and drop the joints from the Project Area to the Workspace.
Step 15 Animating the Arms
First, follow these pictures and copy the values:
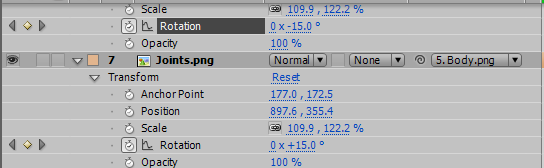
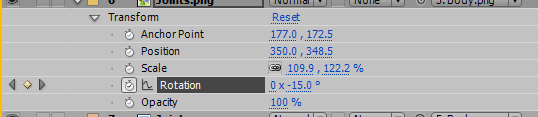
What would happen is that when we rotate the joints, the arm would rotate instead. Having the joints and rotating to instead of manually doing the arms for each frame is easier. The latter can be done with the same effect but it's more work for the same effect.
If we are to manually animate each frame, not only you need to draw each arm frame but you'll also need to follow all the values for the all the positions, scales, etc for each frame for each movement in the timeline. But we'll have the same effect of the movement, if not better.
Step 16 Animating the Mouth
This process was already shown last week on my last, Prince Julian Birthday Emote post. We'll do a body swapping method for the appropriate mouthing of the words, "Good Luck." We'll use these mouths:

The unknown / filler is something I thought I would not use, hence I didn't assign a proper name. It became a good in between to smoother some mouth animation and ended up adding it in.
You can create your own or simply copy these on your work. Put it in every 4f spaces and 4f length like this:
There's 2 mouths which is 2f long, combined for 4f:

Step 17 Saving or Rendering
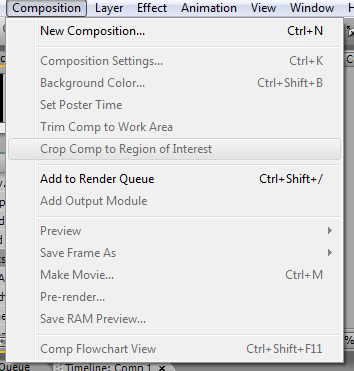
On your menu bar, go to Composition, then Add to Render Queue.
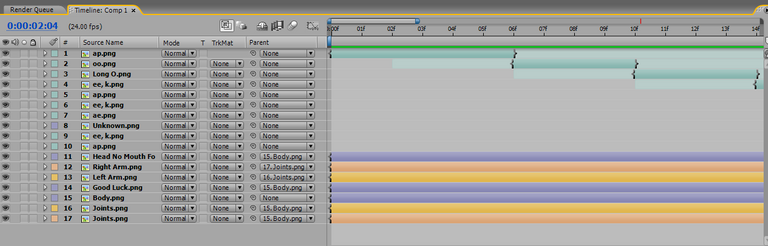
Your timeline area should show like this:
Before, we made a work around to safe it on GIF. However, after I reinstalled my After Effects, the options finally showed. I can now save the animation as GIF directly from Adobe After Effects.
Click on this option:

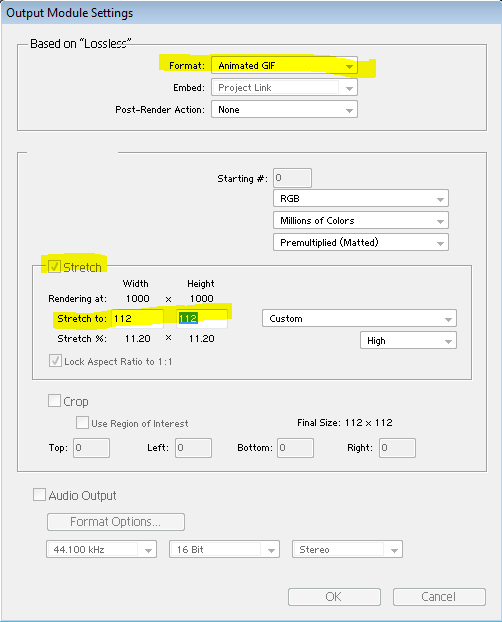
Then follow the filled options below. I only changed the one that is highlighted. I did a 112 x 112 size which is the largest in Twitch Emotes and a 300 x 300 size just for a better preview.
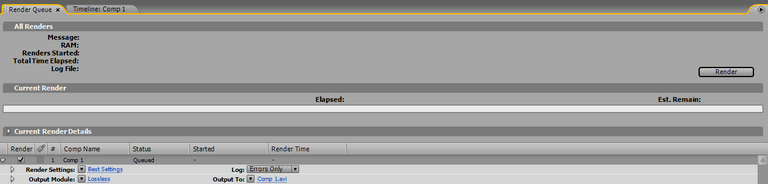
Once done, click ok, then click on Render. Wait for a few seconds or minutes to finish the rendering and you'll have this final result:
300 px x 300 px for preview

112px x 112 px for twitch
On this end, I added a green screen because even though I managed to save it as GIF instead of AVI, the transparency still didn't work. I'll do the green screen work around which means an extra step.
Step 18 Green Screen Removal
We're going to need the help of our trusted Online Gif Tools to remove the green screen for the final output.

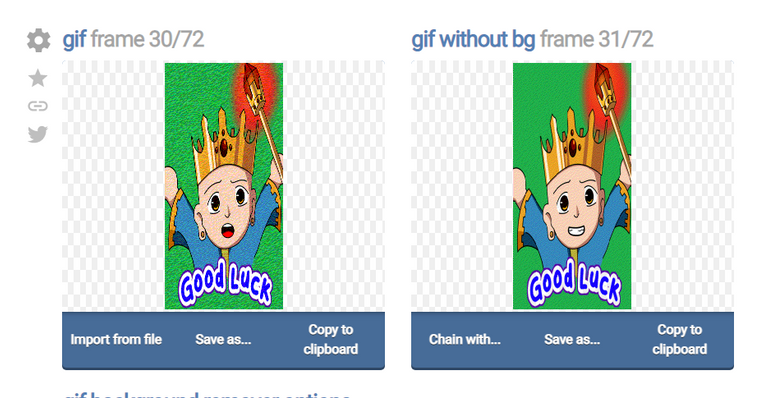
Drag and drop your output to this box and wait for it to load. If it was imported successfully, you can see your gif animated in the other box.
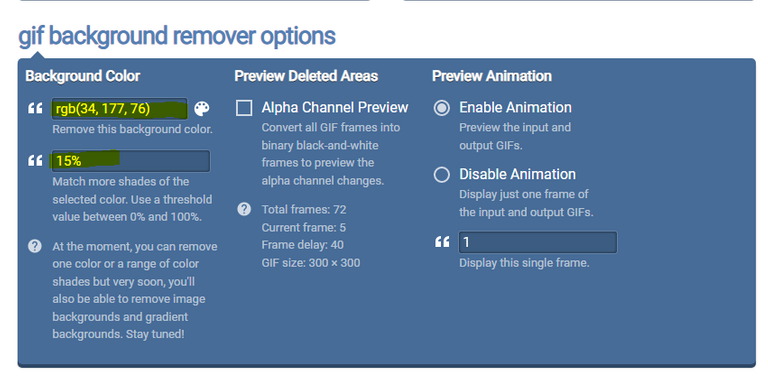
I checked the green screen color through Photoshop's Color Picker Tool and it was RGB: 34, 177, 76. Enter those value in the Background Color.
Also, if the result on the right still had jitters or the green screen wasn't completely removed, increase the threshold area by a few percent. I managed to clean mine pretty good at 15% intead of the normal 10%.
Finally, click on Save As, then Download and wait for your animation to be saved. You can normally see it under the Downloads folder.
And we're done with the final output of Prince Julian's Good Luck Emote.

Author's Notes:
If the gif size didn't change and stuck to 1000 x 1000 px, you can use the Online Gif Tools to change the size.
They also have a lot of other options that you can use on your gif such as the background remover tool which we used last time. This is certainly one of the best websites when improving the quality of your gif.
Disclaimer
- This post is an entry for Splinterland's art contest.
- Other sources that I do not own are cited under their respective photos. Photos and drawings without cited sources are mine and made for this post.
- I had to separate the post into two parts because Ecency is giving me error that the post is too long. lol.
If you're interested in playing the game, support me by registering using my referral link here
Have Fun Drawing!
Thanks for sharing! - castleberry#6859
